4RunAmok Build Thread

socal4x

New member
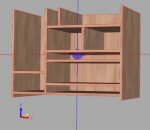
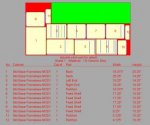
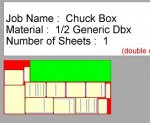
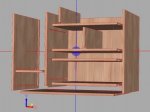
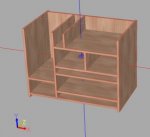
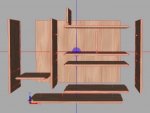
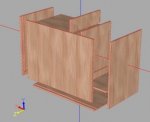
You got my creative juices flowing, well not really creative since I just replicated your layout using my cabinet software and used blind dadoes so you still have a clean front edge that we could even edgeband if wanted. For the wood I would probably use 9-ply baltic birch (not stuff you can get at Home Depot). The baltic birch is incredibly strong and lighter weight than some other materials. It's also typically very flat which makes for a strong and square cabinet.

I just threw this together and would probably change the dado depth and width and I would also add dadoes into the back panel for added strength. This would be one heck of a strong cabinet. If your interested let me know and we could work out the lid and hinges, I just need to know how you want it to open up.

Chuck Box.jpgChuck Box CNC Layout Detail.jpgChuck Box CNC Layout.jpgChuck Box Exploded.jpg
 

4RunAmok

Explorer
Wow, what a cool program!

I've already got most of mine made, except for the drawers...which only need bottoms, and I chose to use polycarbonate for the bottoms.

I've made a huge move from LA to San Diego, so everything is a bit on hold, even though I work where I have access to a complete wood shop...
 

4RunAmok

Explorer
Wow, there is a lot missing from this thread it would seem...

Off the top of my head, it is missing updates regarding our Edgestar 43qt fridge, info regarding the engine trouble we'd been having, some chuckbox info (but you can find that in the Storage Solutions forum and the Camping Equipment forum)...

Fast-forward to June 2012... Long story short, the engine was drinking water. Under pressure, the coolant was leaking into Cylinder #3, either via head gasket or cracked head. We have 229,393 miles on the 4runner... So what to do?
  1. Say farewell to my 4runner and get the Tacoma/FlipPac we want? (What would I do with my vanity plate?!?!)
  2. Rebuild the top end?
  3. Rebuild the whole engine?
  4. Get a replacement from a junkyard and swap it in?
Option 1 wasn't looking very likely with the finances...
Option 2 didn't make any sense because it was almost just as much in labor to do this as it was to just swap in another engine, and it REALLY didn't make any sense considering I'd have a low end with 230,000 miles on it still..
Option 3 would just take too long, and our situation wouldn't allow for it...
So we went with option 4...

We wound up with a motor from a junk yard with ~80K miles on it, from a rolled 4runner. The upper intake plenum was damaged, so the mechanic used my old one, making the new engine a great complete swap-in!

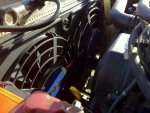
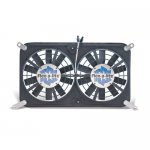
I'm also getting rid of the belt driven fan and putting on a Flex-a-Lite dual electric fans
51jdsxRe4jL._SS500_.jpg
They arrived Wednesday, and due to a glitch in the included mounting hardware, the mechanic was not able to install them with the swap. So I'm going to get on this later today and get them installed.

So... Mileage-wise, we're back to roughly where we were in 2002! We have been dealing with the water issue for about 2 years now. So couple the high mileage with the rough starts and having to keep water in the radiator, you can imagine the anxiety I endured while taking this truck deep in to the desert for camp trips, or on other long trips. I look forward to putting that behind me.


In other news... Thanks to a really good friend (You know who you are!), I have a second battery, another Odyssey PC1700!! So I will begin working on installing this sometime soon. This will help with the fridge and the other accessories. At the same time, I'll be relocating the Yaesu to the rear of the truck as well as building a power station back there for camping comforts :)
 

4RunAmok

Explorer
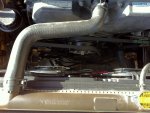
I got the fans installed this weekend with the help of barlowrs! :D

These are the vehicle specific fans by Flex-a-Lite, purchased through Amazon.com
Photo Jun 10, 5 47 08 PM.jpg


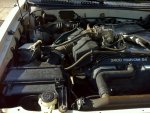
There's a lot more room in there now!
Photo Jun 10, 5 46 13 PM.jpg

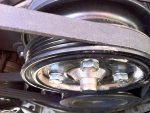
I removed the studs from the pulley and put in bolts, otherwise you have to use washers up against the pulley setup..
Photo Jun 10, 5 46 50 PM.jpg

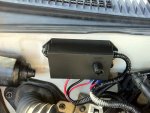
The control unit is on the back firewall
Photo Jun 10, 5 46 03 PM.jpg

Pretty straight forward controller, wires easy
Photo Jun 10, 5 46 29 PM.jpg

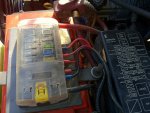
Ran power and ground wires over to the fuse box on top of my battery
Photo Jun 10, 5 47 48 PM.jpg

I have it set to come on at about 195-200, it runs for short periods. It's kind of loud, so I'll be either replacing the controller with a variable speed controller or putting in a resistor of some kind to slow the fans down to reduce noise. It's not so loud that it's annoying, it's just louder than I'd like it...

So far so good!
 

4RunAmok

Explorer
Originally it was to ease supposed tension the weight of the fan clutch and fan puts on the water pump. But then I found out that the water pump is driven by the timing belt. I've gone through 2 water pumps on the old engine, and now a new one on the new engine, and I was told (by a toyota parts counter guy no less) that the bearing goes out from the weight. He must have been talking about some other water pump because the fan is supported by a whole different assembly on the 5FVZE egine.

There are other reasons, even though that one is negated, faster warmup, better fuel economy (not that I've seen any yet). But I do notice it to be peppier off the line, not sure if that's the lack of a fan or just the new motor being more responsive..

Either way, no regrets, but don't let someone tell you that the water pump will benefit from it.
 

4RunAmok

Explorer
Ok, so a few updates in one post (I thought I posted this earlier, but I guess it disappeared...)

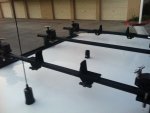
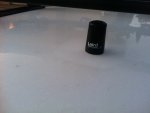
First, a cellphone booster. I bought the Wilson Electronics 801201 (multiple user version)... I ended up using one of my existing NMO mounts, but needed an adapter to go from Mini-UHF to FME to fit into the booster... The unit came with a 12" dual band (800mhz/1900mhz) magnetic mount antenna, obviously not going to work with my NMO, so I bought a Laird Tech Phantom 800/1900 antenna, mostly because I need it to fit under the roof rack/RTT.

I don't have the Booster's interior antenna sorted out yet, I'm not sure where I want to mount it, so no photos of that just yet...

But I have a couple of the antenna...
Photo Oct 31, 6 08 13 PM.jpg

Photo Oct 31, 6 08 01 PM.jpg

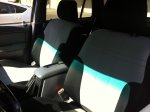
I also picked up some CalTrend Neoprene Seat Covers from Autoanything.com
Photo Oct 31, 12 13 49 PM.jpg


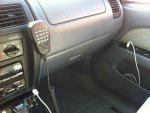
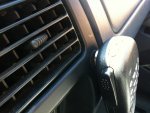
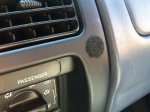
The other cool mod I did recently is for my ham mic... A couple months ago I came up with this idea, and told Barlowrs, he got to executing it before I did, and I recently rode along with him offroad, and it worked so well, I had to get it installed. My prior setup was a way overmodeled Ram Mount 1" ball and arm holding a mic clip... this had to be replaced... The new magnetic system works flawlessly, and the mic refuses to fall off so far! It didn't fall off even once while offroading with Barlow!

Photo Oct 31, 12 11 06 PM.jpg

Photo Oct 31, 12 12 41 PM.jpg

Photo Oct 31, 12 11 24 PM.jpg

Photo Oct 31, 12 11 53 PM.jpg

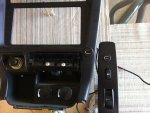
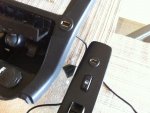
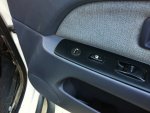
Lastly, I got tired of the USB/cigarette adapter, and my wife got tired of the cord limiting her photo taking abilities since it was tethered to the bottom of the dash... So I picked up some USB ports from cyclebots.com, and put one in the door bezel on her side, and one in the dash bezel for my phone...

Photo Oct 28, 1 25 51 PM.jpg

Photo Oct 28, 1 25 10 PM.jpg

Photo Oct 28, 4 48 08 PM.jpg

Pretty easy mods overall, but they're really improving the interior workings of the 4runner...

Next up??? Redoing the entire rear storage area.. reducing the subwoofer to eliminate the huge box/amplifier rack, getting a drawer setup built, a mid-height pullout working surface, and an upper platform sturdy enough to heavy transport utilizing the existing mounts for the rollup cover that comes with the 4runner...
 

4RunAmok

Explorer
Please do! And if you need tips, let me know... Hardest part of this mod is getting the wire through the door snorkel, because they tape it closed on the vehicle side, you have to pull it from the vehicle, cut the tape, and feed your wire.

The wire I used is 18 gauge "Zip Cord" from powerwerx.com, it has a red power and black ground molded together (like speaker wire, but meant for +/-). I also used molex (you can use Anderson) connectors behind the bezels so if I need to remove it, I can unplug it.
 

Forum statistics

Threads
189,744
Messages
2,920,339
Members
232,830
Latest member
kernsrock65
Top