'97 Dodge Ram 2500, 4x4 Cummins Powered

xdbx

Adventurer
Guys,

Thanks for posting. I picked up the tiregate yesterday because the deal was just too good to pass up. Got home, did a bunch of test fits. Looks like it will work out very well!

Here are a couple photos for those that run across this thread and wonder similar. That's a 265/70 on the spare rim. my 285/70 hits in about the same spot.

P1010761-L.jpg


P1010762-L.jpg


I can even close the gate on the open door!

P1010760-L.jpg


Don't forget the longer chains and trailer pin harness!

P1010763-L.jpg
 

ExpoMike

Well-known member
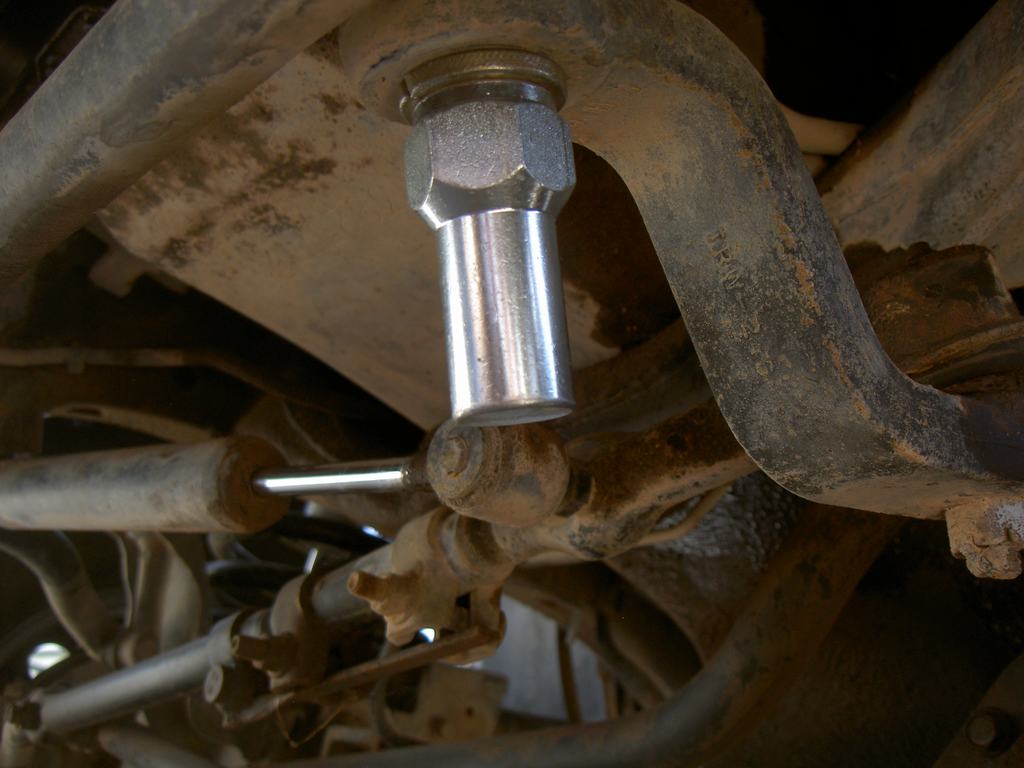
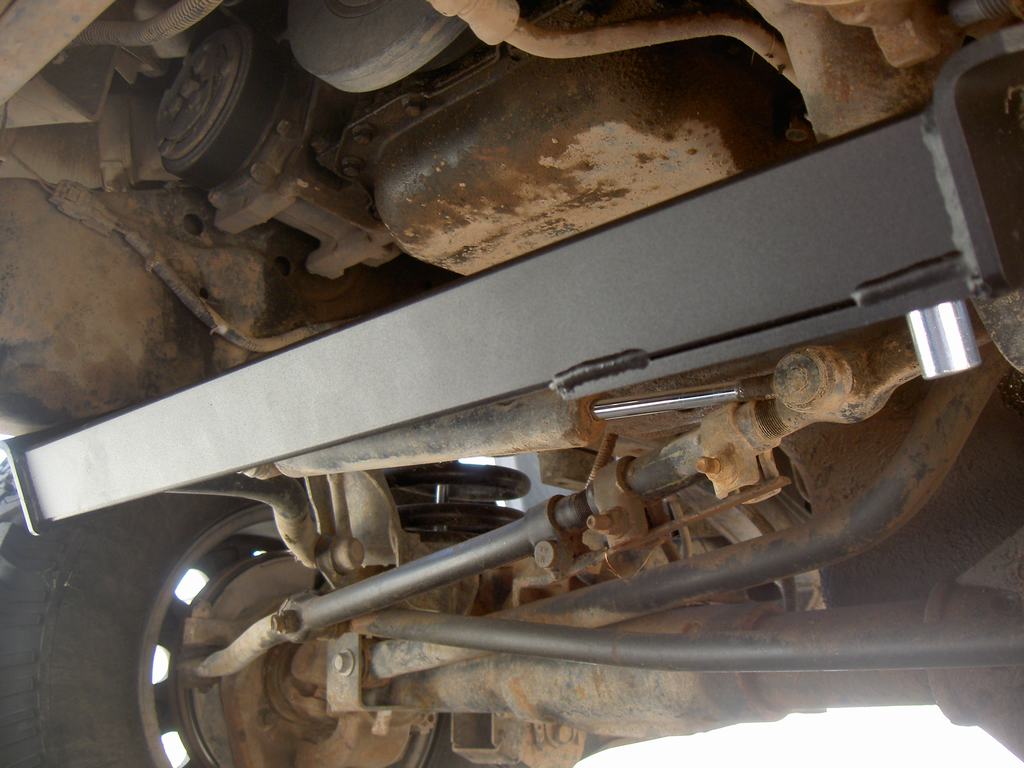
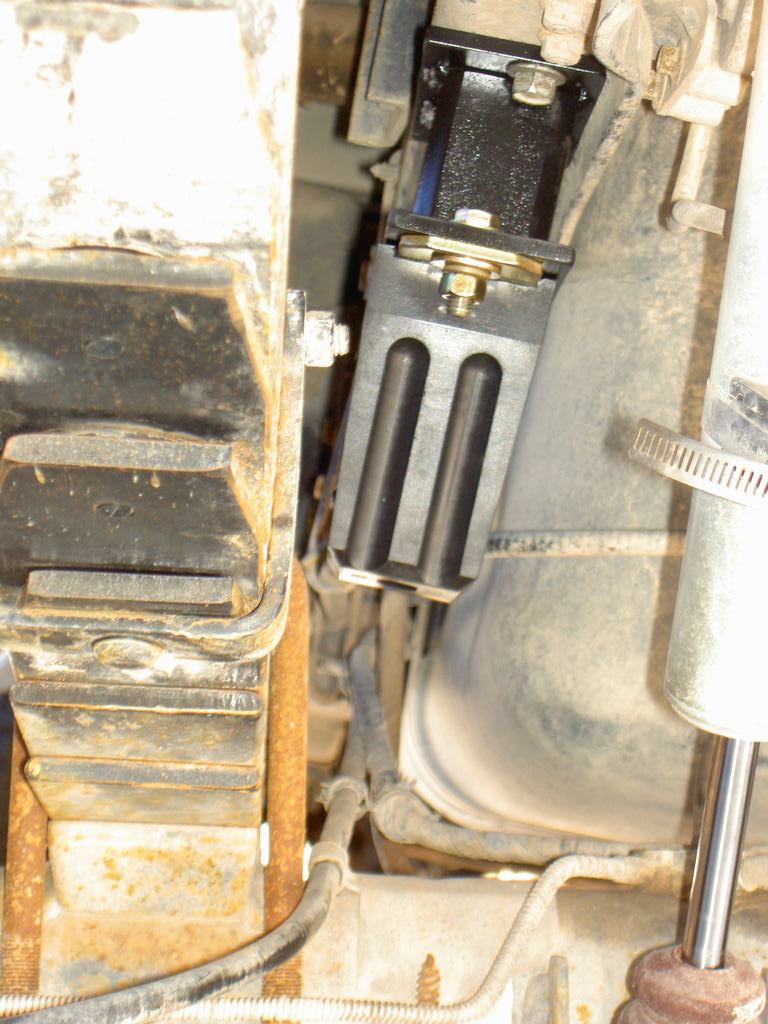
Well an update on the Ram. Lately I have been having an issue with a fuel leak that I have not been able to figure out where it was coming from, since as it got to temp, the leak would go away. The general area pointed to a common issue where the fuel return hose gets old and starts to leak. Problem was, I could never feel any wetness on this line nor get a good angle to see if it was leaking from it. The other area I thought was the fuel filter housing. I wasn't sure if it might have a crack or leaking o-ring. Well, to get to the return hose (which most of the Dodge forums seem to point to) you need to remove the filter canister. Armed with a new filter/o-rings, I moved it from the street to the driveway. Getting up under the rig, to see where I needed to put a catch can to drain the filter, I noticed on the backside of the filter housing, it was wet. Hummm... think I might have found the issue. I removed the cartridge housing and was going to replace the return hose anyways. In Chrysler's widsom, they manage to put the connection from the rubber line to the hard line to the frame, about as far away as you could get something, yet still see it. Since it looks like it was replaced and wasn't leaking, I left that alone.

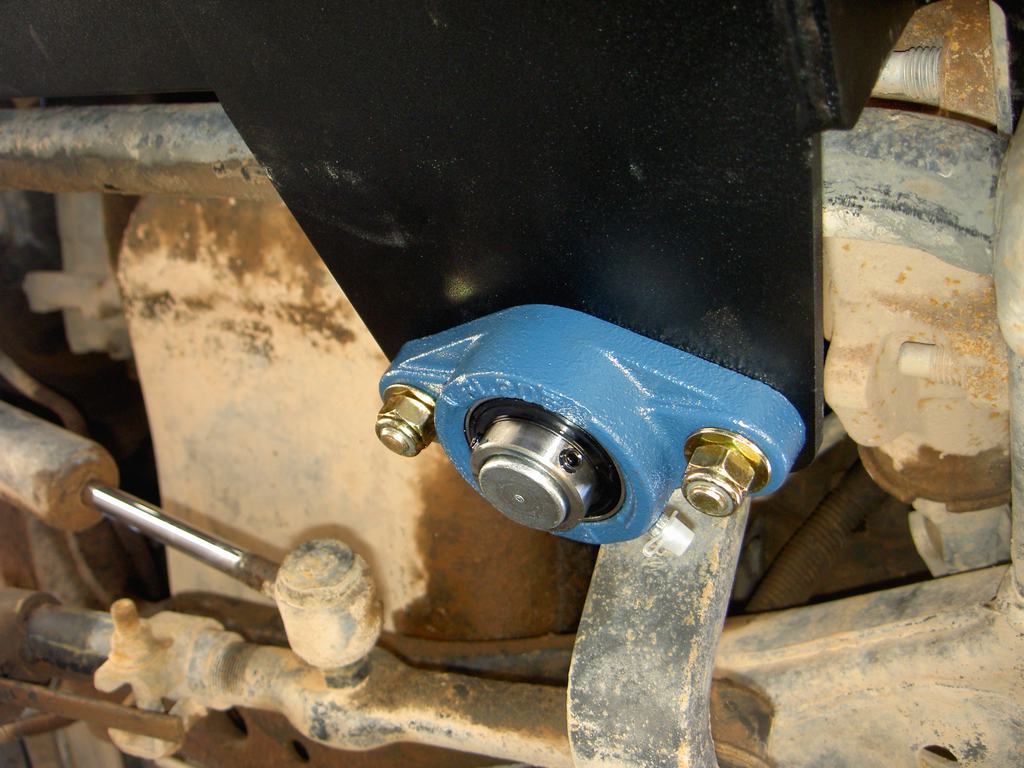
Now looking at the filter, I noticed the o-ring (actually a square cut o-ring) had a little spot where it might have been pinched during installation. New filter, 3 o-rings and put everything back together. After priming the system (they are nice enough to put a manual prime pump) I got it fired up and running smoothly. Let it idle for a few minutes and then drove it around the block. So far, no more leak!!! I guess time will tell if this solved it but I am guessing it did. Overall replacing the filter wasn't as hard as some made it out to be. It's a little tight but should only take about 30 minutes total.
 

trust

Adventurer
Loving your build, I have an 01 QC SWB that I'm very slowly evolving into a longer term, milder exploration truck for those trips where the Jeep Scrambler isnt necessary. A couple of thoughts/questions
1) you mentioned some gauges, did you get them done? I'd be interested in where you found them/what brand you chose and would suggest you might add fuel pressure to you rlist. I am not sure if your CTD uses teh lift pump arrangement that mine does but they are notorious failure points and the gauge has saved me on a couple of occasions from destroying the injector pump when the lift pump failed
2) Flat bed status? I have been toying with going that route myself and was wondering what your impressions were if you've gotten that far yet
3) Hitchgate, I did make a facsimile for my daughter's Scout 800 that did work out fine, for those of us with barely useful Craigslist and who are to cheap to spend new unit prices, thay arent hard to build. I have the material for another i was goin gto build for the scrambler but am not thinking that perhaps the Dodge would benefit more, The gas can mount intrigues me, which part did you fab and what was included in the AT set up?
4) Did you figure out your OBA yet? on my Scrambler I mounted the tank(s) under the body and the compressor (engine driven) under teh hood and simply plumbed quick connects to both ends of the Jeep, just a thought, but you could likely do some plumbing in lieu of making th ething portable

Love the set up! keep the updates coming please
 

ExpoMike

Well-known member
Thanks trust for the props. Haven't done a bunch of stuff yet as I am still working on the Panel truck but to answer your questions, here I go.

1) I have not installed the gauges yet. I had them made by Speed Hut gauges. They can custom tailor gauges with colors, lighting, fonts and graphics. I had some made that should match the factory look fairly close and have the Ram head emblem on them. Should look cool. I bought a 3 gauge A pillar pod but really don't want to go that route. Still figuring out what I want to do... As for what they are, pyro, EGT and trans temp. 12V Cummins are not known for fuel issues like the 24V Cummins.

2) I have a aluminum flat bed I picked up but have not done anything with it yet. Not 100% sure this is the route I am going and it will require some down time and space. Right now the Panel truck is taking both of those.

3) If you look back, you can see the 3 legged bracket I made and mounted the AT holder on. Basically a Tee that would bolt onto the HitchGate mounts (that they use for their mount). I drilled 3 holes and used button head bolts to hold the holder to my bracket. Works great.

4) The portable idea for mounting it was a temp idea for a trip back in Dec. It never panned out. I am going to hard mount it and run lines. Part of the plan will be determined if I keep the stock bed or go to the flat bed.

I'll keep updating as I get stuff done. Thanks for following the build.
 

ExpoMike

Well-known member
Well, did another project to the truck. From the start I knew I was going to add a steering box brace, to help some of the wondering issues that Ram trucks seem to have. I had been on my list but most of the kits were close to $200 so I just hadn't gotten to buying one. On a Cummins forum I also frequent, someone posted up about Custom Diesel having this setup for $99 and had been getting good reviews. I jumped at that price and ordered one up. It came in very quickly and looks to be a very nice setup. Including the test drive time, I had about an hour total in the installation.

Did it make a difference? Yes it did. Not all the wondering is gone but a large amount is. Biggest thing I noticed was on turns, I no longer have to make minor adjustments to stay tracking on the route selected. Also mid corner bumps don't require any correction either. For $200 I would say it was an okay mod but for $99, it was a great mod. Here are some pics.

You remove the stock pitman arm nut and replace it with this "stud" nut. One thing, with as long as it is and the torque of 185 ft. lbs. a standard deep 1/2" drive 1 1/4" socket would not fit. The stud part would not drop far enough in. I bought a set of 3/4" drive, deep impact sockets and that worked great... plus my new 250 ft. lbs. torque wrench. :)

PICT6319.jpg


Brace

PICT6320.jpg


Loosely bolted in place. It mounts to the same point of the sway bar, reusing those bolts and the sway bar mounts on top of the bracket

PICT6321.jpg


Greaseable bearing with two set screws (which I Lock-Tited in)

PICT6322.jpg


Not sure what the next mod will be. Likely get around to installing the larger rear wheel cylinders to improve the rear brakes.
 

Regcabguy

Oil eater.
The DSS 3rd gen trackbar conversion helped my '99 in addition to the steering gear brace. The stock trackbars would wear quickly on mine.

The one-ton Chevy wheel cylinders helped also,but on mine Dodge offered a TSB which supplied parts to bypass the rear brake portioning valve for constantly loaded vehicles. Some guys would tie the wire up high to simulate a heavy load. I don't know if a '97 comes with one. I installed some EGR stainless steel front brake lines which firmed up the pedal quite a bit.

I had a DTT built tranny and Smart Controller which enabled me to install a Pacbrake which finally gave me competent stopping power.
 
Last edited:

anthonyca

Observer
How is the truck going? I have a 97 with a 5.5 inch fabtec lift and 37 inch Toyos. I want to drop it a little bit and run 34 or 35s. I also don't like how the carli kit lifts the front so high and will give that stupid nose up look when loaded but everyone I have talked to on the forums who has Carli loves the ride.

I really like you spring set up and how you got rid of those ridiculous blocks that dodge put in. Have you had it in the sand to test the wheel hop? Are the front springs progressive? How is the ride? Mine rides pretty bad. My friends 03 with a KORE kit is even worse.
 

ExpoMike

Well-known member
Truck is doing okay. Really haven't done much with it. Still have a bunch of things I want to do but time has been focused on other vehicles.

The custom springs was the best thing I did for the ride. Keep in mind my camper is on all the time so I have no idea how it rides empty. The front springs are not progressive and ride a little nicer than the stock ones did. They ride nice but not like a Caddy. The rears are like OMG! They work great and ride like butter, soft and smooth. I have put about 500 miles of offroad and they work so good. Completely eliminated my wheel hop problem. That has been at both full street air pressure (60 psi) and dirt pressure (35 psi).

For an out of the box setup, Carli is what I would go with. I have zero love for Fabtec and have read number of complaints about the harsness of KORE setup. If you have a camper on most of the time, I don't think anything out of the box is going to work. Custom built in the only way. Since National Spring in local to me, it made sense to work with them.
 

ExpoMike

Well-known member
Finally, I got a project I had been putting off for over a year now, done. Since having the springs installed in the rear, I lost the use of the factory rear bump stops as they were designed to hit an "arm" that stuck out from the factory lift blocks. Crappy design if you ask me. I had started last weekend with one design idea but found the frame was not flat (it's stepped) where I had planned to tie into. It was going to be too much work so I went with plan 2, similar to how I did our Cherokee when I had it. I made a spacer and used aftermarket bump stops. With all the measurements, I was able to get them at the same travel range that the factory setup was so this should work well. Got everything built and installed, did a little test drive with some dips and some posing flex at a local loading dock. In all I think this will work out perfect.

Here's the pics of what I built.

Factory block and bump stop

PICT6330.jpg


Spacer I made, 1/4" thick steel

PICT6327.jpg


PICT6328.jpg


Prothane 4.5" bump stop

PICT6329.jpg


Spacer and stop mounted together

PICT6331.jpg


Mounted to the factory location

PICT6332.jpg


PICT6333.jpg


Checking the flex. This was far as I could get without a someone spotting. Looks like it will work perfect (passenger side)

PICT6334.jpg


Driver side

PICT6335.jpg


Poser pics testing flex

PICT6336.jpg


PICT6337.jpg


Glad to have that done!
 

bloodyWEST

Adventurer
simple and effective, looks good. where did you find those prothane bumps?


looks funny to see a "camper" poser flexing lol
 

ExpoMike

Well-known member
Actually bought them on Amazon as my local offroad store was going to have to order that size. Got them in 2 days versus the 5 the store was going to take.

It's all about the flex baby!!! LOL It is interesting to see how much the frame twists when you look at the body and bed lines.
 

Regcabguy

Oil eater.
Yeah the 2nds had quite a bit of flex.
Nothing like a Ford though. I remember looking at a comparison of a 2nd gen Dodge vs a 97 F-250 driving down a rough canyon slot. The Ford flexed so much the author was unable to open the hood. No issues with the Dodge.

The 3rds-4ths with the hydroformed frames are very stiff. I could feel the improvement in handling with my camper on my '07.
 

ExpoMike

Well-known member
Okay, after a year long search on how I wanted to mount the gauges I ordered from Speed Hut, I finally found what I wanted. I ordered a 3 gauge pod off EBay. When I got it I was very happy to find it fit very well on the underside of the dash, almost like it wad made for it. Now I wanted to have a secure method of mounting this, since it was mounting to the plastic dash. I didn't just want to use sheet metal screws as most likely would. I found "jack nuts" that are similar to nutserts but are designed for "soft" materials. This allows me to put in a machine screw and the load is spread out more. This worked perfect. Now I just need to finish up all the wiring and senders. Have a good buddy that does auto electrical coming over Sunday to help me out. Here's some pics of mounting the pod and gauges.

Custom made Speed Hut gauges, EGT, Boost and Trans Temp. These have programmable warning lights.
PICT6340.jpg


Gauge pod from EBay
PICT6341.jpg


Jack nuts, before and after expanding
PICT6342.jpg


This is what's the front looks like
PICT6343.jpg


Installed in the dash
PICT6345.jpg


Test fit the pod
PICT6344.jpg


With the gauges mounted up. Definitely like how this turned out
PICT6346.jpg


More once I get them wired up.
 

Forum statistics

Threads
187,806
Messages
2,898,334
Members
228,899
Latest member
nicotoup
Top