98 Jeep ZJ "SHTFV"

Recce01

Adventurer
Wow, those must be some seriously heavy-duty slides!

They are very heavy duty, 500lb capacity from what I understand. I will never put that kind of weight on them, but i wanted slides that will be quiet, and hold up to off-road abuse

Great build I've been watching, seems like you have quite a few friends in all the right places! Also, are you building/buying a new rear bumper?

I have been horse trading all of my life. Sometimes your skills can be traded for someone elses skills. It may seem like this is all happening at once, but it is actually over a year in the works. We had to save money, and coordinate with people we knew to make it happen. The bumper process is next on the list, I will build a few :)

Very nice. I recently picked up a 98 ZJ myself and am starting the planning process for an expedition build.

I just love ZJs. I wanted a land rover forever, and bought this because it also had straight axles and coil springs, and was cheaper than a rover. I am glad I landed on the ZJ, it has done very well for us, you will love it!
 

Recce01

Adventurer
Bumper Design Phase

I made the decision to build our own bumpers. I looked all over the net, looking for the exact thing I was after, and simply didn't find it. I remember doing this last time around as well, though the ZJ was fresh to off-roading so there was very little available for it. Most ZJ bumpers are designed to cover the sheet metal behind the factory bumper skin, so aproach angle ends up limited at the tire face. I doubt we will ever take advantage of more approach angle, but I like the look either way.

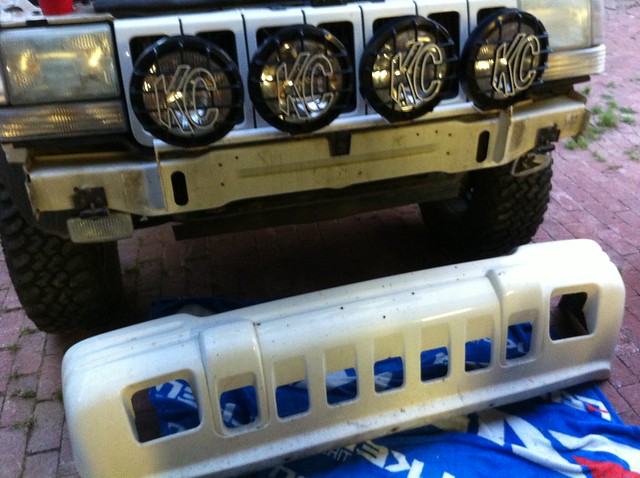
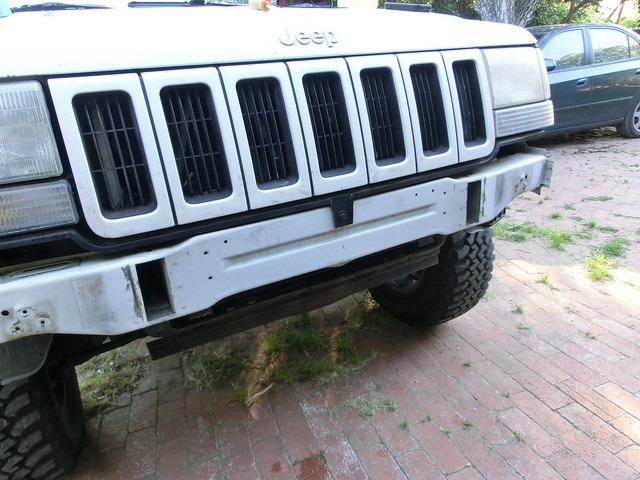
First things first, I had to remove the factory bumper and the rack of lights I had previously welded on. This was a simple process with the exception of the plastic push in rivits which ended up directly under the light bar, making me shear them off for removal. I can't remember for the life of me how I would have got them in to begin with.....

Here is the bumnper being removed...

7094747163_d38f1f5145_z.jpg


This is one of those moments where I have to deal with a past decision. I should have made this light bar bolt on, but in the interest of time, I elected to weld it on real quick

6948681168_fe11426636_z.jpg


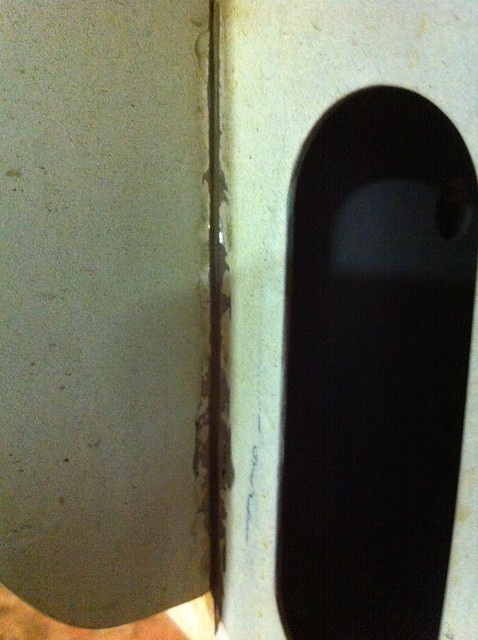
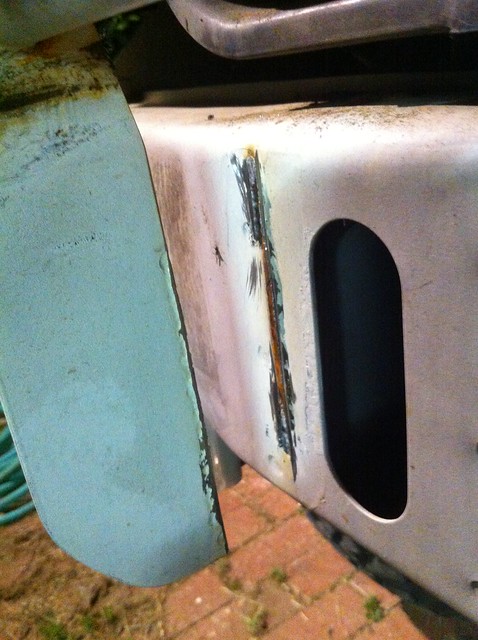
I had no choice but to cut the welds and remove the bar with a die grinder

7094753269_6f56a2eb28_z.jpg


This is a pain in the rear because of the depth, it required a full blade to reach the area that needed to be cut, so when it weared slightly, I had to change it

7094755767_b8ffdb1d2e_z.jpg


This was critical, because I didnt want to effect the integrity of the standard sheet metal

7094758581_4fe2ac07de_z.jpg


In the end it came off fairly easily, thankfully!

6948690164_36f1d81b93_z.jpg


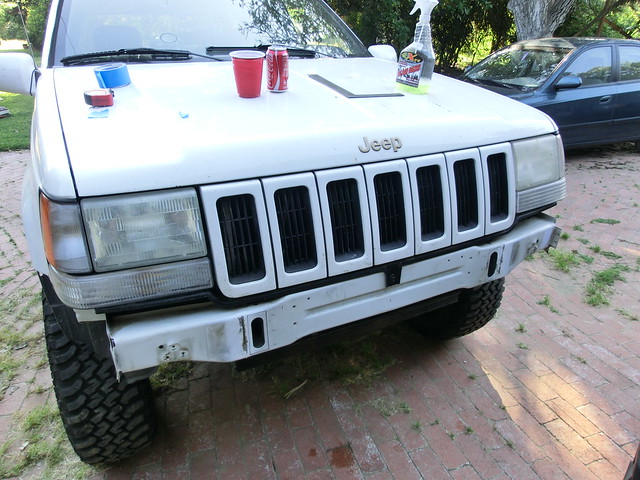
At last, a blank canvas again!!

7111102973_5338d0e41b_z.jpg
 

88Xj

Banned
There is still a lot more to do to this kit to make it the way we want it, but we are at a stopping point so we can focus on some more aspects of this build. I did take a few minutes to mock it up in its intended location with a few components installed.

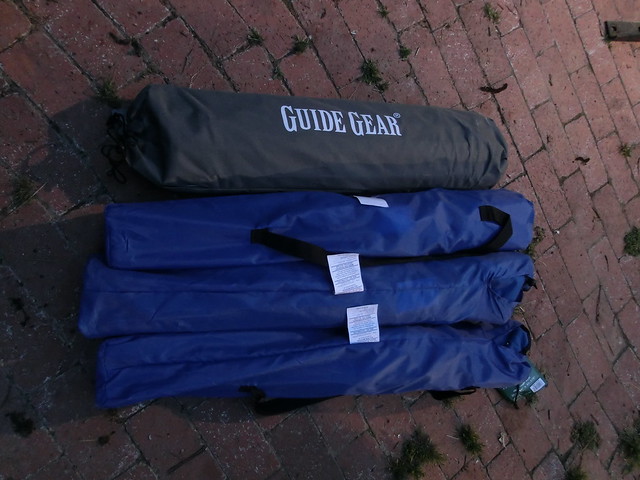
Here are the three chairs and roll top table that need to fit in the drawer table

6991550896_587fc54a97_z.jpg


Here is the system loaded with everything but the stove

7137639535_0149e00abc_z.jpg


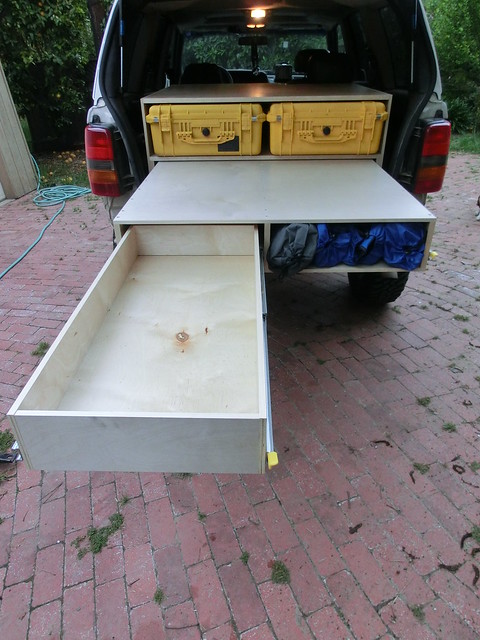
With the table pulled out

7137637543_123be153c8_z.jpg


7137635627_473dcb3b1c_z.jpg


Here is the stove drawer also extended

6991570232_cd014ac390_z.jpg


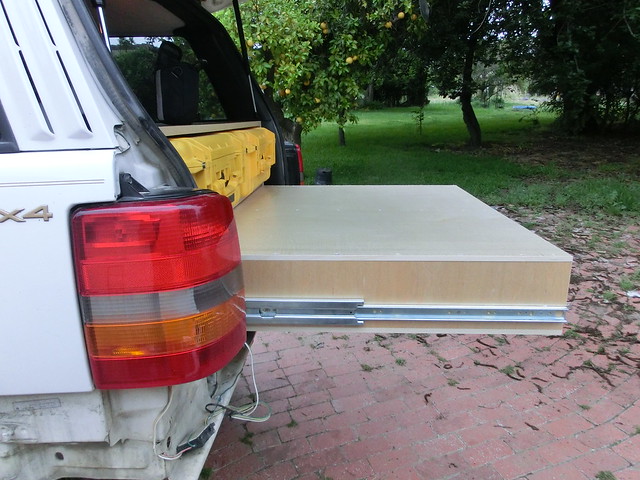
It sticks out of the vehicle around 5.5' I think. I will have to meausre to be sure. The idea is that the smoke from the grill misses the open hatch of the Jeep, and the table is covered by the hatch. It worked out pretty well!

7137649801_93554c78b8_z.jpg


We bought a Coleman grill for it, but it is not what we are looking for. It came bent in the box, and doesn't sit flat. It is actually off by over 1/4 of an inch, so I will be sending it back and looking for a new grill. Any suggestions? We are looking for something that has fold out legs so we can elevate it from the bottom of the drawer so it doesn't start burning the wood. We are aso looking for something inexpensive, as all the money we saved to do this build is rapidly evaporating. Thanks for checking it out!

I want to do exactly that so I have a table to cook off of. Kinda of concerns me of how far out the weight is, even if its a minor amount...would there be any way to add maybe a set of legs to help carry or hold the weight?
 

Recce01

Adventurer
I want to do exactly that so I have a table to cook off of. Kinda of concerns me of how far out the weight is, even if its a minor amount...would there be any way to add maybe a set of legs to help carry or hold the weight?

I really am not concerned about the weight with these drawer slides. It feels super solid!! Granted, these drawer slides are not cheap, but it makes extra legs not necessary. Call Gabe at SoCal teardrops to get pricing, well worth the investment. They are rated at 500lbs. :)
 

Recce01

Adventurer
I want to do exactly that so I have a table to cook off of. Kinda of concerns me of how far out the weight is, even if its a minor amount...would there be any way to add maybe a set of legs to help carry or hold the weight?

After thinking about it, If you really wanted some legs, you could make your drawer a little shallower, then have some fold down legs attached to the bottom of it. After I posted I went out and leaned down on the end and it simply lifts the box up with all that leverage. I will have to get it final mounted before making a final judgement call....
 

Recce01

Adventurer
Bumper Design Phase

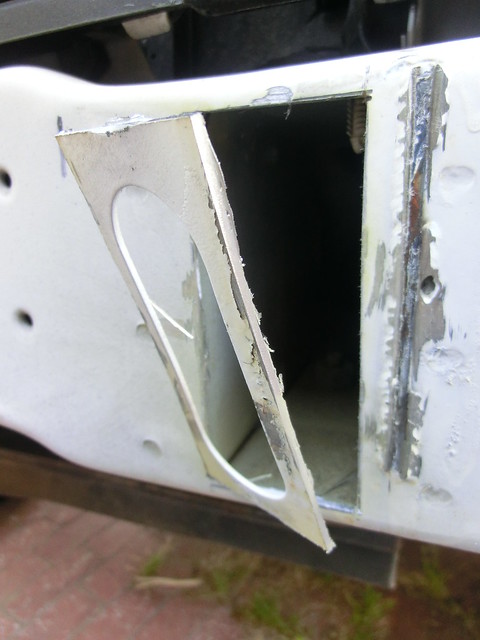
The next step was to figure out how to attach the bumper to the uni-body. This is the part that I riddled with last time I did one of these. It just blows my mind to attach a winch bumper to a unitized chassis. A frame would offer a tremendous amount of confidence. In this case, I have to remember that I did it before, and even used to the winch to dead pull it out of the mud in a river up to the middle of the doors, so I am going to go the same route. The first step was to get access to the holes in the side of the chassis' boxed "frame rails". In order to to this I need to make room for a plate to slide inside the holes. The holes start out as ovals, and I need them to be rectangles, so out comes the die grinder again..

First mark the approx. locations of the cuts

6965024826_f26c8b50cb_z.jpg


Then get after it with a die grinder and try to make decent straight cuts

6965023460_503d714966_z.jpg


Then I just pull out the pieces

6965032046_870f8228af_z.jpg


The result gives me straight out access to the inside of the boxed material

6965028900_999b6d242b_z.jpg


Now that I am to this point...

6965034900_efb841a604_z.jpg


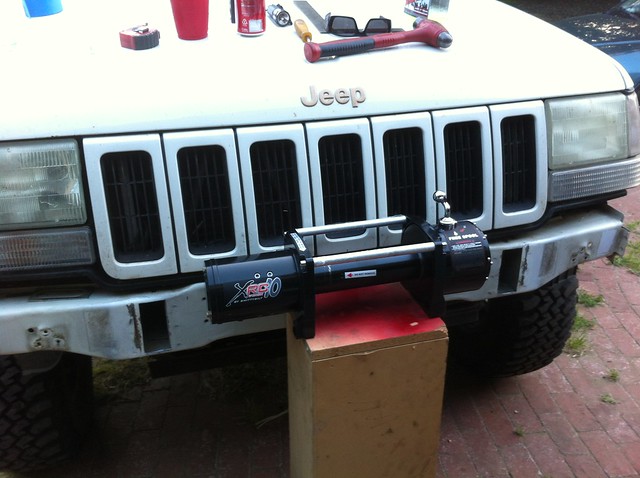
I decided to pull out the winch and mock it up for position. The location and height of the winch determines the limit to approach angle. I see a lot of bumpers where the winch sits up on top of the bumper, and that just adds to the leverage of the brackets attached to the weak sauce chassis, so I decide to split the difference and will try to mount it just about here

6958810642_00c324719c_z.jpg
 

Recce01

Adventurer
Bumper Design Phase

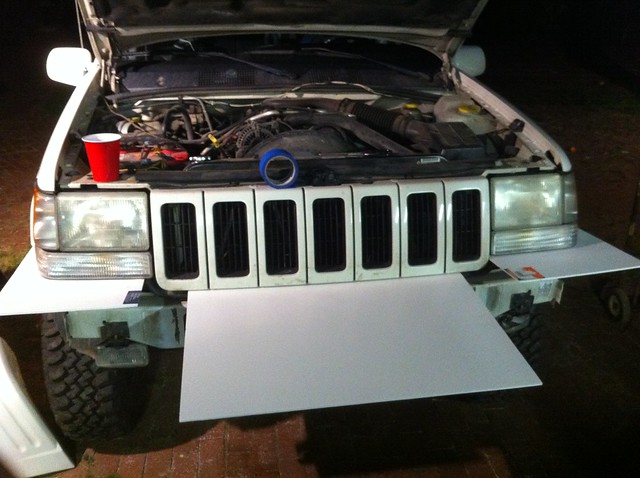
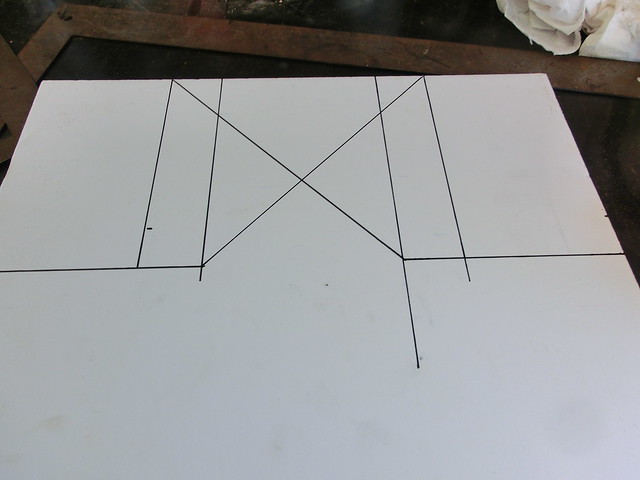
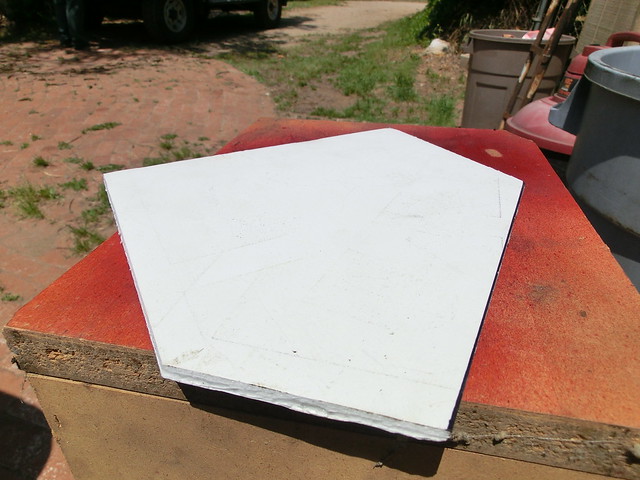
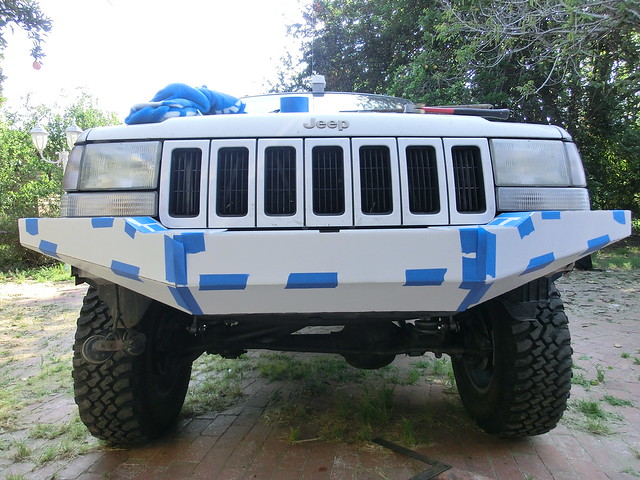
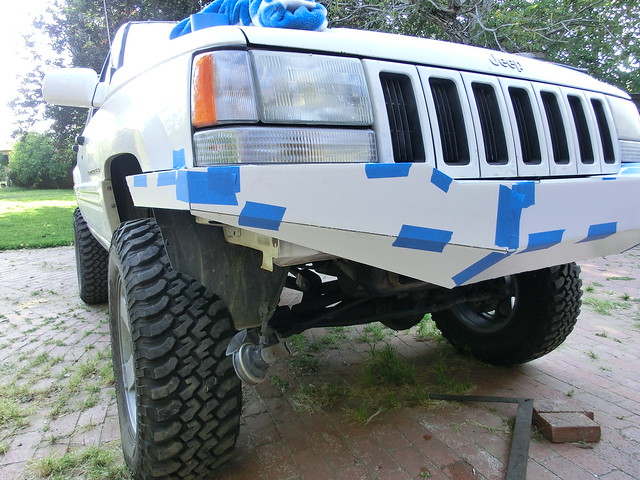
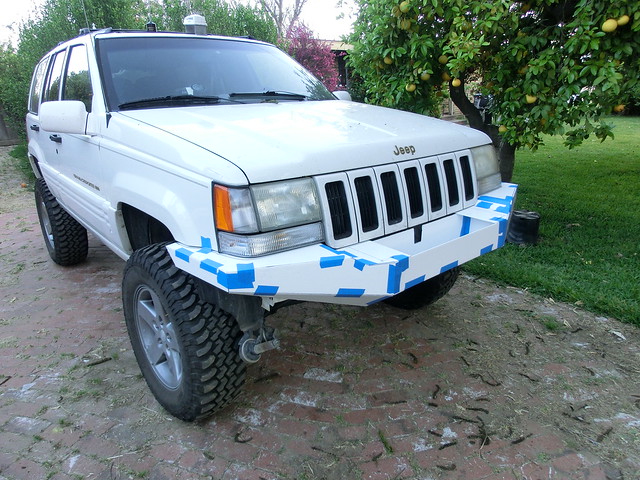
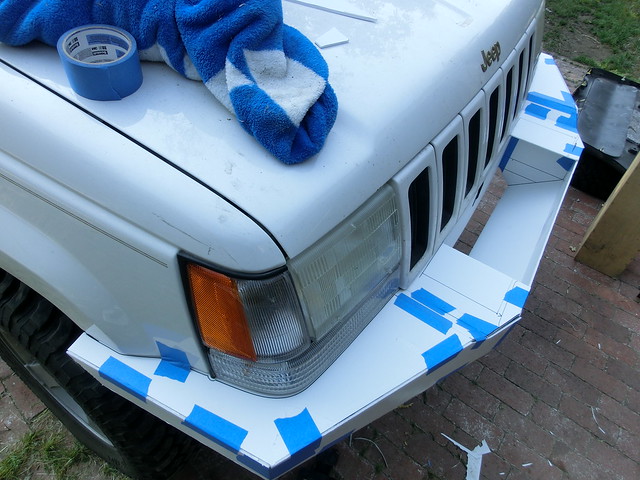
This is the "fun" part for me, it is where I get to be creative and make some mock up pieces to see how the bumper is going to look. Eventually I will use .188 cold roll mild steel to construct the bumper, so I found a material similar in thickness to use to represent the steel for design purposes. I went to the local "Joann Fabric" store and purchased 8 sheets of foam core poster board. This should work perfect...

6948674534_e5b401373d_z.jpg


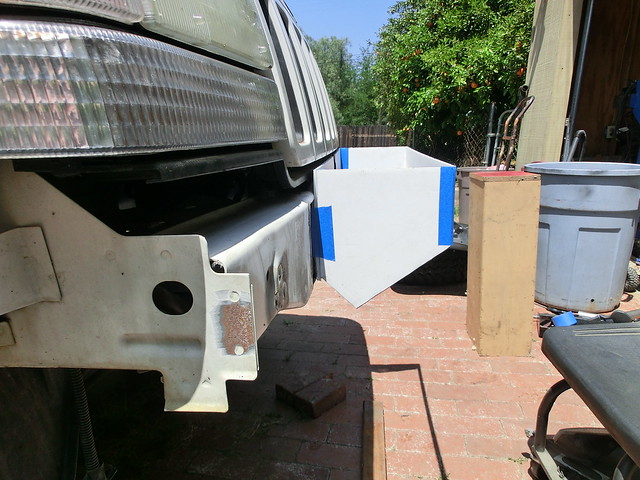
I started out by building the bumper brackets that go inside the chassis

6965041152_85b06be055_z.jpg


This will bring .188 material to the front of the chassis, the next piece to make will represent the profile of the center of the blade to include the top surface, front face and lower slope. To be honest, this is kind of a guess

7111114183_123cfde4b9_z.jpg


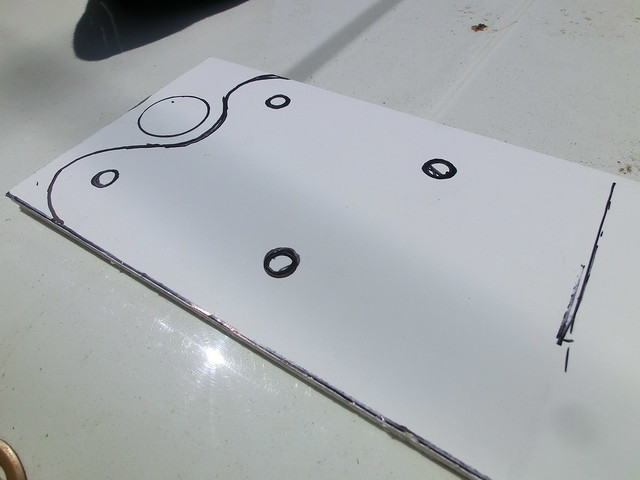
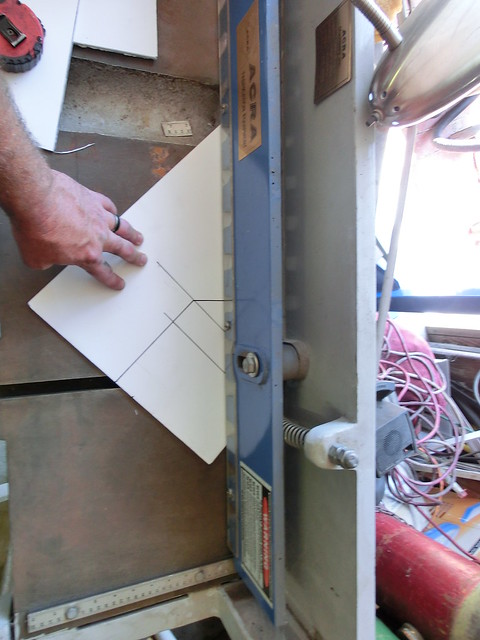
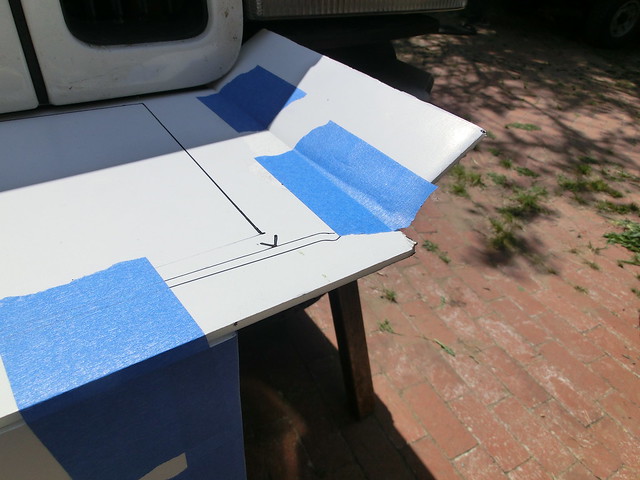
Due to the fact that these patterns will eventually be used to cut the actual parts from, I want them to be as straight and accurate as possible. For that reason I elect to use my stomp shear to cut most of the straight edges, at least where ever possible

6965040030_e8cc285d4a_z.jpg


Here is the finished bracket

7111111739_fff44339b5_z.jpg


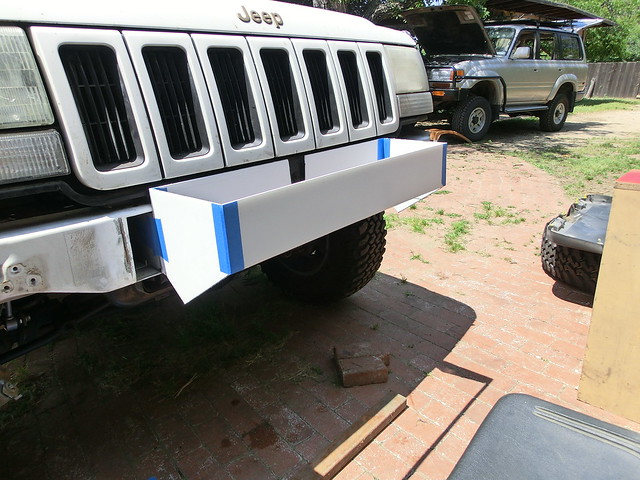
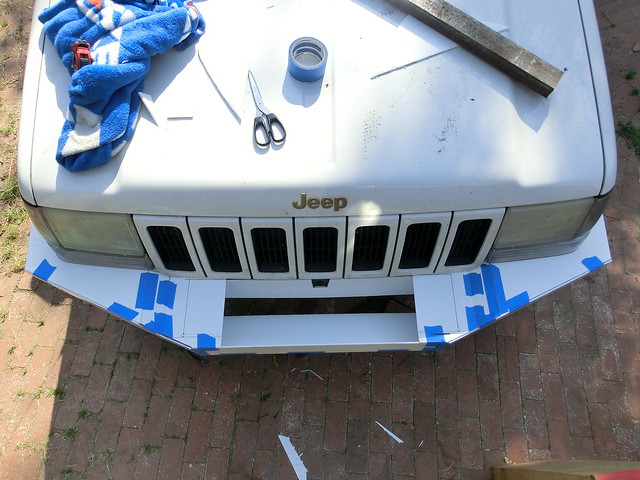
I then use my temporary welder (Blue painters tape) to attach the bracket in its intended location. I also decided to run a plate across the front face of the chassis in between bolt in brackets, as pictured here

7111113109_8d20c1c1d4_z.jpg


I place the bracket on the other side, and then make the front face. This will result in a box shape that I can slip the winch in to confirm fitment

7111123045_30d623ba31_z.jpg


Here is the side profile, and also the time to make any final decisions on the shape of the bumper. From here on out, all plates will attach to these and be tied to these angles

7111118191_c6190282bd_z.jpg


The lower slope plate is next on the list, it also helps to square up the box, and keep it square as I move on to the next plates

7111129285_56fd5cf0bd_z.jpg
 

Recce01

Adventurer
Bumper Design Phase

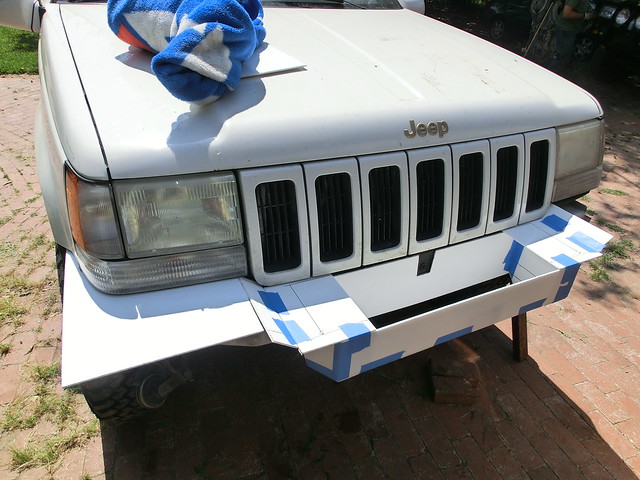
This is where my project differs significantly from my old ZJ project. I had a 1993 with a straight across grill. This 98' grill dips down in the center, and throws a bit of a wrench in my design phase. I decided to just start making plates and see how it looked

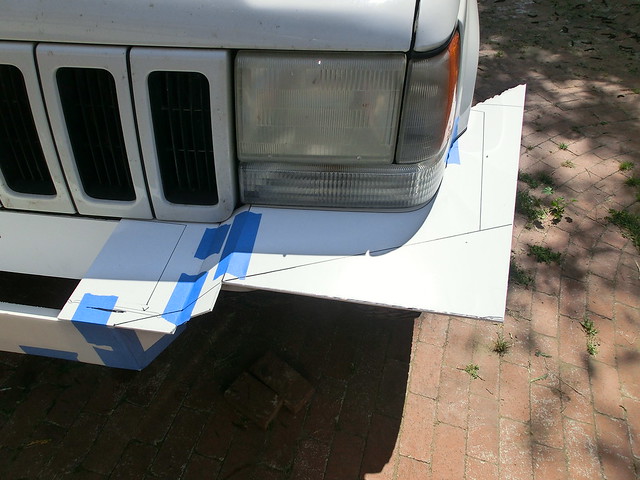
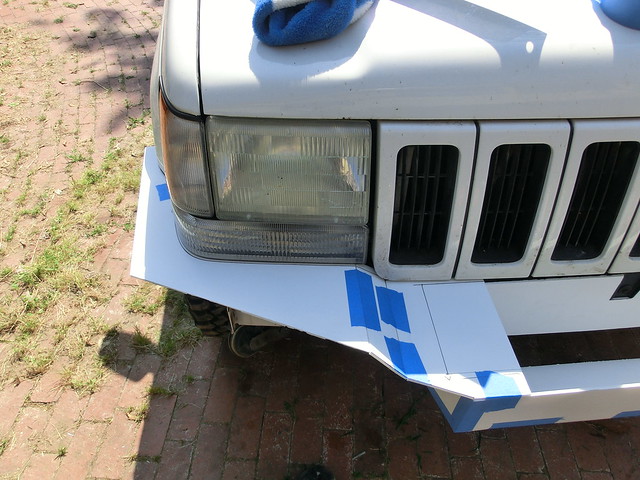
Here are the top filler plates that go up to the edged of the grill

6965054746_e820db670c_z.jpg


I decided to just make the plates angled for simplicity instead of trying to get crazy with some radius action , I guess that is because I couldnt figure out how to radius actual .188 steel plate

7111131641_ba2246ee33_z.jpg


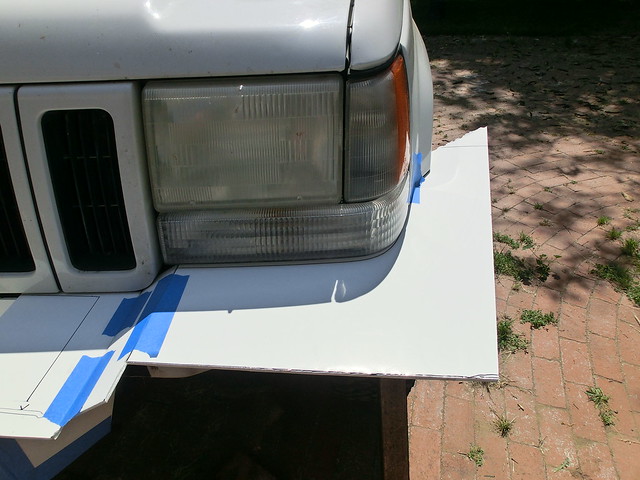
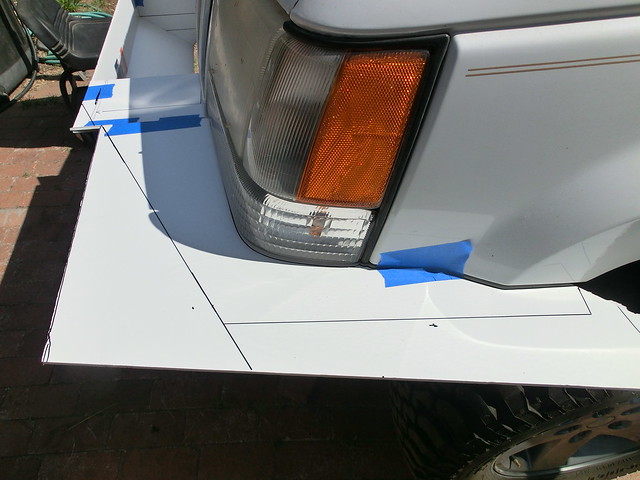
Next I made some outside plates to mock up and figure out the inside dimension of the turn - around the headlamps

6965057332_448db76238_z.jpg


Once I had the inside dimensions sorted out, I made some oversided plates so that I can draw in the final outside profile

6965062518_a78f623146_z.jpg


I spent a little time riddling with the shape of the bumper on the side of the vehicle, I finally decided to oversize it and make sure it would mat up half way decent with the flares in intend to install in the future

7111137077_6a1de6ccec_z.jpg


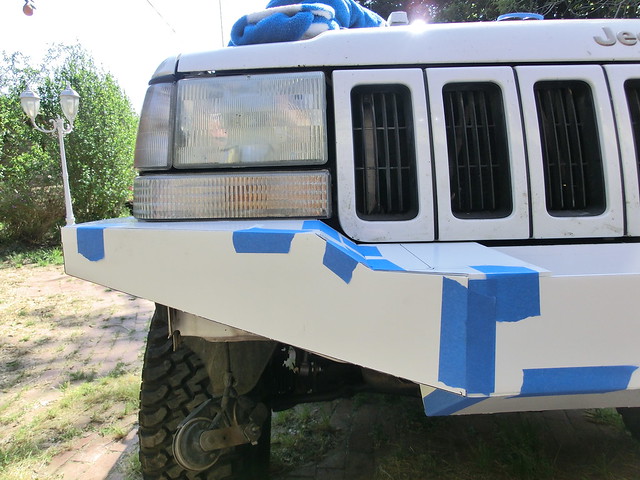
It looks like it is too wide, but it leaves me enough room to drop a tube on the corner and protect the headlamps from branches and brush

6965065452_fe4a592482_z.jpg


I had to trim the lines and see how it was going to look

6964981216_dc2232e92a_z.jpg


It seems to look wide here, but my camera has a crazy wide angle effect :)

7111060525_537e827e62_z.jpg


The next plate to add was the front side faces. I just figured what height I wanted on the outside, traced the profile of the top and cut it to fit with a razor blade

7111068195_5e5ef1355c_z.jpg


It is starting to look like a bumper!!

7111058557_907763bdcf_z.jpg


The kick up on the grill is really starting to grow on me, it adds character!!

7111063427_3117ea68c8_z.jpg


I only had the lower slope side plates, the far side plates and the rear caps (which will be done sans a pattern for now) left to do
The lower slope side plates are fairly easy, just connect the points

6964998146_3a2326baea_z.jpg


It looks like it will work, the side plates help!

6965009020_02f4ecd6e9_z.jpg


7111085727_07679709be_z.jpg
 

Recce01

Adventurer
Bumper Design Phase

The final front bumper design seems to be very close to what I was looking for. I will have to take a plasma cutter to some sheet metal under the front bumper, but I am not too worried about it! This camera makes it look way wider than it is, kind of bothers me in pictures, but suits me just fine in person :) I may clip the corners at a 45 degree angle just to get rid of some points, but I have not decided yet. I can always take a plasma to that too after it's done if need be!!

6965015334_67972fe746_z.jpg


7111081137_aec589822b_z.jpg


7111074699_52c5bb074f_z.jpg


7111088853_e080c4bf76_z.jpg
 

Recce01

Adventurer
Bumper Design Phase

Next up, rear bumper design to include spare tire carrier and Jerry can rack. Can anyone reccomend a good place to buy Nato cans with metal lids and spouts? Also, anyone know of a good Jerry Can mount system that can be purchased and welded to a carrier? Thanks for checking out my thread.
 

Recce01

Adventurer
Looking great...I like the upturn around the grille too. Nice touch!

Thank you! The upturn was the hardest thing to figure out. The front bumper is almost done, and the rear bumper is tac welded together. I just have to find some time to post, been too busy working!! Thanks for looking!
 

Recce01

Adventurer
Rear bumper design

Well guys and gals..... the last few weeks have been an absolute whirlwind of activity. I made the crazy decision to try and get the rig done enough (in my opinion) to roll to the Overland Expo. A friend of mine who used to work on our Rally car team became a rep. for Engel Fridge/Freezers, and he said if my rig would be done that he would have it placed in the Engel booth at the show. That was motivation enough to spend every waking moment not doing my regular job working on the Jeep to prepare it for the show. So I elected to slack on the posting, and fire up the fab shop every night at 6pm, and run until I couldn't run anymore. This entailed lots of Dubstep at rediculous volume (sorry to neighbors), RedBull and the help of a few good friends to make it come to fruition.

At this point we have already done 6 days in the vehicle, and man oh man are we pleased with the results. Like any vehicle the laundry list of things to do is ever growing, but that will have to come in later posts. First, I wish to bring you up to speed with the progress. Keep in mind that I was much less focused on taking photos, and way more focused on just getting the job done, so you will have to excuse the night photos when I get there, I am not terribly good at taking photos at 3 or 4 in the morning lol.

When we left off before, we had completed the front bumper design, and were just starting to lay out the rear bumper. I grabbed the foam core board and the razor, and started dreaming up a design :) First things first though, I have to remove the factory bumper and mounts...

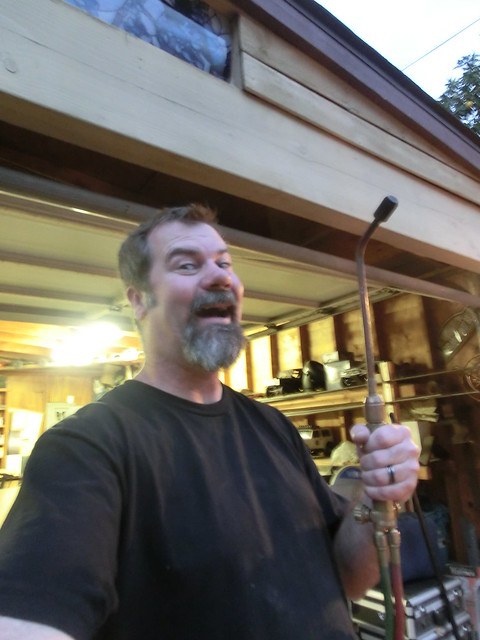
This turned into a serious PITA, and I had to use this...

7117851717_9a73b76ec9_z.jpg


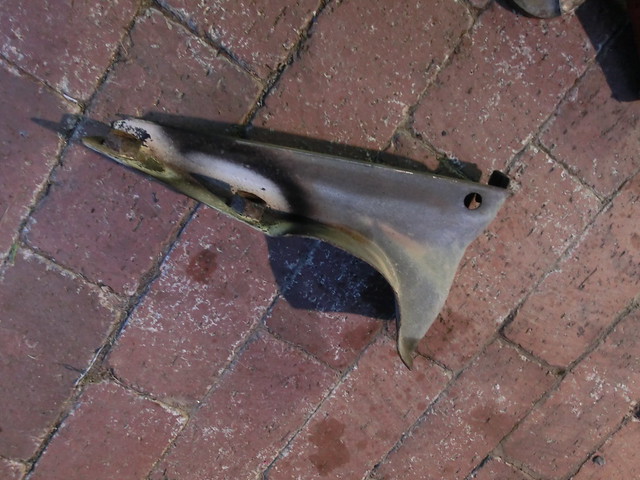
To heat and remove these...

6971745734_d4903dca3c_z.jpg


so I could get these off...

6971791370_9786579f08_z.jpg


Anyone who owns a ZJ knows the fuel filler goes through the "frame" just in front of these nuts on the drivers side, so It was likely one of the most sketchy things I have done in years in my fab shop. I of course added tons of heat shielding before shoving the rose bud down the frame rail, but it scared the bejesus out of me regardless. Finally the brackets and hitch were off!

7117814515_8ded646780_z.jpg


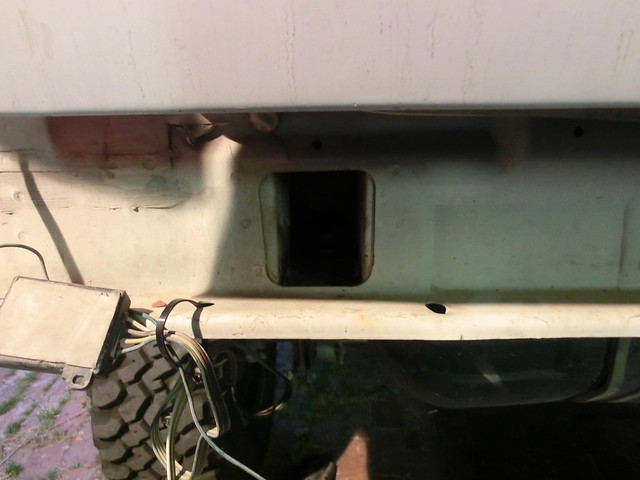
The next step was to open up the holes in the rear of the frame, and make room for the brackets

6971761322_200710cff4_z.jpg


so out comes the die grinder or cut off wheel and the sparks were flying once again.... the holes were opened and ready for a mock up bracket

7117842217_25b15e9872_z.jpg


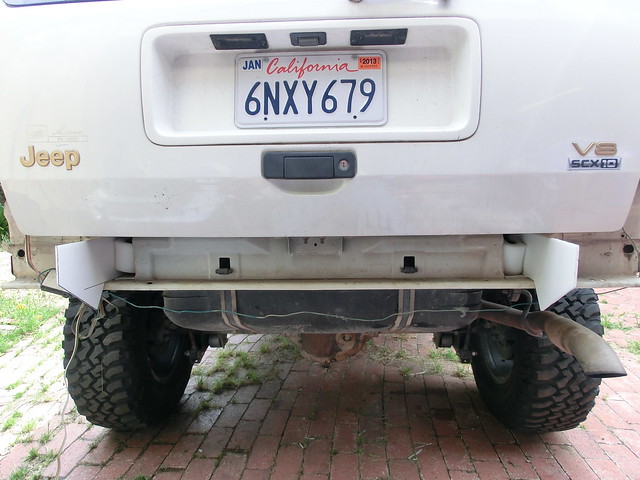
I decided to do some flat brackets on the bottom that would bolt through the stock holes as well as some verticle brackets that I would eventually weld to the flat bottom plates, and bolt through from the side. I wanted more than just 2 bolts per side, especially with a sparte tire carrier planned for this bumper. I did some figuring of angles, and sheered up the vertical brackets and put them in place

7117828635_471aae76de_z.jpg


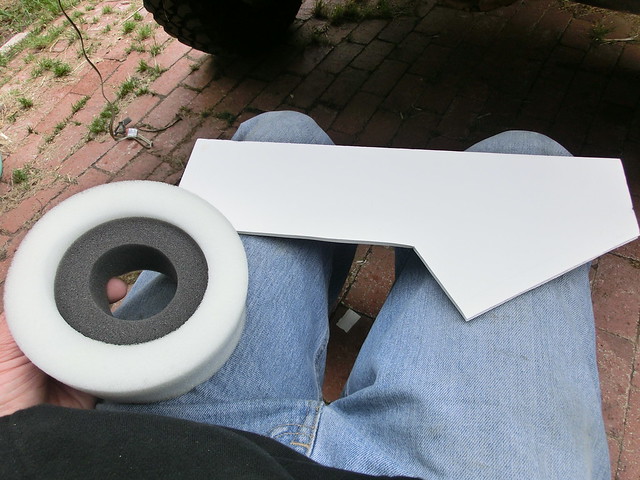
I used the RC Car tire foams to keep them snug against the side of the frame so I didnt have to drill them and bolt them in for now

7117827413_198c2650a0_z.jpg


At last, I was to the fun part, a blank canvas, time to get creative!

7117796059_2cb1ae8f5b_z.jpg
 

Recce01

Adventurer
Rear bumper design cont.

I had already made the basic decision on the rear most part of the blade. That is determined by the shape of the rear bumper brackets. So to start I just had to measure and shear the appropriate size pieces for the brackets, and tape them in place. First the top plate.....

7117810155_13944d72ca_z.jpg


Then The rear plate..

6971736992_28bc685246_z.jpg


You will probably notice a 90 degree section that is open in between plates, that is meant to be the weld area once these plates are transfered to steel. The bottom plate was next on the list..

6971756314_b6281f211d_z.jpg


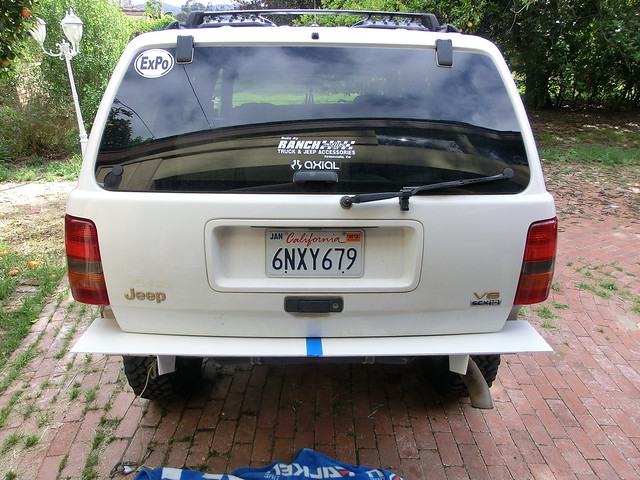
The main blade is somewhat laid out...

6971735002_521ac2c6cb_z.jpg


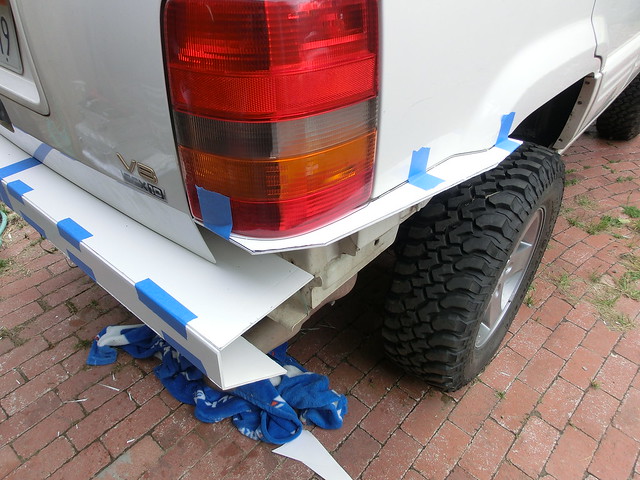
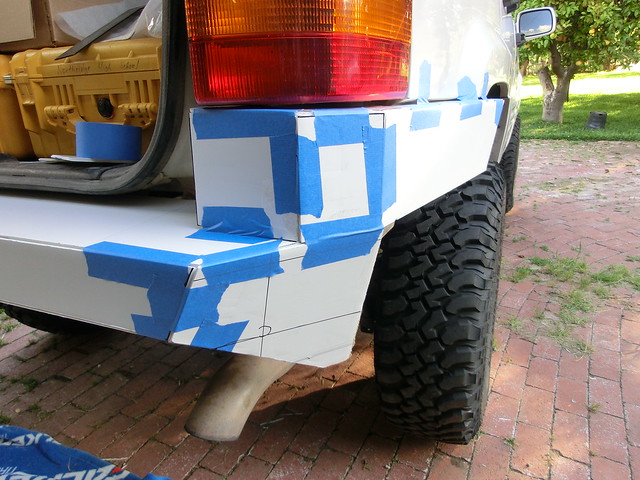
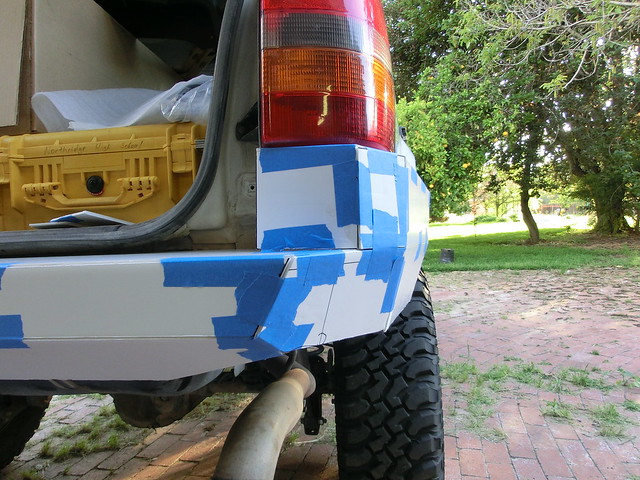
This is where the serious head scratching starts to set in. I have been avoiding facing the fact that I had no idea what I was going to do on the side of this vehicle for the rear bumper. Truth be told, I was literally and completely lost. The problem is the size (height) of the space that needs to be masked or covered. I don't see the point in putting so much extra weight in material there, yet it has to be covered and or protected, or it will look un-finished. I did what any fabrication hack would do, and that is to start making parts. When all else fails, build something, then make it work :) I decided to start with the top profile, as that would be the same regardless of what I do below....

6971722598_b18021ab6c_z.jpg


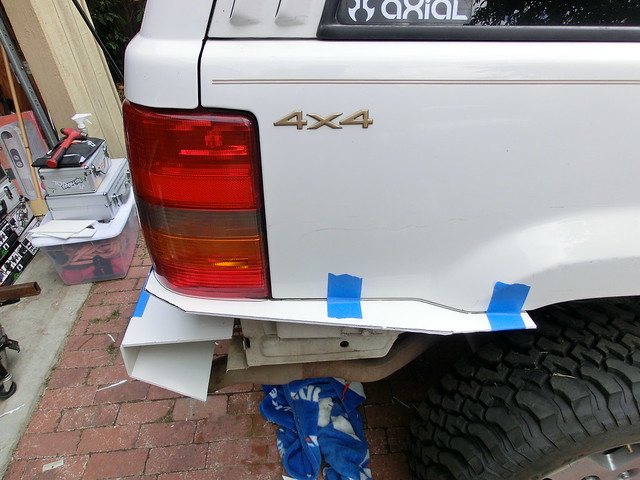
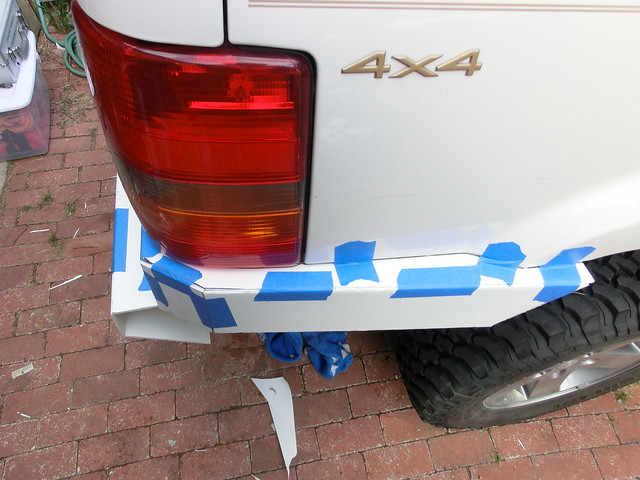
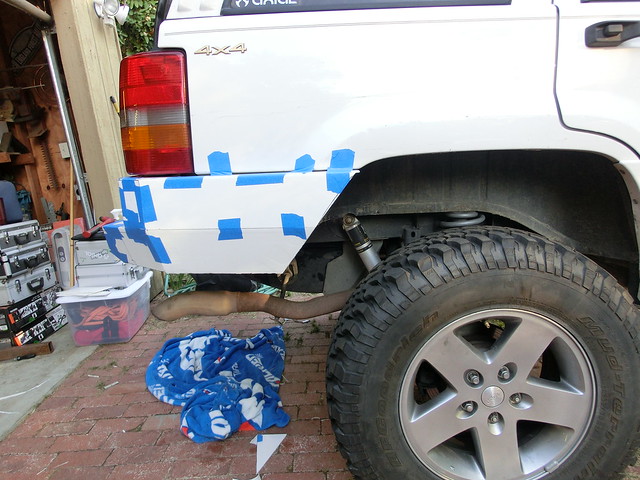
Even though it is not reflected in these photos, I decided to make the outside line straight from under the tail lamp to the front point of the rear bumper, this would save the number of plates that I need to make, even though the bend would have been cool and would have added more character

6971776342_fc8108bfc4_z.jpg


Due to the fact I was still at a loss on what to do with the sides, I just started making more pieces, like these under the tail lamps

7117865039_222b11abd4_z.jpg


I figured I would just start filling in the blanks until it was completed. The funny thing abnout plate bumpers is how easy it is to "paint yourself into a corner", where you can't make the angles match up. I was very worried about this, and the overall esthetics, but I figured I didn't have much choice, so I just kept going.

Here are the upper side panels...

7117865917_199b020c5a_z.jpg


I had finally reached that critical moment, where I needed to decide the angle of the bottom plate. In my opinion it had to kick in toward the center of the vehicle, as it would have looked way to squared off to run it straight down at the same exact angle.

6971774714_074b330bba_z.jpg
 

Recce01

Adventurer
Rear bumper design cont.

choosing the angle would force me to commit, and there was no turning back. I decide to change the angle on the lateral plane first , this would kick the rear of the bubper in, and make it not so squared off. I simply followed the line from the top plate all the way to the rear of the vehicle...

6971760558_7b055991e1_z.jpg


I estimated the angle that I wanted on the sides and drew that angle into the vertical surface and cut it

6971783462_f9c77afb4b_z.jpg


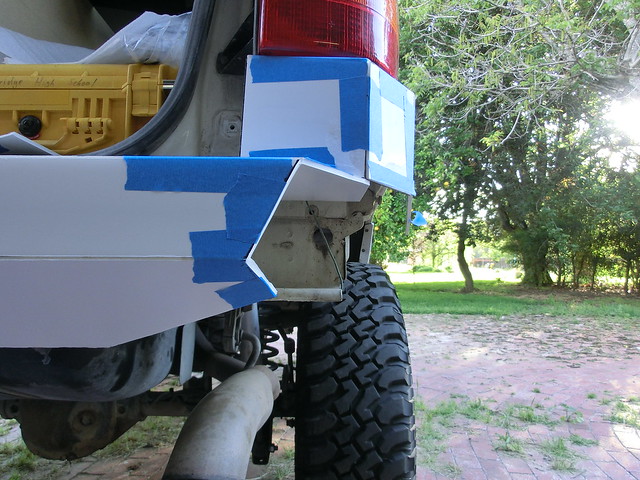
The last and final 2 cuts were determined by the angles I put on the lateral and verticle plates. I just held up a straight edge and marked the cut lines, then cut them. I did add some angle to the bottom plate for extra clearance in the back corners

6971751236_4820483b1f_z.jpg


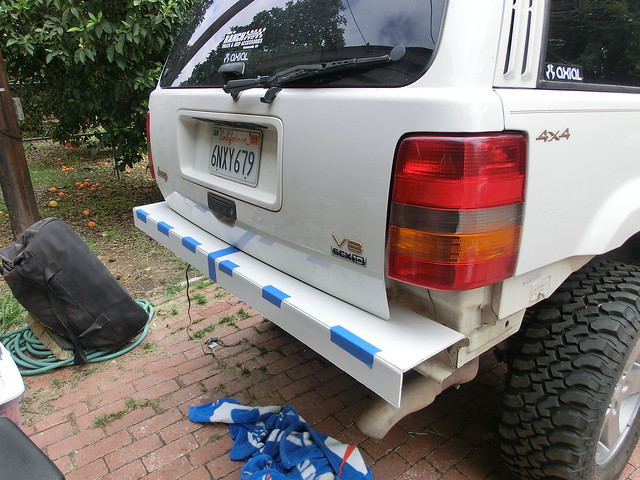
Then it was as easy as adding the side plate to fill in the blank

6971739366_d853a2a4a7_z.jpg


I ended up trimming the bottom of that last plate significantly in order to make the overall height of the bumper much shorter, this became a necessity when I added the side plate

6971782434_8a56a76f74_z.jpg


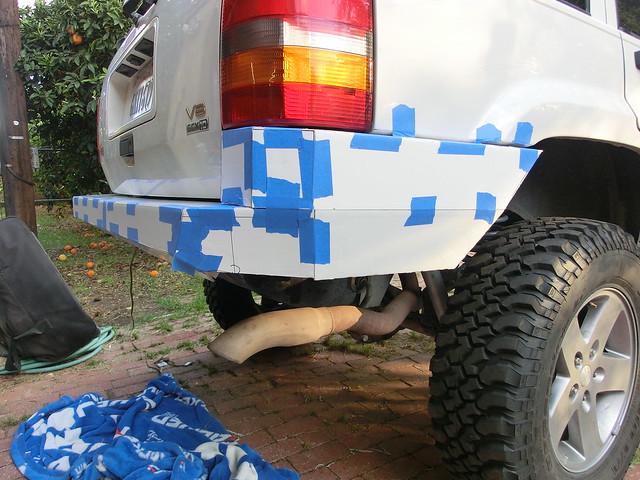
The result isnt that bad, I figured it would take some time to grow on me, as I have not been a big fan of this rear bumper situation

6971789388_8e3066f146_z.jpg


7117826569_397e5366bb_z.jpg


I only did one side of the rear bumper, and was just going to hope I measured correctly and it would be semetrical in the rear :)
 

Forum statistics

Threads
188,201
Messages
2,903,721
Members
229,665
Latest member
SANelson

Members online

Top