A new to us 1997 Toyota HZJ80R Landcruiser

p1michaud

Expedition Leader
Updates

It's been a while since I last update the thread. I've been busy with work but have managed to sneek in a few trips. I need to get on top of posting them... On the rig side of things, I've made a few slight changes:

  1. Headlight Retainer Mod Got a relay from the wreckers for free and it's a plug and play mod. Once you remove the key and open the door, the headlights turn off.
  2. I had another air leak in my air bags. Same one as before (driver side). So I got fed up with them and pulled them out last weekend. Two things happened, sligth improvement in the ride and I'm not worried about the darn things anymore. Should have done this a long time ago. I've got a set of heavy duty rear coils to handle the weight of the rear bar, long range fuel tank and rear drawer system plus fridge and tools.
  3. Replaced the windshield, rear passenger side glass and headlight covers. All of wich were damaged due to rocks/gravel except for the rear passenger side glass that was taken out by a free TV... To top it off, one week after getting the new glass put in, I had another rock crack the windscreen. Some times you can't win.
  4. I spliced in a Master Pull tube thimble and replaced the winch hook on my synthetic winch line. For some reason it only came with a chaffe guard in the eye splice and no thimble.

    No pics sorry, pretty routine stuff.

    Next on the list: Timing belt, glow plugs, injectors and intake manifold gaskets.

    Eventually, I'll be removing the rear seat and extending the rear platform to include better tool, spares and water storage for the longer trips arround Oz.

Cheers,
P
 

p1michaud

Expedition Leader
Lower steering arm – missing stud!

For the 80 Series gurus, a question for you I have...
I’ve just found that I’m missing one of the studs that holds the lower steering arm to the knuckle on the left hand side of the Landcruiser. The three others seem to be intact. I don’t have an issue with simply replacing the stud and checking the torque on all the others. From what I’ve read on various forums, this is a symptom of other issues and the theories are as follows:
  • Scenario 1: Apparently this only comes into play if you have a larger lift on your cruiser (guessing over 4”). The problem is the steering arm from the steering box is on a fair angle and it forces that bottom arm downwards when the suspension cycles upwards causing the nuts to come loose and eventually shearing the studs.
  • Scenario 2: Incorrect preload on the kingpin bearings - too much preload (problem #1) (not enough shim) will result fairly quickly in premature bearing failure, leading to (problem #2) not enough preload, this allows the load to cycle excessively on the axle studs leading to stud failure. The theory is that it is probably NOT the steering loads that work the bolts loose but rather the cyclic tensile loads causing the studs to loosen then the steering loads bend them and finish them off.
  • Scenario 3: Incorrect torque on initial stud installation.

What say you?

Other useful information:
  1. I’ve only got a 2” lift on my cruiser so Scenario 1 does not seem very plausible.
  2. Stud thread is: 12 mm x 1.5 mm
  3. Torque: 45-50 Ft-lbs

By the way, is there a remove/replace procedure for these? Nothing in the OEM repair manual that I could find. Would it be worth putting some Loctite on the studs and nuts. I was thinking Red to hold the studs into the steering knuckle and Blue to hold the nuts on the studs. Thoughts?

Cheers,
P
 

Pskhaat

2005 Expedition Trophy Champion
I have continually run into this situation on my 80. In fact, I just had to buy a new cone washer for a lost one. I have thought about all your scenarios but a lot of other folks have this issue. This continues to happen to me despite having professional service (Slee) and put in the new-style studs.

As part of oil changes I re-torque them to 90lbs (as per Slee suggestion) whilst lightly hammering upwards on the arm. Many times I get several degrees of tightening turns. Seems to be a PM item.
 

p1michaud

Expedition Leader
Half way there!

I have continually run into this situation on my 80. In fact, I just had to buy a new cone washer for a lost one. I have thought about all your scenarios but a lot of other folks have this issue. This continues to happen to me despite having professional service (Slee) and put in the new-style studs.

As part of oil changes I re-torque them to 90lbs (as per Slee suggestion) whilst lightly hammering upwards on the arm. Many times I get several degrees of tightening turns. Seems to be a PM item.

pskhatt,
Thanks for the feedback. Seems to be a relatively common occurence from what I've read also.

Well I managed to pull everything apart last night. It was not too bad because all the seals and bearings were in good condition so the oil grease in the birfield had not turned to soup. I was also fortunate enough to drill through the broken stud with a 3 mm bit then when I moved to the next size up 8 mm the drill bit eventually dug in, turning the stud straight through to the other side. I finished cleaning everything out, installed the new studs complete with red Loctite. I've also installed the new king pin bearing races. All that's left is new axle seal while I'm there (only 6 months old but not going to take the chance). Then put everything back together using new grease, bearings, gaskets and seals. I did notice that all the studs were finger tight only during dissasembly...:Wow1:
Cheers,
P
 

p1michaud

Expedition Leader
Back on the road

Well after two evenings worth fo wrenching, the repairs are complete. This is what I found:
  1. One of the four studs holding the steering arm to knuckle was sheared off and the other three were finger tight only!
  2. All seals were in great condition with no damage or leaks thus no grease/gear oil soup to deal with.
  3. The wheel bearings had just shy of 200 000 Km's on them and were in good condition.
  4. Birf was in great condition with no cracks.
  5. Brakes were good.

Here are a few pictures:

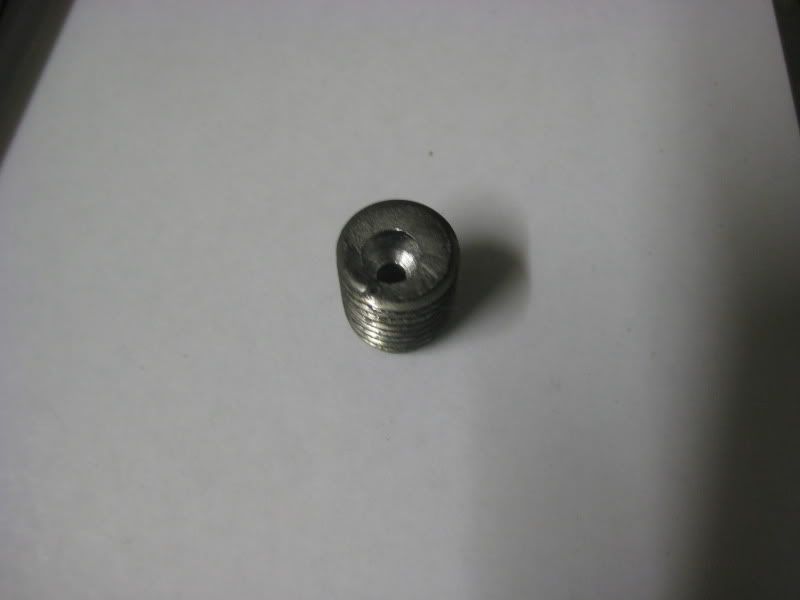
The broken stud after being drilled out. You will notice that I was fortunate enought that is just drilled straight through into the knuckle.
IMG_4346.jpg


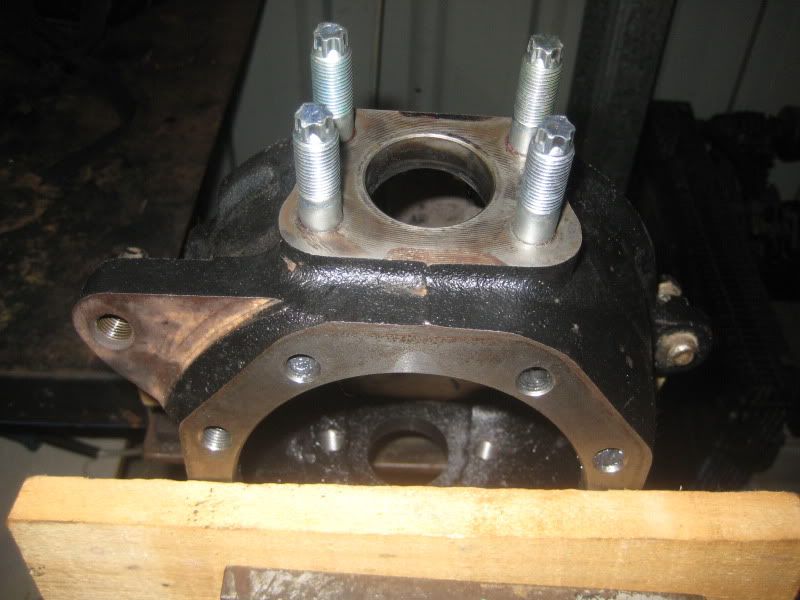
The new knuckle studs in place at 50 ft-lbs with red Loctite after sitting over night.
IMG_4344.jpg


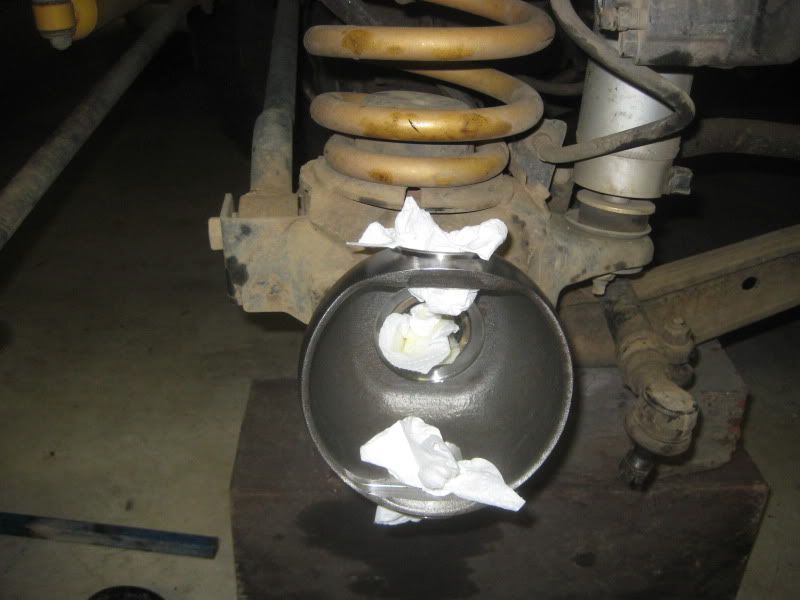
The empty housing complete with new king pin bearing races and awaiting a new axle seal while I was this far into the rebuild.
IMG_4347.jpg


Re-installation went very well with all new seals, felt/rubber wipers and new bearings everwhere. The king pin bearing pre-load ended up at 8 lbs. My only problem was installing the rubber wiper backwards on first assembly. :costumed-smiley-007 I tore everything down and flipped it arround. All in all, I would not hesitate to do this repair in the field. The only issue I could see is keeping the work area clean (i.e. free of dust/sand) for the re-assembly. Well keeping yourself clean might be a challenge as well. My wife actually showed me a very cool and environmentally friendly method for cleaning yourself up after the job. Olive oil. It works great to remove all the grease from your skin and you smell better as well. :sombrero:

Cheers,
P
 
Last edited:

p1michaud

Expedition Leader
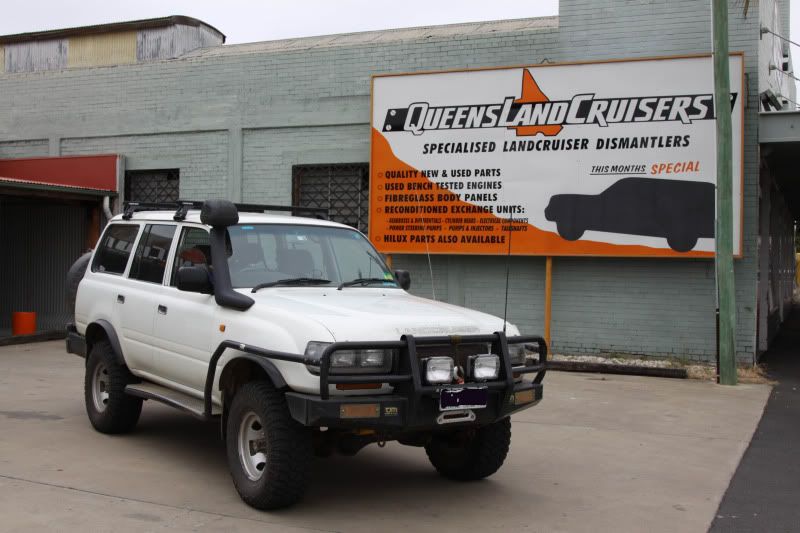
Landcruiser Parts Gold Mine!

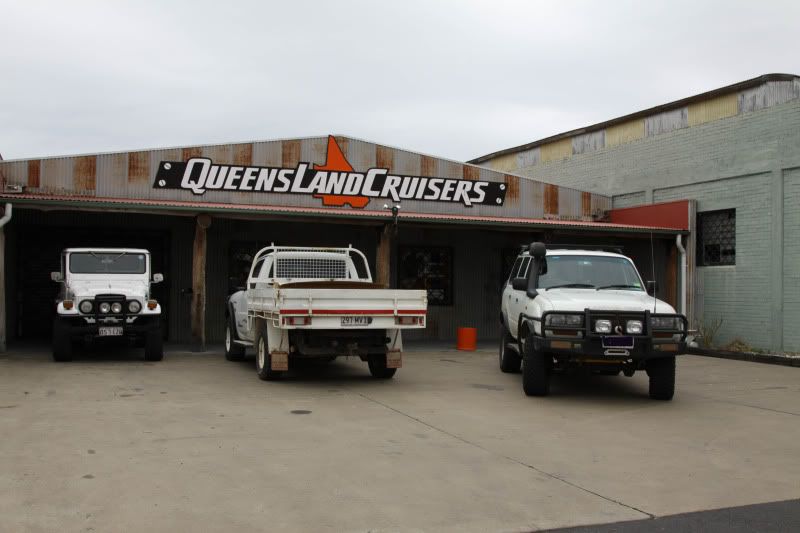
I've been fortunate enought to find the Landcruiser equivalent of a gold mine here in Queensland Australia. The place is called Queensland Cruisers and specialize in wrecking Landcruisers only! When I walked in the door, my heart skipped a beat at the sight of a nearly new (127 000 Km) HD-T engine on a crate complete with Turbo and injector pump. If I only had $9000 AUD to hand over...

This place has just about every part you can imagine on hand. It's a great spot and I can see being a regular customer. Rumor has it that Marv Spectre Off Road dropped in for a visit and buy a few container loads of cool Oz Landcruiser parts to ship to the US... :costumed-smiley-007

At the end of the day, I only snapped a few pics and picked up some minor repair parts but I will return...

QLDCruisers-1.jpg


QLDCruisers-2.jpg


Cheers,
P
 

CanuckMariner/Nomad

Love having fun 😊 in the 🌞 by the ⛵ and the ⏳
Sorry I haven't posted up in a while Pierre but have been into a lot of things besides travelling lots. Kyle (my son) got a JDM 80 series and has it pretty much decked out like yours. He and a friend are meeting me at SEMA this year and then a few more days of trailing at HnB in Logandale.

Your 80 is looking great an seems like you are getting to be quite the mechanic as well. Lucky you to have all the cruiser parts places, including wrecking yards so close by. Up here if a 4x4 Toyota hits a wrecking yard, word gets out and it's gone in a weekend.

My 73 is almost completely together after gutting the insides and dash to get the years of dust out and detail her to show room specs and then some. Polished out all the pinstripes and hope to have her ready to sell in 2011 or keep her for 4 more years and sell in the USA.

My 77 has been great and quite the improvement on size (~14" longer) and accessibility (4 doors instead of two) as well as most of my gear fitting directly from the 73.

Keep up the posts as we love to hear how someone decks out their 80 when all the jewellery is so close at hand :drool:and such a backyard to play in.:costumed-smiley-007
 

p1michaud

Expedition Leader
Cruisers

What are the specs on Kyle's 80?

Thanks on the compliments, I've been working away at the rig for some time and getting out for a bit of a play and explore when we can. One of the main reasons I end up doing most of the work is that quality mechanics who are proud of their work are getting harder and harder to find. I happen to work with a bloke who was the head mechanic for the local Toyota dealership for 17 years. He now works at the power station with me and he does not have too many good things to say about the current mechanics. In fact he no longer has his vehicle serviced there...

How many Km's on the 73? I may be in the market in a few years...:sombrero:

I've been meaning to fire off an e-mail asking about your thoughts and experiences with aftermaket turbo's on the 1HZ. I've just about reached that point where I'm looking for a bit more power. 60Km up a hill in 3rd has somehow lost it's appeal...:costumed-smiley-007

Cheers,
P


Sorry I haven't posted up in a while Pierre but have been into a lot of things besides travelling lots. Kyle (my son) got a JDM 80 series and has it pretty much decked out like yours. He and a friend are meeting me at SEMA this year and then a few more days of trailing at HnB in Logandale.

Your 80 is looking great an seems like you are getting to be quite the mechanic as well. Lucky you to have all the cruiser parts places, including wrecking yards so close by. Up here if a 4x4 Toyota hits a wrecking yard, word gets out and it's gone in a weekend.

My 73 is almost completely together after gutting the insides and dash to get the years of dust out and detail her to show room specs and then some. Polished out all the pinstripes and hope to have her ready to sell in 2011 or keep her for 4 more years and sell in the USA.

My 77 has been great and quite the improvement on size (~14" longer) and accessibility (4 doors instead of two) as well as most of my gear fitting directly from the 73.

Keep up the posts as we love to hear how someone decks out their 80 when all the jewellery is so close at hand :drool:and such a backyard to play in.:costumed-smiley-007
 

CanuckMariner/Nomad

Love having fun 😊 in the 🌞 by the ⛵ and the ⏳
Don't want to take this thread off topic too far so will respond by email. You will find that your comments about mechanics is not far off even on this side of the pond.:costumed-smiley-007
 

p1michaud

Expedition Leader
Over a year ago...

You know what's scary? Just how fast time flies. I can't believe it's been well over a year since I last posted. The good news, the cruiser has never been running better. The better news, it's taken us on quite a few little adventures in that year. Of course there had to be a few modifications along the way...:sombrero:

The first was a trip to Landcruiser Mountain Park where the cruiser with lockers did not disappoint. It drove everywhere we were brave enough to pointe it.

IMG_0569.jpg


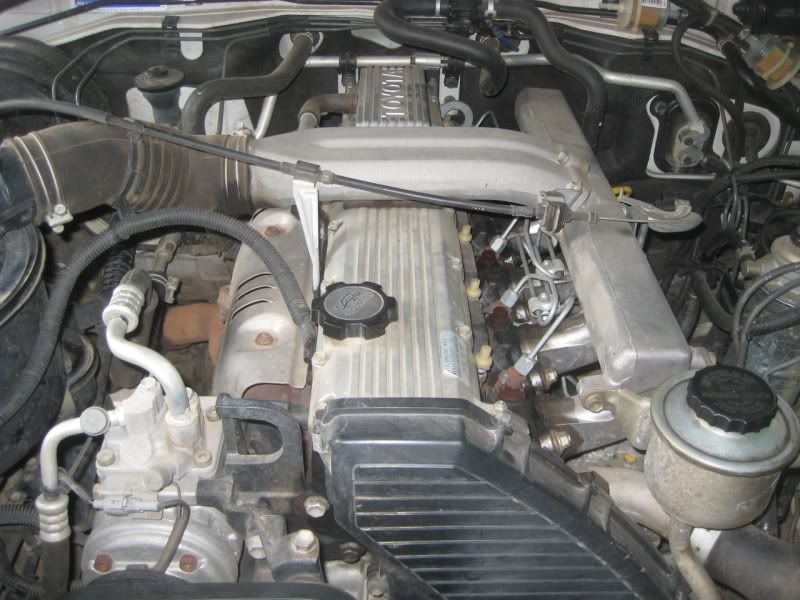
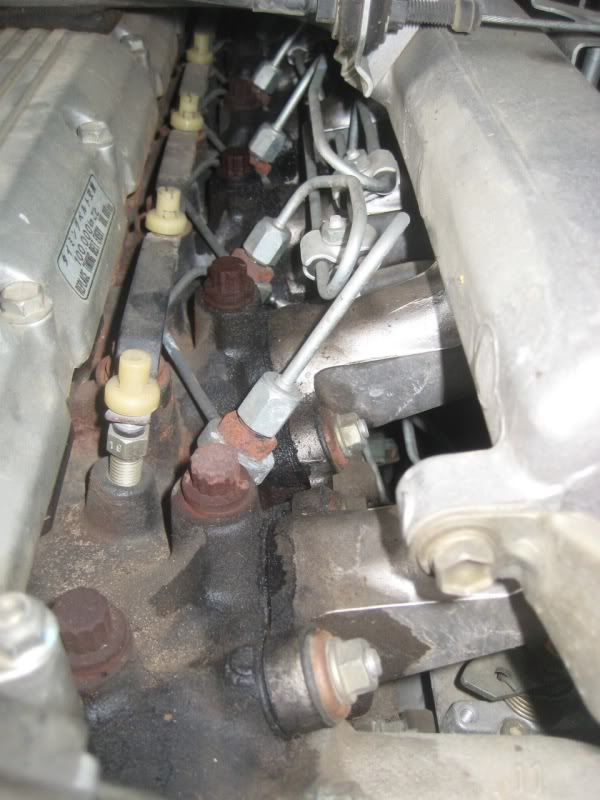
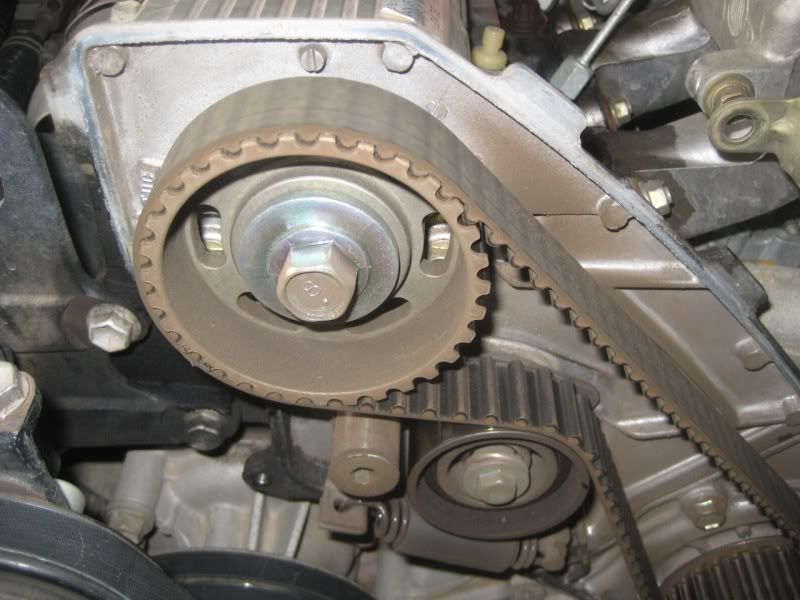
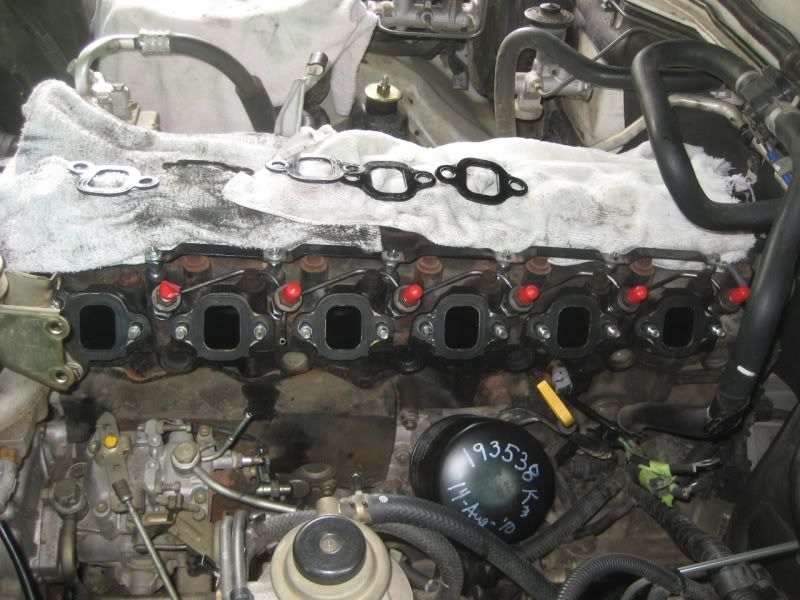
Then it was time to give the 1HZ some attention. It had rolled over 200 000Km of trouble free service so the following was in order:
  • New glow plugs
  • Reconditioned injectors
  • New timing belt
  • New inlet manifold gaskets

The ever simple and reliable 1HZ
IMG_4502.jpg


Glow plugs and injectors before starting
IMG_4511.jpg


Old timing belt, the most difficult part of the job was replacing the tensioner spring
IMG_4513.jpg


Will it ever run again?
IMG_4534.jpg


A few dramas later everything was back together and the engine roared to life. The full story including a broken cam shaft cover and lost injector cover is best told over a camp fire and few cold ones...:beer:
 

p1michaud

Expedition Leader
The adventures continues...

So after some much needed TLC, the cruiser took us to some simply amazing places in Queensland. You need to come for a visit at some point in your life.

Moreton Island - 1 hr max from Brisbane city. Why this place is not fully booked out every weekend is a mystery.

IMG_1406.jpg


We spent a whole week there camping, fishing and celebrating Australia day in January 2011. This was our second trip there. A cool collection of cruisers from down under.
IMG_1431.jpg


Prior to this trip we also installed a superb Windcheetah 2.2m long aluminium roof rack to handle the Oz tent, Max Trax, shovel and awning. It's sleek, well built and light weight. To date I've used an ARB roof rack, moved away from it due to weight but it was a stout piece of kit, tired Rino Rack cross bars for a bit then decided to have a crack at the Windcheetah.
 

p1michaud

Expedition Leader
Storage improved!

The next on my dusty list of modifications was to address the issue of general storage especially water storage in this very very hot country. The story goes as follows:

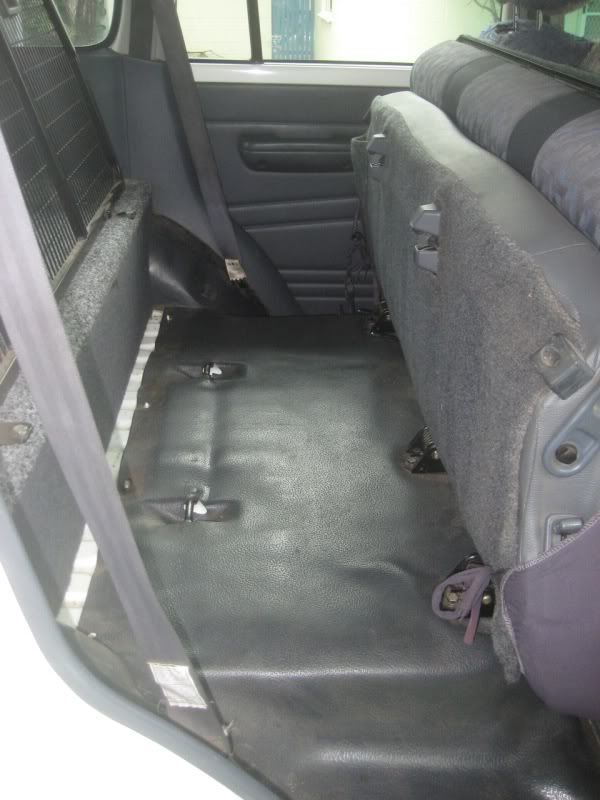
The rear seat folded forward, showing a nice flat space but lots of wasted room due to the rear seat.
IMG_4546.jpg


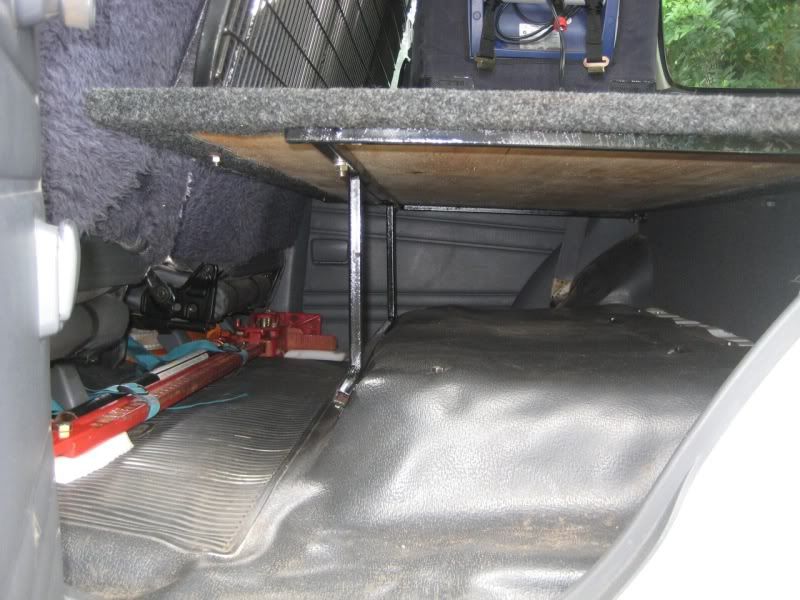
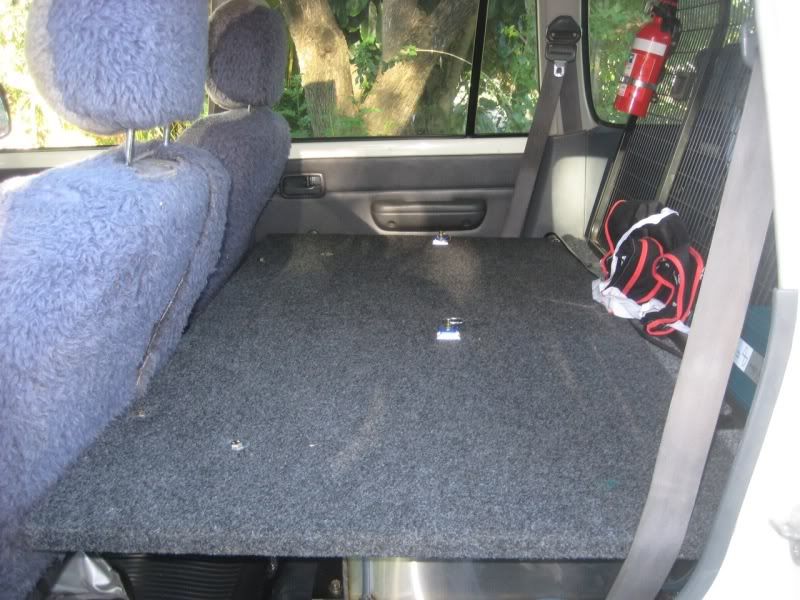
From there I build a steel frame to bolt into the rear seat mounting location complete with a piece of ply covered in marine grade carpet.
IMG_4562.jpg


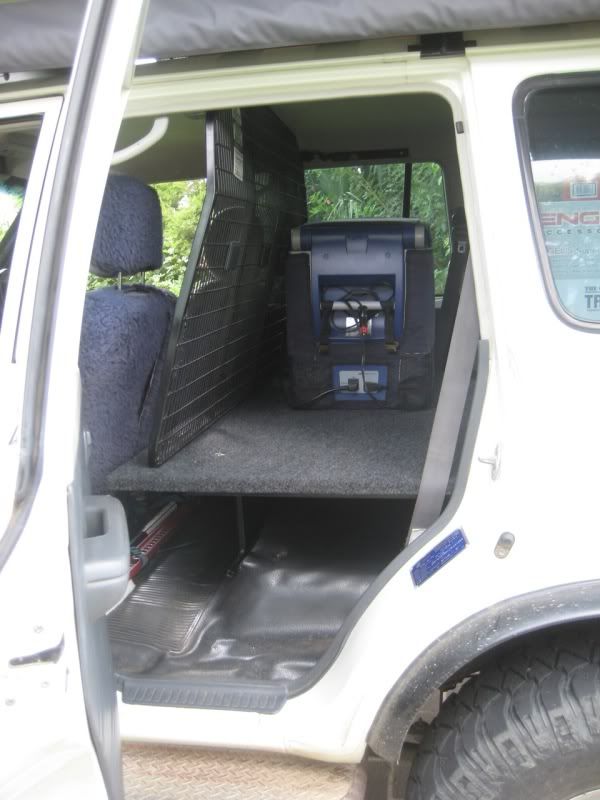
That was phase 1 before getting the final dimensions for the water tank.
IMG_4561.jpg


IMG_4694.jpg


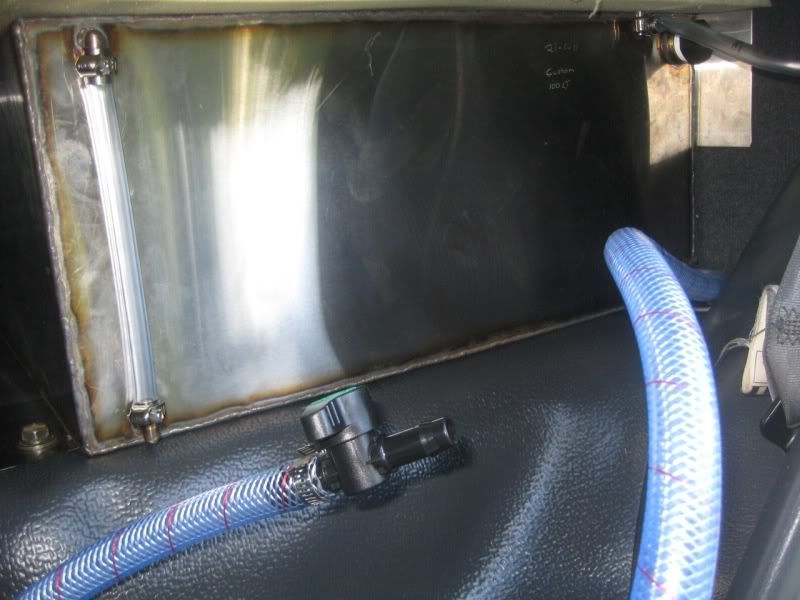
After using this for a bit, I had a custom Stainless Steel water tank fabricated to my specifications from this mob: OffRoad Systems in NSW, Australia. It was an expensive option but the design criteria was: no plastic, as large as possible and low to the ground preferably in front of the rear axle due to the weight. The final volume ended up at just a tad over 100L. Unfortunately I did not get a pic of the tank prior to install but here it is in place.
IMG_4693.jpg


The tank supply is gravity fed only at this point but after reading about some very cool water purification and storage set ups in Overland Journal, I'm leaning towards a full 12v pump/filter/faucet set. I'm going to try this out for a bit before going down that route.

One more gadget was to install a 600w inverter to handle charging duties for the camera batteries as well as computer power point should I need it down the road. I've got nearly all the items required to have OziExploer in the 80 except for a proper laptop mount...:elkgrin:
 

p1michaud

Expedition Leader
Rear suspension lower control arms, they do bend...

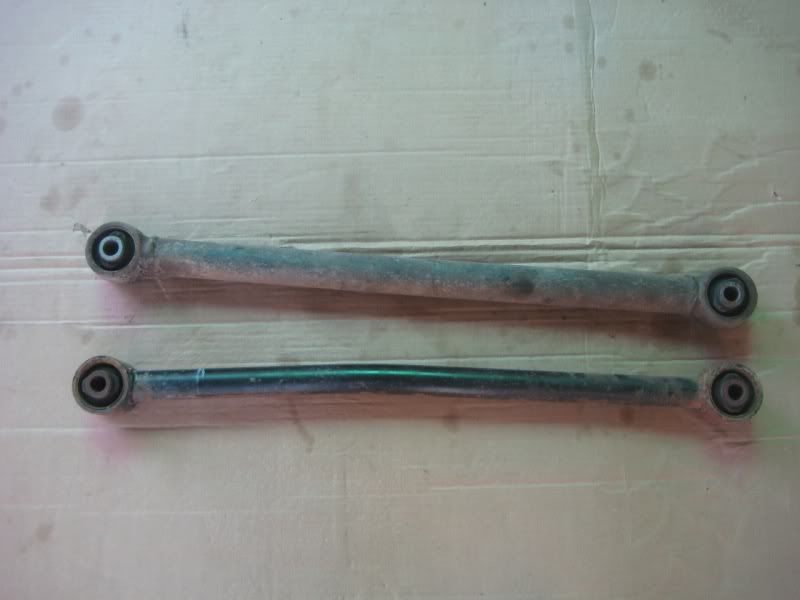
After a mishap on a particular difficult trail where both lockers were in, wheels spinning slowly forward while gravity pulled the cruiser backwards I managed to bend the stock lower control arms. The immediate fix was to replace with a factory part from the junkyard.

IMG_4698.jpg


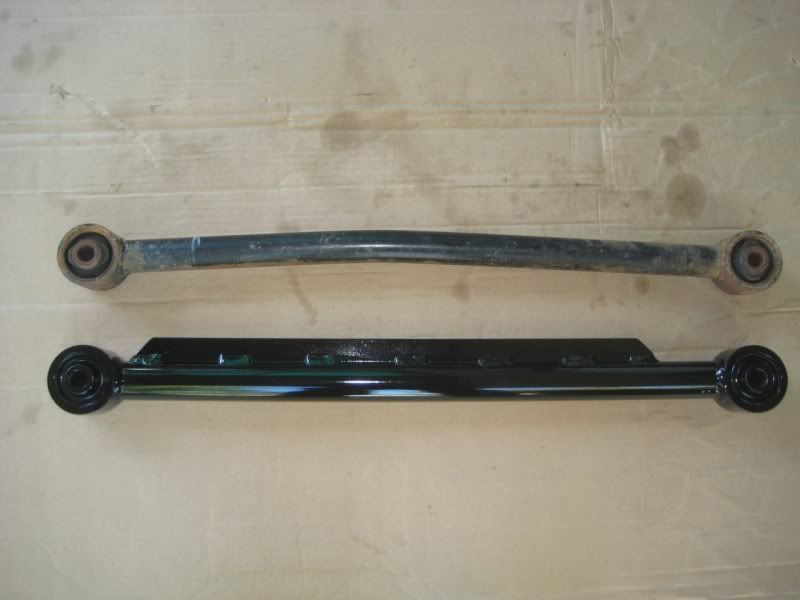
I kept this replacement for nearly one year but it's been nagging at me ever since. After some further research I found out that Toyota had the larger lower control arms from 1990 to 1994 then upgraded to a smaller diameter but thicker wall arm in 1995 to 1997. My cruiser is a 1997 and the replacement was from an earlier cruiser. Off the the internet for a bit of research to find out that a company called Superior Engineering here in Queensland makes some of the strongest suspension 4x4 parts in Australia. Their testing grounds consist of the many off road competitions in Australia. If it's solid enough for competition it's good enough for touring and general duties right? A few minutes on the phone and some credit cards numbers later I had a delivery waiting at my door. Here's what the replacements look like compared to the stock bent one.

IMG_4697.jpg


I dare say that if these bend, I'll have other serious problems... :costumed-smiley-007

That rounds out the work on the cruiser so far. The only changes I can foresee at this point other than regular maintenance is a pressurized and filtered water supply system. Time to hit the bulldust!
 

Forum statistics

Threads
188,395
Messages
2,904,141
Members
230,274
Latest member
mbauerus1
Top