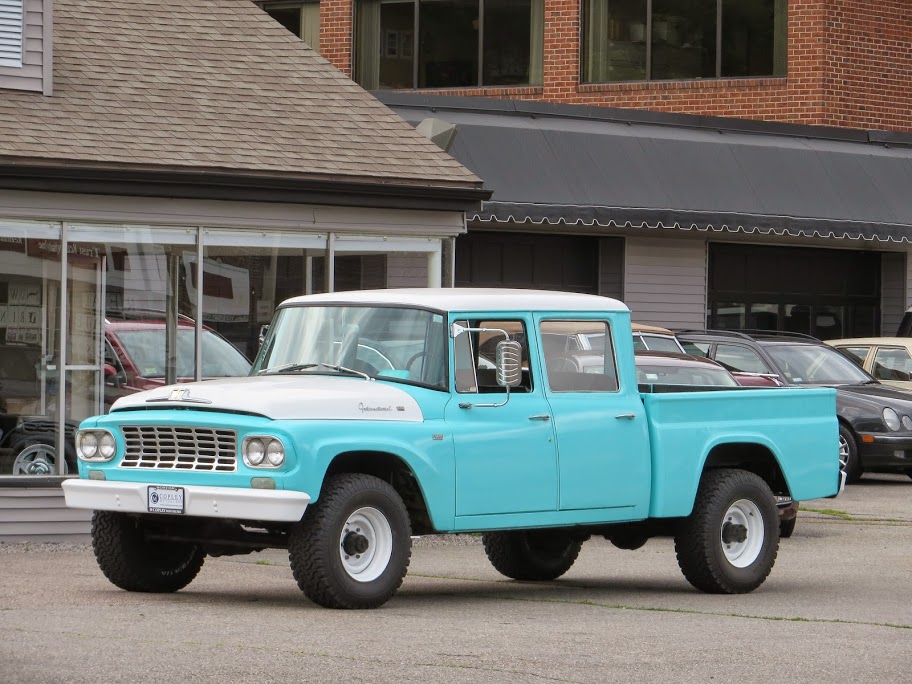
All-Purpose Scout 80 build

MotoDave

Explorer
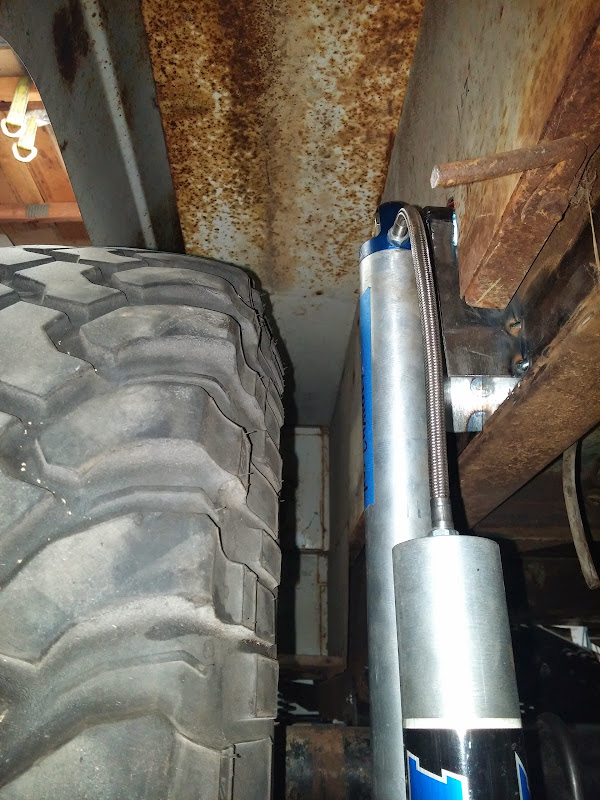
Squeezed in a little bit of garage time in between all the family stuff this weekend. I tacked on the rear shock hoops, here it is at ride height (shock isn't conncted to the axle, just mounted to check clearances)

2014-11-30%252015.55.36.jpg


Hrm, this isn't gonna work ...
2014-11-30%252015.54.00.jpg


That's with the drivers side jacked up ~4", and the passenger side hanging free.

So on to the backup plan it is, mounting some 10" short body Bilstyein 7100's under the foor. Did a quick mockup to get an idea of what I want the mounts to look like:

rear_shock_mounts.jpg


The lower mount is dropped below the axle about as much as the spring pack will stick down, so I'm not really losing anything in clearance. Its not perfect, but it'll work. I can always re-work it later if I decide it sucks :)

Anyone want to buy some used 12" travel Fox shocks? :)
 

Sooper Camper

Adventurer
i'm guessing tubbing the body/wheel well and moving the mount closer to vehicle center isn't an option? nor is a 1.25" wheel spacer/wheels with different backspacing down the road?
that's what i'd do personally...seems like it'd be less work and that sheet metal couldn't hurt from a little attention anyway. looks like you are pretty close to having room, I wouldn't consign to going under the bed just yet.
 

MotoDave

Explorer
Good suggestions -

The inner fender overhangs the frame by about an inch as you can see in the pictures, which definitely doesn't help things. It does however make fitting a back seat that fits 2 adults easy, which is one of the requirements for this truck. The most I could take out of the width is about 1" per side, which wouldn't get me to where I need to be.

Won't find wheel spacers on anything I own. Looking at them as an engineer they are basically an exercise in how much of a stress concentration you can design into a part, and no-one will convince me they are safe.

Different wheels could be an option, but these already have quite a lot of negative offset. And I have them, and they were cheap :) Guess I should measure one to see exactly what I have. I also don't really want the front track any wider than it already is, and I won't run different wheels on the front and rear with different offset.

A friend had a good suggestion, to try mounting the 10 Bilstein shocks in the same location but outboard of the frame. This might keep the top of the shock mount under the arc where the tire swings. It'd be a nice option for keeping the area under the bed open for a fuel tank, as well as being a bit more ideal for damping ratios.

Honestly the 12" travel shocks would likely not see more than 10" of travel (if that). The leaf pack I'm using is a 56" chevy 3/4" with a few leaves pulled out, and doesn't have a ton or aarch to it. I'm not expecting the rear to be close to the front in terms of flex, unless I have a custom leak pack made for the truck some day (not unlikely).
 

superbuickguy

Explorer
Good suggestions -

Won't find wheel spacers on anything I own. Looking at them as an engineer they are basically an exercise in how much of a stress concentration you can design into a part, and no-one will convince me they are safe.

Different wheels could be an option, but these already have quite a lot of negative offset. And I have them, and they were cheap :) Guess I should measure one to see exactly what I have. I also don't really want the front track any wider than it already is, and I won't run different wheels on the front and rear with different offset.

.

Okay, I'll bite - what's the difference between running spacers (aka adapters - meaning they have another set of lugs on them) or a different offset (other than unsprung weight, of course)?

In a week or two I'll be putting my link suspension together - I got a HP 44 for the front and a 60 for the back, I'm narrowing to 60"... the more I work on mine, the more impressed I am at how you packaged in all that stuff under the engine.... dang it's tight under there.... I'll PM you where I'm blogging the build - it certainly doesn't fit in any category here, not an import, not a domestic....
 
Last edited:

MotoDave

Explorer
Okay, I'll bite - what's the difference between running spacers (aka adapters - meaning they have another set of lugs on them) or a different offset (other than unsprung weight, of course)?

In a week or two I'll be putting my link suspension together - I got a HP 44 for the front and a 60 for the back, I'm narrowing to 60"... the more I work on mine, the more impressed I am at how you packaged in all that stuff under the engine.... dang it's tight under there.... I'll PM you where I'm blogging the build - it certainly doesn't fit in any category here, not an import, not a domestic....

Scanned through your build thread, nice project. I've got a soft spot for old Land Cruisers, in fact I originally wanted to build a FJ55 before deciding the cost to get a halfway decent body was just too much.

On spacers - I agree that the load on the wheel bearings from a 1.25 wheel spacer and a wheel that has 1.25 more offset is the same - doesn't mean its no putting more moment on the bearings, but none the less its probably OK. My issue with the adapter style spacer is you're transferring the load through an aluminum part with a ton of holes in it, i.e. stress concentrations. And you're doing so in a fully reversing cyclical fashion each time the wheel goes round. I deal with aluminum fatigue in aircraft parts on a daily basis, and this is basically the worst case fatigue loading I could come up with. Couple that with the fact that Aluminum has a finite fatigue life, no matter how low the stress level, and I just see a lot of potential for unnecessary failure there.

I also question if the adapters come with good quality studs, which I see as being another point of failure.

A cast iron or even better forged steel adapter, designed with more thought as to the flow of stresses through the part would be (in my opinion) the right way to approach wheel adapters.

True wheel spacers, that are basically a shim between the hub face and wheel mounting surface have been in use my OEM's for years (think old Porsche) but are typically less than 1/2" thick. They do put more moment load on the wheel bearings and wheel studs, but are part of a system engineered to work this way.

Back to the discussion - the Scout presents some issues for packaging that some other trucks wouldn't have due to the frame width. On early bronco's fro example fitting a coilover outside the frame is no big deal since its frame rails are 6" closer together.

A friend suggested running the short Bilsteins on roughly the same mounting location but outside the frame, which is a good idea. Might be low enough that the upper mount misses the tire as it arcs in, and I'd rather have something hanging down next to the tire than next to the differential. I'm going to mock that up and see how it looks.
 

superbuickguy

Explorer
I see your point about the extra holes, but at some point you've got to trust the calculator and the dude operating it... I went to school with a guy who now designs Boeing jets - to say that is a bit frightening is an understatement, but they seem to like him and no jets he's designed have fallen out of the sky due to his work... so I suppose I'll just have to forget about him making kiwi wine by fermenting kiwi on his window sill for 6 weeks... and his drinking it.

back to the discussion... packaging is always the issue. I went away from the triangle front because it simply doesn't fit, even with the HP 44... I also figure that's where the budget overruns always happen - what sounded like a good idea became a bad idea, followed quickly by an expensive fix.
 

MotoDave

Explorer
I see your point about the extra holes, but at some point you've got to trust the calculator and the dude operating it... I went to school with a guy who now designs Boeing jets - to say that is a bit frightening is an understatement, but they seem to like him and no jets he's designed have fallen out of the sky due to his work... so I suppose I'll just have to forget about him making kiwi wine by fermenting kiwi on his window sill for 6 weeks... and his drinking it.

back to the discussion... packaging is always the issue. I went away from the triangle front because it simply doesn't fit, even with the HP 44... I also figure that's where the budget overruns always happen - what sounded like a good idea became a bad idea, followed quickly by an expensive fix.

See, I'm the guy with the calculator:)

Not sure what you mean by triangle front?

Packaging wise, the upper link wasn't really the hard part on my 3-link, it was the panhard bar. I wanted it to be the same length and at the same angle as the drag link, and I feel I got it as good as I could but it took a lot of work.

In hindsight if I'd used the stock steering arms for the tie rod I'd have more room to work with.
DSC01185.jpg


If the upper link is the problem, maybe a radius arm setup will work?
 

amgvr4

Adventurer
Packaging always seems to be an issue no matter what platform you are working on. I had a hell of a time getting everything to fit in my f250 and like you spent more time on the track bar trying to get it correct than about anything else. I like your work a lot and have used it to help me with my swap however odd that may seem. Us point and shoot types need you calculator guys.
 

superbuickguy

Explorer
See, I'm the guy with the calculator:)

Not sure what you mean by triangle front?

Packaging wise, the upper link wasn't really the hard part on my 3-link, it was the panhard bar. I wanted it to be the same length and at the same angle as the drag link, and I feel I got it as good as I could but it took a lot of work.

In hindsight if I'd used the stock steering arms for the tie rod I'd have more room to work with.
DSC01185.jpg


If the upper link is the problem, maybe a radius arm setup will work?

My original thought was to use this front suspension system

3linkf2.jpg


the problem was mostly the driveshaft but it also was the transmission - and I couldn't find a rubber bar, so I went with a 3 link but a more traditional, like what you did with yours...

above my upper link is the oil filter... at this moment, I have no idea whether or not it will clear and still give me proper geometry... enough with the thread hijack, I'm waiting on photos to upload to update my thread...
 

cj7ox

New member
Superbuickguy, I don't suppose you'd mind posting a link to your build? I'm interested in following. Motodave, keep up the good work! This thread is giving me some really good ideas for my Scout 80! I very well may use your build as a suspension template (when I get the time/money to resume my work on her)!
 

jds0912

Adventurer
Nice build! I love following builds from the meticulous engineer-types. Scouts were the first 4x4 I ever really loved as a kid. I'd love to have one of these to tow my boat some day.
IH2.jpg
 

superbuickguy

Explorer
Superbuickguy, I don't suppose you'd mind posting a link to your build? I'm interested in following. Motodave, keep up the good work! This thread is giving me some really good ideas for my Scout 80! I very well may use your build as a suspension template (when I get the time/money to resume my work on her)!

check your PMs.
 

MotoDave

Explorer
Gotta love those projects you spend a ton of time on for what seems like something stupid simple.

So after about 4 iterations, some on the computer and some in metal, here's where I ended up. I finally conceded that cutting the body flange that hangs down over the frame was the way to go, it gains me over an inch of clearance between the shock body and tire where I really need it most. I'll make a bolt on piece to cover the opening on the inside of the tub, and allow me access to the nut on the backside of the shock mount. The lower mount hangs down from the axle which isn't perfect, but its less than the thickness of the spring pack, and it is tucked next to the tire. I hope its not too much of a rock anchor.

To head off the comments, the shock in the pictures is a 12" travel shock, set at the length of the 10" version at ride height (50% of travel). I'm ordering a new body and shaft to rebuild them into 10" versions, rather than buying new Bilstein shocks as i said earlier.
2015-01-18%252018.14.58.jpg


2015-01-17%252019.16.17.jpg


2015-01-18%252018.15.27.jpg


With the axle articulated as much as I think it will, there's 1/2" between the shock eyelet and the tire sidewall. I think a rear disc conversion will push the wheel mounting face outboard a bit more which will help.
2015-01-17%252019.15.19.jpg


The bolt will be replaced with a flange head version that will allow the shock spherical to articulate without binding on the hex head. There's a spacer between the mount and eye that I can tweak to fine tune the spacing a bit more.

Glad to be done with this part and I can move onto other things. Next up will be lifting the body off the frame somehow, finish welding all the suspension bracketry, and generally cleaning up the frame and underside of the tub. Then assembly can finally start for good.
 

Forum statistics

Threads
188,294
Messages
2,905,053
Members
229,961
Latest member
bdpkauai
Top