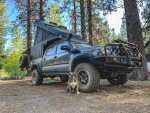
AlumEscapes AluCab Canopy Build Thread

2012Taco

AlumEscape
Taco! You’re a hero. Can I pay you to flip my door when I get my camper?

Haha, thanks - it's really not too difficult of a job other than relocating the strut bracket on the camper side provided you have access to either a tap for threading the holes or a rivet gun to accomplish the same. I honestly would have been pleased even if I had to lose the strut cylinder but I don't have the spare tire on the door like some folks do, so it wouldn't have caused me any troubles.

I'm stoked it worked out though - do you have an estimated delivery date for yours? It it going on that JT in your avatar?
 

2012Taco

AlumEscape
Tire Carrier and Propane Mount

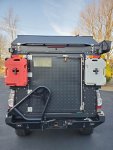
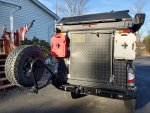
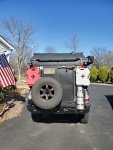
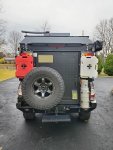
My old All-Pro bumper setup had the spare tire mount on the passenger side and a second, small swingout on the driver side that I used to gas and propane. Now that I had the door swing reversed I was half way to my envisioned camp setup. I did not want to have the spare tire swung on the passenger side anymore as it would just be wasting space under the awning. I was hesitant to carry the spare on the rear door for a few reasons, the biggest being that it would interfere with the rotopax on the Molle plate when opening the door and it looked like it would have been a pain to mount the trasharoo. My last consideration was I really wanted to have my propane bottle hard mounted to the camper near where I'd be cooking (under the awning on the passenger side) and hard mounting also leaves me an option in the future for easy plumbing of a heater.

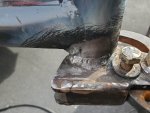
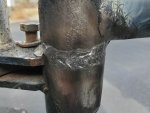
That said, I either needed to rebuild the All-Pro tire swingout from scratch or butcher the originals. I chose the latter. The biggest things that needed to be modified were the locking position pins, the latch and the actual "arm" that the wheel bolts too. After cutting off the offending items I was able to get the tire swing set on the driver side for fitting. Then I was able to get the old driver side latch tacked to the tire swing and burnt it in. I also installed the spring pin the locks the swing in the open position but didn't snap any pics of that.

20200216_095708.jpg20200216_105142.jpg20200216_105151.jpg

All painted up and ready for the "arm" changes.

20200216_162829.jpg

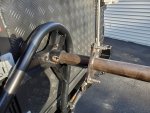
Now that the swingout was reversed from the original direction, the plate where the original All-Pro "arm" mounted is an innie instead of an outie. The original base mount was easily reversed by bolting on the other way but I needed a new tube of sufficient length to reach the wheel mounting plate which I was able to cut off the old All-Pro tube. Luckily I had some 2" OD ¼" wall DOM leftover from a previous build and it would work perfect for this. First was to mock up and determine just how much tube I needed for everything to clear.

20200218_160004.jpg20200218_160546.jpg

Here you can see I left a smidge of clearance between the rotopax and the tire.

20200218_160606.jpg

All cut to fit and burned in.

20200219_155916.jpg

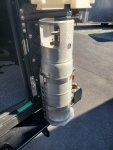
Last up was the propane mount. I already had the Worthington 6# aluminum tank and have been very happy with it. I previously had a steel mount I made up from my last build but it would have needed to be heavily modified to work on this new setup so I instead found a mount from PowerTank. The bonus is it's aluminum as well so should look a lot cleaner for longer. Mounting was pretty straight forward, simply pull the AluCab plate off and punch some holes and bolt back on. I did use an additional plate to act as a washer on the back side of the AluCab and I'd recommend the same to others as the plate is thin.

20200222_115843.jpg

All installed!

20200223_135121.jpg

Next update will probably be the Prinsu rack on the truck and a few other incidentals around the canopy. Luckily the weather is still quite good and I've made a little more progress on the wiring. I'm hoping to get that wrapped up before the first weekend trip planned for the end of this month!
 

camodog

Adventurer
No delivery date or estimations. Just patiently waiting. I am hoping to have it before Memorial Day, but I don’t know.
And it will be going on the gladiator.

I may try to do the door flip myself, I don’t think the strut cylinder is needed because I won’t have my 37” hanging off the door. Just a limiting strap is all I really need.

Now to figure out a way to mount my shadow awning on the right side.
 

2012Taco

AlumEscape
So – I’ve been sluggish updating this build thread as always!

Lot’s has been done since March and with camping on hold due to travel restrictions and other limitations I’ve had a lot of time to tinker and build out the camper for my needs.

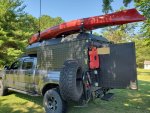
The next thing added to the build was a chopped down Prinsu cab rack that I picked up at Expo East ’19. I had originally planned to buy the modified version they produce to work with cab-over campers but they didn’t have any of the shortened racks on hand. The deals were too good to pass up so I bit the bullet and bought the full length DC version which would allow me to have some extra cross-bars too, but would need to be shortened to fit. Fitting was pretty straight forward, just cut the back half off behind the middle mounts and touched up the ends with black paint. There are numerous threads around on installing the racks so I’ll spare further details.
20200301_121832.jpg

I also added some fold down steps to the sides – those on the driver side allow me to get to the ratchet straps for the kayak on the roof and the one on the passenger side is primarily to have a spot to hang stuff.
20200223_135138.jpg20200223_135131.jpg20200223_153749.jpg

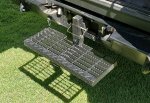
I really didn’t want to have to carry a step stool or something inside to get in and out of the camper when I’m not towing (the tongue on my other trailer works as a step) so I also fabricated an adjustable height rear step that mounts in my hitch using some chopped down metal stair grating and some leftover scrap materials in the shop. This step can be tucked up pretty tight to the bumper height so I don’t lose much on departure angle but I can lower it of needed at camp to make getting in and out a breeze.
20200714_152847.jpg

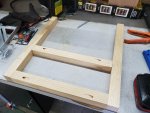
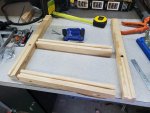
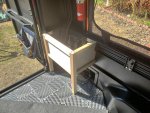
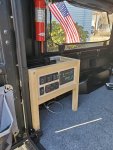
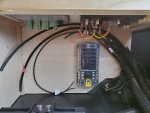
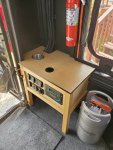
Once all the electrical layout was in order and the required parts came in I got started on the interior storage. First up was the step/cabinet on the rear driver side which would hold the camper electrical (fuse panel, solar controller, switches, etc) and also be the step to access the bed area above. I had originally planned on using 80-20 for the interior build but after pricing out the components and filler panels I went back to 2x2 pine appearance boards, similar to the teardrop trailer I made a few years ago. I wanted to maximize space but still keep things sturdy so I built this one off of the canopy rails for anchorages with a pair of legs on the front. Kreg fasteners are the way to go for work like this and make everything cleanly finished from the outside. The face and side panels are ½” veneered ply routed into the frame.
20200308_102537.jpg20200308_110357.jpg20200308_133958.jpg20200308_161731.jpg20200308_161742.jpg

Next up was wrapping up the wiring in this cabinet and blasting it apart for staining, adding some lighting to the awning and finally tackling the changes I wanted to make to the rear door latch!
 

2012Taco

AlumEscape
So the last of the detail work on the electrical cabinet was done after a couple coats of satin poly were applied and I edged any exposed plywood edges in laminate.
20200320_153830.jpg

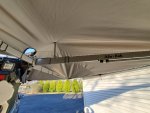
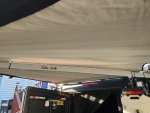
Next was adding LED lights to the awning bars – I’ve done red and white on past awnings and decided I wanted to move to true RGB+W for this build. I picked up these https://www.flexfireleds.com/rgb-color-changing-strip-light/outdoor-ip65-RGBW-LED-strip-light from FlexFire LED and was very pleased. Each of the three arms now have RGB+W strips on the top side aimed up at the fabric which gives a give diffused glow. Wiring was again routed through a gland fitting to the controller inside and everything is controlled by a small remote.
20200326_175903.jpg20200326_175927.jpg

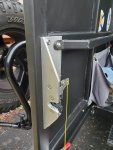
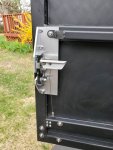
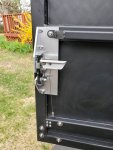
The biggest change to the AluCab design on my build is I hated the shipping container latch. I found it to be a clunky solution that while super secure for holding the door shut with a spare tire on it just wasn’t an elegant solution for inside and outside access, especially after flipping the door swing around. Since I’m not mounting a wheel and tire to my door, I had a lot of options available. Eventually I went with the K.I.S.S. principle and went with a proven design that Jeep uses for their tailgates. I tracked down a good stainless sliding bolt paddle latch, aircraft cable and a striker and latch and started rummaging through the scrap bin and drilling holes in my camper!

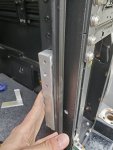
After getting things mocked up I knew I needed to space out the strike bolt away from the frame and give it a sturdy place to mount as it’s going to be the only thing retaining the door. I had some 1” solid aluminum bar that’d work perfect. Here the bar is drilled and tapped for the strike bolt and I’m marking and drilling for the two bolts through the AluCab frame that will secure the 1” bar.
20200329_122434.jpg

Here is a view of the strike bolt and how it protrudes into the opening.
20200401_165931.jpg

Next was working on the door-side latch – I started with some ¼” thick angle aluminum from another project and did some quick trimming and fastening to make sure everything was lined up.
20200329_150045.jpg

After everything was confirmed to fit and work I trimmed up and cleaned up the bracket and drilled a few more holes through the door to securely anchor the latch bracket to the door.
20200329_165219.jpg

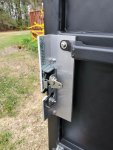
Next was to secure the paddle latch on the outside of the door. Paddle latches are not 100% weather tight and I did not want to cut a big hole through the door and door structure so I decided to build a “box” to hold the paddle latch on the outside of the door. Some old steel angle scraps and 14ga steel did the trick.
20200330_153644.jpg

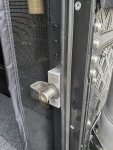
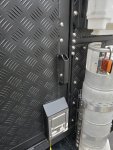
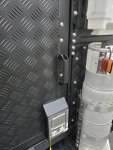
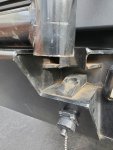
Last up was to connect the paddle latch to the striker latch and make an interior “handle”. I drilled and tapped the slide bolt on the paddle latch and installed a threaded stud that moves down when the paddle is pulled, to unlatch the interior strike latch. The only through hole in the door with this setup is a small slotted hole from the paddle latch mount to the camper interior (about 3/8” x 3/4”) that this threaded stud travels in. The stud is connected to the interior strike latch via stainless aircraft cable and I made a small handle for the inside latch with some scrap angle aluminum.
20200404_130920.jpg20200401_165906.jpg

After adding a handle on the outside as well, this project could be crossed off the list. Overall, I could not be more pleased!
 

Bigmo

Member
Super nice build. I've gotten tons of great ideas from watching your thread. Keep it coming, and thanks for posting it all up.
 

SoyBoy

Member
So the last of the detail work on the electrical cabinet was done after a couple coats of satin poly were applied and I edged any exposed plywood edges in laminate.
View attachment 610482

Next was adding LED lights to the awning bars – I’ve done red and white on past awnings and decided I wanted to move to true RGB+W for this build. I picked up these https://www.flexfireleds.com/rgb-color-changing-strip-light/outdoor-ip65-RGBW-LED-strip-light from FlexFire LED and was very pleased. Each of the three arms now have RGB+W strips on the top side aimed up at the fabric which gives a give diffused glow. Wiring was again routed through a gland fitting to the controller inside and everything is controlled by a small remote.
View attachment 610483View attachment 610484

The biggest change to the AluCab design on my build is I hated the shipping container latch. I found it to be a clunky solution that while super secure for holding the door shut with a spare tire on it just wasn’t an elegant solution for inside and outside access, especially after flipping the door swing around. Since I’m not mounting a wheel and tire to my door, I had a lot of options available. Eventually I went with the K.I.S.S. principle and went with a proven design that Jeep uses for their tailgates. I tracked down a good stainless sliding bolt paddle latch, aircraft cable and a striker and latch and started rummaging through the scrap bin and drilling holes in my camper!

After getting things mocked up I knew I needed to space out the strike bolt away from the frame and give it a sturdy place to mount as it’s going to be the only thing retaining the door. I had some 1” solid aluminum bar that’d work perfect. Here the bar is drilled and tapped for the strike bolt and I’m marking and drilling for the two bolts through the AluCab frame that will secure the 1” bar.
View attachment 610485

Here is a view of the strike bolt and how it protrudes into the opening.
View attachment 610490

Next was working on the door-side latch – I started with some ¼” thick angle aluminum from another project and did some quick trimming and fastening to make sure everything was lined up.
View attachment 610486

After everything was confirmed to fit and work I trimmed up and cleaned up the bracket and drilled a few more holes through the door to securely anchor the latch bracket to the door.
View attachment 610487

Next was to secure the paddle latch on the outside of the door. Paddle latches are not 100% weather tight and I did not want to cut a big hole through the door and door structure so I decided to build a “box” to hold the paddle latch on the outside of the door. Some old steel angle scraps and 14ga steel did the trick.
View attachment 610488

Last up was to connect the paddle latch to the striker latch and make an interior “handle”. I drilled and tapped the slide bolt on the paddle latch and installed a threaded stud that moves down when the paddle is pulled, to unlatch the interior strike latch. The only through hole in the door with this setup is a small slotted hole from the paddle latch mount to the camper interior (about 3/8” x 3/4”) that this threaded stud travels in. The stud is connected to the interior strike latch via stainless aircraft cable and I made a small handle for the inside latch with some scrap angle aluminum.
View attachment 610491View attachment 610489

After adding a handle on the outside as well, this project could be crossed off the list. Overall, I could not be more pleased!

Very nice build. I am close to pulling the trigger on an accc. Could you post some photos of the back door with the new latch? Opened and closed.

Several months in - are you happy with your latch mod and the reversed door?
The funny thing, each person I spoke to about camping out the passenger side - they look at me all cross-eyed. Almost saying - what difference does it make. To me, it makes a ******** ton of difference. And obviously, Alu-Cab doesn't get it either!

Have you got a trip ready weight for your rig (passengers, full water and gas et al)
 
Last edited:

2012Taco

AlumEscape
Very nice build. I am close to pulling the trigger on an accc. Could you post some photos of the back door with the new latch? Opened and closed.

Several months in - are you happy with your latch mod and the reversed door?
The funny thing, each person I spoke to about camping out the passenger side - they look at me all cross-eyed. Almost saying - what difference does it make. To me, it makes a ******** ton of difference. And obviously, Alu-Cab doesn't get it either!

Have you got a trip ready weight for your rig (passengers, full water and gas et al)

Thanks, I'm super pleased with the door reversal and the new latch setup. Honestly the shipping container style latch and the driver side camping setup (door swing, awning option and table/shower slides) that they offer from factory were the only two things I didn't like about the AluCab. I was lucky to have been able to talk them into doing the passenger side awning mount and get the table/shower mount reversed but they wouldn't change the door. From what I understand they won't do the passenger awnings anymore either but I might be mistaken.

Either way, here are a few pics of the door swapped around and the latch setup. If you're looking for something in particular let me know and I'll try to get a shot this weekend when the rain lets up.

20200401_165906.jpg20200404_130920.jpg20200801_102254.jpg20201123_102715.jpg

As far as weight, it's very heavy but a lot goes back to the bumpers, winch, skids, sliders, batteries, larger fuel tank, etc. The weight slip I have from a few weeks ago after dropping off a load of scrap put the truck at a shade over 6,500#. I figure with a full tank of fuel, water, food, kayak and such it's probably not much under 7,000#.

I was really rather surprised by the weigh slip as the truck still drives alright; not speedy by any means, but not under-powered either. I will say I wish the brakes were better - they are fine around town, offroad and normal trips but I did get fade coming down Mount Washington this summer. That said I was probably north of 8,000# as we had hiked up so I was carrying a total of 5 adults, 3 kids and a dog down that 7.6 mile descent, that averages 12%. I guess I shouldn't complain :ROFLMAO:
 

SoyBoy

Member
Thanks, I'm super pleased with the door reversal and the new latch setup. Honestly the shipping container style latch and the driver side camping setup (door swing, awning option and table/shower slides) that they offer from factory were the only two things I didn't like about the AluCab. I was lucky to have been able to talk them into doing the passenger side awning mount and get the table/shower mount reversed but they wouldn't change the door. From what I understand they won't do the passenger awnings anymore either but I might be mistaken.

Either way, here are a few pics of the door swapped around and the latch setup. If you're looking for something in particular let me know and I'll try to get a shot this weekend when the rain lets up.

View attachment 629105View attachment 629106View attachment 629107View attachment 629108

As far as weight, it's very heavy but a lot goes back to the bumpers, winch, skids, sliders, batteries, larger fuel tank, etc. The weight slip I have from a few weeks ago after dropping off a load of scrap put the truck at a shade over 6,500#. I figure with a full tank of fuel, water, food, kayak and such it's probably not much under 7,000#.

I was really rather surprised by the weigh slip as the truck still drives alright; not speedy by any means, but not under-powered either. I will say I wish the brakes were better - they are fine around town, offroad and normal trips but I did get fade coming down Mount Washington this summer. That said I was probably north of 8,000# as we had hiked up so I was carrying a total of 5 adults, 3 kids and a dog down that 7.6 mile descent, that averages 12%. I guess I shouldn't complain :ROFLMAO:

All great information. I am pumped. THX

As it happens - a few hours ago I pulled the trigger on a one-owner local 2013 Access cab long box 4.0 automatic 4*4 Tacoma with 70k miles. And since OK4wd has a Black Monday sale this week - I just got off the phone to order the ACCC.

DONE.

Let the build begin...
 
Misc. Lighting and Wiring:

You can never have too many lights, right?

I plan on adding some LED strip lighting to the underside of the awning bars but those would only be usable when the awning is deployed. I stumbled across these (https://www.superbrightleds.com/mor...porch-and-utility-light-700-lumen/5568/12478/) and figured they'd do nicely for side lighting other than headlamp when getting things setup or packed up.

Wanting to avoid unprotected holes into the dry portion of the canopy I decided to mount these up front taking advantage of the AluCab slot profile and filler panel - a few holes later and the light was roughed in. Wiring followed later but I used a cable gland seal to run into the canopy on the underside of the overhang and drilled and installed a booted toggle for power in the same area. I figure it's out of prying eyes and again is well protected from the elements.

View attachment 570384View attachment 570385View attachment 570393

Next up I circled back to the Rigid pods and brake/turn/reverse lights. Again, cable gland seals were used for each hole and the holes were tucked up as high as possible behind the Molle plates for added protection. Boy, punching that first ¾" hole hurt.. I also used Deutsch style connectors, a 2 pin for the pods and 6 pin for the brake/turn/reverse lights.

View attachment 570386View attachment 570387View attachment 570388

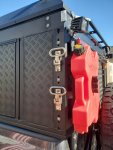
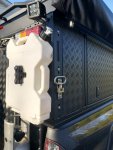
While working on the Molle panels I added the base plates for my Rotopax as well.

View attachment 570389View attachment 570390

Last up for lighting right now was adding some switched lighting to the underside of the bed platform. While the National Luna red/white lights are very nice it's annoying to have to cycle through the three levels of brightness just to turn the light on/off. Combine that with the fact you actually need to climb into the back of the truck to reach the switch and I had to find another solution. Since I plan on adding my electrical panel and switch setup just inside the back door I decided that was as good a place as any to put the switch for my added lights. I selected a pair of these (https://www.superbrightleds.com/moreinfo/rigid-light-bars/linear-led-light-bar-fixture/3277/7284/) in 18" lengths to mount on each side of the bed platform. Being a stickler for clean installations it was a bear fishing those wires through the bed framing but worth it in the end.

View attachment 570392View attachment 570391

Next update will include the door swing change!
Did you just mount the Rotopax locking mount directly to the molle panel or did you use another mounting plate to make it work?
 

2012Taco

AlumEscape
Did you just mount the Rotopax locking mount directly to the molle panel or did you use another mounting plate to make it work?

I mounted directly to the molle panel with bolts from the back. IIRC, you could use the rotopax base plate to space them out further but I did not. I think that X area might already be setup for the rotopax bolt pattern but I needed to lower my mounts to clear the lights I added on the top of the molle panel.
20200211_164516.jpg
 

Forum statistics

Threads
188,337
Messages
2,905,692
Members
229,959
Latest member
bdpkauai
Top