AmbuLand build thread

Abitibi

Explorer
Glad you guys get it cause my wife sure doesn't! At least she enjoyed relax time without kids when we were at it...

How about the actual floor plan, any suggestions? It was a challenge to come up with since I'm trying to seat and sleep for of us without having the kids sitting too far at the back...

For sleeping, adult on the dinette/bed combo and kids will be on the pop top roof.

Cheers
Mr. D


Sent from my iPorn using TapaChat HD
 

skibum315

Explorer
Looks like a really good layout to me, my only concern with Lego stuff has always been keeping the scale uniform ... looks like a great start, though!

... and you think it's bad having your wife roll her eyes at the mockups? How about just when you get in too deep explaining what you're hoping to try and do with the project ... or the next big idea you want to try and incorporate. You've gotta learn how to read when you need to reign in the enthusiasm a bit ... not everyone wants to hear all of the intricate ins-and-outs of every little nuance. Or at least that's been my experience.
 

java

Expedition Leader
IMO if there is any way to keep a bed set up all the time do it. Its SO nice, just stop and crawl in. It also becomes a bit of a "large item" storage, extra jackets or a duffel etc.
 

Abitibi

Explorer
I'm going with the dinette style as it can easily be kept as a bed for extended periods of time and afford a similar storage (extra box can be located under the table...) but if the weather turns ugly I think it'd be nice to be able to have a"gathering" area.

And that's why I'm building a drop down table from the electrical cabinet that can be used while sitting in all 4 front seats.

As for my dear wife I learned early on that it's best to avoid all camper built conversations. That way she doesn't have a reason to ask how much I spend on it...

Cheers
Mr. D


Sent from my iPorn using TapaChat HD
 

skibum315

Explorer
As for my dear wife I learned early on that it's best to avoid all camper built conversations. That way she doesn't have a reason to ask how much I spend on it...
Amen! Mine has taken to start rolling her eyes when I bring up recent conversations with certain friends & acquaintances ... these are the folks she's been calling my enablers. Pretty much the whole of the ExPo Forum falls into this category.
 

Shocker

VanDOOM!
Hehe, my wife is the same way. Especially when my son goes around the house hollering VanDOOM!!! when we are chatting about where we are going to go with it. :)

She will come around...
 

Abitibi

Explorer
Got a bit of time to play on the AC system yesterday with my buddy Jay who knows way more than I do when it comes to electrical.

First thing was to get rid of this archaic breaker box,

aqu6ume3.jpg


and replace it with something from this century...

mu8eveny.jpg


5uzaha4u.jpg


Also got a nice row of relays in the process, should help with size and amount of wires going back and forth between the front dash and the electrical panel...

5a6y4abe.jpg


I also added a Xantrex LinkLite Volt/Amp meter as I have one in my Patrol and it saved my butt more than once, great little piece of equipment!

While at it we also upgraded most of the AC wiring, starting from the shore plug-in.

Still lots to do (need to clean wiring) but it's nice to see some progress :)

Cheers
Mr. D

Sent from my iPorn


Sent from my iPorn using TapaChat HD
 
Last edited:

flightcancled

Explorer
So are you planning to run the AC on shore, battery, while running... All the above?

Looking clean! That's a lot of circuits to wire up still though! Are you breaking them down as much as possible or just leaving plenty of room to grow?


Sent from my iPhone using Tapatalk
 

Abitibi

Explorer
Sorry if I confused this but by AC I meant electrical current, not air con which will only be while running (I'm not a fan of air con and the only reason I might keep the rear one would be for potential resale value if that ever happens). Personally I'd rather get rid of the rear one, it'd simplify my life! Lol

For the circuits, YES I still have a whole lot of work ahead of me but I have a good idea of what I need and what I want (those two are subtle but quite different! ;) )

I've planed for everything plus some more space to grow. Everything I didn't need got removed to simplify the process.

Not sure if it's very common but all my fuses are actually mini-breakers that can be manually reset, pretty cool! :D

Cheers
Mr. D


Sent from my iPorn using TapaChat HD
 

flightcancled

Explorer
I was a bit confused, I thought you meant you had installed a fully electric AC unit and was curious how you were running it without overdrawing.

Not sure if it's very common but all my fuses are actually mini-breakers that can be manually reset, pretty cool! :D

If only!

I haven't seen that before anywhere. That's a major score.


Sent from my iPhone using Tapatalk
 

Abitibi

Explorer
Here's a close up of those mini-breaker fuses...

neqe6avu.jpg


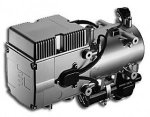
I also started looking for real estate for this big guy (Espar D10). I might have to modify my mounting bracket as I was hoping to mount it on its side against the frame directly in front of my battery tray (the driver side cargo door). This unit can only have a 20 degree side inclination so that screws me up a bit. Oh well, let's add it to the mods list :)

aja4u2a2.jpg


Slow is my motto :)

Cheers
Mr. D
 
Last edited:

Abitibi

Explorer
G'day

I started my Espar D10 project yesterday. :D

ImageUploadedByTapatalkHD1395599767.844654.jpg

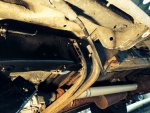
First thing was to find a good location for this big puppy. Couple options but my favorite is on the outside frame, driver's side & just in front of the tranny crossmember. Tucked away and easy plumbing.

Next I built a bracket out of 1/4" steel to mount the unit against the frame but slightly pushed out (1" spaced from the frame). I followed by cleaning/prepping the frame with a wire brush (grinder) to paint the area before the install.

I realize there's a few options as to where to tap in the engine for the coolant source and return but where would be the best spots on the 7.3? I already have two lines running between the engine and a heater at the back of the ambo box. It'd be really easy to tap in those existing lines but is this my best option?

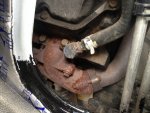
One line connects above the exhaust manifold, driver's side, is that supply or return?
ImageUploadedByTapatalkHD1395599606.281324.jpg

The other line goes in front of the engine, passenger side and into the firewall to what I guess to be the heater core?

Any advices would be greatly appreciated!

Cheers
Mr. D

Sent from my iPad using Tapatalk HD
 

flightcancled

Explorer
I would love to see photos of the placement!

The d10 is one of the bigger units right? What happened to the smaller ones you had?

I haven't heard anyone mention anything about these units needing to be level before, is that just for the D10?


Sent from my iPhone using Tapatalk
 

Abitibi

Explorer
Yes, the D10 is the larger unit. It's a bit overkilled for the size of my ambo but it has more control and can run at a lower level than the D5 which works for me.

I'm not sure about the D4 or D5 but in my install instruction it mentions a mounting to a maximum 20 degrees side angle (can be temporarily more). Front to back is 70 degrees. A buddy of mine installed his at 90 degrees without issues (yet) but time will tell. I'm pretty sure it's the same for the smaller units though.

I ended up selling both of my smaller units when I found this one brand new for an excellent price.

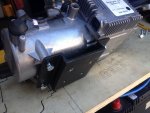
This is the bracket I built out of 1/4" steel:
ImageUploadedByTapatalkHD1395631121.664661.jpg

We got nice weather today so I drilled the mounting holes on the frame and managed to paint the area as well. I was surprised how relatively easy it was going through the frame, good practice for the UJOR kit :D

All prepped up:
ImageUploadedByTapatalkHD1395631195.423044.jpg

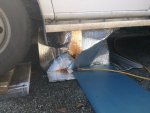
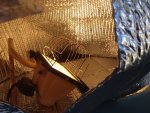
It was nice but still a bit chilly to paint so I had to improvise :) kept it nice and cozy for the paint to dry...
ImageUploadedByTapatalkHD1395631434.780996.jpg
ImageUploadedByTapatalkHD1395631232.479149.jpg

Almost ready to mount. The paint (POR-15) was still a bit tacky so it will have to wait until tomorrow.
ImageUploadedByTapatalkHD1395631334.344543.jpg

Couldn't resist...
ImageUploadedByTapatalkHD1395631381.761895.jpg

Once it's mounted I can start building the water cabinet and do some of the plumbing, looking forward to some progress!

Cheers
Mr. D
 

Forum statistics

Threads
186,737
Messages
2,887,644
Members
227,160
Latest member
roamingraven
Top