Just dragging this back up from the dead. I have been very busy that last 5-6 weeks or so with jobs and normal life stuff, and havent had much time to mess with the trailer.
Now, I have about 10 days between my old job (last day today), and my new job (I start on the 12th). I have been planning to paint the trailer so I can finish up all of the details (wiring, lights, etc. etc.). I got all of the materials I need to paint this thing, so I will be spraying it in the next few days, then putting it back together for a camping trip next weekend.
I am using Dupont materials, epoxy primer, Dupont Imron paint (white and black), and some Herculiner for a few areas and all of the various reducers, activators and hardeners etc. Luckily I was able to get all of that at cost from my old job, so that definitely helped. Its EXPENSIVE stuff...
Anyway, I will be posting photos showing my progress over the next few days. I also have almost all of the wiring components I need, and will be installing as much of it as possible before the trip.
Well... the paint is all but finished. I will post pictures later after I make some progress putting things back together.
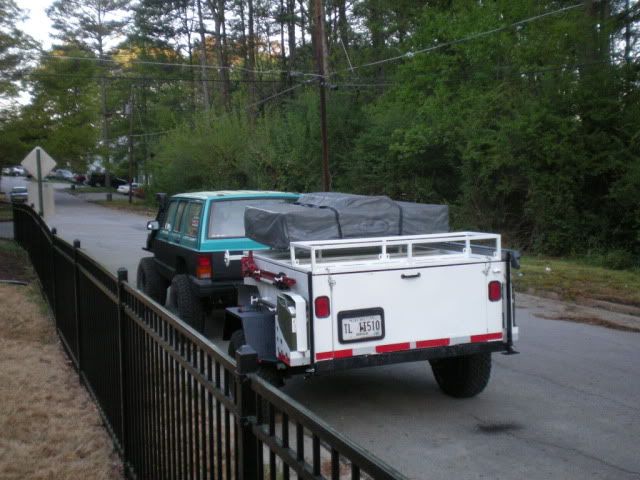
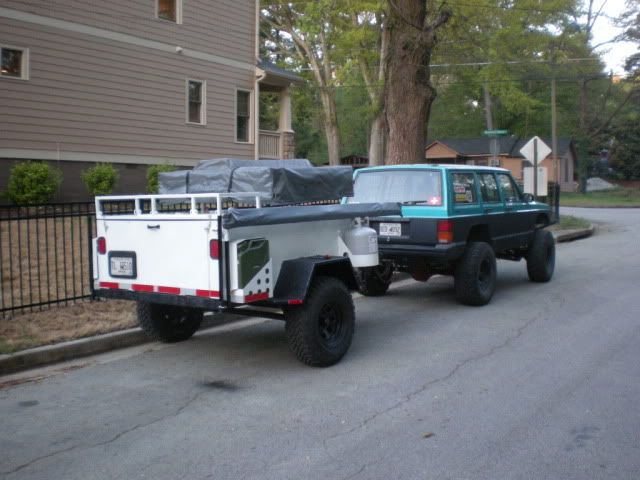
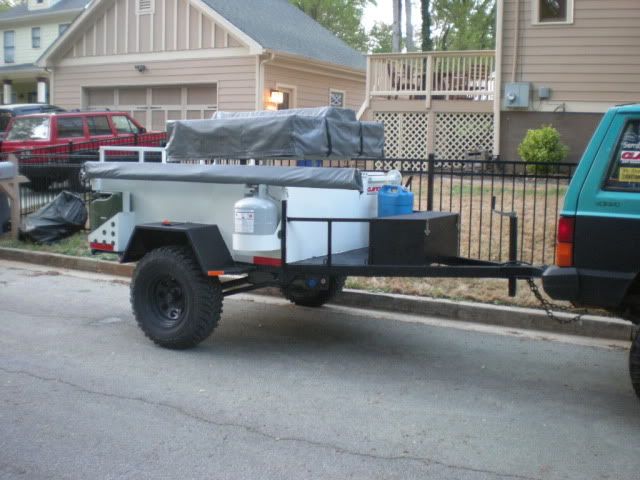
The main body (outside) of the trailer is white, with the front deck/tubing/tongue box portion being black. I also sprayed the underside of the lid black.
I say black, but the official color is "Black, Spring time in the Southeast, with a Pollen Pearl".
Yeah... you shouldnt try to spray gloss black spray paint outside when you can literally see sheets of pollen falling out of the trees. Thats ok though, its just a trailer. I did push it back inside my shop as soon as I finished spraying it to minimize the pollen. I dont really care honestly, it beats having overspray all over everything inside the shop. That was NOT going to happen. Gotta go put on the Herculiner on the inside, then I can put it back together completely.
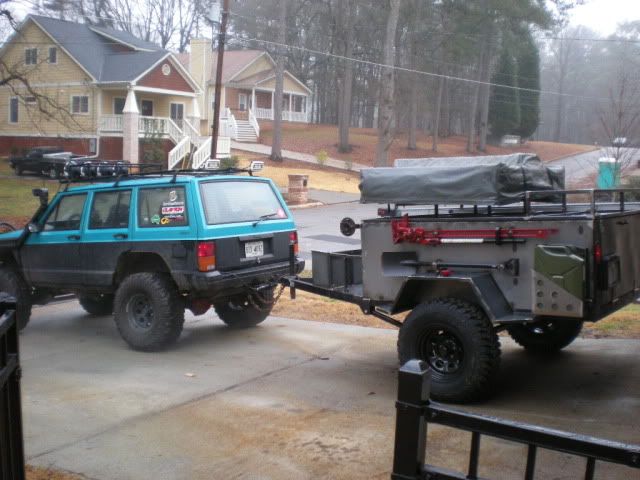
Forgot to post these pics here... I finally got around to putting some paint on this thing about a month ago. Used Dupont epoxy primer, single stage dupont Acrylic Enamel for the white, and Herculiner on all the black stuff including the fenders, tongue/box, and inside the tub. I think it turned out pretty sweet for a 'driveway' paint job over a couple days...
Still finishing up the wiring between trips, but its almost 100%. I have camped in it 4 times now, and everything works like a dream. One of the best things I have ever built for sure.
white stumpy? really? it looked so sick in it's natural steel color. you should have done grey.
looks great otherwise though. maybe now you should consider steps so you don't have to worry about navigating a ladder after sitting around the campfire for too long.
I decided to paint the top half of the Jeep white to match it, so white it is. I was gonna do desert tan, but figured white would be better in the long run.
I am working on an elevator for the entry into the tent on those types of nights...
I decided to paint the top half of the Jeep white to match it, so white it is. I was gonna do desert tan, but figured white would be better in the long run.
I am working on an elevator for the entry into the tent on those types of nights...
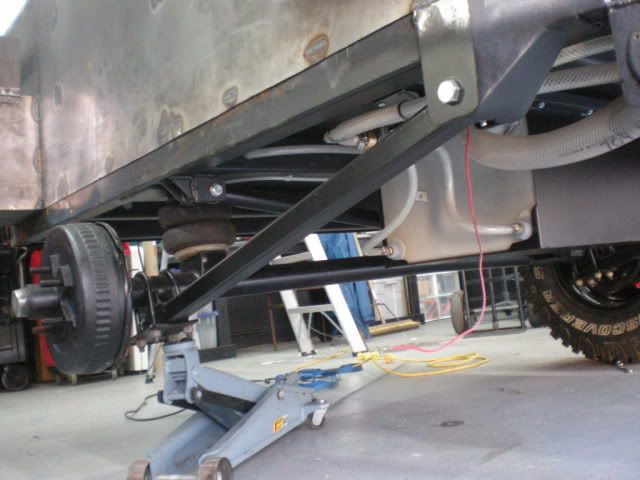
I decided to go ahead and build a custom suspension for it. I used my solid axle that I narrowed, and made a trailing arm set-up with a panhard bar. I used 1.5 (.25 wall) square tubing for the arms, and 1.5 round DOM for the panhard bar. Greaseable poly joints on the arms, and the trackbar/panhard, and everything is in double shear.
If you're willing to field yet another couple suspension questions :sombrero:, I have a couple for you. As I already mentioned, I like the simplicity of the design - I'm a big K.I.S.S. person, as well, but really like the idea of the air bags for tunability. It sounds like you're very pleased with the handling of the suspension set-up.
When one of your wheels hits a bump, where does the lateral flex likely occur, given that you don't have joints at the frame end? Is it happening in the bushings, along with the axle tube? I'm trying to wrap my mind around the mechanics. I understand that it's not a long-travel type of suspension set-up, either, so crazy articulation isn't needed.
Did you just weld a solid round "pin" through the trailing arms to act as a "centering pin" to locate the axle?
Does the angle on your panhard bar seem to be working out fine? I have seen many people mention to have it as parallel to the axle as possible, but didn't know how subtle (or extreme) the differences would be between having a mild angle like yours.
What size greasable bushings did you use? 1.5" I.D.? I already own a couple that size.
Why did you choose the solid bushings vs. joints at the frame end? Other than cost, would there be any pros/cons to using joints (e.g. - Johnny Joints) at the frame end with this suspension design?
This site uses cookies to help personalise content, tailor your experience and to keep you logged in if you register.
By continuing to use this site, you are consenting to our use of cookies.
")
")