Another Tacoma Build (Brian's 2015 DCLB)

brianjwilson

Some sort of lost...
Cobblecrazy,

Thanks for the input. Something to think about for sure. I haven't decided that I'll need a roof box anyway, but wanted to plan to be able to use it. I can feel a small difference even lifting the front with the light weight panels. The only reason I would want a box now is to move the "extra" stuff out of the way. Folding chairs, backpacks etc. Mostly lighter bulky stuff. I find that I can store most things in the dinette and shower step. But the chairs and table and stuff sit on the floor in the back and make roadside access a little more tricky.

Crazy how good fuel economy you're getting! You must drive a whole lot nicer than I do. The supercharger is great but really sucks the gas under a load. Last trip to the beach and back was 13-15mpg. Possibly a small difference from the fleet being wider. Probably won't be better with the new gears, just better performance. I don't have an issue with the fuel burn itself but the range sucks.

I priced out a single yakima cross bar and fairing today but got sticker shock. Some $300 for a cross bar, clips and towers, and fairing from REI. Im sure I can do much better online. It may help a little with mileage, as I do hear some wind buffeting at speed, but I'm not expecting a miracle.

I installed the rear third member (4.56 gears and arb locker) tonight after my wife got home and took over baby duty. Not a bad job at all, aside from the third being awkward and heavy to lift in by myself. Initial drive felt great. Nice and quiet up to 60 at least. Much improved acceleration and shifting, holding overdrive with the torque converter locked much better. Although at 60 I'm right around 2050rpm. Generally a great engine speed for cruising heavy I think, but just when the supercharger is starting to make boost. Instant mpg wasn't impressive but it's early to say much.

Hopefully the front install goes smoothly, definitely going to be more work. Oh and then there is the wiring and plumbing....
 
Last edited:

cobblecrazy

Adventurer
I think we've talked about it before, but if I can point to one thing that drives me crazy is things under foot (or having to constantly move things around) when I'm getting in and out of the truck/camper. The top box is nice for those things when traveling, but a pain when the camper is popped up and you remember that you forgot to get something out. I have stored the folding chairs inside the camper from time to time, but on a few trips we've fought the rain/snow and sand getting inside with the folding chairs so I really like keeping those kinds of things outside.

My top box is a little wider than some because I wanted one that I could store a spare bicycle wheel inside and the long thin ones were just a little narrow, but I think the narrower ones would be better for transferring the weight out. I can see you will run into a decision on whether to cover your vents or your solar panels if you run a top box.

I store a majority of my clothes under the bench seat, and some stuff gets put in the gap behind the bench seat back and the wall/window (the curtain is closed so no one can see the stuff). I use down sleeping bags which I leave on the bed when I close the camper as they crush down very thin. I have 4 cushion sections for the bed - 2 of them are stored on the counter top (I have the flush mounted sink and stove), one behind the bench seat back, and one props up along the base of the bench seat to allow for my step to sit in the walkway.

I also looked at the Yakima fairing as I have quite a few Yakima products, but the cost was too high for what you got - even looking on Craigslist. Additionally, it seemed that the aerodynamics of just using that fairing would allow the wind to still go around and hit the camper. What I really liked about the Prinsu Designs rack was it not only had that front fairing but it also had the side panels which would keep some wind from going around - plus it allowed for a small amount of storage above the cab and in front of the camper (and extra storage area when I take the camper off and just have my shell on the back of the truck).

I'm still tweaking the springs. I went with the extra OME leaf in the Dakars and I think it worked out okay, but with a multi week long trips worth of gear it seemed to be a little overloaded. I've had a little settling of the springs over time. The quandary is always not getting the ride too stiff for when the camper is not on the truck (which is not very often - I'm jealous of your ability to pull all the way into the garage with the camper - I need about an extra foot of clearance at my garage door before that can happen). There's a shop that just does springs here in town so I'm going to get over to talk to them about options.

I've found the sweet mpg spot is running 55-60mph (plus finding routes that are flatter to rolling helps) which lets the truck run between 1500 -1700 rpms. On my recent trip to Portland/Vancouver I went 395 up through Alturas then to Klamath Falls, up 97 to the 58 cutoff over to I5. It seemed as though the hills weren't that bad going that direction and I didn't really run into much wind on the way up. On the way back I battled winds from Alturas all the way to Reno so that was where my worst gas mileage occurred.
 
Last edited:

brianjwilson

Some sort of lost...
Yeah we talked about shuffling things around in the camper, I'm sure. I don't mind packing the dinette full if I can leave the rear 4' open. Which is a big benefit of this layout for us. I have the arctic pack so really no space for bedding. I bought an RV superbag which is king sized, like two big sleeping bags that zip together and have sheets velcroed in. It easily packs on one side of the dinette, along with pillows and stuff. Cushions for the pull out bed go on top of the dinette table. This still leaves the other dinette seat free (to the ceiling) and the entire space under the table, and that is where I've been putting our clothes bags and baby stuff. Plus there is storage under both seats. One side has a bag of charcoal and misc item, the other still empty. Food storage is ok too.

But still, it always comes down to the last couple bulky items. I can put the chairs on the floor of the cab, and the deuter kid carrier backpack on the seat but I don't like the cab being too crowded or having loose items in there. We'll see, hopefully we'll get a couple more quick trips in soon and figure it out.

I actually planned the rack/solar setup for the rocketbox 11. 24" wide by 16" high. If it doesn't fit flush with the driver's side, it may overhang an inch or so to clear the vents. Either way I hate to have a big box up there most of the time. Kind of takes away from the low profile and quick setup.

I understand what you're saying about springs. That's why I ended up using the timbrens. It took a bit of measuring and guessing to get the right size and weight rating, then I messed with my spring pack and ended up needing a taller spacer. My spring and u bolt setup makes for a quick removal with the camper off. I need to get it off road as it is and see how they ride. I also feel better about spreading the load on the frame and mounting points more.

Are you carrying extra fuel? I need to come up with a way to mount my rotopax can on the back.
 

cobblecrazy

Adventurer
Rotopax

I'm not carrying extra fuel right now but I think the tray will be good for future longer "outback" ventures.

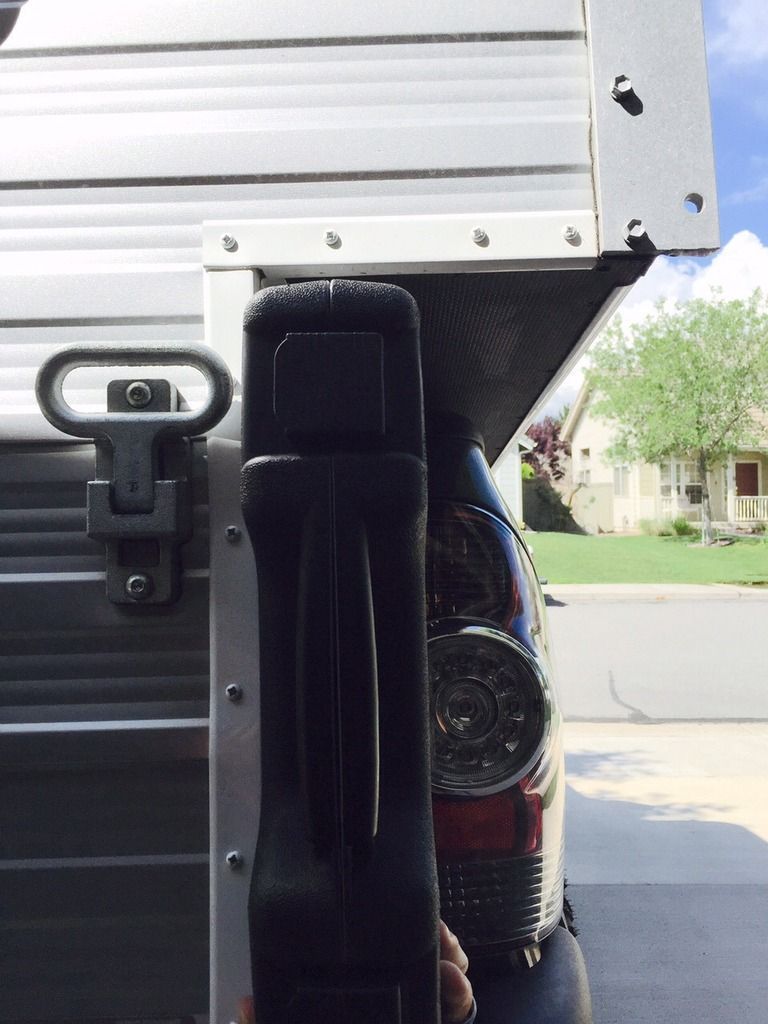
I know this isn't a great pic but what about mounting the Rotopax along each of the sides. My tool carrier is just about as wide and doesn't appear to be in the way of the turn signals/brake lights. You might even be able to utilize the mounting points for the tailgate as the anchor for the bracket (I've seen this used for a tire swing out) and run the bracket close to the camper sides to keep the can out of the way of the tail lights.

 
Last edited:

cobblecrazy

Adventurer
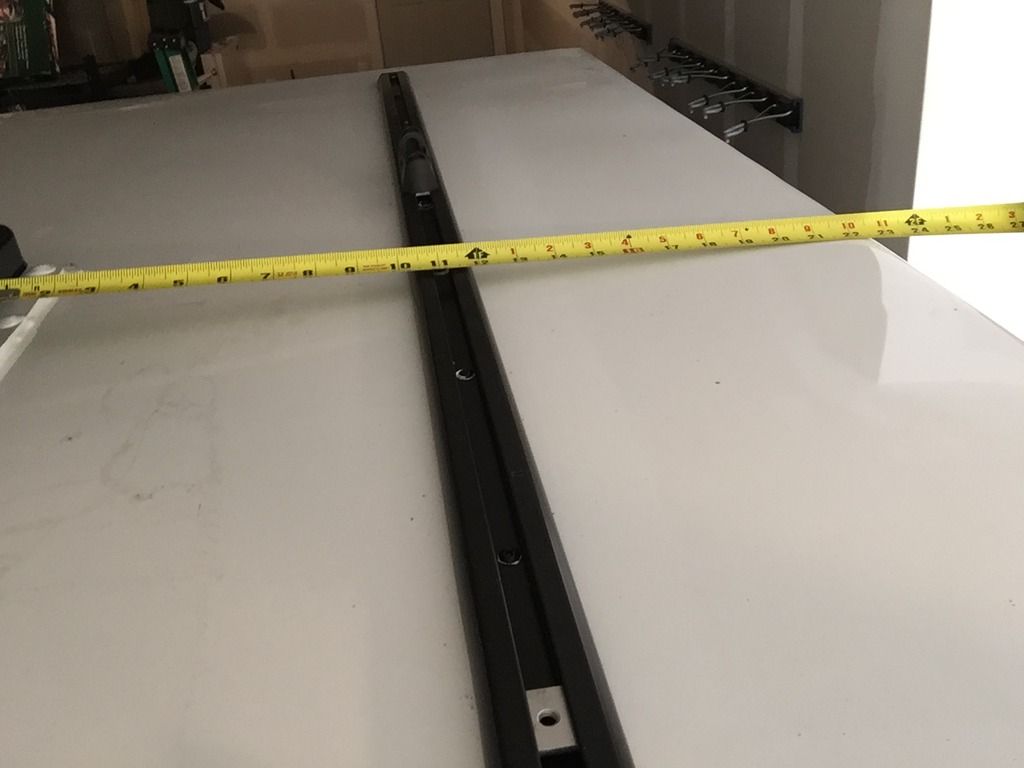
I'm about 23 1/2" from the side of the vent to the center of the track and 35" to the side of the camper. The top box is about 40" at the widest, but again mine is the wider version of their top boxes.

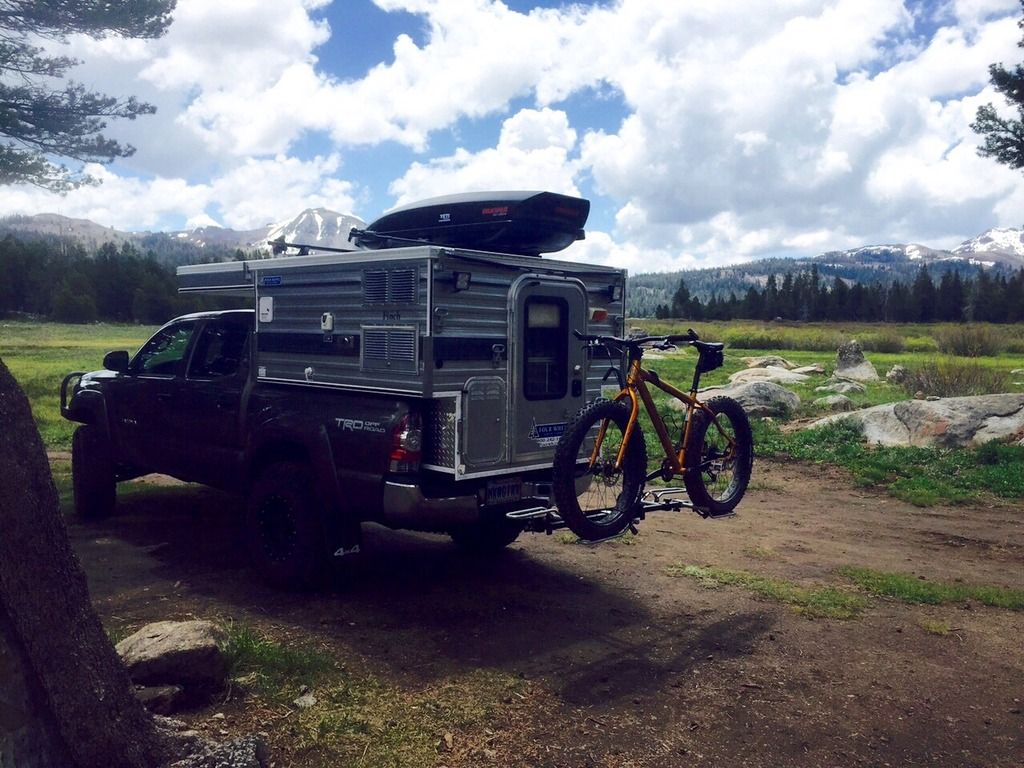
These were about the best pics I could find


It's kind of hard to tell but this shows the top box a little back on the tracks. The bike is mounted on Yakimas BOA mount so there is no rail to interfere with the vent.


Here you can see I moved the box a little more forward.

Oh, and I have the artic pack installed as well, but the down bags don't seem to cause any issue with the sides closing in.
 
Last edited:

brianjwilson

Some sort of lost...
L
I'm not carrying extra fuel right now but I think the tray will be good for future longer "outback" ventures.

I know this isn't a great pic but what about mounting the Rotopax along each of the sides. My tool carrier is just about as wide and doesn't appear to be in the way of the turn signals/brake lights. You might even be able to utilize the mounting points for the tailgate as the anchor for the bracket (I've seen this used for a tire swing out) and run the bracket close to the camper sides to keep the can out of the way of the tail lights.


That might be a good option. I haven't had a chance to look around and measure. My garage is a mess from the recent projects, I need to dig out my fuel container.

One thing that I loved on the jeep was my trasharoo. I thought about figuring a way to mount the rotorpax on the rear wall and putting the trasharoo over it. Lots of little things to figure out I guess.

My daughter is at day care today and tomorrow so I can get a couple things done. Right now I'm taking a break with the front torn apart, working on installing the front diff. Then I have to figure out where to mount the compressor, wire up switches, run air lines etc. Then clean the garage, mow the lawn, who knows what else. May not actually get out camping this weekend since I want to wrap things up and I hate getting rushed.
 

brianjwilson

Some sort of lost...
Whew, another long day. I swapped the front diff today. Again not bad overall but I had a few hang ups. Doing this by myself on a hot garage floor generally produces a few extra delays and screw ups.

Everything went well until I was trying to remove the CVs from the diff. The passenger side came out fine. The drivers side took hours of prying from different angles, with different tools, hammering and swearing etc. It seems like every time I do a front diff, one of the CVs give me hell. I decided I would try to drop the diff with the CV attached. Wouldn't you know it, I found another tool that I dont have. A 12mm Allen socket. I have a set but didn't realize that it only went to 10mm. So I poured a drink and waited for my sister in law to come home, and took her car to harbor freight. I bought a 24" pry bar, a larger Allen set, and a 24" fan. Once back home I set up their massive fan, made another drink and popped the CV right out. I lowered the diff onto myself which I instantly regretted. It is heavy and awkward with lots of sharp edges, and no real space to maneuver. After holding in my breath and sliding out from under the truck I rolled it off of myself and started tearing it down to transfer parts to the new clamshell.

Everything came off of the clamshell with no issue, except the ADD shaft stub. As usual I was just being too nice. Eventually I stuck a flathead through the other side of the diff and pounded with a big hammer, and it popped out.

To reinstall the diff I more or less balanced it on a floor jack. Still a bit tricky but not as bad as having it on my chest. The rest of the install went smoothly. I followed the instructions from east coast gear supply's website.

The test drive was uneventful. 4x4 and everything works as it should, everything is smooth and quiet. 4low is good and low now. ;)

Tomorrow is compressor, wiring and air lines. I need to do some reading on relocating switches on the left side of the dash.
 

pdxfrogdog

Adventurer
Congrats on the build... super nice and very well thought out. I'm in a jeep right now, but think there is a FWC in my future, some day. Inspiring to see what you are doing.

Got a question from your house battery pictures. Where are you sourcing your battery wires from? Looks like nice stuff.
 

brianjwilson

Some sort of lost...
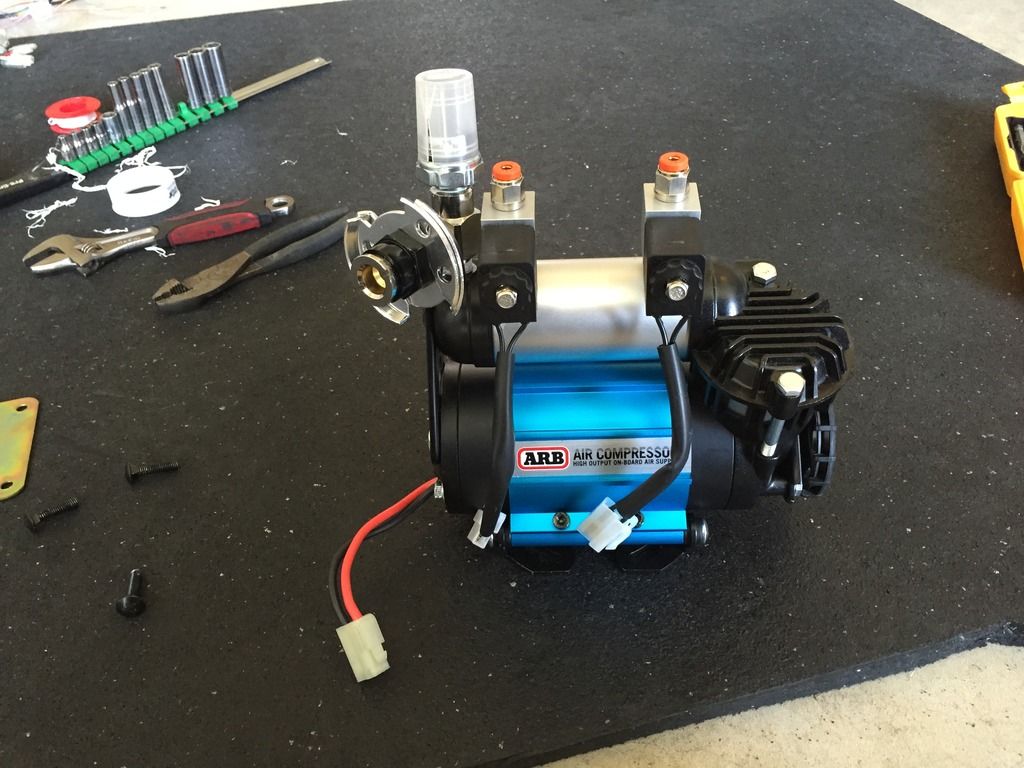
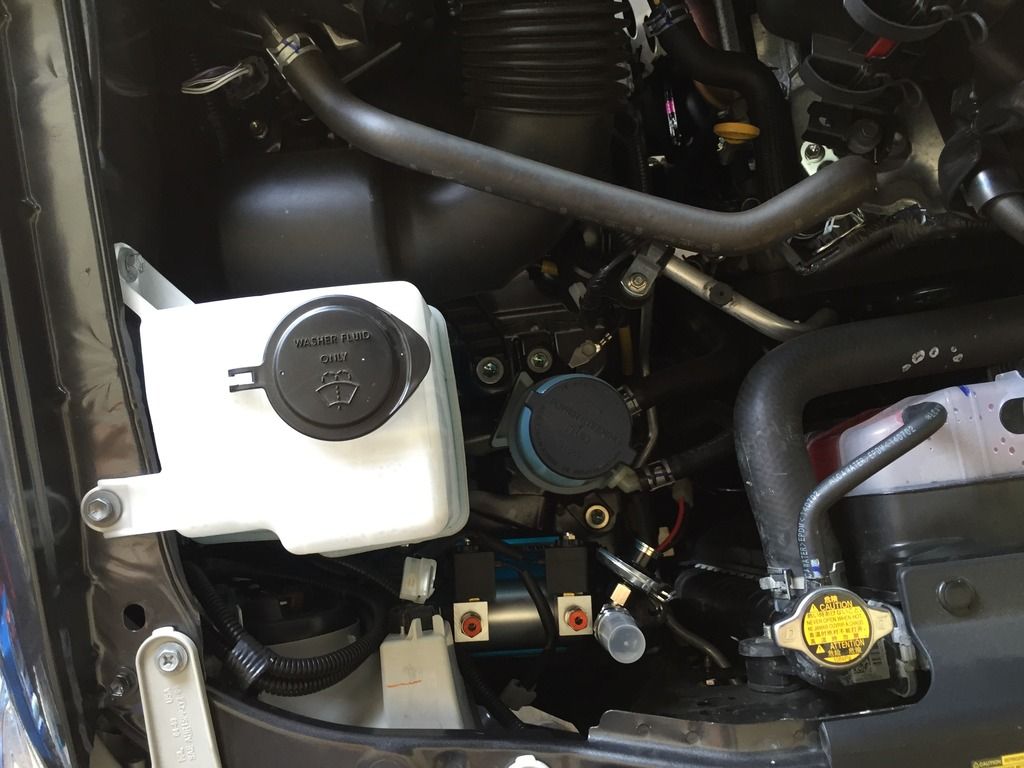
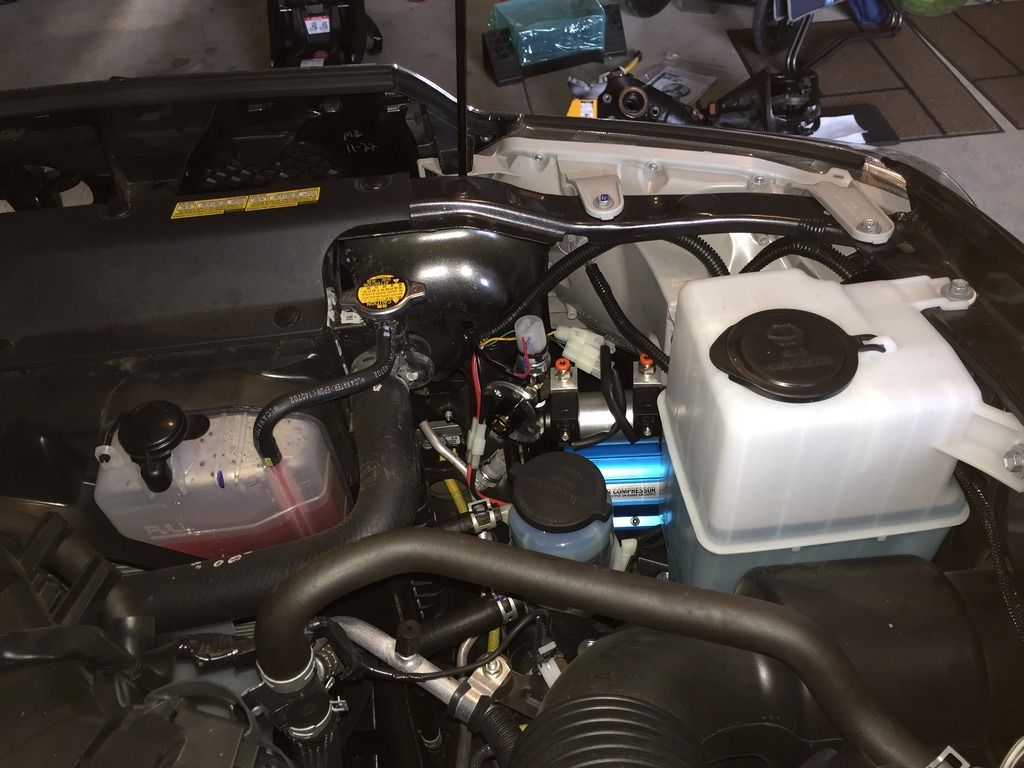
Today was full of distractions, definitely not as productive. However I did finally get the compressor mounted. There is really only one spot under the hood, with the supercharger, smog pump etc. Of course it is a super tight fit and took quite a bit of time getting it wedged in there in just the right spot. Nevertheless it is there.


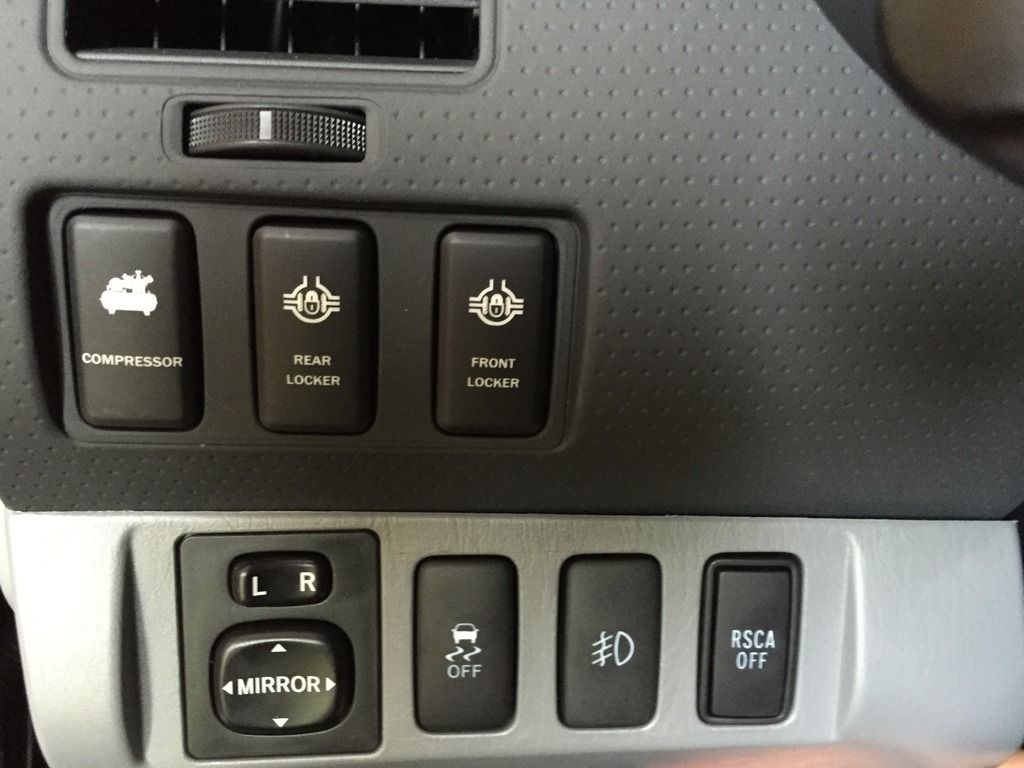
Final wiring needs to be completed, and air lines run. Here is a teaser of the factory style switches. The fog light switch was on the upper panel. I went to relocate it, little did I know each slot has a specific key like cut out, so I had to hack a little plastic out.
 

aaen

Adventurer
Well done. Those buttons basically look factory. Do they also light up as well?


Regards

Steve

I suffer from fat finger syndrome and a tiny keyboard on an iPhone. So I apologize for the typos and misspellings.
 

brianjwilson

Some sort of lost...
Well done. Those buttons basically look factory. Do they also light up as well?


Regards

Steve

I suffer from fat finger syndrome and a tiny keyboard on an iPhone. So I apologize for the typos and misspellings.


If I can find the correct wire to use, yes. ;)

Aironboard.com
 

Forum statistics

Threads
188,216
Messages
2,903,936
Members
229,665
Latest member
SANelson
Top