Aspen X Trails Kelly Tear Drop build

Aspen Trails Trailers

Supporting Sponsor
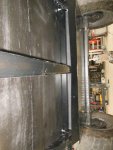
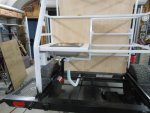
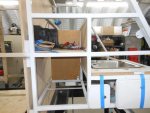
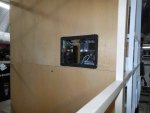
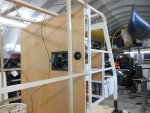
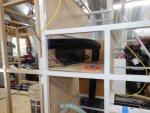
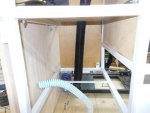
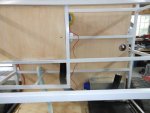
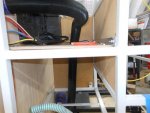
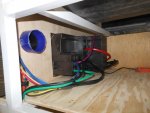
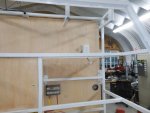
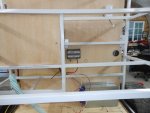
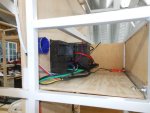
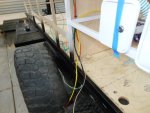
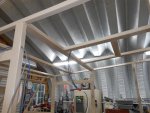
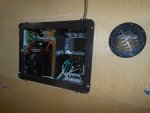
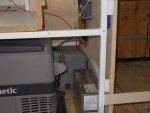
Pictures of front skid plate installed, the beginning of the plumbing, location of sink and drain, water inlet, shower location, wiring control center temporary install, routing of wires. Hope to finish routing the wires in the morning and llocate propex heater tomorrow, pick up rear skid plate. Temporary install of rear decking, build battery box, drill holes for decking. Holding tank will be ordered in the AM.

Bob

www.aspenXtrails.com
951 692 0958
 

Attachments

  • Kelly Build Tear Drop skid, wring, control unit, plumbing start 001.jpg
    Kelly Build Tear Drop skid, wring, control unit, plumbing start 001.jpg
    65.3 KB · Views: 81
  • Kelly Build Tear Drop skid, wring, control unit, plumbing start 002.jpg
    Kelly Build Tear Drop skid, wring, control unit, plumbing start 002.jpg
    47.1 KB · Views: 78
  • Kelly Build Tear Drop skid, wring, control unit, plumbing start 003.jpg
    Kelly Build Tear Drop skid, wring, control unit, plumbing start 003.jpg
    58.2 KB · Views: 79
  • Kelly Build Tear Drop skid, wring, control unit, plumbing start 004.jpg
    Kelly Build Tear Drop skid, wring, control unit, plumbing start 004.jpg
    68.6 KB · Views: 78
  • Kelly Build Tear Drop skid, wring, control unit, plumbing start 005.jpg
    Kelly Build Tear Drop skid, wring, control unit, plumbing start 005.jpg
    69.1 KB · Views: 76
  • Kelly Build Tear Drop skid, wring, control unit, plumbing start 006.jpg
    Kelly Build Tear Drop skid, wring, control unit, plumbing start 006.jpg
    50.5 KB · Views: 78
STREGA

Explorer
Bob your quick progress on trailer builds always amaze me, can't wait to hear what new things you have coming! :sombrero:
 

Aspen Trails Trailers

Supporting Sponsor
This one is actually going slower than I had planned. Changing the water tank, adding the propex and the larger holding tank have been a challenge. The skid plates were new also, plus the sandblasting and powder coating has been a nightmare. Doing three colors on the frame was a challenge. I have a due date of mid May, and I am concerned about it. I want to bring it to Expo, but may not make it. When you build at your own pace, it makes things easier it seems. Being under the gun, takes some of the fun out for sure.

In fairness to the powder coating, they had to build a new wrack for the trailer, and with it, only left two inches on each side of the oven. So I can not really say much about their effort, the sand blaster, that is a different story. Enough complaining, back to work.


Bob

www.aspenXtrails.com
951 692 0958
 

Aspen Trails Trailers

Supporting Sponsor
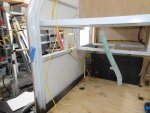
The following are of the Propex heater being installed, the ducting routing, and some of the wiring box. The two small black circles are the heater ducts, the one on the right is heat, the other cold air intake. Wires hanging are for fan, 12 volt hot wire, exterior driver side lights and interior lights.

Bob

www.aspenXtrails.com
951 692 0958
 

Attachments

  • Kelly Build Aspen X Tear Drop, heater ducting location 001.jpg
    Kelly Build Aspen X Tear Drop, heater ducting location 001.jpg
    74 KB · Views: 74
  • Kelly Build Aspen X Tear Drop, heater ducting location 002.jpg
    Kelly Build Aspen X Tear Drop, heater ducting location 002.jpg
    69.8 KB · Views: 71
  • Kelly Build Aspen X Tear Drop, heater ducting location 003.jpg
    Kelly Build Aspen X Tear Drop, heater ducting location 003.jpg
    48.8 KB · Views: 72
  • Kelly Build Aspen X Tear Drop, heater ducting location 004.jpg
    Kelly Build Aspen X Tear Drop, heater ducting location 004.jpg
    74.8 KB · Views: 73
  • Kelly Build Aspen X Tear Drop, heater ducting location 005.jpg
    Kelly Build Aspen X Tear Drop, heater ducting location 005.jpg
    56.1 KB · Views: 69
  • Kelly Build Aspen X Tear Drop, heater ducting location 006.jpg
    Kelly Build Aspen X Tear Drop, heater ducting location 006.jpg
    59.3 KB · Views: 71

TheThom

Adventurer
If you ever have any of these that you just don't want and feel like it needs a good home, let me know.... :drool:

As always, looks great
 

Aspen Trails Trailers

Supporting Sponsor
Thanks Thom, one good thing for this one is, that I bought two of the big batteries when planning for this one. So I have one to put in my trailer. I am not sure I am going to be able to buy them anymore. The company was sold, and the new owner only wants to sell batteries by units of 12. I can possibly do 12 105's but 12 255's is just not going to happen. Hoping to have a price for you on Monday. I will look into buying the 105's and make group sale if I can get them reasonable.

Bob

www.aspenXtrails.com
951 692 0958
 

TheThom

Adventurer
Do what you can. If it doesn't work no worries. You've already gone above and beyond. I appreciate the effort.

Yeah, 12 of those big suckers would be tough. It'd take you 3-4 years to put them all in trailers.
 

Aspen Trails Trailers

Supporting Sponsor
Got a lot of the wiring done today. Wired in the roof fan, and AC wired, micro wave plug wired. Each 110 unit has a color coded wrap. All have loom guides and bolted to the frame.

Solar Controller is wired other than the connection to the battery. The load side of the controller goes to the 110 controller, that fuses all 12 possible accessories. The 110 is connected to the 110 box, and it charges the battery, converts 110 to 12 volt use and monitors the battery even in storage. 110 line is in and wired to box, 12 solar is in and wired to controller.

Bob

www.aspenXtrails.com
 

Attachments

  • Kelly Build AspenXtrails Tear Drop, 110 wiring, solar controller 001.jpg
    Kelly Build AspenXtrails Tear Drop, 110 wiring, solar controller 001.jpg
    61.2 KB · Views: 62
  • Kelly Build AspenXtrails Tear Drop, 110 wiring, solar controller 002.jpg
    Kelly Build AspenXtrails Tear Drop, 110 wiring, solar controller 002.jpg
    58.8 KB · Views: 63
  • Kelly Build AspenXtrails Tear Drop, 110 wiring, solar controller 003.jpg
    Kelly Build AspenXtrails Tear Drop, 110 wiring, solar controller 003.jpg
    59 KB · Views: 63
  • Kelly Build AspenXtrails Tear Drop, 110 wiring, solar controller 004.jpg
    Kelly Build AspenXtrails Tear Drop, 110 wiring, solar controller 004.jpg
    61.8 KB · Views: 63
  • Kelly Build AspenXtrails Tear Drop, 110 wiring, solar controller 005.jpg
    Kelly Build AspenXtrails Tear Drop, 110 wiring, solar controller 005.jpg
    61.4 KB · Views: 66
  • Kelly Build AspenXtrails Tear Drop, 110 wiring, solar controller 006.jpg
    Kelly Build AspenXtrails Tear Drop, 110 wiring, solar controller 006.jpg
    72.1 KB · Views: 59
  • Kelly Build AspenXtrails Tear Drop, 110 wiring, solar controller 007.jpg
    Kelly Build AspenXtrails Tear Drop, 110 wiring, solar controller 007.jpg
    60.7 KB · Views: 61

Aspen Trails Trailers

Supporting Sponsor
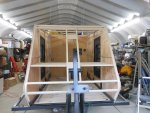
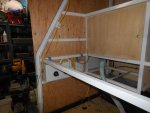
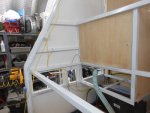
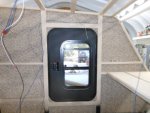
The following pictures are of the passenger side wall cut outs. Hehr door fitting, the front counter, which underneath it will be where the solar panel will be stored. This counter can be used to eat off, but its main function is to carry the action packers, while overlanding. I am doing the walls different on this trailer. I have a trough along the bottom of the wall area for silicone, the walls will be dropped into the silicon, forming a tight seal. These are at floor level. I will also attempt to carpet the walls prior to screwing the sides on. This will make the build much quicker I think. I will cut the carpet up 3/4 inch from the bottom, so it will not interfere with the silicone seal area. I have done this with the galley area with white vinyl, and it worked perfectly. Hoping this is worth while effort. It does require cutting the walls, screwing the walls to the trailer and then removing them. Applying glue and carpet, allowing to dry and then reattachment.

I am waiting on the holding tank that may arrive tomorrow to finish the galley. No bare plywood is visible when the trailer is done, other than the sander ply for the back wall.

Back to work.

Bob
www.aspenXtrails.com
951 692 0958
 

Attachments

  • Kelly Build Aspen X Trails Tear Drop, sides front counter 001.jpg
    Kelly Build Aspen X Trails Tear Drop, sides front counter 001.jpg
    65 KB · Views: 65
  • Kelly Build Aspen X Trails Tear Drop, sides front counter 002.jpg
    Kelly Build Aspen X Trails Tear Drop, sides front counter 002.jpg
    64.4 KB · Views: 67
  • Kelly Build Aspen X Trails Tear Drop, sides front counter 003.jpg
    Kelly Build Aspen X Trails Tear Drop, sides front counter 003.jpg
    84.1 KB · Views: 70
  • Kelly Build Aspen X Trails Tear Drop, sides front counter 004.jpg
    Kelly Build Aspen X Trails Tear Drop, sides front counter 004.jpg
    61.3 KB · Views: 68
  • Kelly Build Aspen X Trails Tear Drop, sides front counter 005.jpg
    Kelly Build Aspen X Trails Tear Drop, sides front counter 005.jpg
    70.9 KB · Views: 70
  • Kelly Build Aspen X Trails Tear Drop, sides front counter 006.jpg
    Kelly Build Aspen X Trails Tear Drop, sides front counter 006.jpg
    63.8 KB · Views: 69

Aspen Trails Trailers

Supporting Sponsor
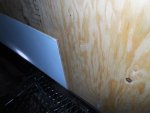
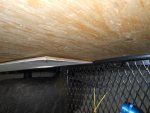
The following are of the driver side. As most know I am not a big fan of the fancy wood interiors. Just feel they will get scratched all up, as when I am out on the trail it is about the trail, and not being super careful to no scratch anything. Mine are designed to get beat around if need be. I know I am guilty of just throwing stuff in the trailer and heading out. That is the reason for the carpet on mine, and the added sound proofing. I have come up with another way of doing it. It takes me hours to do it the way I have been, so on this one, it will be placed on the plywood with
3M 90 spray on adhesive. Then attached to the trailer. I will pre drill all the holes, penetrate the carpet and then attaché the whole wall. I have made a trough on the sides of the trailer that will be filled with silicone, the wall with the carpet cut from the bottom inch will be dropped into the trough and attached by screws. Silicone will seal all cracks and a bead ran on the top before placing it on. I may put the white vinyl on the roof of this trailer. Have not decided on that yet. The carpet allows for rubbing on the sides and makes the trailer much quieter. Almost sound proof it seems. I am excited about this new idea. It should save me many hours over all.

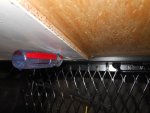
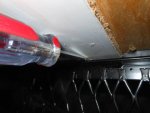
The white piece is the fiber glass that I attach to the outer walls, the screw driver shows the space I have to compress the carpet. This trough will be filled with silicone before the second wall is laminated to the outer wall. This should make the lower virtually impossible for water to enter.

Bob
www.aspenXtrails.com
951 692 0958
 

Attachments

  • Kelly Build, driver side wall 001.jpg
    Kelly Build, driver side wall 001.jpg
    73.6 KB · Views: 79
  • Kelly Build, driver side wall 002.jpg
    Kelly Build, driver side wall 002.jpg
    62.3 KB · Views: 74
  • Kelly Build, driver side wall 003.jpg
    Kelly Build, driver side wall 003.jpg
    69.2 KB · Views: 74
  • Kelly Build, driver side wall 004.jpg
    Kelly Build, driver side wall 004.jpg
    83.9 KB · Views: 74
  • Kelly Build, driver side wall 005.jpg
    Kelly Build, driver side wall 005.jpg
    52.9 KB · Views: 73
  • Kelly Build, driver side wall 006.jpg
    Kelly Build, driver side wall 006.jpg
    65.5 KB · Views: 72
  • Kelly Build, driver side wall 007.jpg
    Kelly Build, driver side wall 007.jpg
    59.4 KB · Views: 74
  • Kelly Build, driver side wall 008.jpg
    Kelly Build, driver side wall 008.jpg
    43.7 KB · Views: 73

Pikeman

Adventurer
Looking good Bob. One of these days I might get back to work on my trailer. Although after seeing your trailer and now this build I might have to scrap the box on mine and maybe do a Pod on it.
 

Aspen Trails Trailers

Supporting Sponsor
Great to hear from you. Have not seen you around for awhile. I thought about you during the Del Sol run. Did not go this year. I have just been too busy. Let me know when you decide, if I can help just scream.

Bob
 

Aspen Trails Trailers

Supporting Sponsor
Notified today that the water tank was not ordered last week as promised. Spoke with Rich at RONCO plastics, he is bailing me out it appears. They make the tanks for Plastic Mart. Really puts me behind schedule, but will not have to wait the two weeks PM told me. Rich says he will get it out by Monday. A Sooner fan, we have been friends awhile. Will deal directly with him from now on!!!

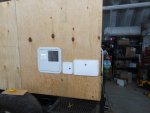
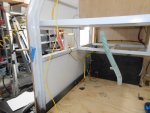
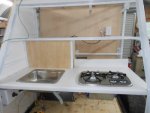
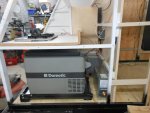
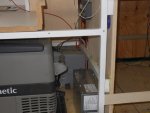
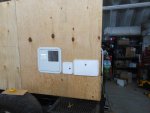
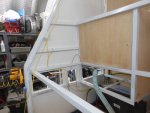
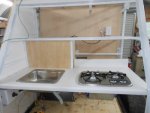
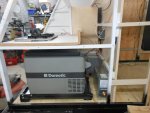
Pictures are of the driver side with the accessory doors shown and in their location. The rear driver side, the vinyl has been attached, but the wall is not permanent yet. The counter top installed, sink in and the stove are in. Passenger rear side is off to show the area of the fridge and the different wiring being done.

Notified this morning the fiberglass is ready to be picked up, so will most likely do that tomorrow, so I can work on it over the weekend.

Beginning to look like a trailer now.

Bob
www.aspenXtrails.com
051 692 0958
 

Attachments

  • Kelly Build Aspen X Trails Tear Drop,  wall, sink stove cut ins 001.jpg
    Kelly Build Aspen X Trails Tear Drop, wall, sink stove cut ins 001.jpg
    54.9 KB · Views: 54
  • Kelly Build Aspen X Trails Tear Drop,  wall, sink stove cut ins 002.jpg
    Kelly Build Aspen X Trails Tear Drop, wall, sink stove cut ins 002.jpg
    60.7 KB · Views: 58
  • Kelly Build Aspen X Trails Tear Drop,  wall, sink stove cut ins 003.jpg
    Kelly Build Aspen X Trails Tear Drop, wall, sink stove cut ins 003.jpg
    63.4 KB · Views: 54
  • Kelly Build Aspen X Trails Tear Drop,  wall, sink stove cut ins 004.jpg
    Kelly Build Aspen X Trails Tear Drop, wall, sink stove cut ins 004.jpg
    62 KB · Views: 55
  • Kelly Build Aspen X Trails Tear Drop,  wall, sink stove cut ins 005.jpg
    Kelly Build Aspen X Trails Tear Drop, wall, sink stove cut ins 005.jpg
    48.8 KB · Views: 57
  • Kelly Build Aspen X Trails Tear Drop,  wall, sink stove cut ins 006.jpg
    Kelly Build Aspen X Trails Tear Drop, wall, sink stove cut ins 006.jpg
    67 KB · Views: 57
  • Kelly Build Aspen X Trails Tear Drop,  wall, sink stove cut ins 007.jpg
    Kelly Build Aspen X Trails Tear Drop, wall, sink stove cut ins 007.jpg
    49.7 KB · Views: 56

Aspen Trails Trailers

Supporting Sponsor
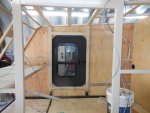
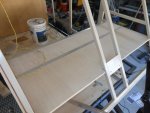
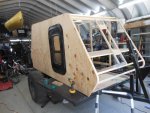
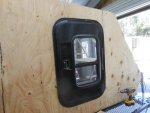
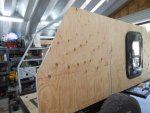
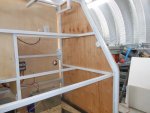
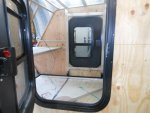
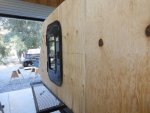
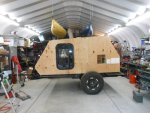
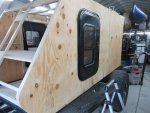
A few pictures of it starting to come together. Interior shot of where the action packers will set during transport, two like the one and one sideways on the front shelf. The overall look of the trailer before fiber glass is attached. You can see the tech screws going into the steel main frame. Each one is has red lock tite, the head is ground down smooth to the wood and then silicone. These are in a temporary form, will be removed for silicone along the bottom and when forced back in under the roof, silicone is applied there. That forces the silicone into any possible void, the roof is over the side walls. The exact same system is used attaching the fiber glass, virtually no way for the sides, base or roof to leak.
 

Attachments

  • Kelly Build Aspen X Trails Tear Drop,  wall, sink stove cut ins 001.jpg
    Kelly Build Aspen X Trails Tear Drop, wall, sink stove cut ins 001.jpg
    54.9 KB · Views: 53
  • Kelly Build Aspen X Trails Tear Drop,  wall, sink stove cut ins 002.jpg
    Kelly Build Aspen X Trails Tear Drop, wall, sink stove cut ins 002.jpg
    60.7 KB · Views: 51
  • Kelly Build Aspen X Trails Tear Drop,  wall, sink stove cut ins 003.jpg
    Kelly Build Aspen X Trails Tear Drop, wall, sink stove cut ins 003.jpg
    63.4 KB · Views: 52
  • Kelly Build Aspen X Trails Tear Drop,  wall, sink stove cut ins 004.jpg
    Kelly Build Aspen X Trails Tear Drop, wall, sink stove cut ins 004.jpg
    62 KB · Views: 53
  • Kelly Build Aspen X Trails Tear Drop,  wall, sink stove cut ins 005.jpg
    Kelly Build Aspen X Trails Tear Drop, wall, sink stove cut ins 005.jpg
    48.8 KB · Views: 50
  • Kelly Build Aspen X Trails Tear Drop,  wall, sink stove cut ins 006.jpg
    Kelly Build Aspen X Trails Tear Drop, wall, sink stove cut ins 006.jpg
    67 KB · Views: 52
  • Kelly Build Aspen X Trails Tear Drop,  wall, sink stove cut ins 007.jpg
    Kelly Build Aspen X Trails Tear Drop, wall, sink stove cut ins 007.jpg
    49.7 KB · Views: 53
  • Kelly build, AspenXtrails tear drop build, carpet 001.jpg
    Kelly build, AspenXtrails tear drop build, carpet 001.jpg
    72.3 KB · Views: 52
  • Kelly build, AspenXtrails tear drop build, carpet 002.jpg
    Kelly build, AspenXtrails tear drop build, carpet 002.jpg
    75.1 KB · Views: 56
  • Kelly build, AspenXtrails tear drop build, carpet 003.jpg
    Kelly build, AspenXtrails tear drop build, carpet 003.jpg
    58.3 KB · Views: 53

Forum statistics

Threads
188,363
Messages
2,906,088
Members
230,117
Latest member
greatwhite24
Top