Barn Door for JK factory hardtops

jscherb

Expedition Leader
Hey Jeff - just thought of a great idea (at least I think so ;))! It popped into my head this morning when brainstorming about how to upgrade my ever-growing collection of first aid kits in the Jeep. I travel a lot to remote areas, often with kids, so I think about this often.


I'm convinced that someone with your talents could design and sew a large first-aid kit that attaches via molle straps to the MORryde drop-down panel in the top of the cargo area that you designed. The kit would be the size of a large binder, and opens like one. The kit would open upward and toward the rear, with the top half flipping back to hang downward into the cargo area for easy access. And of course, it could be removed via the molle straps for easy transport, if needed. It would be so easy to use this kit, compared to the typical approach of having to remove a kit from the Jeep, lay it on the hood or ground, rummage through it and hope you quickly see what you're looking for. This could be a perfect product for Overland Outfitters, and I'd be the first to buy one!


Make sense? If not, I can try to draw a sketch. Just don't laugh at it. :)

Funny you should mention that, take a look at what's on my sewing table right now... alongside a production first aid bag I designed for Overland Outfitters last year are several yards of heavy cotton duck fabric and a bunch of red cross emblems for my next project.
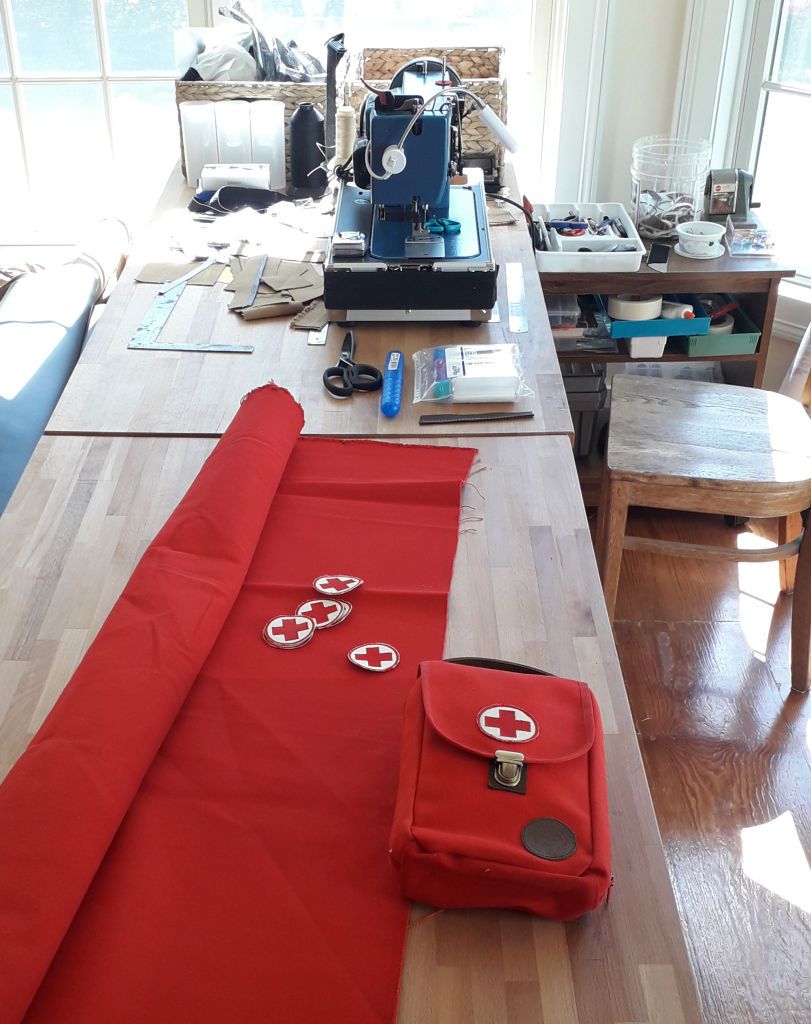
Materials_zps5oxipxpc.jpg


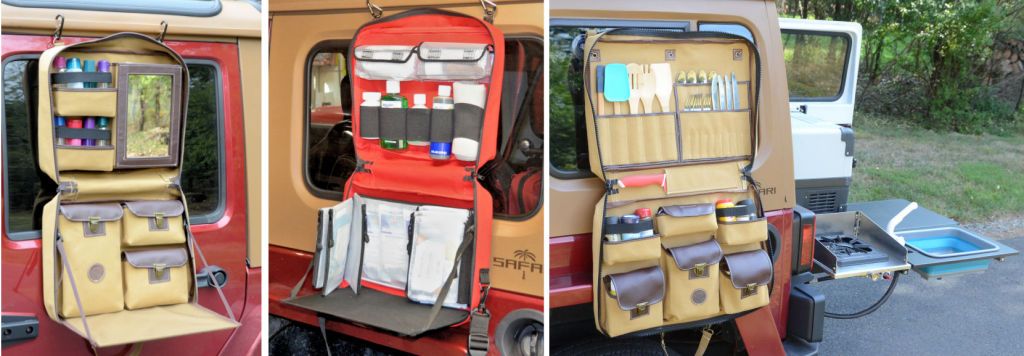
The Kitchen Keeper project I recently finished and posted about is part of a set of three new ideas I'm working on, all based on a portfolio design that opens for hanging. The Kitchen Keeper was the first; the next two include a "Camper Girl" bag, it'll open the same way and hang and have a mirror mounted in it plus compartments specifically designed to fit common toiletries, cosmetics and other items that a Camper Girl wouldn't want to be without. And the third one is a first aid kit, again with a portfolio design that can hang or lay on the ground next to the injured person. It's intended to be a step above a standard first aid kit, something that a trail First Responder might find useful.


When you posted your idea I was in the process of drafting a post to see if there are any First Responders out there that want to work with me on the final design. I've got several "Camper Girls" working with me on the final design of that bag but until now I haven't put out the word looking for First Responders.


I'm doing the First Responder bag for Overland Outfitters (they sent me the red canvas and the red cross emblems to use for prototyping) and I've suggested to them that they provide a final bag to a First Responder who participates in the final design.

My First Responder bag project isn't exactly what you're suggesting, but it could hang down from the drop-down Molle panel and I'll make sure the straps that are part of the design work for that location.

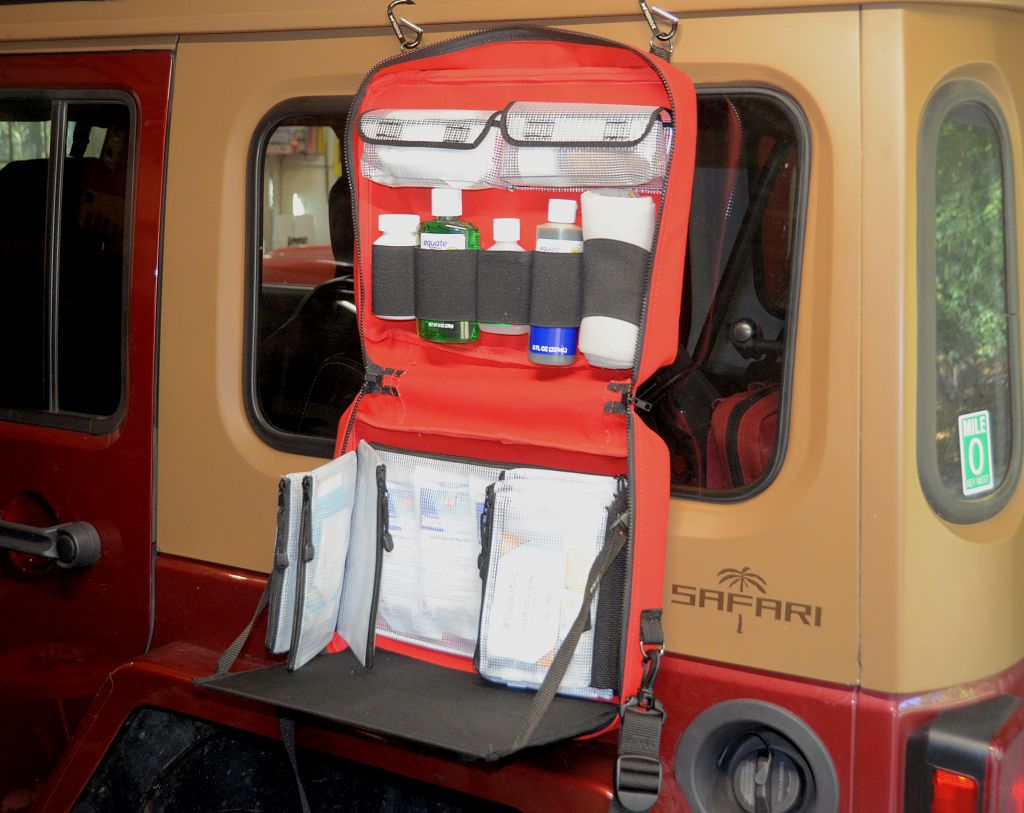
Other projects and commitments kept me from getting to this project until this week, but here are a few photos of the finished First Responder bag. It can open and lay flat next to your victim for easy access to the supplies it contains:
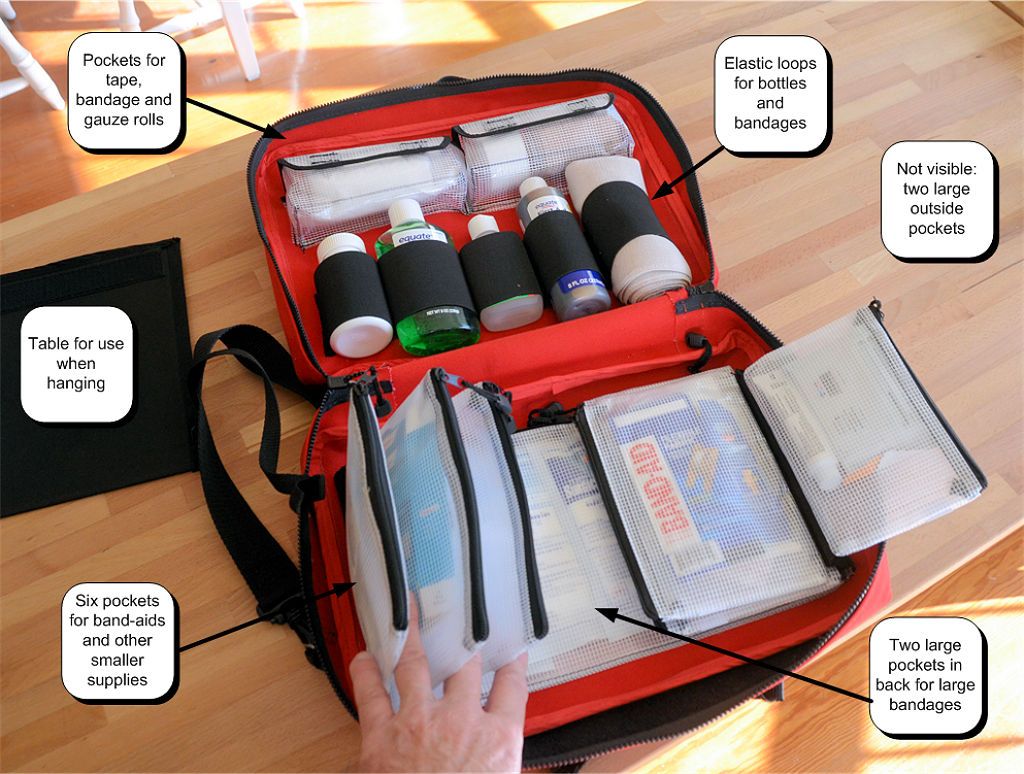
FirstResponderContents2.jpg


The top half has pockets for rolls of gauze, tape and bandage plus five elastic loops for bottles or bandages - I've got Ibuprofen, Burn Relief Gel, Itch Relief Liquid (bee stings), Antiseptic and a large Ace Bandage in it in these photos. The bottom half has six zipper pockets that flip like the pages of a book and one larger zipper pocket behind the first six and a large unzipped pocket behind that. And there are pockets on the outside on both sides.

It can hang almost anywhere. For hanging it also has an integrated work table.

On a tree:
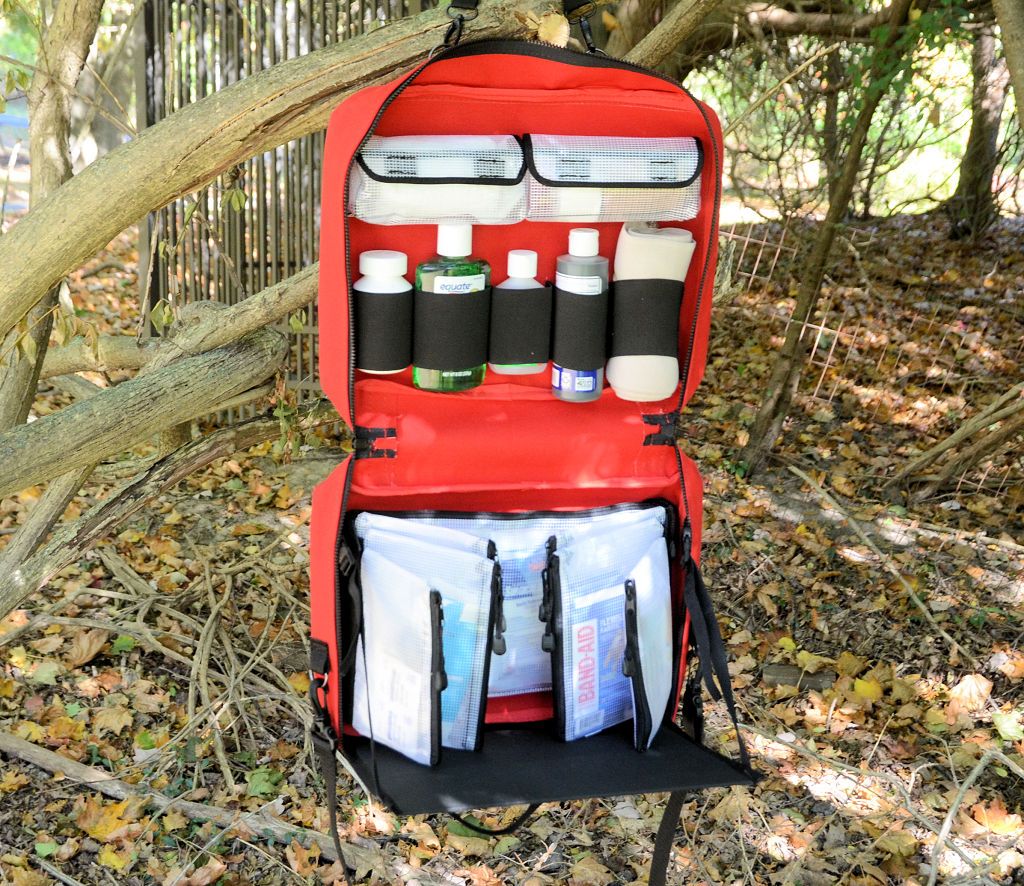
FirstResponderInTheWild.jpg


On a drip rail:

FirstResponderDripRail.jpg


Or as MattJ suggests, on the Overhead Molle, and be opened when needed:
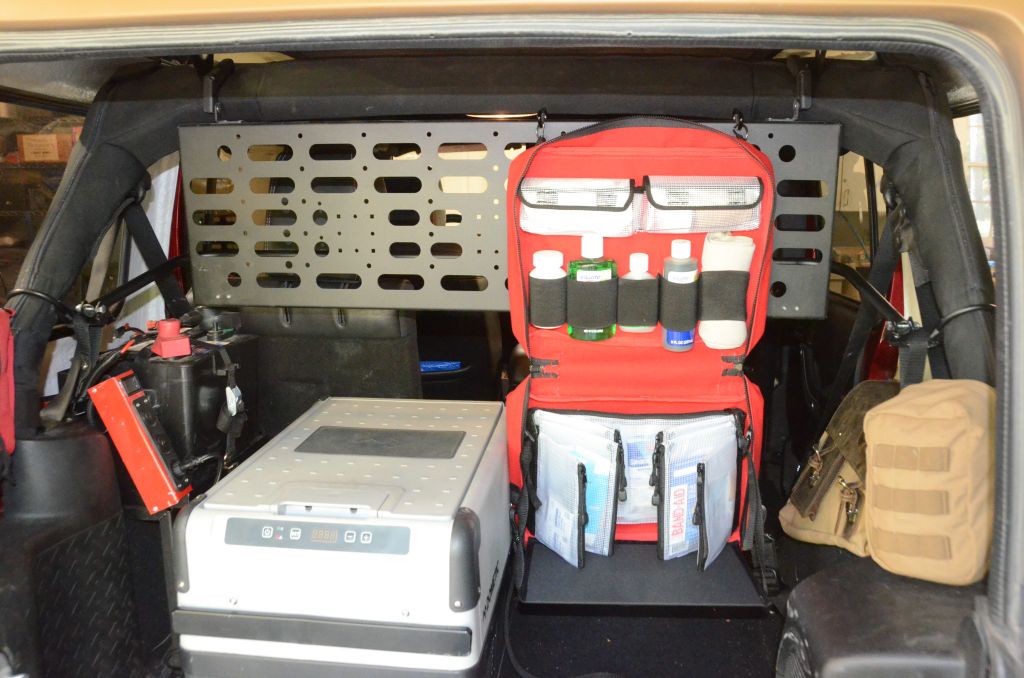
FirstResponderOnMolle.jpg


It's got carry handles that unclip and double as hanging loops plus a large shoulder strap and a large pocket on either side.
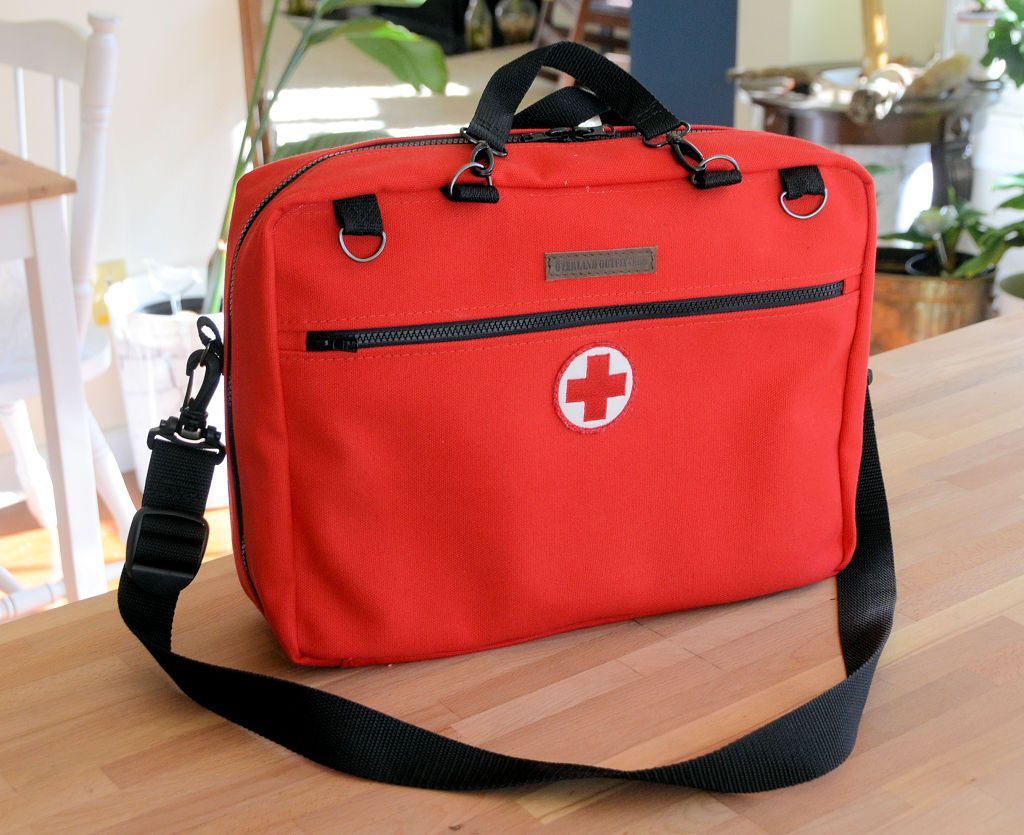
FirstResponderBag1.jpg


The basic shell is the same as the design I was calling the "Necessity Bag", I did that for manufacturing efficiency. I was invited to a call last week between Overland Outfitters and Quadratec and they both liked the Necessity Bag but QT suggested calling it the Camp Cabinet so I'll refer to it by that name now. I hadn't sewn the First Responder bag in time for the call but I explained the idea to both and they liked that idea as well so it may be that both of these will be coming to a catalog near you sometime soon.
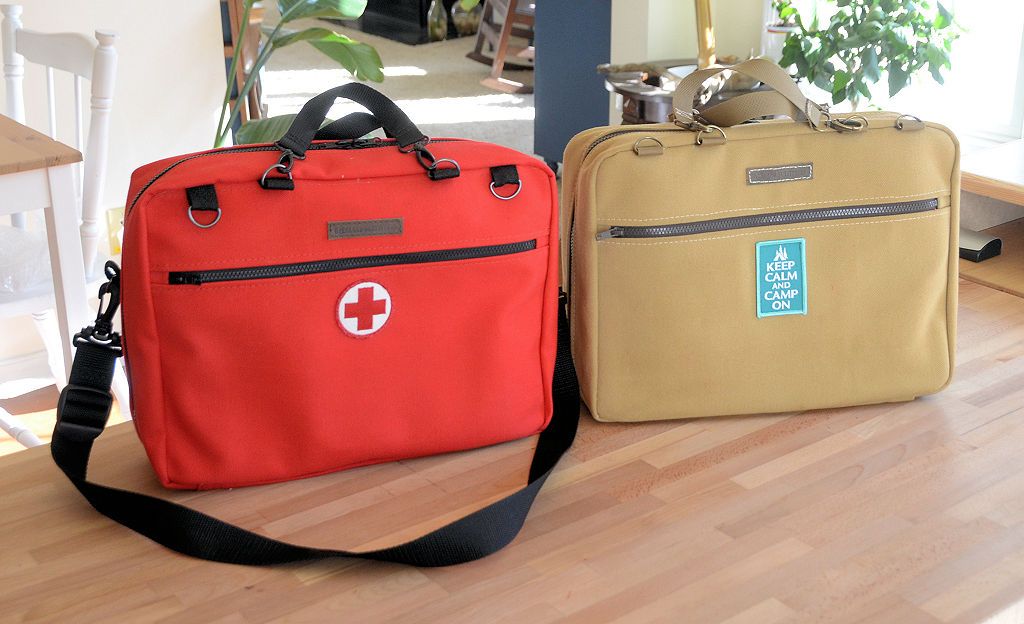
FirstResponderAndCampCabinet.jpg
 
Last edited:
jscherb

Expedition Leader
I like your first aid bag design, looks to be well laid out
Thank you. The goal was quick access so I used transparent material for the pouches and pockets and made the pouches flip like the leaves of a book so no time would be wasted finding the needed supplies.
 

jscherb

Expedition Leader
It's great, Jeff! Will you post up the catalog link here when it is available for purchase?
Thanks. I'm glad this 3 bag project is done now, I've got other projects I want to move on to :).

Today I talked with the company that wants to pick them up and it sounds like they would like to produce all three of the recent bags in time for the spring catalogs. They said they wished they could get them to market in time for the Christmas season but since they're running at less than 50% capacity right now due to virus conditions that won't be possible so their schedule will be driven by the deadlines for the big spring catalogs. They said their goal is to be able to take preorders for these in December and to do that they need to have their preproduction samples ready for photography (and testing) by then.

In the next few days I've got to get the patterns and assembly instructions for the bags to them and then I'm out of the picture, the next I'll probably hear from them about it is when the send me preproduction samples ready to verify and test.

Left to right, the bags in question: the Camp Cabinet toiletry bag, the First Responder first aid bag and the Kitchen Keeper.

PortfolioSeries.jpg


As they update me and provide preproduction samples for me to verify and test I'll keep people updated.
 

jscherb

Expedition Leader
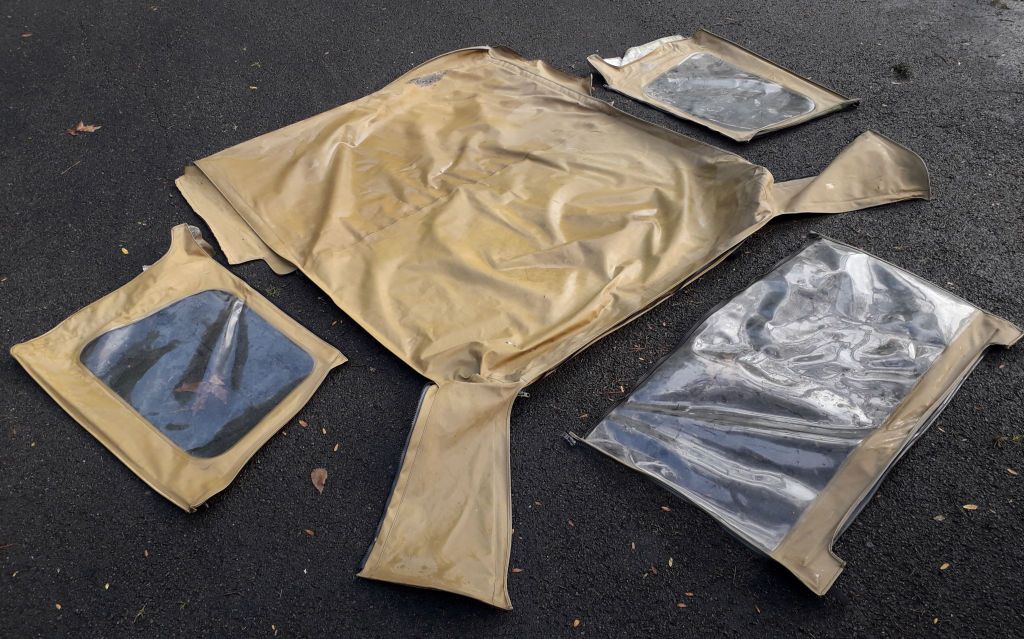
I went to the local u-pull for something from a TJ this morning, but there was too much rust to make the part I went there to get worthwhile. But I did come away with a complete Spice TJ soft top for $10.

SpiceSoftTop.jpg


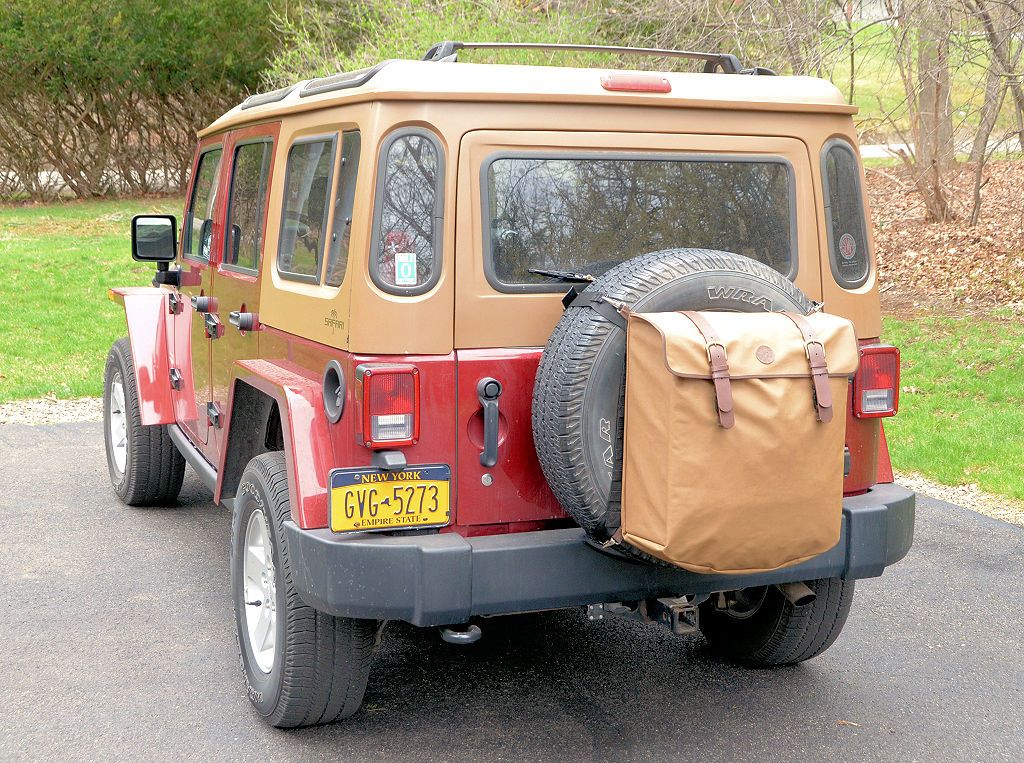
Other than some bad seams, the fabric and zippers were in pretty good shape, and after cutting it apart and running the pieces through the washer and dryer it's great source material for future sewing projects. I don't have a plan for using the fabric or zippers yet, but since Spice is a big part of my JKU color scheme I'm sure I'll make something useful (and color coordinated) with it. The trash bag on the spare was sewn from discarded soft top fabric too.

TrashHopperJK1_zpstuk7j28n.jpg
 

jscherb

Expedition Leader
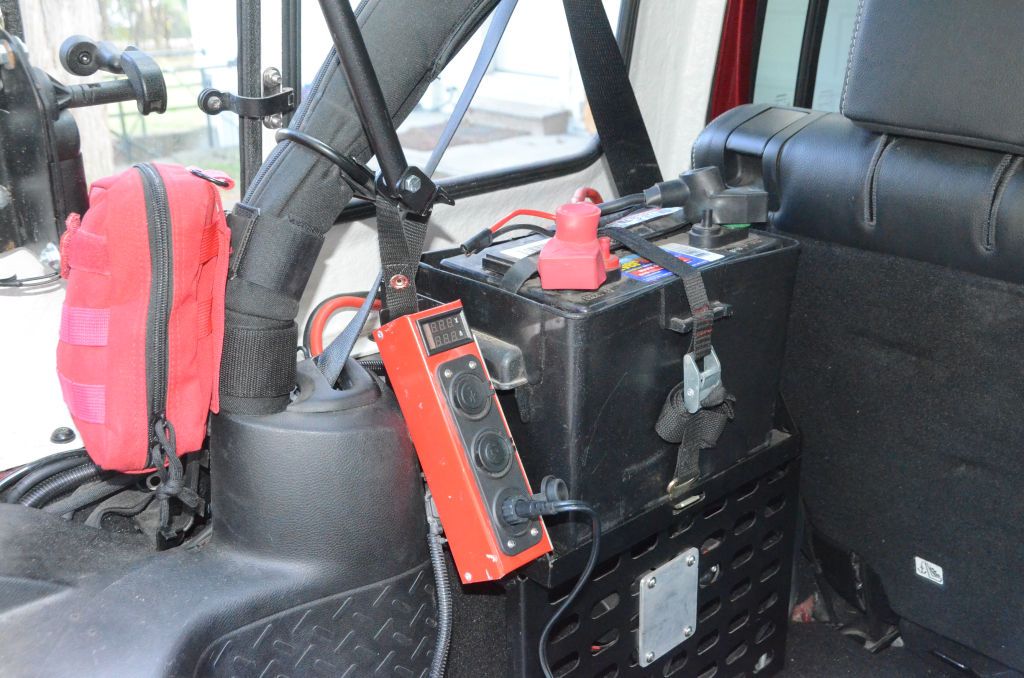
A "soft top" for my kitchen battery...

Because of the wires connected to the fridge battery in the back of my Jeep, the plastic cover of the battery box doesn't fit very well. I've been running for a very long time with no cover on the battery so today I decided to remedy that. Made out of fabric from a used factory soft top, the new cover fits well and looks nicer than a utilitarian battery box cover would. Here's how I've had it set up:

KitchenBattery.jpg


In the photo above I've got the small power panel in place; the Trail Kitchen has an integrated power panel so when I've got the full kitchen in place I don't use the small panel.

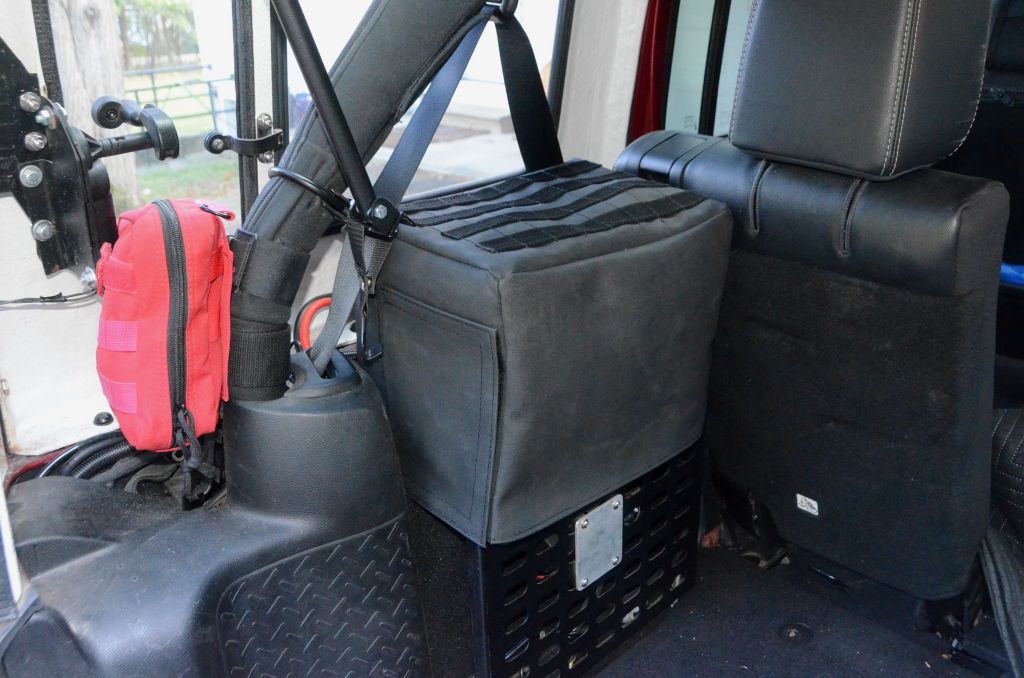
Here's the soft top in place:

KitchenSoftTop1.jpg


I've put Molle straps on the top, front and the side facing the window because in those places there's room for pouches to be attached if I need to.

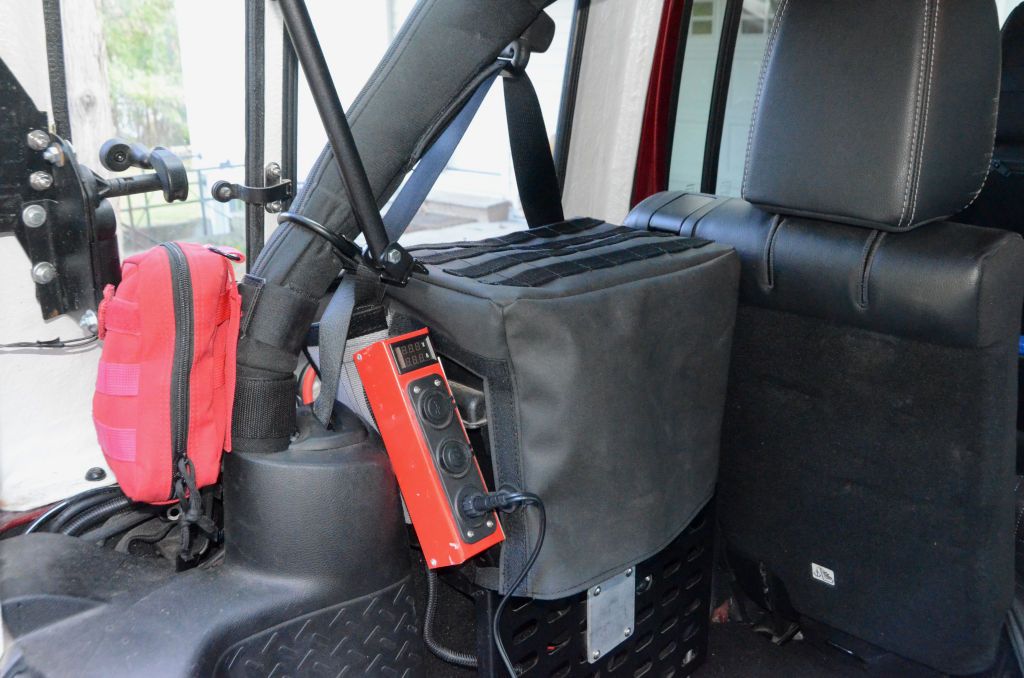
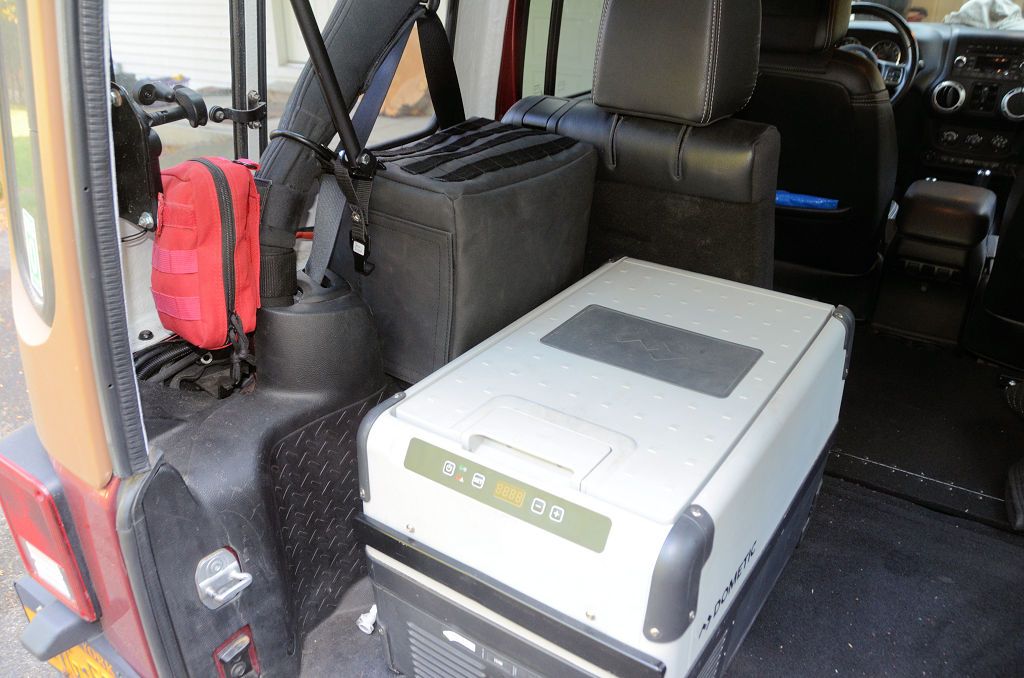
The cover has a flap on the back side - when the full Trail Kitchen is in place the power wires run out the bottom of the soft top and to the power panel on the kitchen, but when I've only got the fridge in place the flap is opened so the small power panel can be clipped on.

KitchenSoftTop2.jpg


KitchenSoftTop3.jpg


If you follow this thread you might think that all I've been doing lately is sewing - I have been doing a lot of sewing but I've been doing some metal fab as well. I've posted my last few metal fab projects in the "Land Rover ideas for Jeeps" thread. In case you haven't been following that thread, recently I've done a compact ground anchor for winching that uses my sand ladders as a base:


And I've made an extension for my rack to give me more storage space up top when I've got the roof top tent mounted.

FinalExtension.jpg


ExtensionOnJKU2.jpg


The LJ roof is a bit shorter than the JKU roof, so on the LJ the rack extends a beyond the front of the roof.

ExtensionRailDone1.jpg


Also I'm planning to start another fiberglass project; I'll post about that when I start it.
 

jscherb

Expedition Leader
Earlier in this thread I posted about my quick install/quick remove winch mount that lets me use the winch on all 3 of my Jeeps.
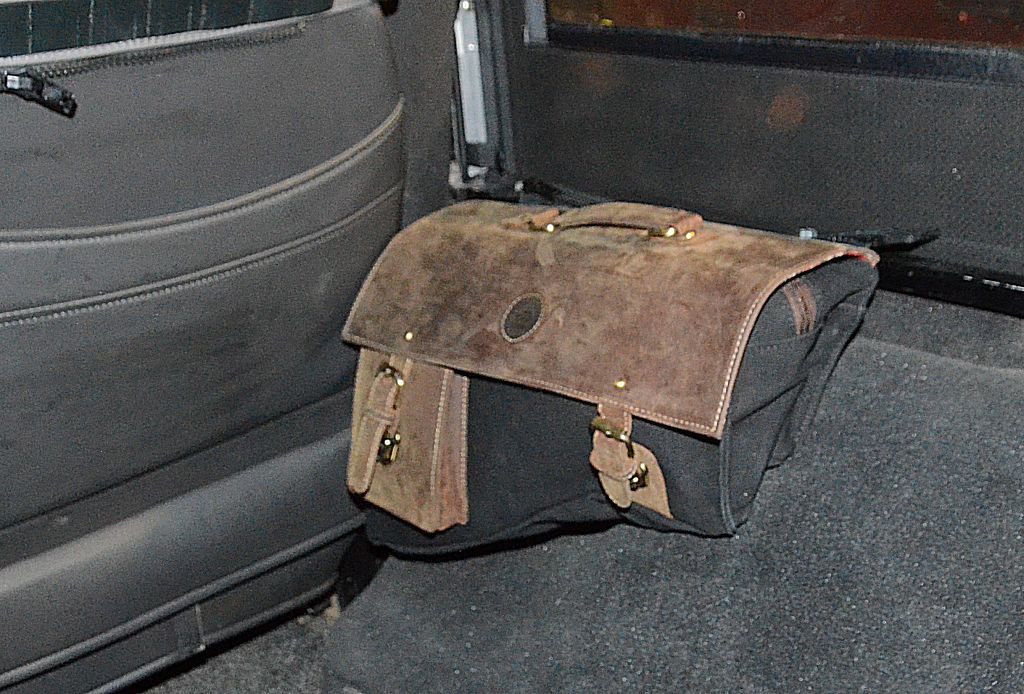
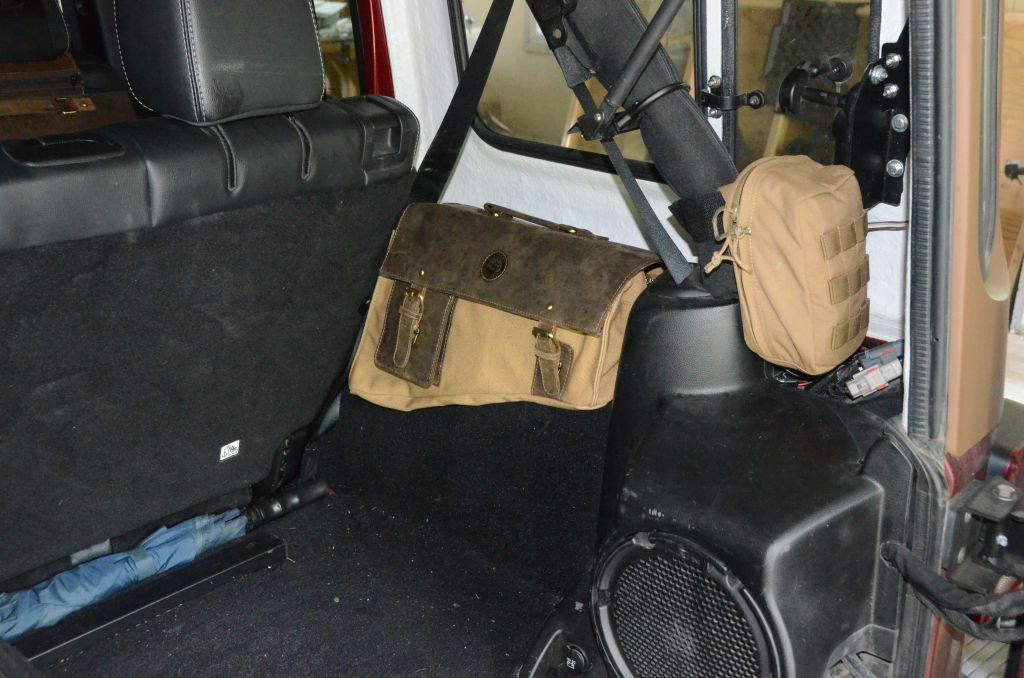
Since I may be using my winch on any of my Jeeps I keep my winch gear in a bag so I can move it to the Jeep with the winch. To keep the gear accessible but out of the way I use a bag that mounts above the inner fender just behind the front seats. Here's the winch bag in my LJ:

SaddleBagInLJ.jpg


It has a zipper mount that uses the hardtop bolts to attach it to the tub and when I need the bag outside the Jeep I just unzip it from the mount. The bag is very roomy - in it I carry a pair of gloves, a winch damper, a tree saver strap, the winch control, a snatch block and a d-ring shackle.


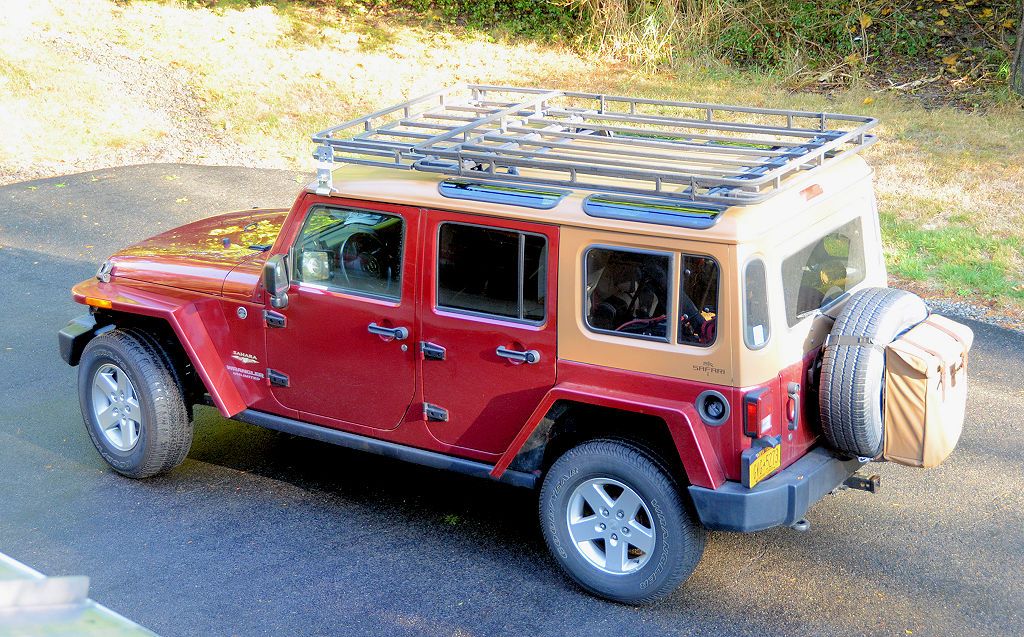
The bag works out really well and can mount in my JKU (this isn't the winch gear bag, I've got other things in the tan bag):

ProductionSaddlebagTan2.jpg


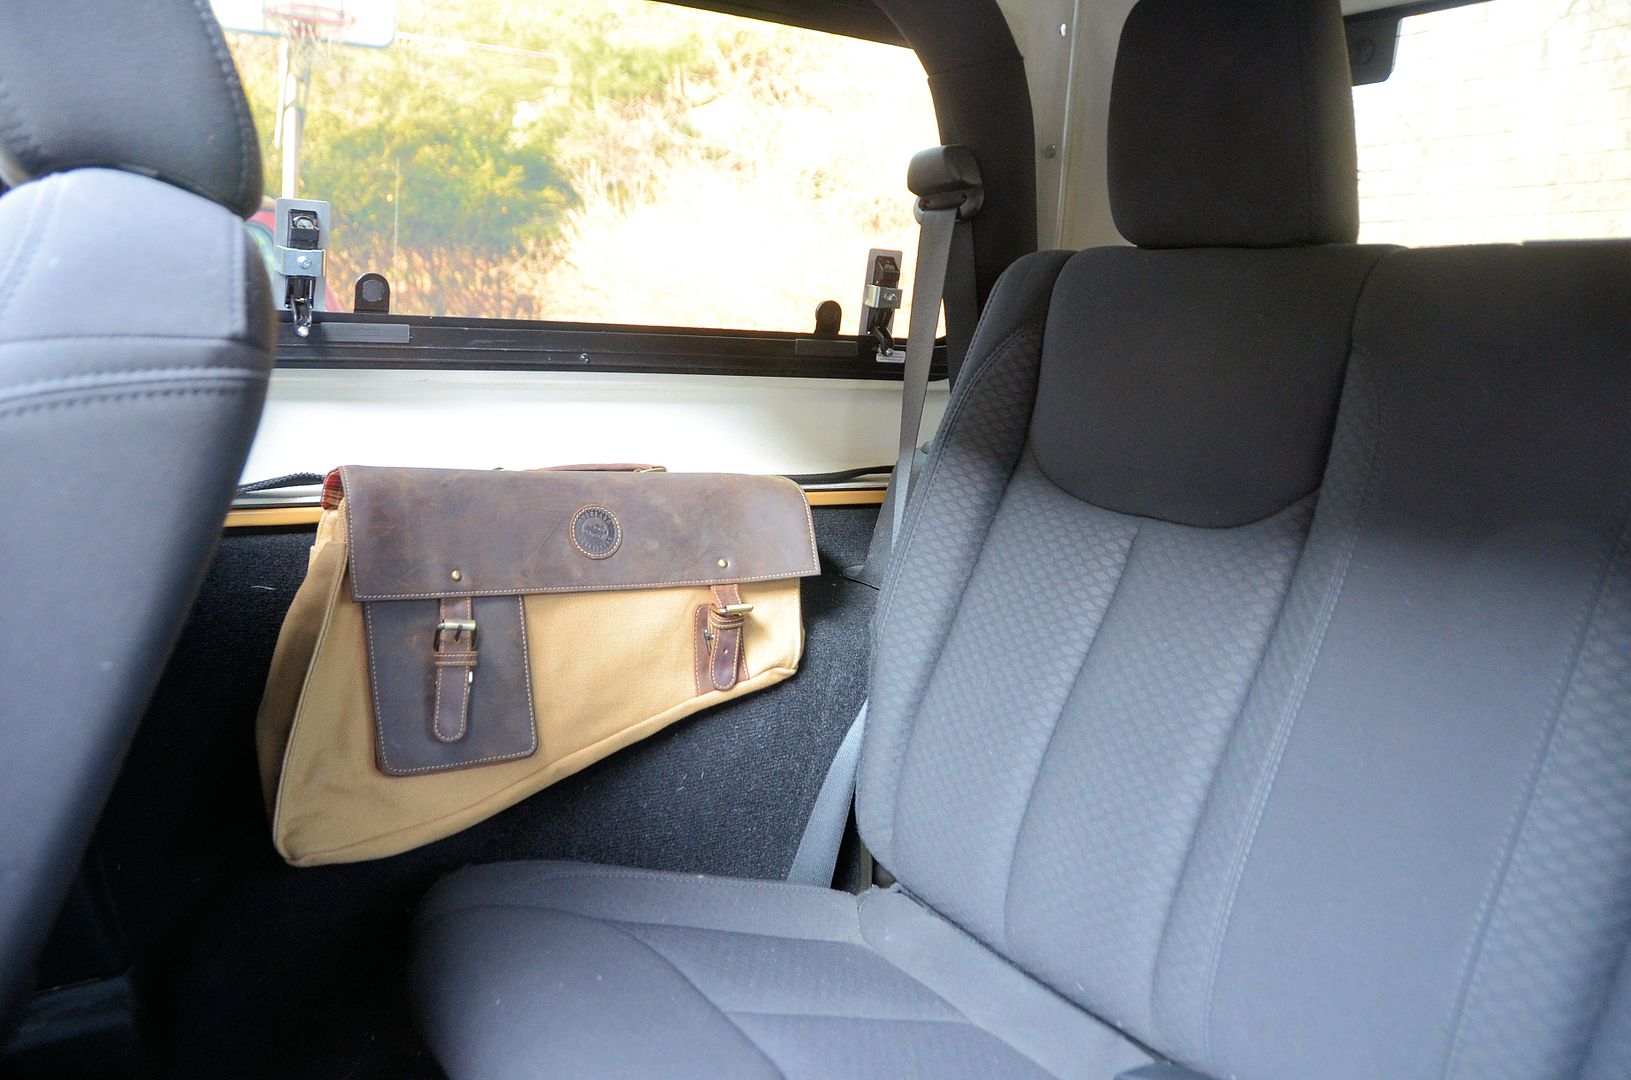
It also mounts in a 2dr JK or 2dr JL, in front of the back seat and there it also functions as a nice armrest.

SaddlebagIn2dr1.jpg
 

jscherb

Expedition Leader
Today's metal fab project:

HingeBrackets1.jpg


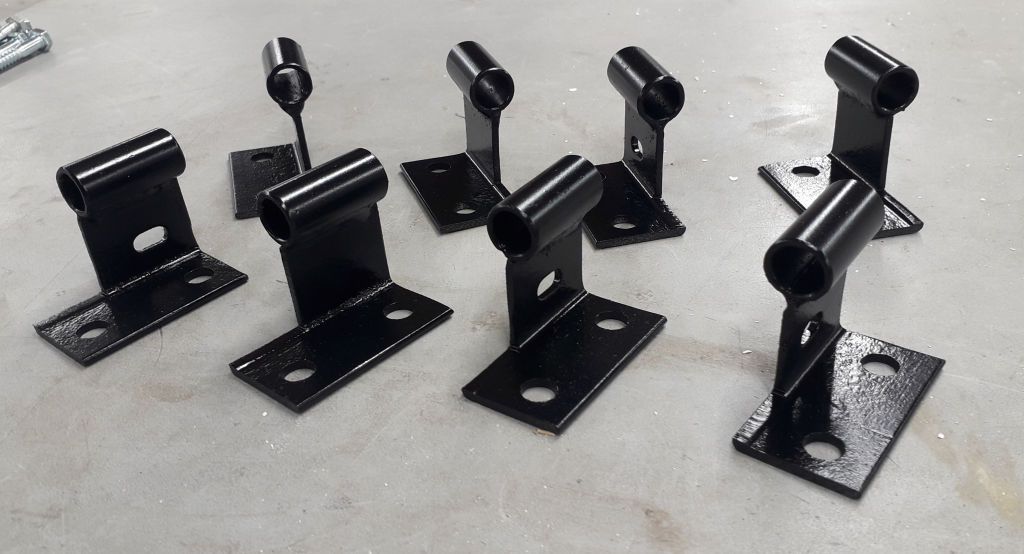
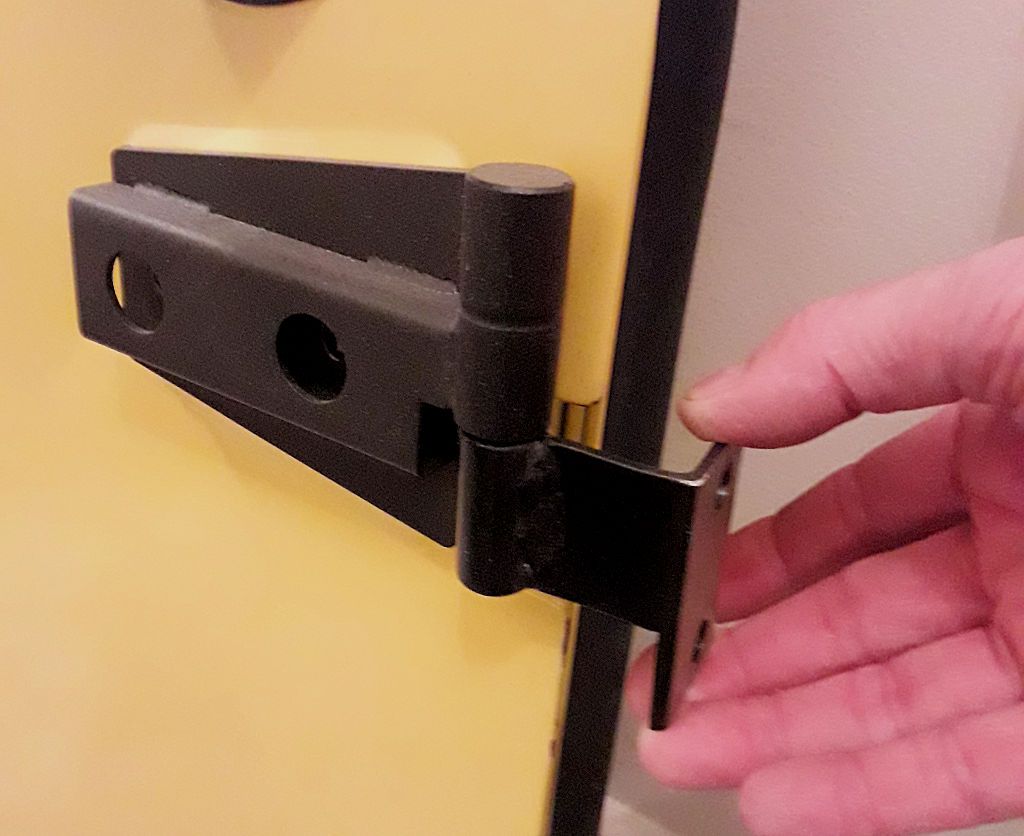
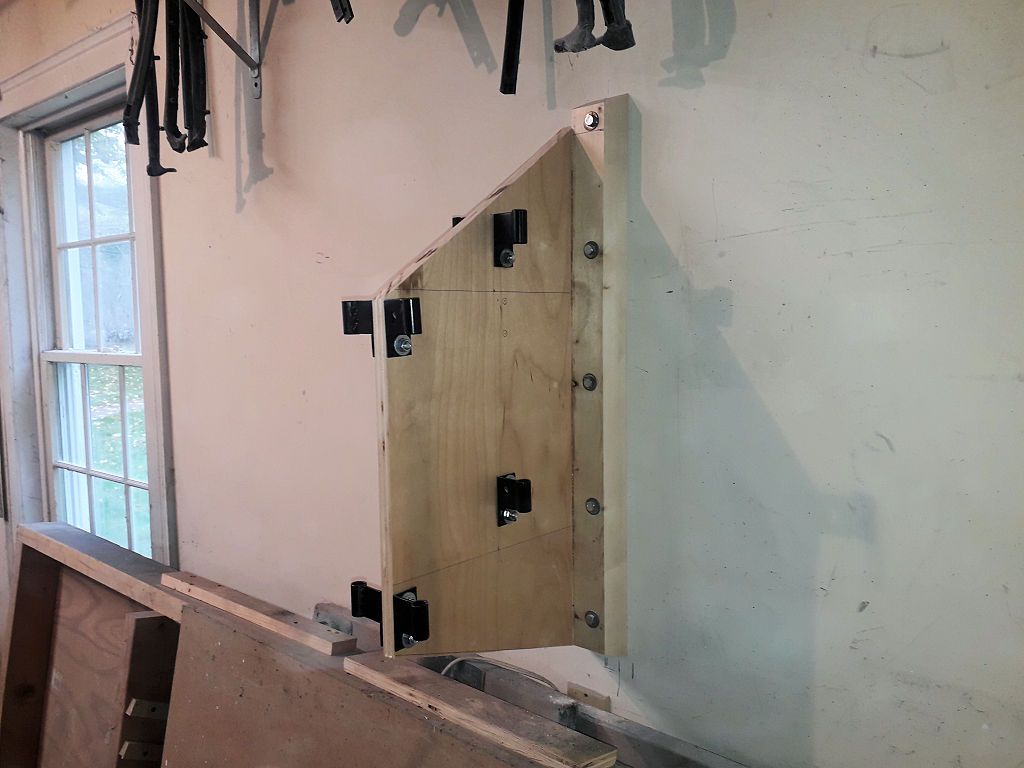
I'm making a rack to store the JKU half doors on the garage wall. The first step was to make these brackets that the door hinge pins will insert into to hang the doors. These will bolt to a wooden bracket that screws into a stud in the garage wall.

HingeBrackets2.jpg


Tomorrow I'll get everything mounted to the garage wall.
 

jscherb

Expedition Leader
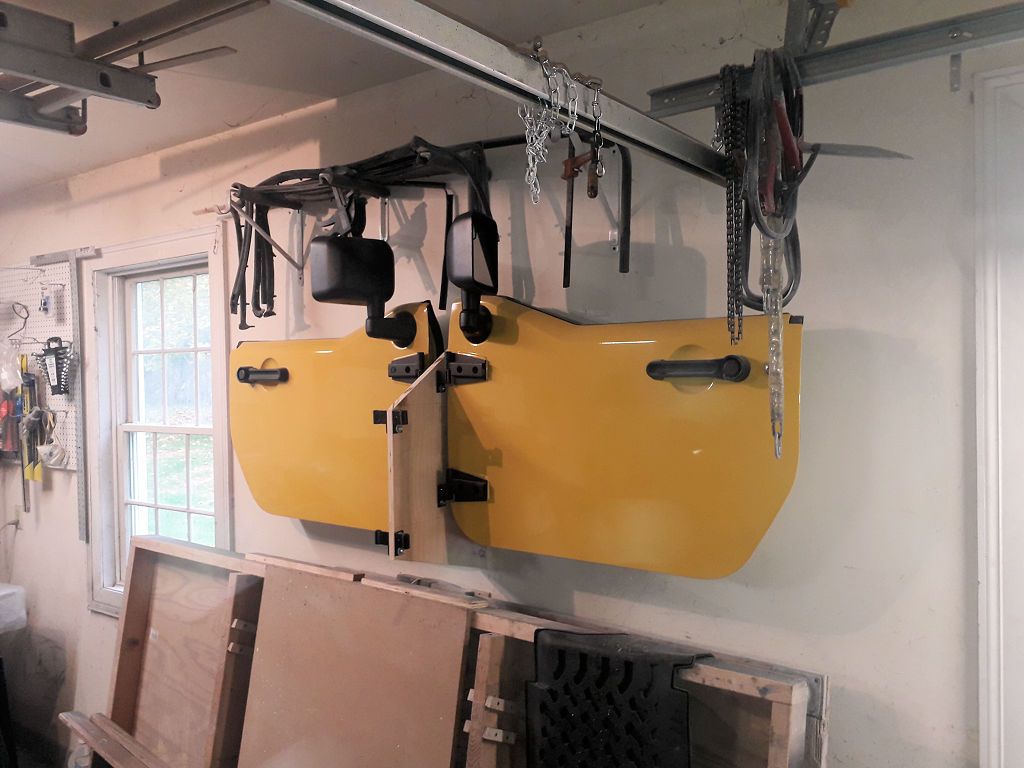
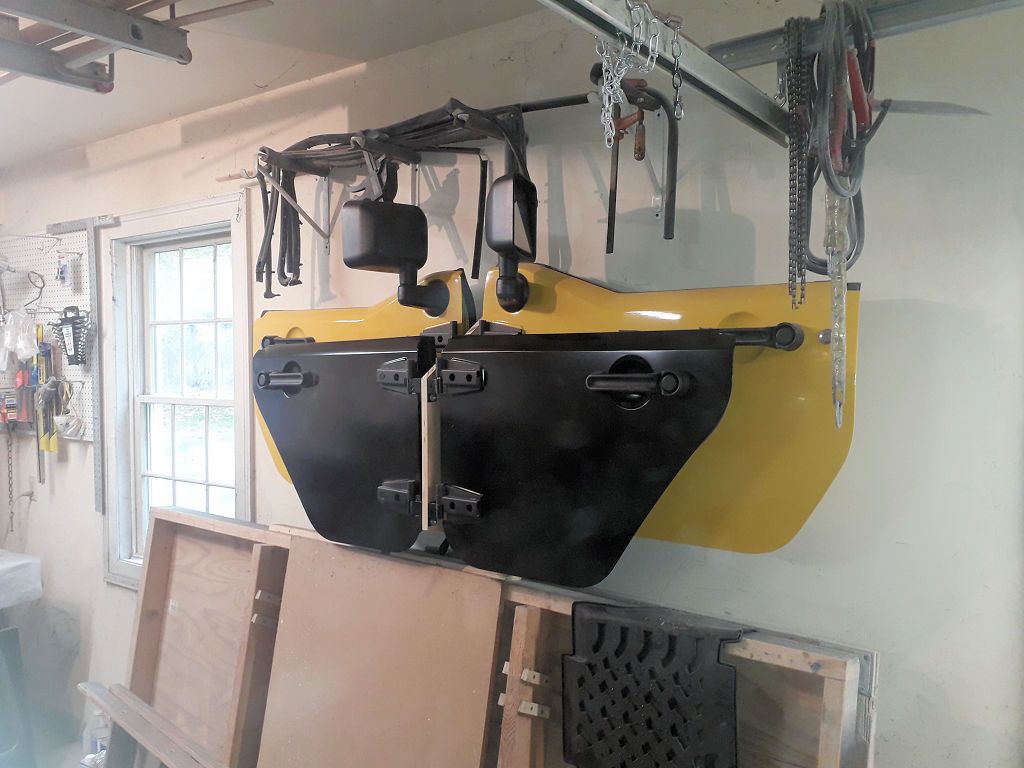
Finished the door hanger project.

DoorHanger1.jpg


DoorHanger2.jpg


The rear doors hang in front of the front doors and slightly lower so they clear the mirrors and putting the front doors in the back means the mirrors won't stick out so far into the garage bay.

DoorHanger3.jpg
 

jscherb

Expedition Leader
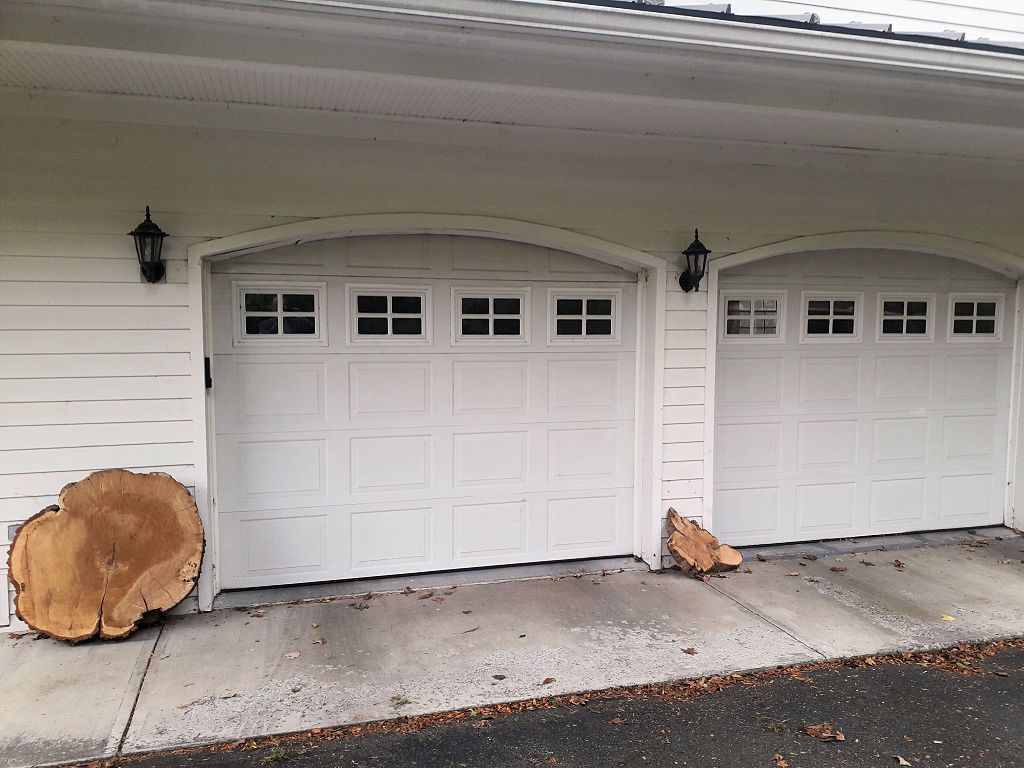
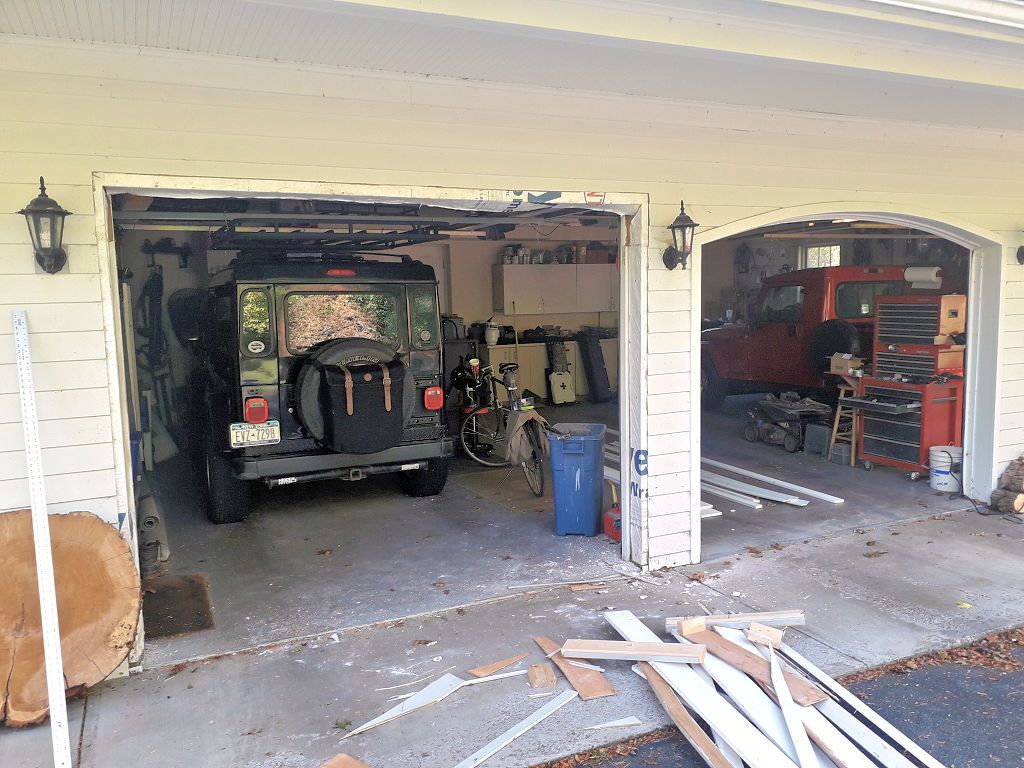
Another Jeep project for the garage... my garage door openings are arched - it looks nice but because of the height I have to be dead center when I've got the roof rack on the Jeep. A little bit to either side and the rack won't clear the opening.

GarageDoorOriginal.jpg


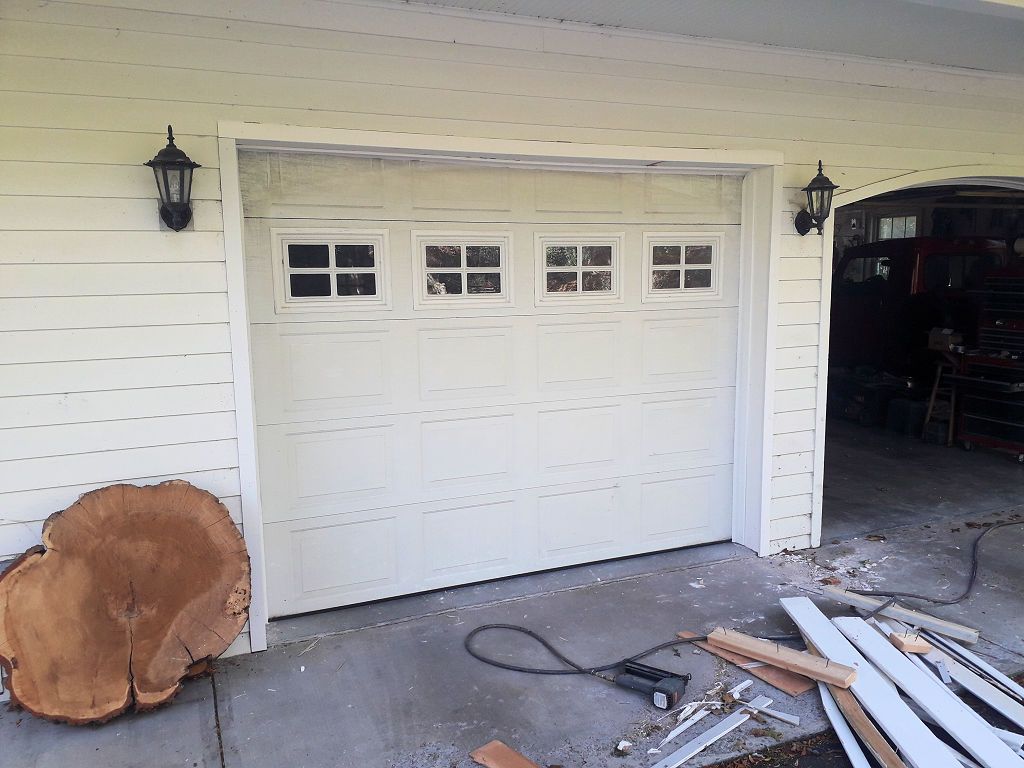
That was getting old, so the other day I pulled down the trim around the door, cut the siding to remove the arch and retrimmed the opening. Work in progress:

GarageDoorInProgress.jpg


Done.

GarageDoorDone.jpg


Now I don't have to be dead center to enter or leave this bay with the roof rack on. The only problem is that my wife wants all 3 doors to match, so she wants me to modify the other two bays.
 

jscherb

Expedition Leader
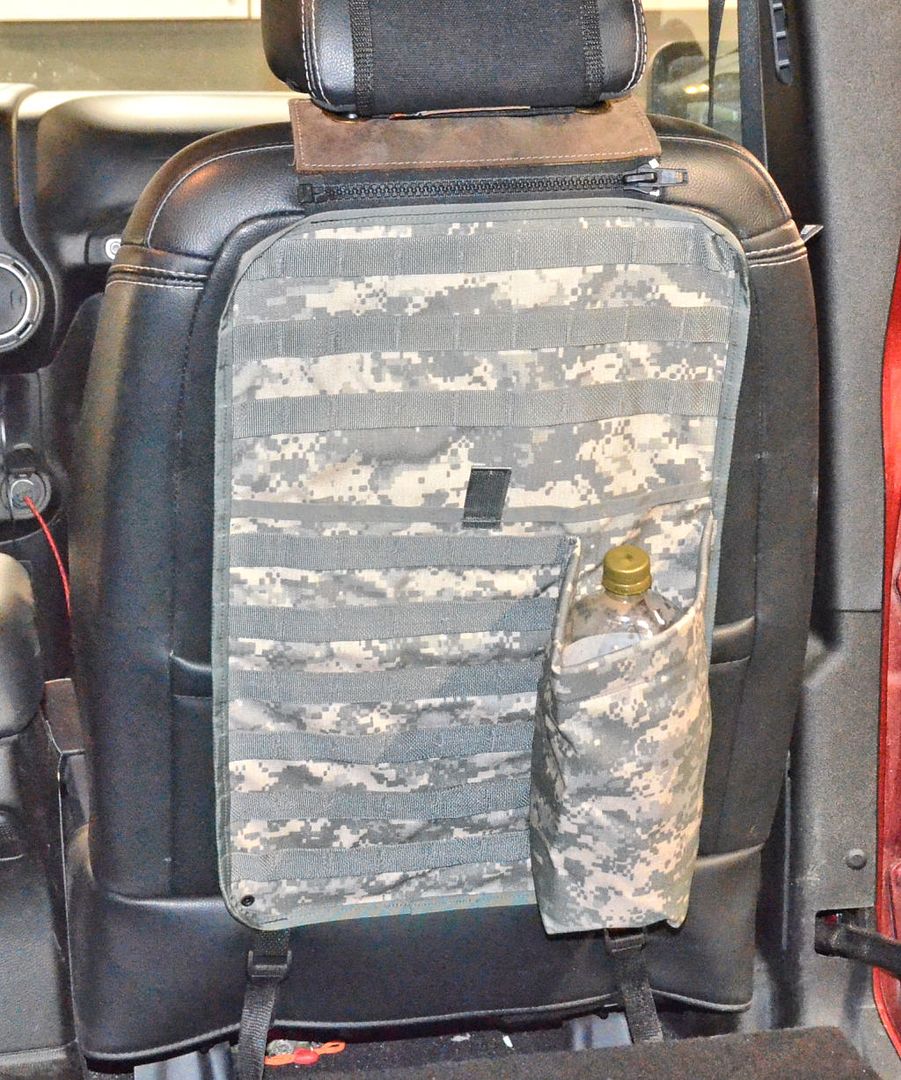
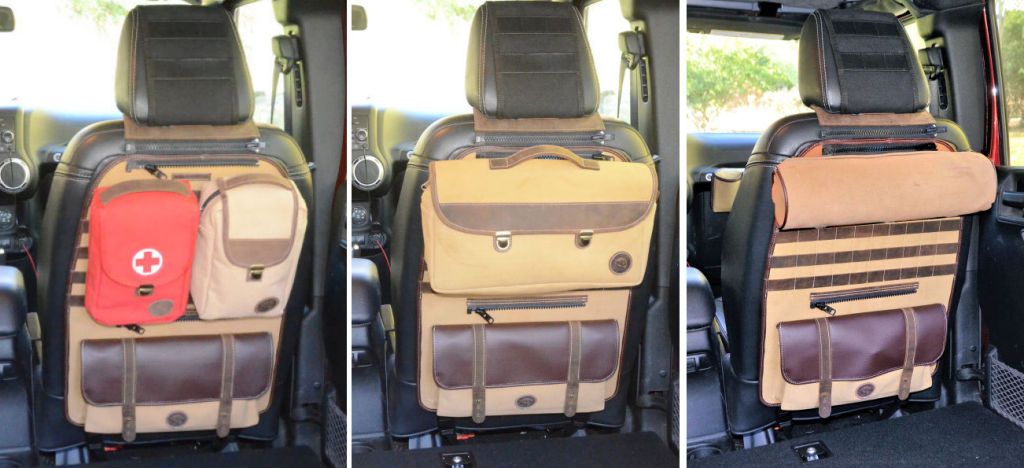
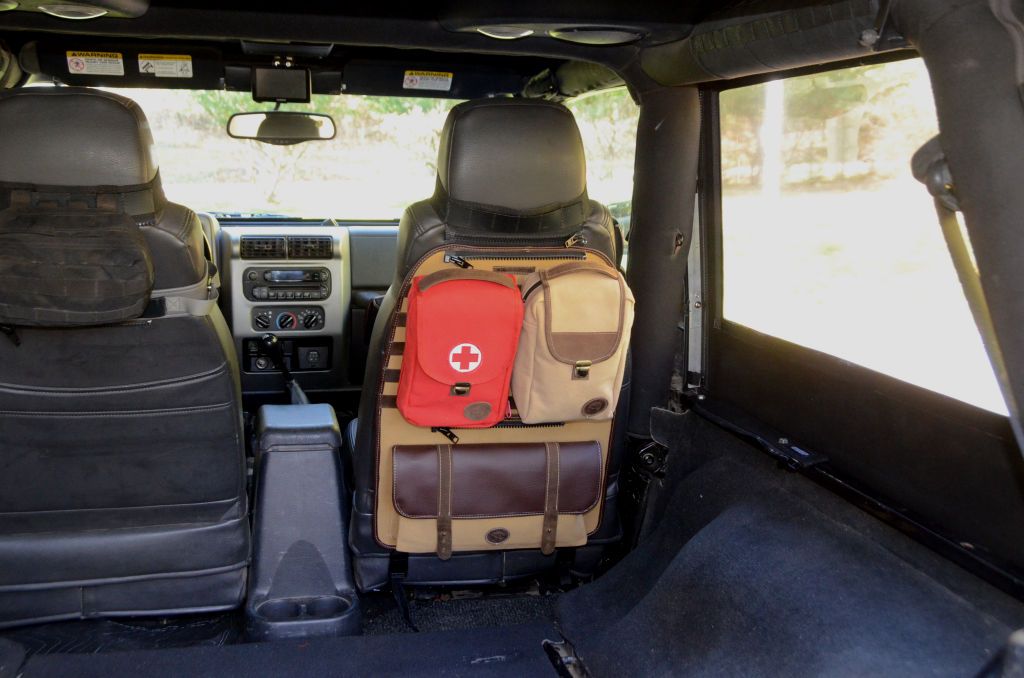
A while back I picked up a seat back PALS panel at my favorite military surplus store. I didn't have a use for it at the time but it was so inexpensive I couldn't resist it, I figured I'd find something to do with it eventually.

The other day I decided to try hanging it on the back of a seat in the LJ. As it came from the military it had lengths of paracord at each corner to tie it to the seat. That wasn't going to look good, so I removed the cords and sewed a zipper at the top so it could zip to the Overland Outfitters headrest post Zip & Go attachment I already have in the Jeep; I also sewed straps with adjusters to the bottom of the panel.

MilSurplusTestJK.jpg


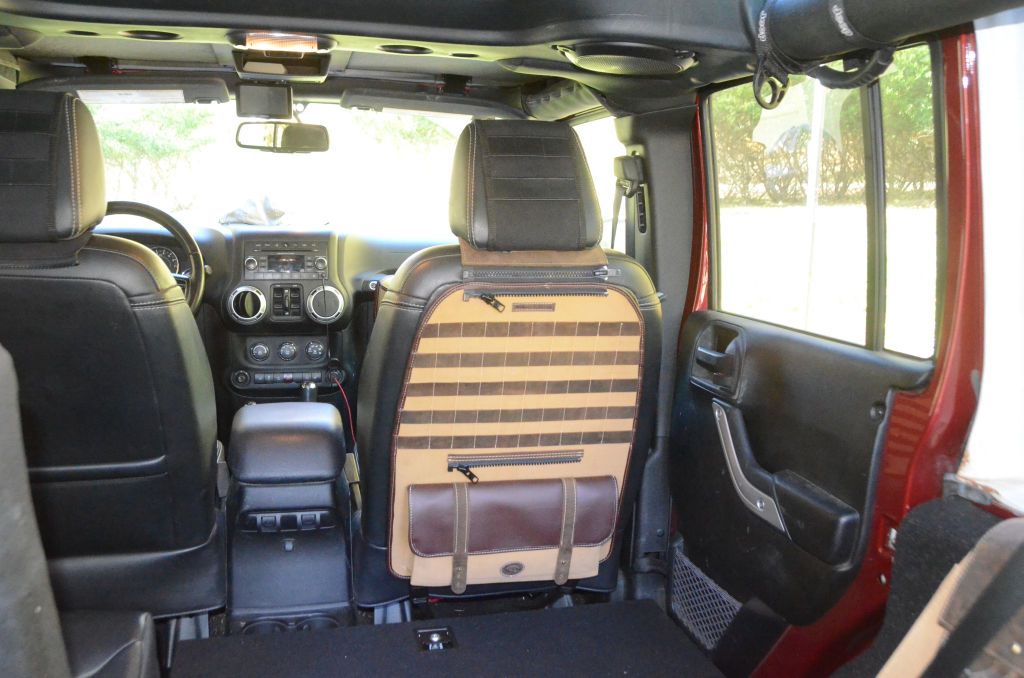
Once I made the changes to how it attaches to the seat it fit pretty well and securely, but I thought something could be designed that would look nicer, similar in style to the canvas bags from Overland Outfitters that I showed in earlier posts, so I designed and sewed one.

SBOEmpty.jpg


It's made from heavy canvas and leather. At the top it attaches to the headrest post zipper mount from Overland Outfitters and at the bottom there are straps that hook under the seat. It's got a large pocket, and two zippers for attaching Zip & Go bags. The leather PALS grid is standard size so it supports MOLLE gear, and it will support Grab & Go clip on bags.

Here are a few examples. Left to right: Two Grab & Go bags. Because they clip onto the PALS grid, when I need one I can grab it by the handle and pull it off the grid. Center: One of the Zip & Go bags that Overland Outfitters sent me recently. Right: A rollbag I sewed myself a long time ago. I often use it to hold my recovery strap.

SBO3Setups.jpg


It also fits on my LJ seats but because those headrests aren't removable it uses a different zipper attachment that I made a while back.

SBOGrabAndGoLJ.jpg


I'm pretty happy with how the panel turned out.
 
  • Like
Reactions: mhm

jscherb

Expedition Leader
Well dang that does look good.
Thank you very much!

After I installed the military surplus one in the Jeep I did some searching online to see others that were on the market and I didn't like any of them, so designing something that looked great was a #1 design goal.
 

jscherb

Expedition Leader
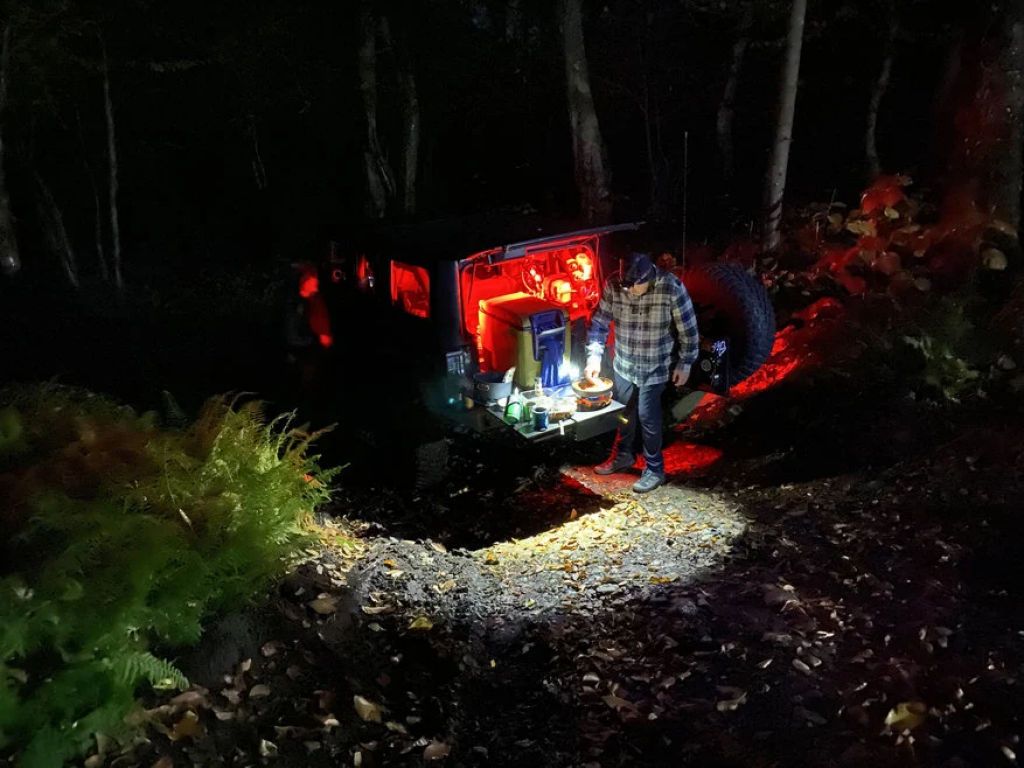
If you've been following this thread for a while you saw me develop the Trail Kitchen for my Jeep. It ended up being picked up by MORryde and has been on the market for a year or two now. Quadratec is one of the retailers selling them, and they recently posted a detailed installation blog about the kitchen. It shows a lot of details about the installation so it's good reading for anyone thinking about adding the Trail Kitchen to their Jeep: https://www.quadratec.com/c/blog/how-install-morryde-trail-kitchen-accessories

The lead photo from the Quadratec blog story:

QuadratecLeadPhoto.jpg
 

Forum statistics

Threads
188,040
Messages
2,901,499
Members
229,411
Latest member
IvaBru
Top