Barn Door for JK factory hardtops

jscherb

Expedition Leader
I came across a series of YouTube videos on the Trail Kitchen the other day. They're not very well lit but they do cover the installation pretty well.

The first two cover the basic installation of the kitchen in a JKU:


The only comment I'd make on the first video above is that the floor storage compartment can be accessible once the kitchen is installed - he says it isn't available. The way to make it available is to remove the hard floor cover before the kitchen is installed; leave the carpet, and after the kitchen is installed the carpet can be lifted up for access to the compartment. If the hard floor is left in place it doesn't flex enough to allow access but the carpet does.

The third video shows the optional countertops:


The last one shows the full kitchen in use:


jscherb

Expedition Leader
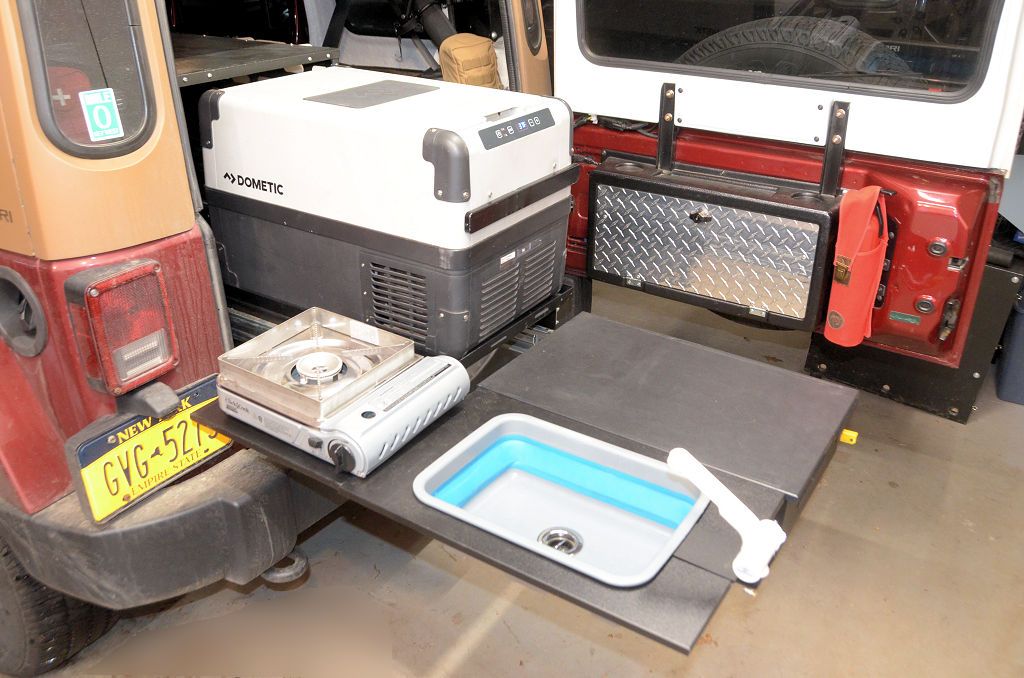
In December MORryde sent me a preproduction Trail Kitchen Sink option to test. It included a countertop with cutout for a collapsible sink, a faucet, a demand pump and related hardware, hoses, quick disconnect fittings and a way to adapt a quick disconnect fitting to a Rotopax container for a water source. I documented the installation in a post here: https://expeditionportal.com/forum/...factory-hardtops.127687/page-305#post-2872031

FaucetFarEnd.jpg


The other day they called me to update me on a number of things. The first news was that the Trail Kitchen Sink Option is now in production and available. It hasn't reached dealers yet; it's expected to show up at places like Retrofit Offroad and Quadratec soon, but they said it can be purchased directly from MORryde now. They didn't have the pricing off the top of their head on the call so they said they'd sent it to me when they got back from Jeep Beach.

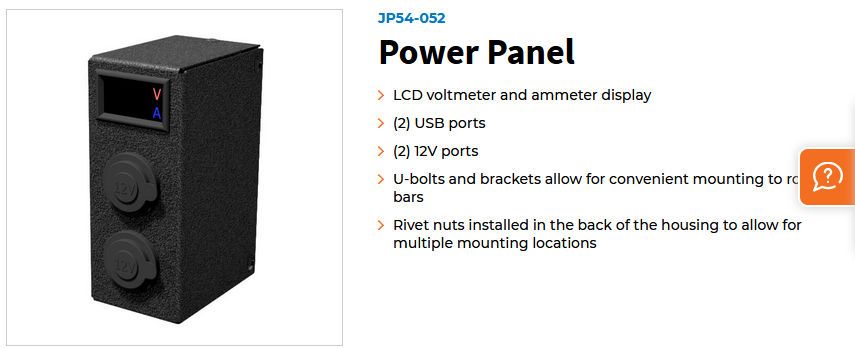
Another product they told me is now available is the Power Panel. It's intended for the Trail Kitchen but it can mount to the rear roll bar so it doesn't require the MORryde kitchen, it can be used as a general power source. It's now on their web site although I'm not sure that this is a final production photo of it:

PowerPanelProduction.jpg


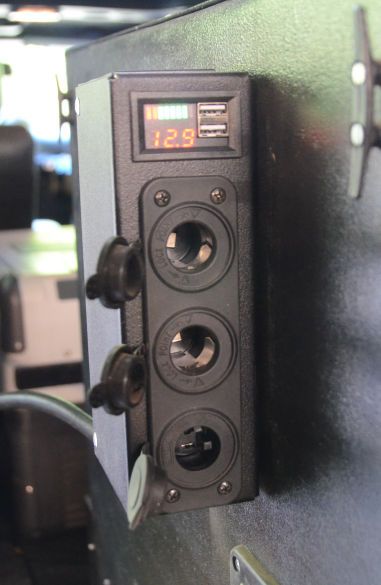
I've been using a preproduction power panel for a long time (since before the pandemic slowed things down at MORryde); I've got it mounted to the side of the Trail Kitchen. Mine isn't quite stock, I swapped one of the outlets for an ARB outlet (also compatible with my Dometic plugs) that provides a very secure screw connection so the plug can never come loose on a rough trail.

ARBInstalled2.jpg


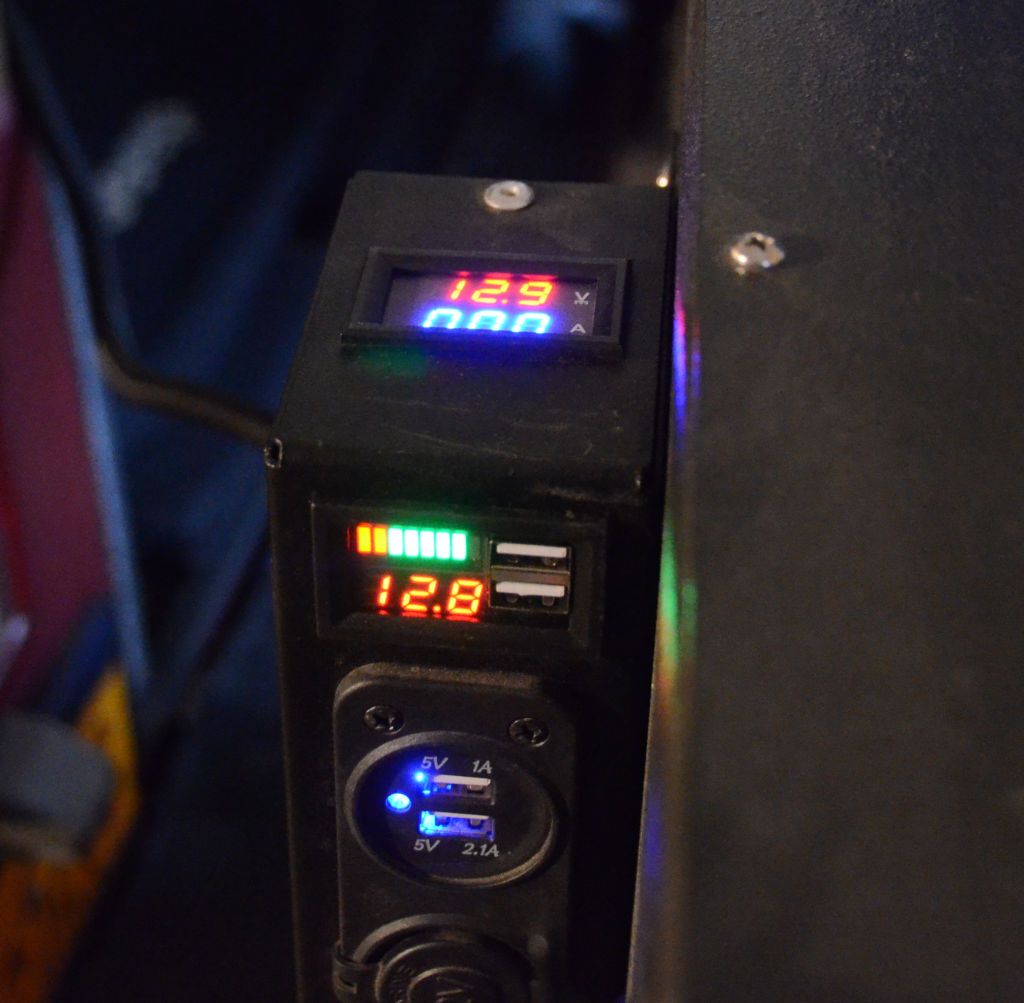
Another way mine isn't stock is that I've got two meters in it, I was testing two different types. The production version only has one meter on the front, mine has the extra one on the top. I don't know which meter type the production panel has.

BatteryMeter2.jpg


And they also said the Trail Kitchen Charging Kit (not sure that's what they'll be calling the final product) is very close (the pandemic really slowed this one down). The charging kit is designed to charge a kitchen battery mounted in the back near the kitchen. It charges the kitchen battery when the Jeep is running and disconnects the kitchen battery from the Jeep's electrical system when the Jeep isn't running so the kitchen can never drain the main starting battery of the Jeep.

Since MORryde doesn't generally manufacture wiring products in house they've teamed up with a wiring manufacturer and they are expecting production candidate products for testing in the next week or two. They said they'll be sending me one for review and approval as soon as they can. I've been using prototype versions in both my JKU and my LJ for a long time now and they work very well, so if they've done their work well it should be a good product. When I get more info about the availability of the Charging Kit I'll post it.

We also talked about new JL products and about upcoming shows - MORryde will be an exhibitor at the Bantam Jeep Fest in mid-June; they're borrowing my JKU (and me) for the show - hope to see some of you there.
 

Presto88

Adventurer
Jeff - do you know where I can buy that PowerPanel? I found it on the Morryde website, but there's no info for ordering from them or telling me where I can get it.
 

jscherb

Expedition Leader
Jeff - do you know where I can buy that PowerPanel? I found it on the Morryde website, but there's no info for ordering from them or telling me where I can get it.
Jim,
It hasn't made it to the dealer sites yet so until then you can contact MORryde directly, their phone number and sales email address are at the top left corner of their web pages.
 

jscherb

Expedition Leader
In my last post about MORryde updates, I wrote that the told me the Trail Kitchen Sink Option was in production and available. I posted this photo of the test unit they sent me:

FaucetFarEnd.jpg


That's what they call the "Deluxe Kit", which includes the faucet, pump and related plumbing.

They just sent me a photo of the "Basic Sink Kit", which includes the hinged countertop plus a sink basin. It doesn't include the faucet, water pump, or plumbing and the sink basin does not have a drain in the bottom - it's a simple collapsible basin. It's less than half the price of the Deluxe option, and will suit the needs of people who don't need running water - the basin can be filled from a Rotopax or other water container, and lifted out of the countertop and dumped to empty it.

BasicSinkKit(1).jpg


For both options, the basin collapses for storage and the countertop hinges into the drawer; the basin can be stored in the drawer and be quickly deployed but stored in a minimum amount of space.
 

jscherb

Expedition Leader
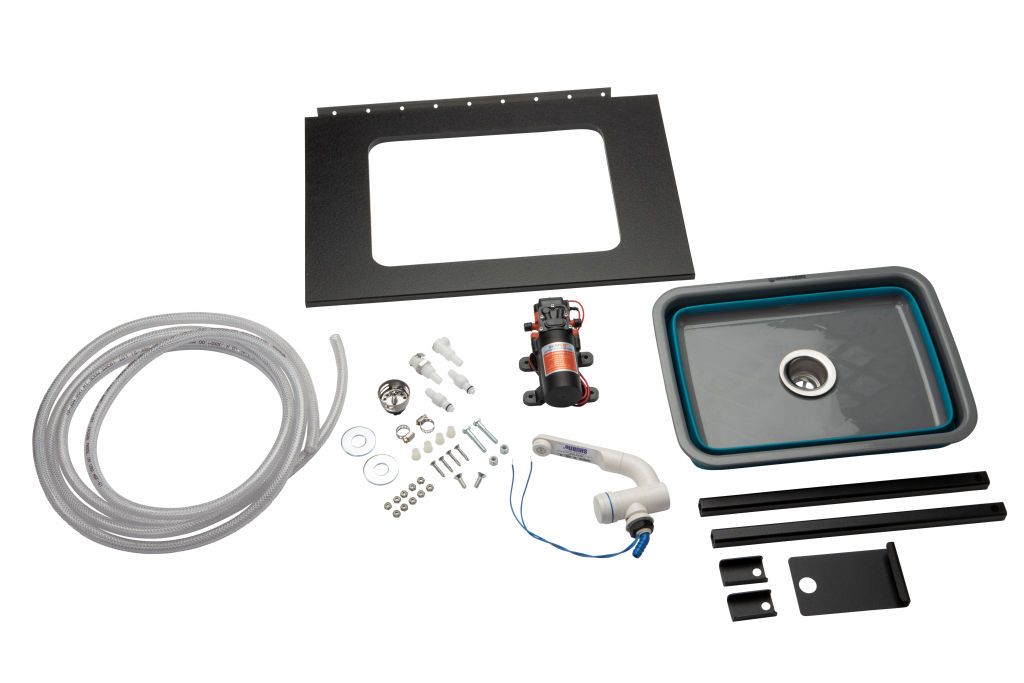
As soon as I clicked "post reply" on the above post, this photo of the Deluxe Sink Kit arrived in my inbox:

DeluxeSinkKit.jpg


It's got the same hinged countertop; same collapsible basin but with a drain with stopper/strainer basket, pump, faucet, hose and quick-disconnect fittings and adapter for drawing water from a Rotopax (or other water container with a similar cap).
 

jscherb

Expedition Leader
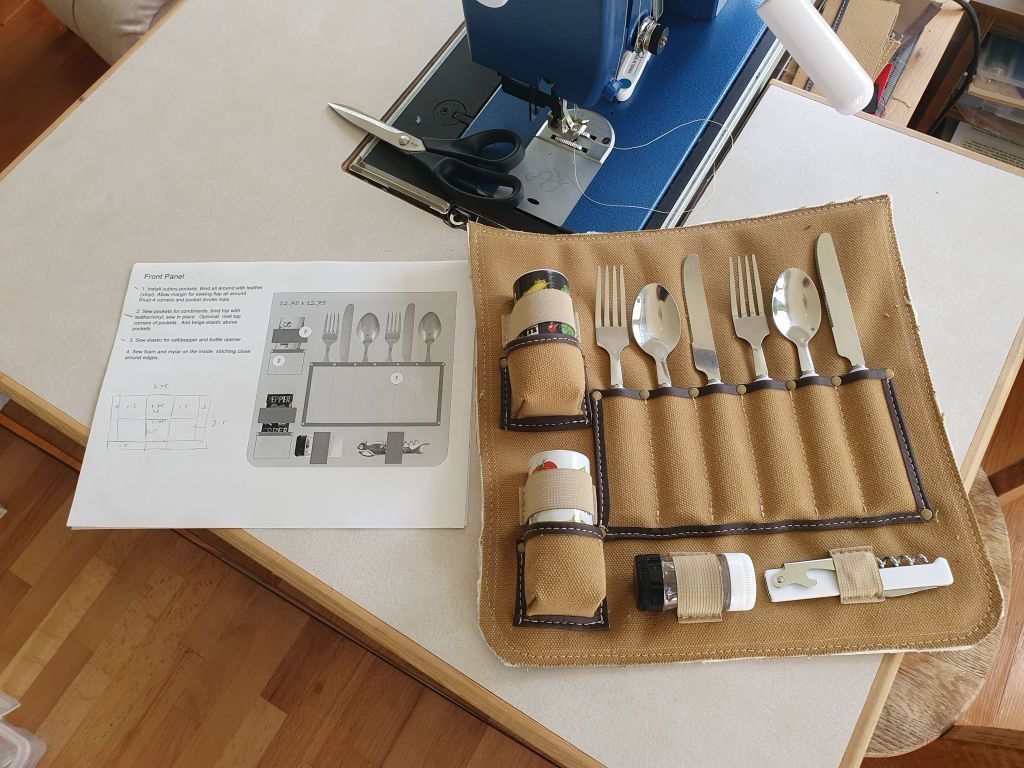
Many other priorities have prevented me from beginning the sewing of my new "Cool Bag" picnic bag design but I finally got some time to work on it. The sewing happens in several subassemblies; the first one is the front side of the bag - it's got pockets for cutlery, two condiment pockets, a place for a salt/pepper shaker and a bottle opener.

CoolBagAssembly1.jpg


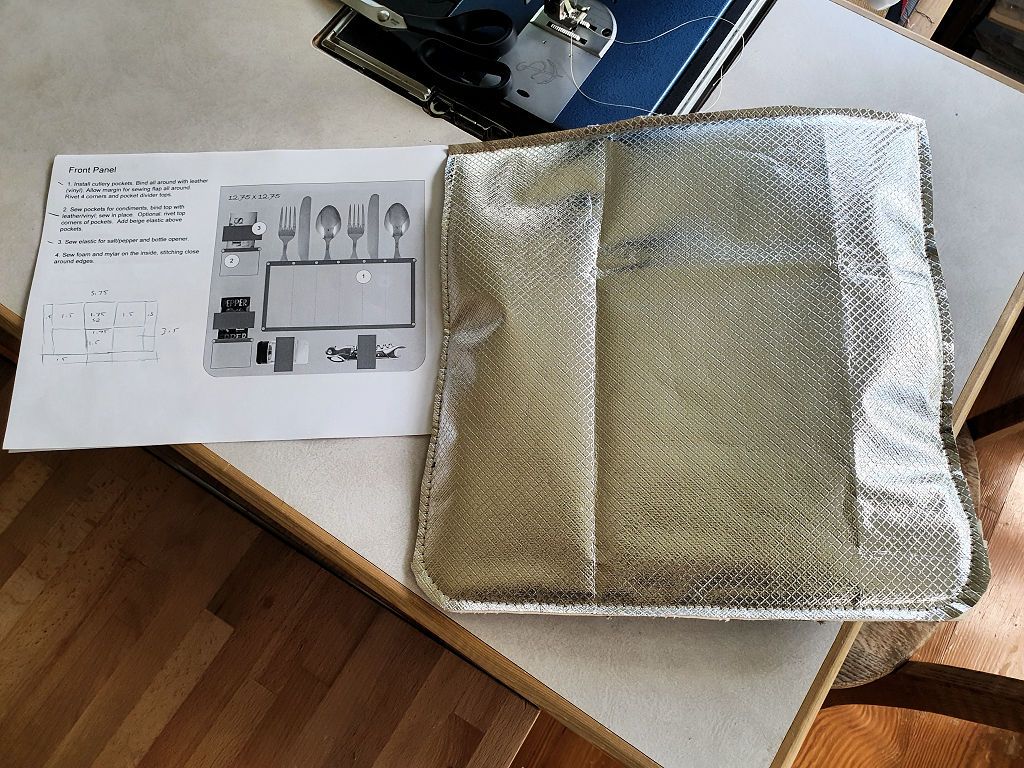
The main compartment of the bag will be insulated with foam and covered with ripstop mylar. The insulation goes on each subassembly that makes up the main compartment so when everything is sewn together the compartment is fully insulated. The insulation is on the back of this panel:

CoolBagAssembly1b.jpg


The next assembly is the front cover that goes over this panel; it'll zip open and carry plates and other items.

I'll post the subassemblies as I do them; maybe some people who are thinking of taking up sewing might be interested to see how a bag like this gets constructed.
 

OregonJKU

Active member
Many other priorities have prevented me from beginning the sewing of my new "Cool Bag" picnic bag design but I finally got some time to work on it. The sewing happens in several subassemblies; the first one is the front side of the bag - it's got pockets for cutlery, two condiment pockets, a place for a salt/pepper shaker and a bottle opener.

CoolBagAssembly1.jpg


The main compartment of the bag will be insulated with foam and covered with ripstop mylar. The insulation goes on each subassembly that makes up the main compartment so when everything is sewn together the compartment is fully insulated. The insulation is on the back of this panel:

CoolBagAssembly1b.jpg


The next assembly is the front cover that goes over this panel; it'll zip open and carry plates and other items.

I'll post the subassemblies as I do them; maybe some people who are thinking of taking up sewing might be interested to see how a bag like this gets constructed.
I like it! It's funny I'm looking for something like this right now. What will be the final dimensions? And what size plates will it hold?
 

jscherb

Expedition Leader
I like it! It's funny I'm looking for something like this right now. What will be the final dimensions? And what size plates will it hold?
It's designed to be fairly compact and sized between lunch bags (not large enough for 2 people) and large picnic backpacks (way too big). It'll be roughly 12" square and about 6 1/2" thick. The cold compartment will be 12 x 12 x 3 1/2" (holds two 20 oz. drinks and two foot long subs or equivalent). The utensil/condiments compartment will be about 11 1/2" square and about 3" thick. Should hold plates up to 11".

It'll have a Zip & Go zipper on the back so it can hang on the back of a Jeep seat (convenient if you want to keep cold drinks in it, they're easily reached from the seat). It'll also have a shoulder strap and backpack straps so it can be carried easily on a hike away from the Jeep.

It's meant to be small enough that it won't be a burden to carry in a cramped Jeep but large enough to carry lunch for two when you park the Jeep on the trail and hike the last mile to that scenic overlook. Grab some subs or salads and drinks before setting out for the day and enjoy a nice lunch.
 

jscherb

Expedition Leader
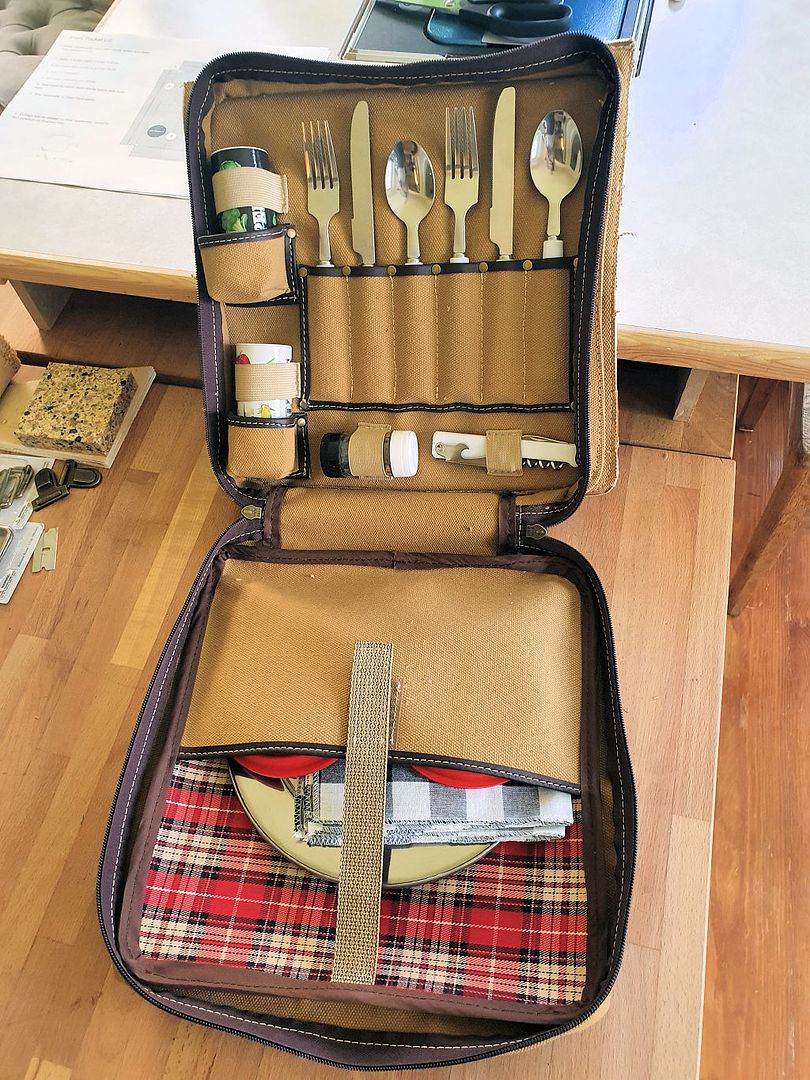
I had time today to work on the second subassembly of the "Cool Bag" picnic bag. Today's work was completing the "warm side" of the bag, which holds placesettings and condiments plus space for some food items, maybe small bags of chips, cookies, whatever.

The project looks like this so far. Needs some pressing to sharpen up the edges, but I'll do that once everything is assembled.

CoolBagAssembly2.jpg


The assembly so far is roughly 12" square, so it's pretty compact. Here's what it looks like when zipped open:

CoolBagAssembly2a.jpg


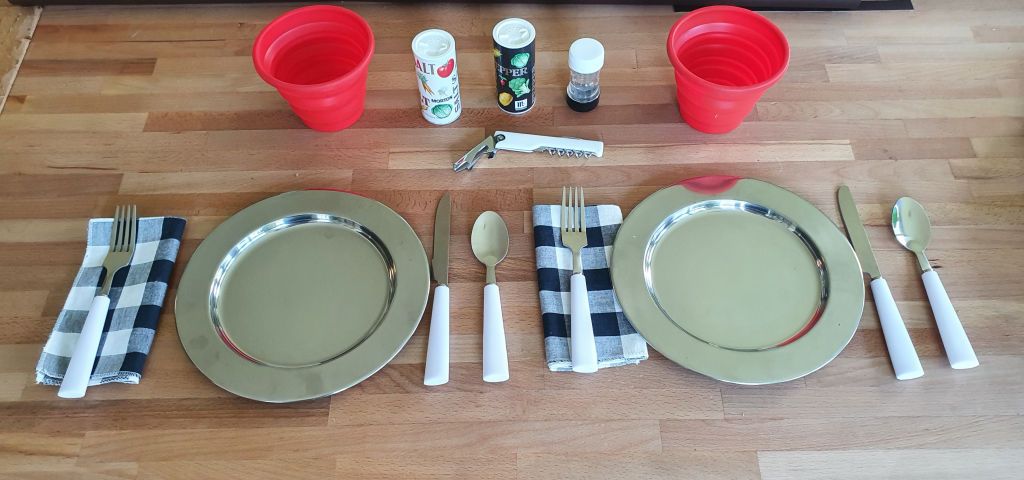
Laid out on my sewing table, this is everything that's in the photo above - two complete place settings including plates, silverware, collapsible cups, condiments, napkins and a bottle opener.

CoolBagAssembly2b.jpg


The cold section is roughly the same size and goes behind the warm section and that's the next thing to sew.

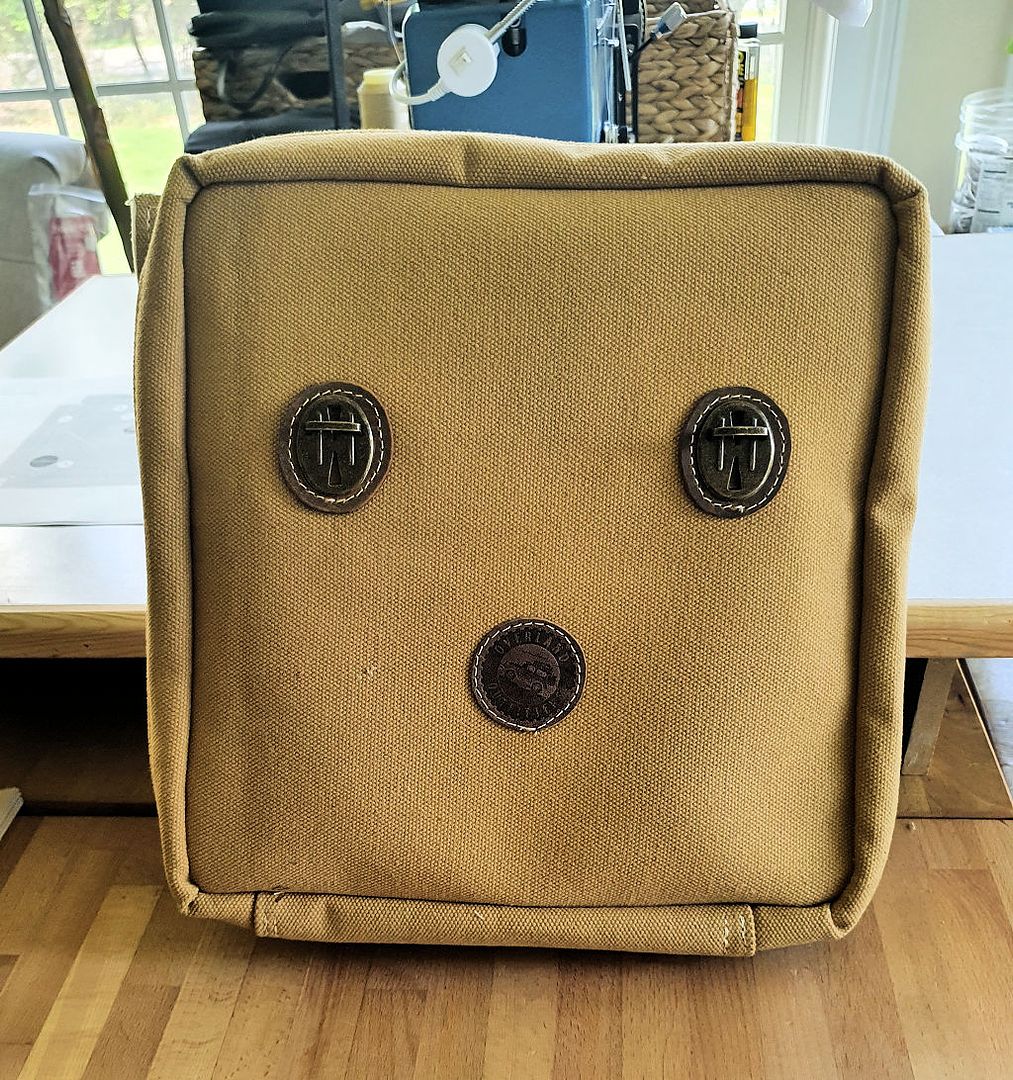
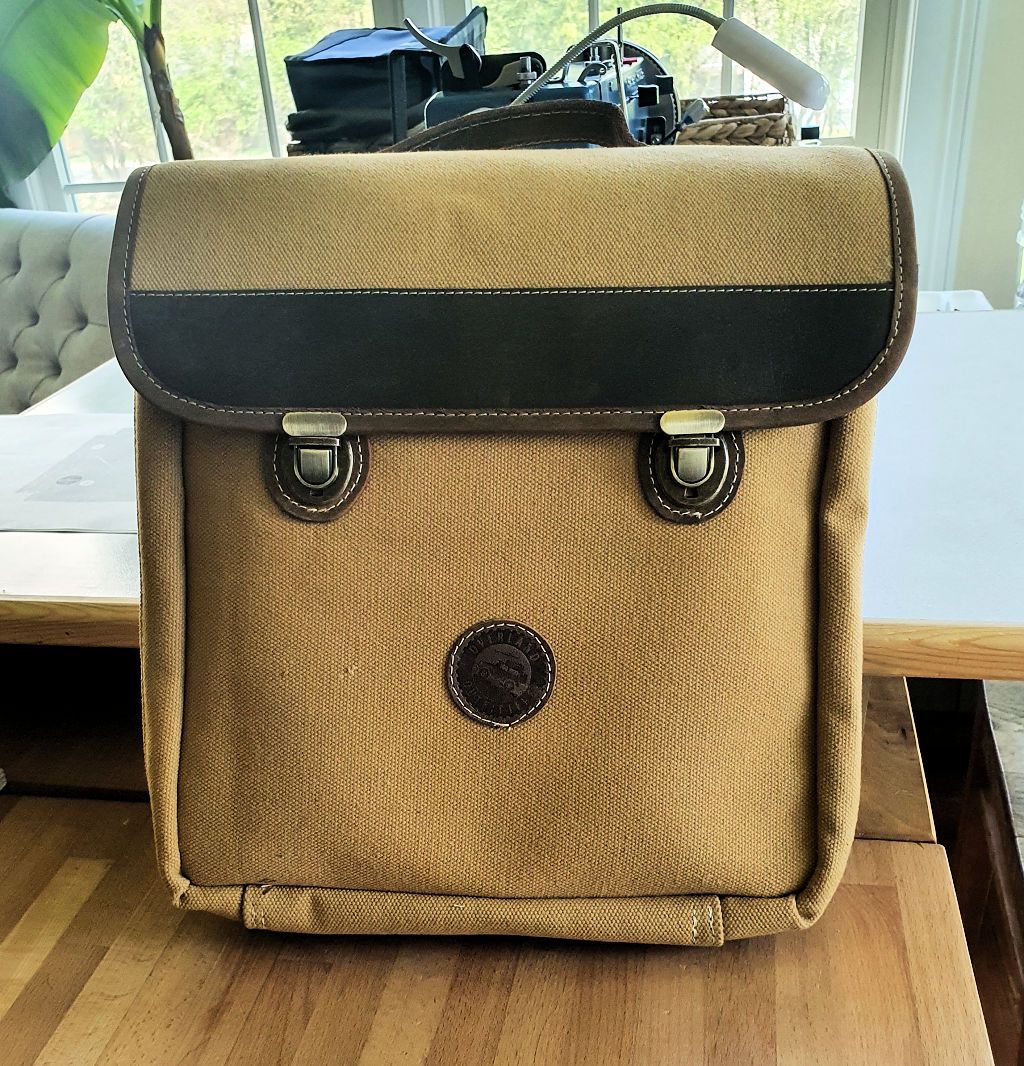
The final bag will look like this next photo; in this photo I've posed an Overland Outfitters 12" Grab & Go bag behind the Cool Bag assembly and used its top flap to simulate the top flap that will be on the Cool Bag.

CoolBagAssembly2c.jpg


So far so good, everything is going together according to plan and I'm about halfway done.
 

jscherb

Expedition Leader
Was able to get a little more time at the sewing machine this morning. Subassembly 3 is the side panel for the cool side of the bag.

CoolBagAssembly3.jpg


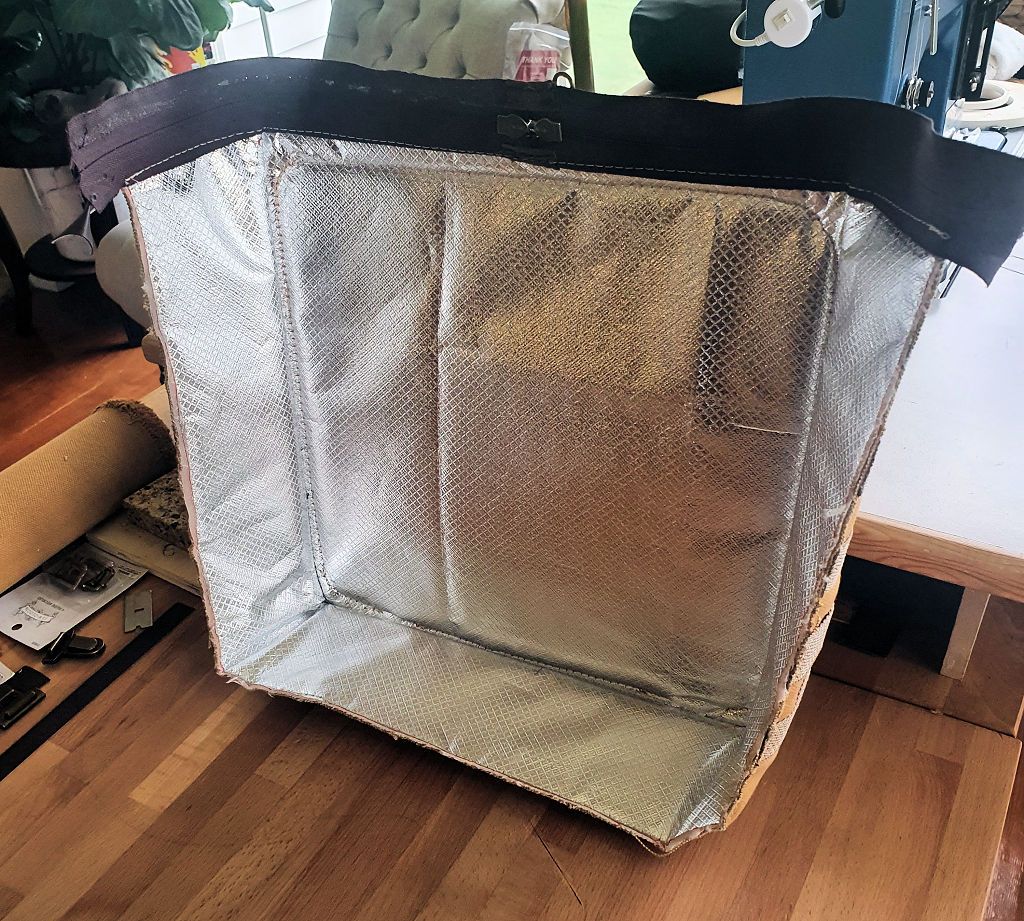
The inside is insulated with foam and covered in ripstop mylar.

CoolBagAssembly3a.jpg


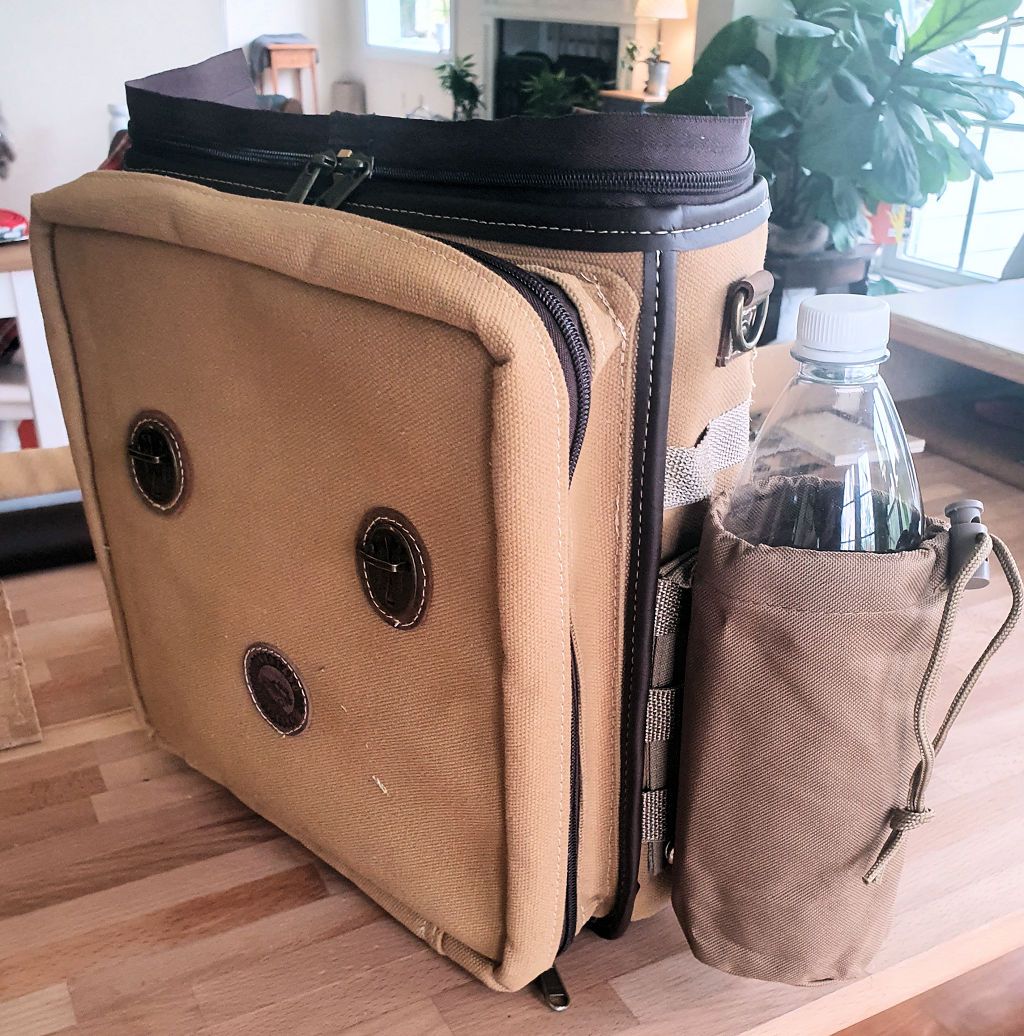
The PALS straps on the side are intended for things like insulated drink holders.

CoolBagAssembly3b.jpg


Two more subassemblies to go - the back + cool side lid, and the main lid.
 

jscherb

Expedition Leader
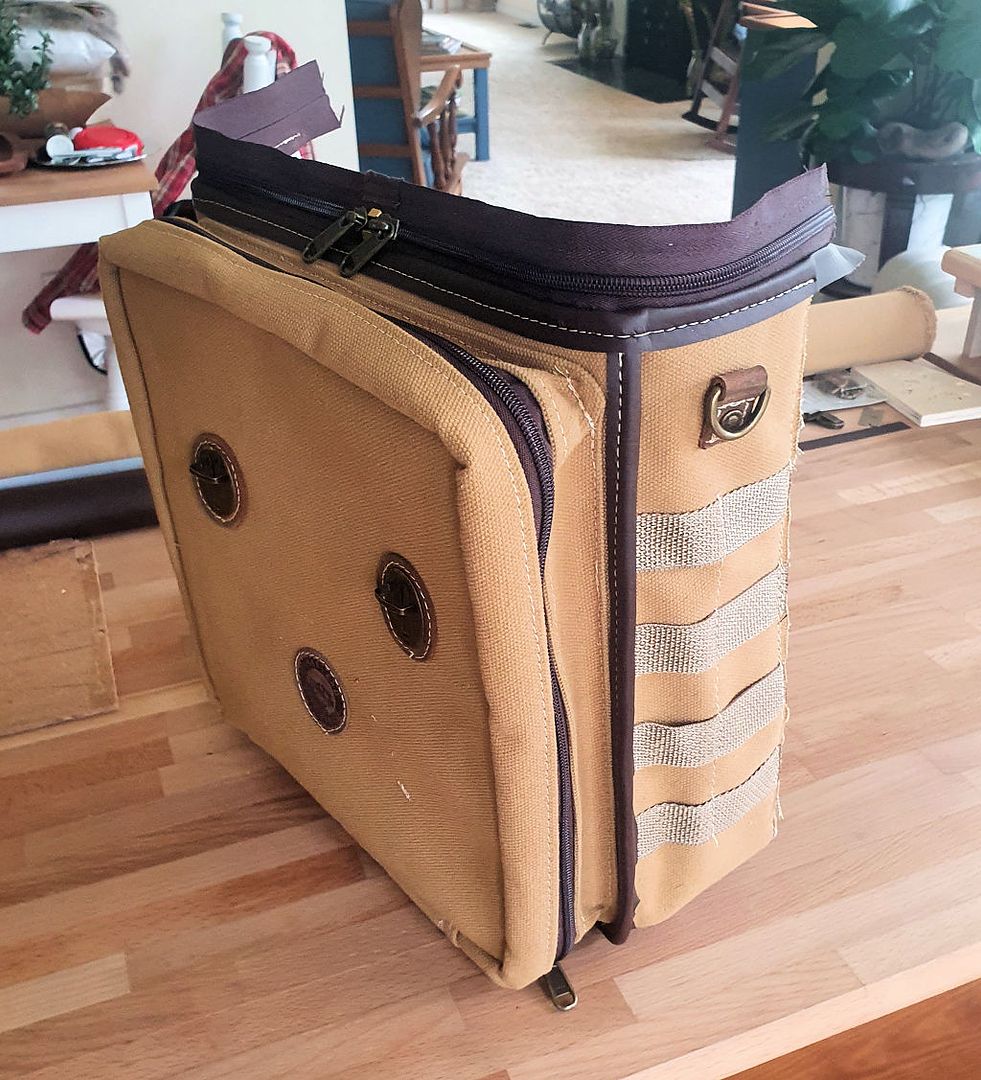
Progress on the "Cool Bag" yesterday, I sewed the 4th subassembly (the back and cool section lid) and assembled it to the bag.

CoolBagAssembly4.jpg


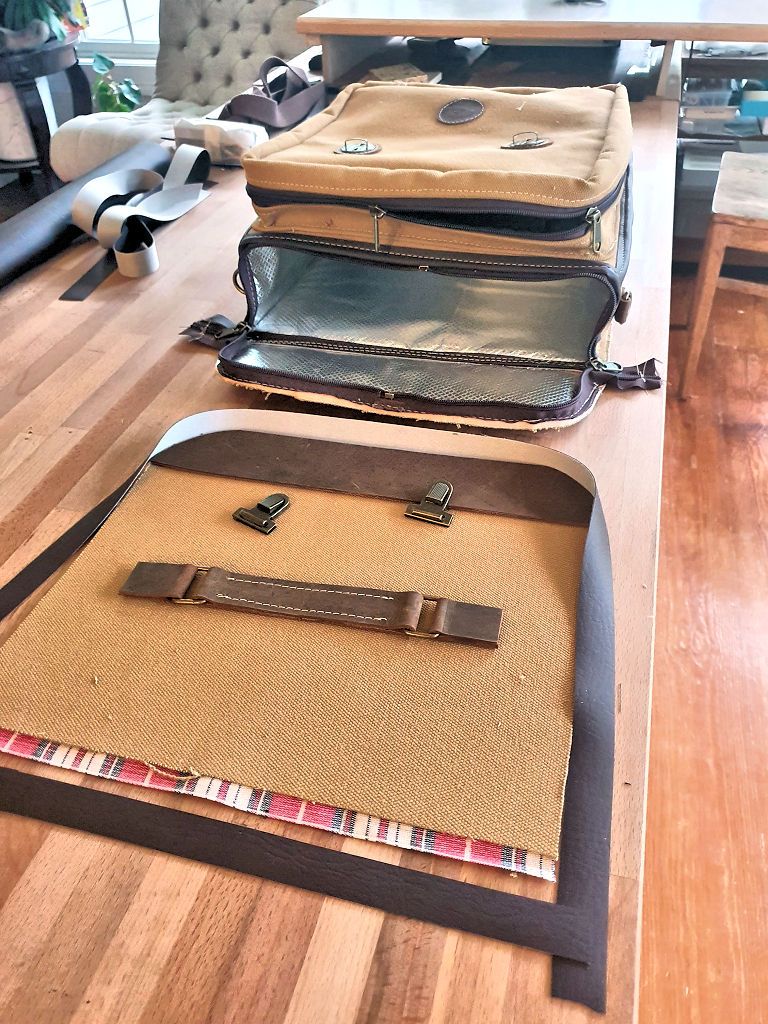
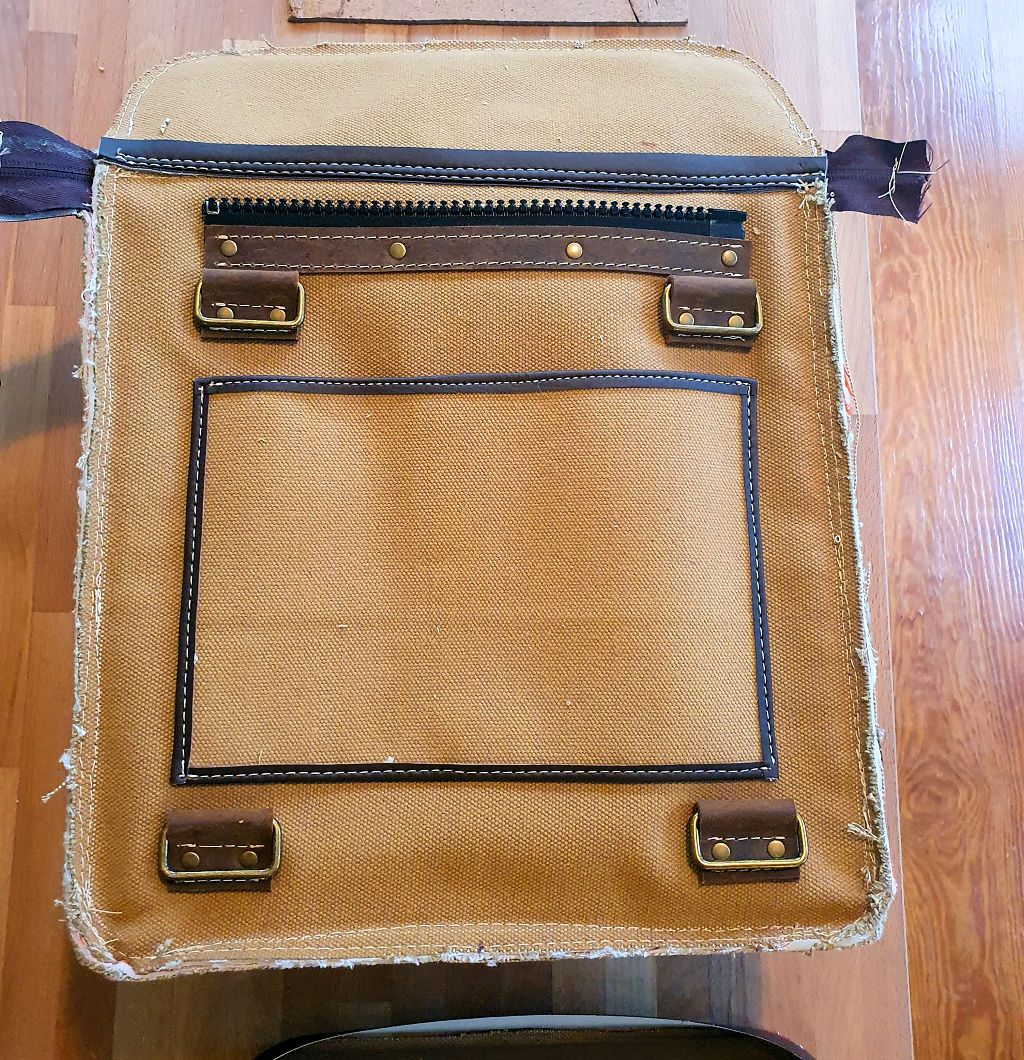
There's still some trimming and seam binding to do as you can see in the next photo, but this shows the hardware on the back. The zipper is for hanging to a Zip & Go attachment on the seat and the 4 loops are for backpack straps for hiking. There are also loops for a shoulder strap, they're just visible on the side in the photo above. For extra strength I've used both stitching and rivets to attach the hardware. Also added a flat pocket on the back, not sure if that will be useful or not.

CoolBagAssembly4a.jpg


Only a few details left - trimming and binding the seam around the back and finishing and attaching the main lid. Won't get any time to work on it today, hopefully will finish it Thursday morning.
 

Jurfie

Adventurer
NICE! I love it. That pocket on the back would be handy to put a few napkins to wipe off any wayward Grey Poupon.

Great job! (y)
 

jscherb

Expedition Leader
NICE! I love it. That pocket on the back would be handy to put a few napkins to wipe off any wayward Grey Poupon.

Great job! (y)
Thanks! I wasn't sure what a pocket on the back might be used for - napkins was one thought I had, maybe a map or papers that you wouldn't want mixed in with the food, I don't know. This is a first prototype, so I'm experimenting with ideas like the pocket to see what's useful. When I make something like this I make it for my own use, but if a company decides to pick up the design I'd tell them what features work, what doesn't, what I'd add, etc. based on my own use. I promised my wife a picnic as soon as it's done, so it'll picnic test pretty soon.

Also sewing a prototype like this gives me more ideas; I'm now planning another smaller insulated bag just for drinks in the Jeep, it'll also hang on the seat back using the Zip & Go mount.

Hopefully I'm not boring people with the subassembly-by-subassembly posts, maybe they will inspire people who want to get into sewing their own accessories.
 

Forum statistics

Threads
188,342
Messages
2,905,813
Members
229,959
Latest member
bdpkauai
Top