Battleship Jones: 2015 Tacoma DCLB Build Thread

Adventurous

Explorer
Who is your insurance? I was rear-ended and got a check from State Farm that I used to purchase a Bodyguard rear bumper and have it shipped to me.

I would go for a heavy duty bumper if funds allow, otherwise, stick with what the insurance will cover.

The check from insurance will cover a portion of an aftermarket bumper, though that portion will vary based on the options selected and company chosen. Right now the 4X Innovations standard rear bumper with swingout is a tempting option. It is one of the few double shear (yay for good design!) I can find that isn't in the neighborhood of $2K shipped and they advertise reasonable wait times.

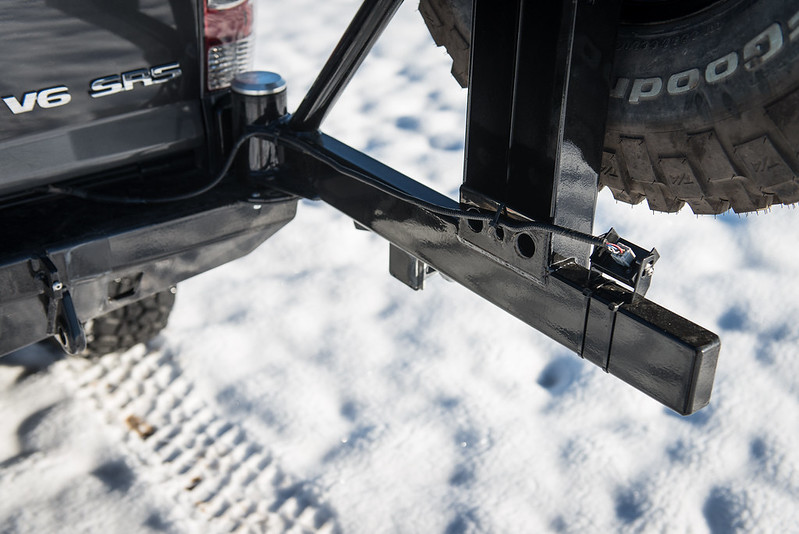
I can't say enough good things about my CBI Bushmaster 2.0 rear bumper. I have the swingout with spare tire carrier, gas can carrier, and hi-lift mount. Admittedly, with all 3 mounted back there, it is heavy. For day-to-day driving, I don't carry the hi-lift with me, but I do always carry my spare tire and 5 gallons of gas. I currently have their older style (purchased in 2013) with the oilite bronze bushings in the spindle; their newer versions have roller bearings in the spindle and are supposed to be much easier to open and close. I will find out soon enough, because like you, I was recently rear-ended and the other guy's insurance is buying me a new rear bumper (since he tweaked the swingout spindle to where it wouldn't open properly). I got an insurance check large enough to pay for any bumper on the market but I opted for the same exact bumper from CBI.

Is it necessary? I'd say that's up for you to decide based on your usage. I like the extra work space of the fold-down table for cooking, etc, and I also like the fact that my spare is not under the truck.

Those are my main motivations as well. I like the thought of having a fold down table at my disposal for those quick little meal prep situations instead of busting out our 6' folding table that I carry along. I also dislike having the spare under the truck for a multitude of reasons and would love the ability to carry the spare plus gas cans, the hi-lift, and traction boards on the rear bumper. That would free up a lot of space on the roof of my vehicle where I generally do not like to keep those items.

I like the CBI bumpers but I don't think one of those is in the cards financially. Unfortunately my insurance check wasn't generous enough to grab any bumper out there so I had to knock them off the list. Glad to hear it all worked out in your favor however!

I have an all pro standard bumper. I like that it moves the hitch up, as sooner or later the hitch will drag when it's in the stock position. Also, of course, you can use a high lift on it, and it has two shackle mounts. What I don't like is that to move the hitch up, the hitch also has to move forward a bit, which can limit the size of tire that will fit underneath. I think that might be a problem with all of the bumpers that move the hitch up, but I'm not sure.

Check out http://www.insainfab.com/home.html. The website does not do his product justice. Really nice work, and he also works in aluminum. There are more pictures in the CO section of TW. Also, if you decide to stay with the stock bumper, I'll bet you can find on on CL, as people sell them when they put plate bumpers on. Glad you and your truck are not worse off. People driving with heavy trailers should be leaving a bigger gap.

If I were to get a non-swingout rear bumper it would have to accommodate a 255/85 in the spare location which as you mention the All-Pro does not. I may end up stepping back down to a 265/75 at some point so that would be less of an issue, but that's not the situation currently. The other disadvantage to me is that the All-Pro high clearance hitch is not weight rated. That might not be a big deal to most, but I foresee a 4K lb trailer in my near future and prefer the assurance of a DOT tested and rated hitch. So far the only company I can find that will stand behind their hitch rating is 4X Innovations/Armortech.

Unfortunately I don't think the Insain stuff is in my budget either. I may inquire to see if they are even in the ballpark of what I'm willing to spend, perhaps their locality would offset some of the shipping costs the other guys charge.

I would also try to spring for a HD bumper of your choice. As for the spare tire carrier, fuel cans, etc., I think it depends on your future plans for the truck. Are you moving to 35's? Planning any really remote long distance overlanding?

35s would be cool but I don't see going in that direction. It would be an expensive waterfall of trimming, gears, and tires for modest benefit considering what I do with the truck. I do prefer to travel in more remote locations, so the extra fuel would definitely be a plus. My biggest concern at this point is spending extra money and adding additional weight to the vehicle if there will be minimal benefit. There's nothing worse IMO than ending up with a vehicle that is built way beyond what you do intend to do with it. I prefer to think of myself as someone who likes to explore and be prepared for getting to those special places that most don't visit. Not to mention there are only so many dollars to go around, might as well be conscious spending them for the right reasons!

Thanks for the feedback all. Keep it coming. I've mulled over the rear bumper decision for years and were I to do it over again would probably have opted for a rear bumper before a plate bumper up front but hey, it is what it is at this point. Just want to make sure I solicit the feedback of those who have been there done that before I plow forward.
 

Adventurous

Explorer
It's been a little while since I have updated this thread. I haven't stopped doing stuff, just haven't taken the opportunity to update this thread. So in the name of catching up, the first thing I added recently were a set of Total Chaos bed stiffeners. They first came to my attention a few months ago and my initial impressions were that they were a bit of a superfluous item but could perhaps be useful for folks who needed additional lashing points or a CB mount. More on that later of course.
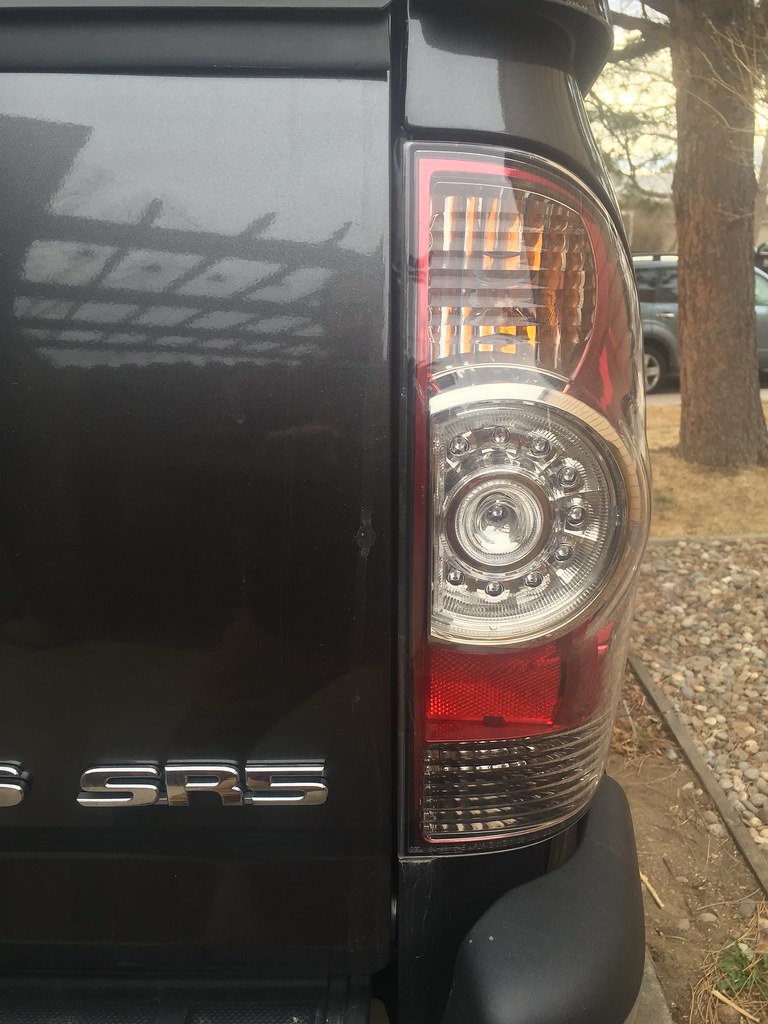
Over the past few months it seemed to be that I could see a bit more daylight in the rear view mirror in the tailgate to bedside gap. I couldn't be 100% positive as it was like watching grass grow, it's so slow that you never really notice until it's big. So I checked things out a couple of weeks ago and was displeased to see that my truck was displaying the dreaded splaying that can come along with the composite bed and having significant amounts of weight, in my case a topper, resting on the bed sides. This picture is post bed stiffener install, but you can see how it permanently pushed the bedsides out leading to an uneven gap along the tailgate. Sad face.

IMG_2225 by Tim Souza, on Flickr

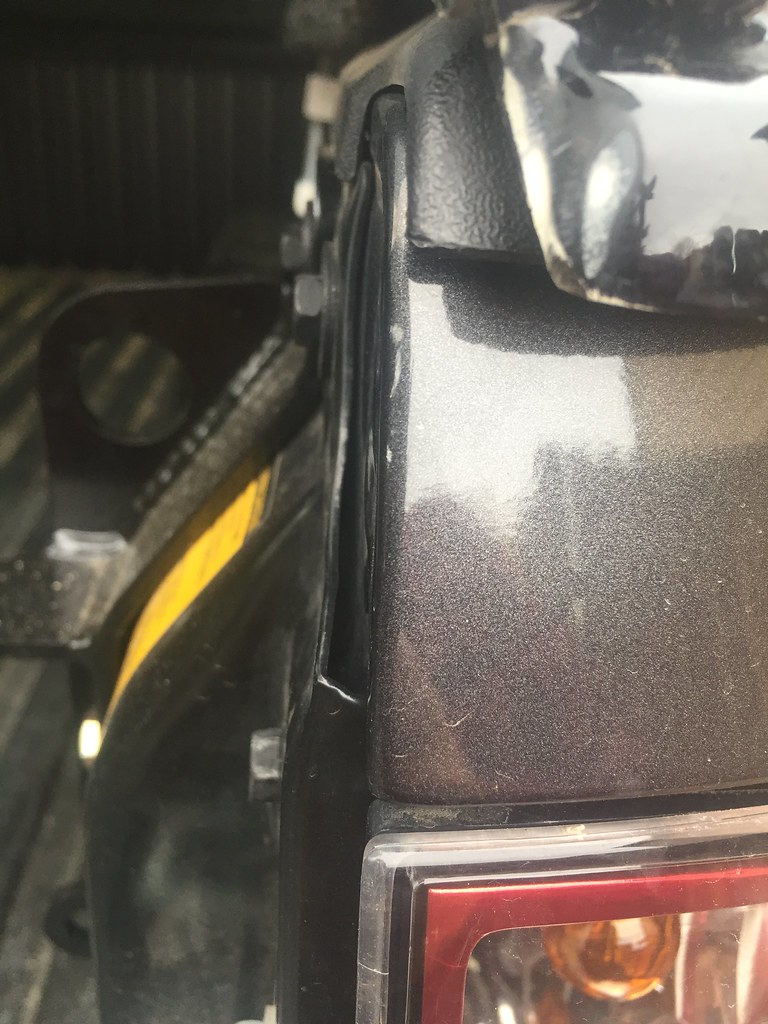
How do you know if your bedsides are spreading and if you are a good candidate for a set? Check out the gap in the bedside to sheet metal support. Again, post bed stiffener install so it pulled it back a little bit. These two pieces should be flush. Clearly they are not.

IMG_2227 by Tim Souza, on Flickr

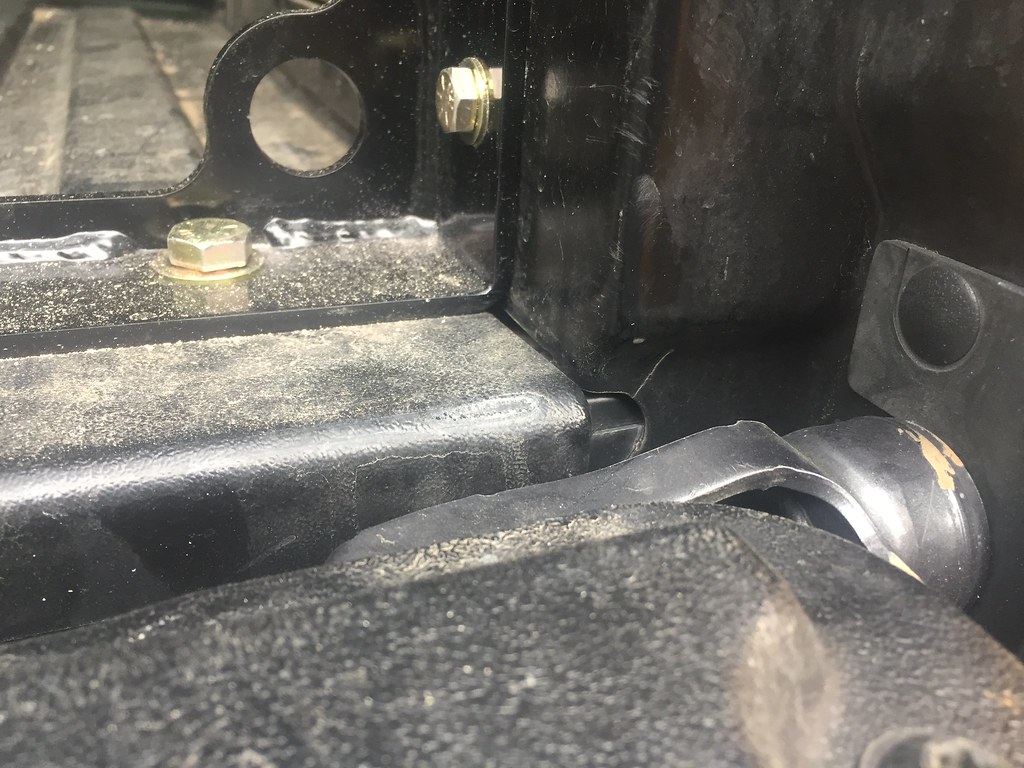
How else can you tell? The metal support starts tearing. It is not exactly unheard of for this to happen, but that's little consolation. I wish I had caught this sooner.

IMG_2226 by Tim Souza, on Flickr

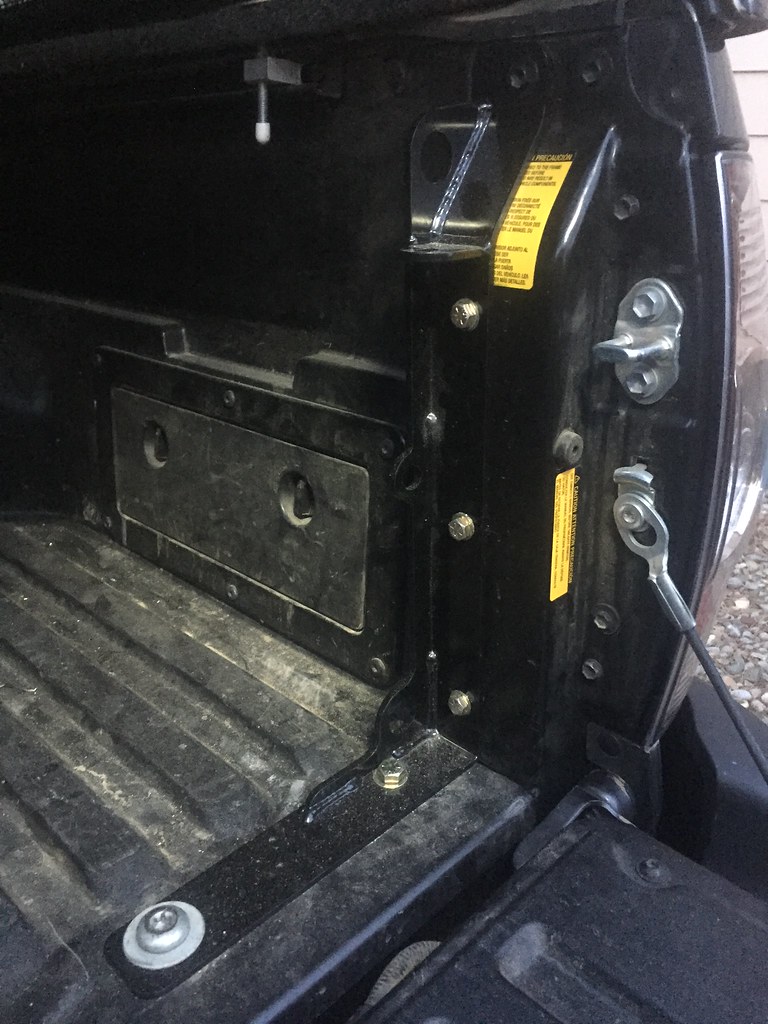
Installation is pretty straightforward though it requires drilling 6 holes, 3 per side. The instructions Total Chaos provides are pretty good and I mostly followed them with the basic premise being tighten bolts from bottom to top so you don't snap any of the bolts. I used a ratchet strap on the tailgate latches to pull everything in before snugging the bolts down to try and bring things back in line. I may try again to adjust things and see if I can bring them in some more, but the good news is you can see the bedsides/rear end wagging a lot less over bumps.

IMG_2229 by Tim Souza, on Flickr

Not sure what else I can do at this point. I'll have to try perusing the parts diagrams to see if these can be replaced. The other side has 2 cracks in it, so apparently it's not just an anomaly. Word to the wise, you may way to check out your truck. If you have heavier loads like a topper or a roof top tent on bed bars, you might want to consider these sooner rather than later.
 

Adventurous

Explorer
I really have to get caught up on updates.

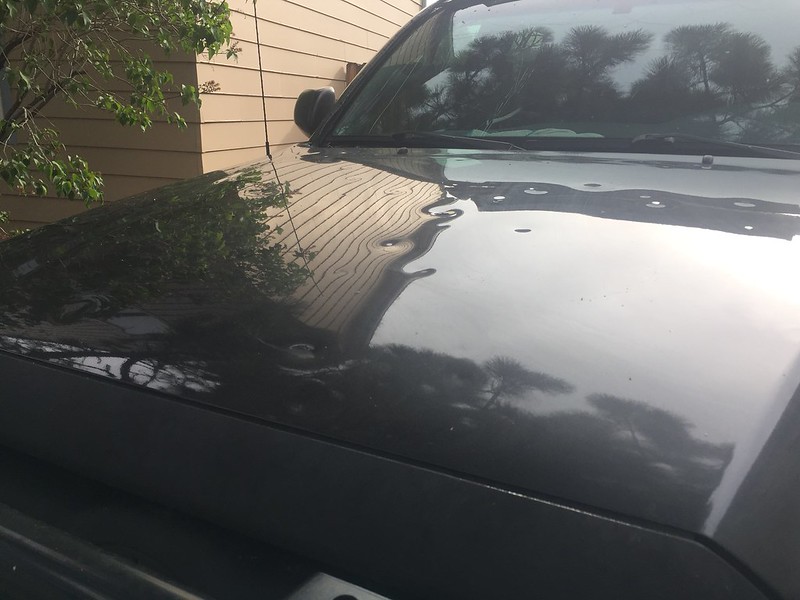
Recently I've been exploring alternative means to get back some MPG as all of these mods are sucking gas. This led me deep into studies of physics and I came across some interesting work on aerodynamics and the science of dimpling. Dimpling is what helps golf balls fly further and I was thinking that I could take advantage of the principle to perhaps gain some aerodynamic advantage over the current state.

I mapped out a plan in my fluid dynamics program and executed it pretty neatly I think. Not everyone will like the look or agree with what I've done, but only the haters will be able to disagree with the crazy MPG gains I'll be seeing.

IMG_2351 by Tim Souza, on Flickr

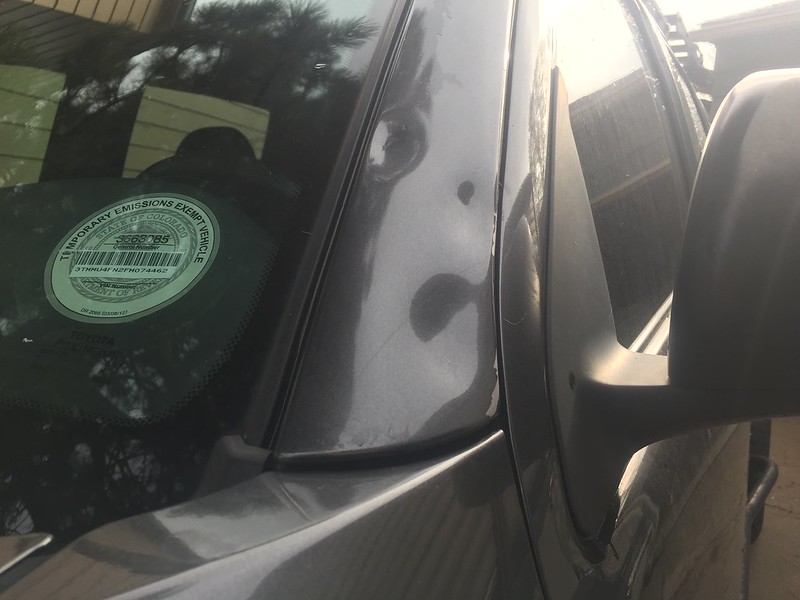
Cracked and chipped off some paint with this one, but it probably won't be a big deal.
IMG_2350 by Tim Souza, on Flickr

IMG_2349 by Tim Souza, on Flickr

IMG_2348 by Tim Souza, on Flickr

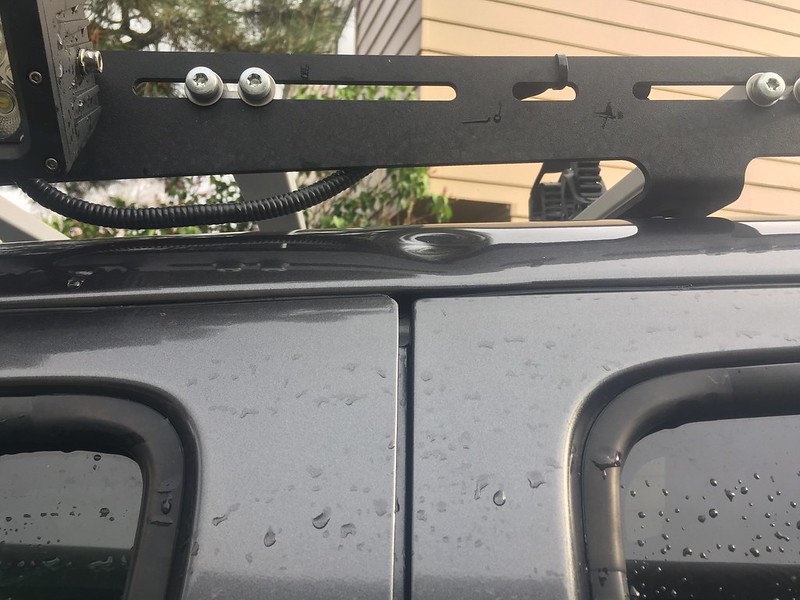
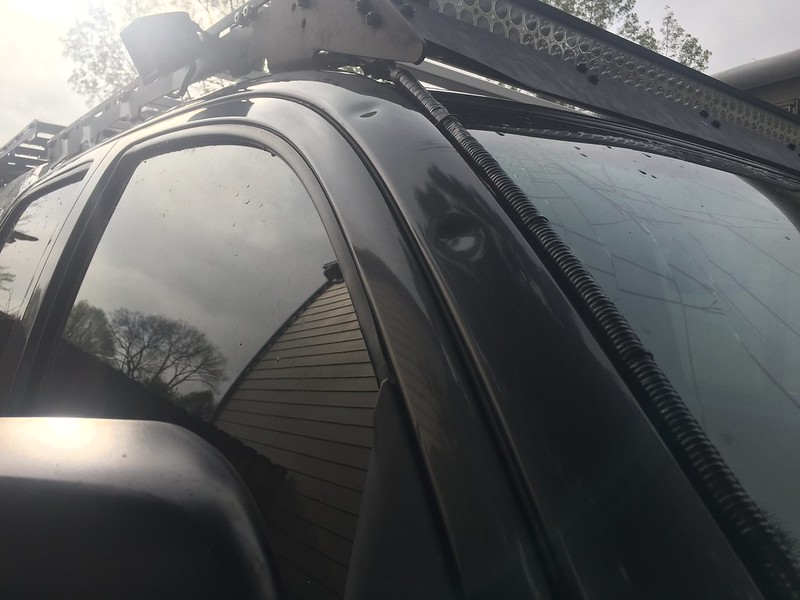
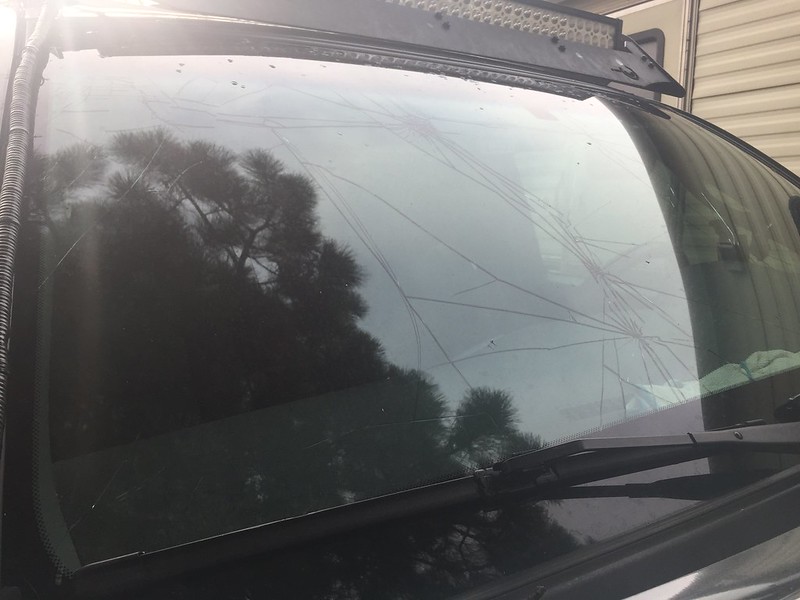
Figured I'd do the windshield as well to induce laminar flow over the roof. Hard to argue with results!
IMG_2347 by Tim Souza, on Flickr


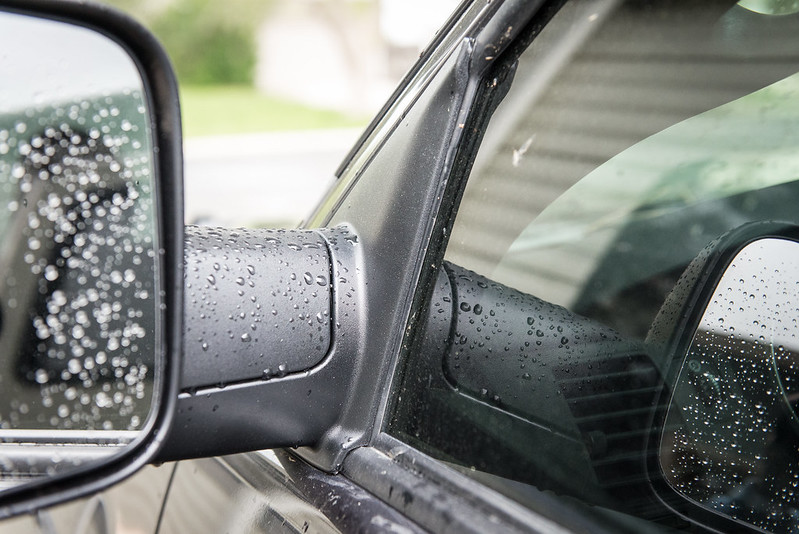
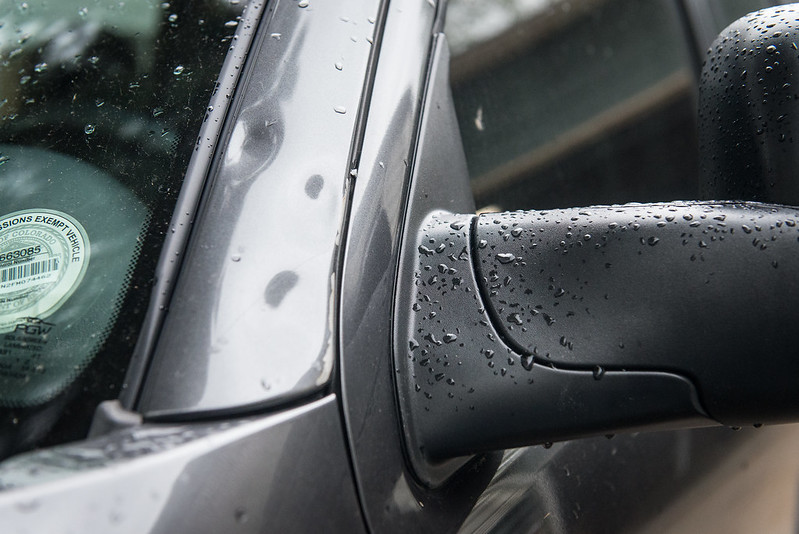
Just kidding of course. We got blasted by hail that was hearty italian meatball sized yesterday afternoon. The parking lot at work was carnage, blown out windows, windows in buildings were broken, most cars had moderate to severe damage. Most of my body panels got fairly well worked over; the bedsides, the driver's door and the driver's side rear door were spared. It is currently sitting immobile in my driveway due to the windshield, so now I have to wait for the insurance agent to come by and assess the damage and see how bad it's going to be.
 

Watt maker

Active member
Man, that sucks to see that. Are you going to get the dents repaired? There was some crazy weather around here this week as well but luckily not enough to damage anything.
 

Kiriesh

Adventurer
Man this is the 3rd vehicle I've seen on forums that got damage from that hailstorm. I saw a couple month old 3rd gen with similar golfball treatment and a wrangler with a decimated soft top. Hopefully they get you all worked out, I love your build.
 

Adventurous

Explorer
Man, that sucks to see that. Are you going to get the dents repaired? There was some crazy weather around here this week as well but luckily not enough to damage anything.

Yup! Insurance will cover all but the $500 deductible so I'm going to take it in and get it all fixed up. A closer inspection revealed there were hail dents to every single sheet metal surface on the vehicle as well as the fiberglass topper and as you can tell from the pictures, the ones on the A-pillar took paint with them. At this point I'm just hoping that they can get them all through PDR and don't have to do much body work.

Man this is the 3rd vehicle I've seen on forums that got damage from that hailstorm. I saw a couple month old 3rd gen with similar golfball treatment and a wrangler with a decimated soft top. Hopefully they get you all worked out, I love your build.

Thanks!

USAA has treated me right so far and has been pretty painless to work with through the 4 claims I've had in the past 3 years (2 hail, 1 not-my-fault totaled vehicle, 1 rear ended). Honestly, at this point I'm getting a bit tired of this bad luck streak and just want to enjoy my things without having someone or something else ruin them.
 

Adventurous

Explorer
The hail damage estimate came in today and boy what a whopper. It came in at over $7K and that covers replacing the hood, the topper and REPLACING THE ROOF!!! Apparently I will, for a brief period of time, have the only topless Tacoma that I'm aware of.

Truck will be in the shop for perhaps 2-3 weeks once I figure out where to take it. Oh well, what can you do.
 

Watt maker

Active member
The hail damage estimate came in today and boy what a whopper. It came in at over $7K and that covers replacing the hood, the topper and REPLACING THE ROOF!!! Apparently I will, for a brief period of time, have the only topless Tacoma that I'm aware of.

Truck will be in the shop for perhaps 2-3 weeks once I figure out where to take it. Oh well, what can you do.

Ouch! At least your insurance is taking care of you. Now comes the hard part, picking a body shop that doesn't cut corners and does the job right from start to finish.
 

Kiriesh

Adventurer
The hail damage estimate came in today and boy what a whopper. It came in at over $7K and that covers replacing the hood, the topper and REPLACING THE ROOF!!! Apparently I will, for a brief period of time, have the only topless Tacoma that I'm aware of.

Truck will be in the shop for perhaps 2-3 weeks once I figure out where to take it. Oh well, what can you do.

Be glad your truck is worth enough to not get totaled. I've seen jeeps get totaled from hail like you had. Maybe they can throw some sound dampening material in there while they're at it :agree:
 

Adventurous

Explorer
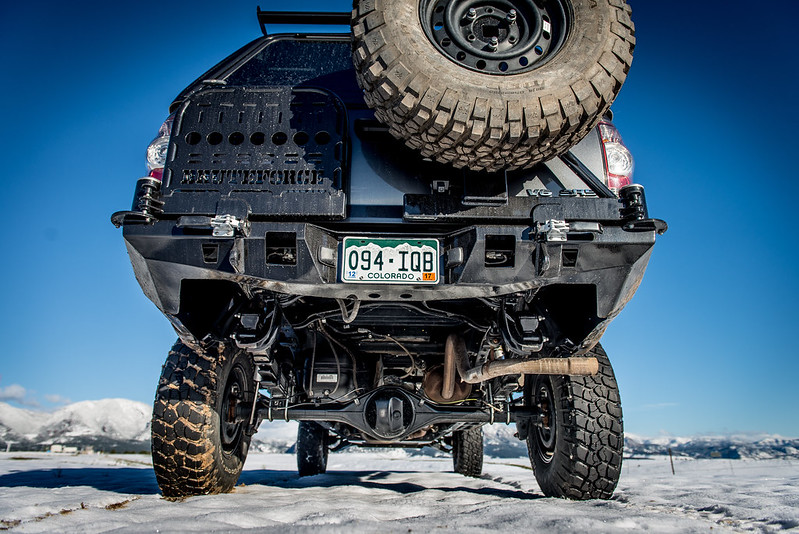
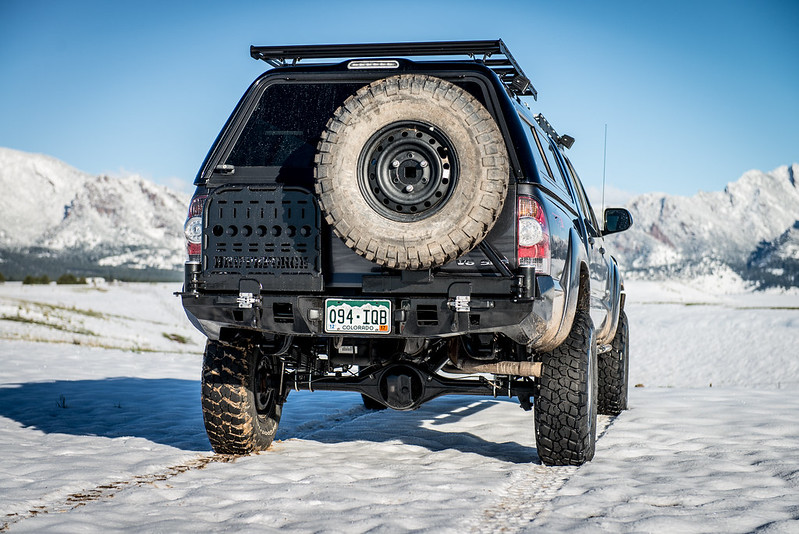
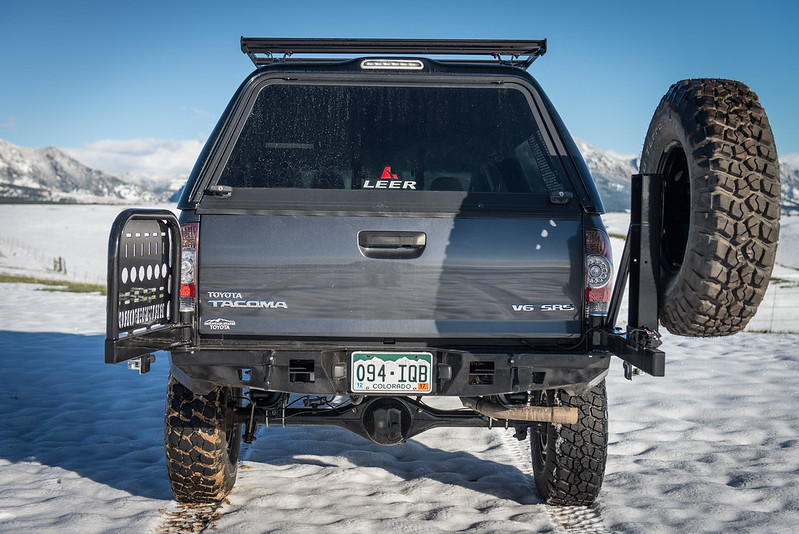
The resolution to my rear end collision in January has finally come. Well, it came about a month ago, but life got in the way so I am only writing about it now. Anyway, skip to the bottom if you want to see pictures, otherwise you are welcome to read about my experience with Billy at Bruteforce Fab.

My desires:
Standard rear bumper
light cutouts
integrated hitch
dual swingsouts

I contacted Billy in mid-January through his website on Wednesday 1/18 to inquire about a dual swingout bumper. He called me that evening and spent 15 minutes on the phone answering my questions and talking pros/cons for dual swingout vs. single swingout. We talked about the various options, his construction techniques, and design philosophy. He was very personable to talk to on the phone and never once seemed less than genuine or tried to cut the call short.

I took a few days afterwards to ponder my options before contacting him via text message to place an order. He emailed over the invoice on 1/23 for a deposit in the amount of half of the bumper cost. Lead time was quoted as 8-10 weeks.

I followed up with him after 8 weeks to see how things were coming along. Once again, he was very responsive via text and let me know things were coming along and that it was on track to be completed within the 10 week quoted time frame. I checked in again at week 9.5 as I was going on vacation in a few weeks time and he was apologetic and let me know that the spindle cages that were on backorder had just shipped and would delay completion of my bumper by about a week. Completely understandable and he was transparent about why things were delayed and assured me that my bumper would be completed on time. As promised it was completed the following week on-schedule and he contacted me to arrange shipping. He ran a few different shipping scenarios for me, shipped it out on time with no BS, and it was in my possession a few days later.

Initial impressions:

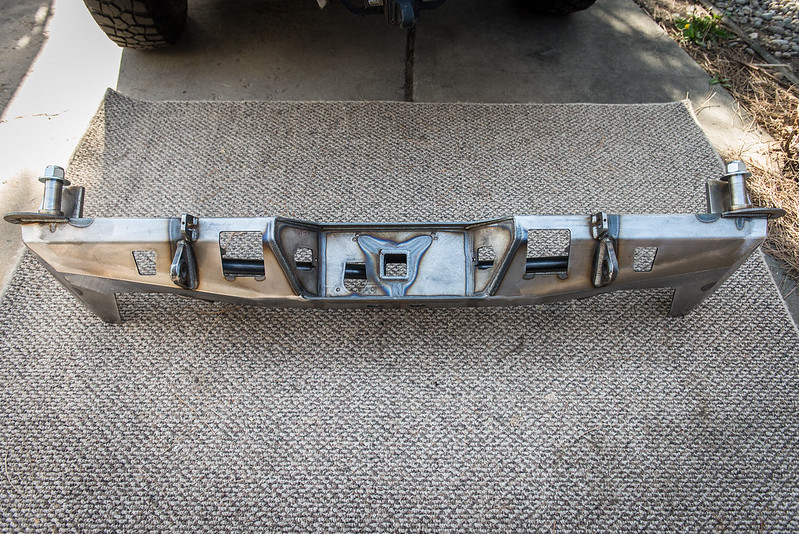
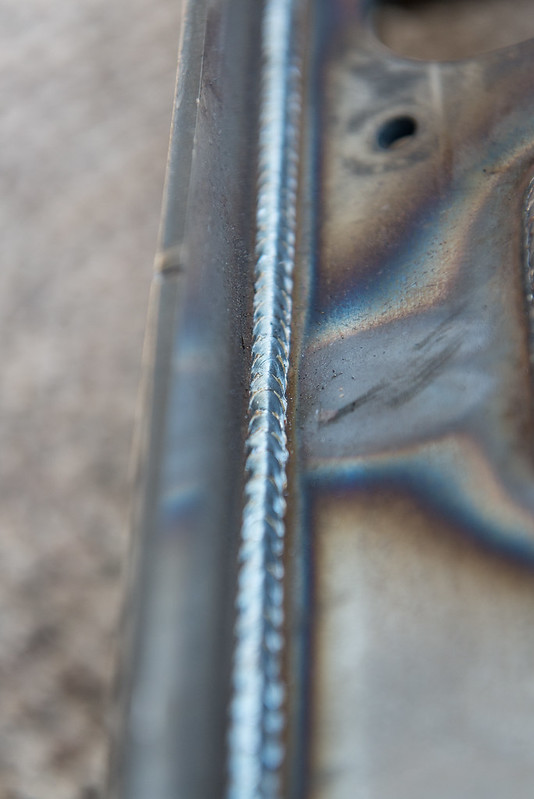
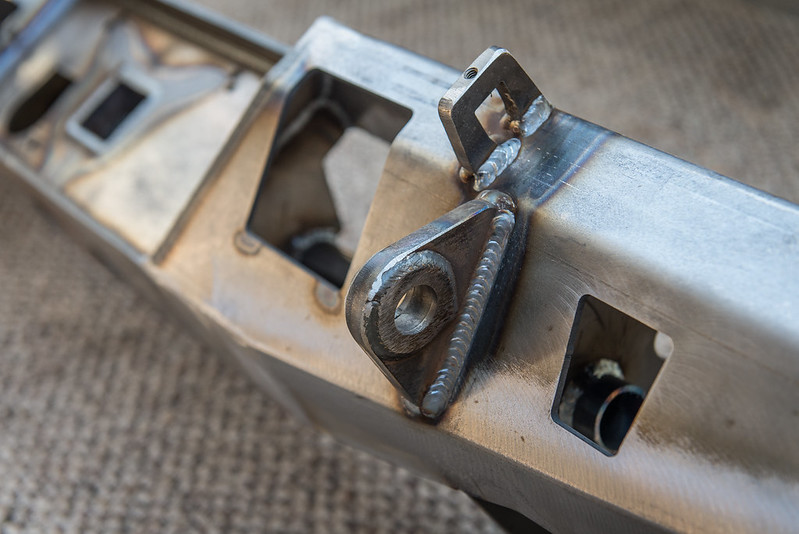
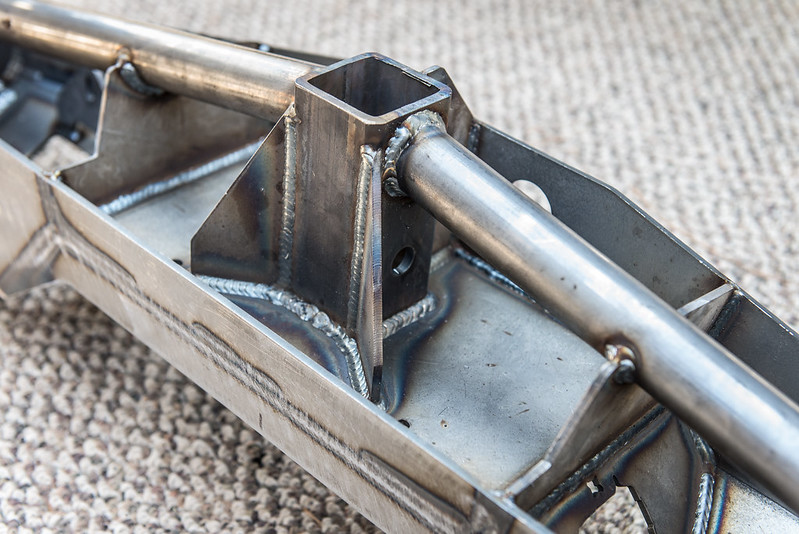
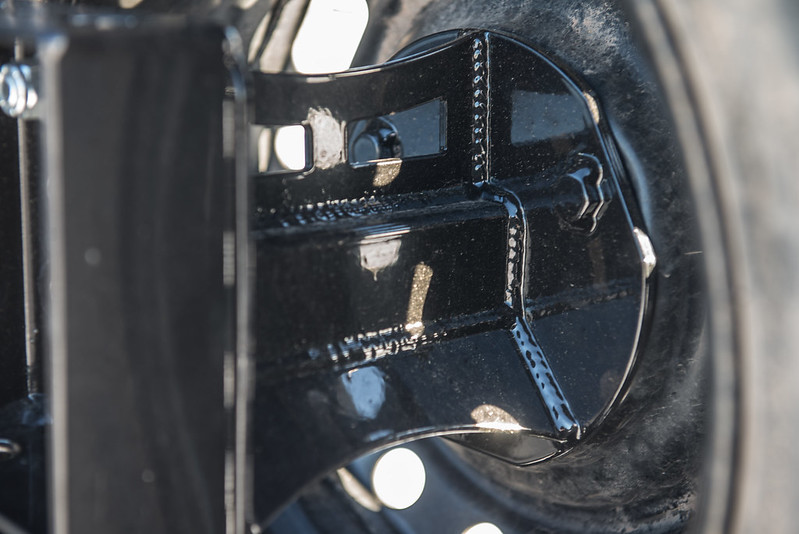
Qualifier, I am an engineer who is detail oriented and has experience in fab shops, so my expectations were high. When it showed up it was beautiful. All welds are meticulous and high quality. The design of the bumper is solid and very well thought out. It is very well gusseted all around and the embodiment of a conscientious craftsman. All parts for assembly were present and I appreciate the time spent to design a camera relocation.

Here are some pictures of the bumper after it arrived on my doorstep.

20170412-DSC_2240 by Tim Souza, on Flickr

20170412-DSC_2241 by Tim Souza, on Flickr

20170412-DSC_2238 by Tim Souza, on Flickr

20170412-DSC_2237 by Tim Souza, on Flickr

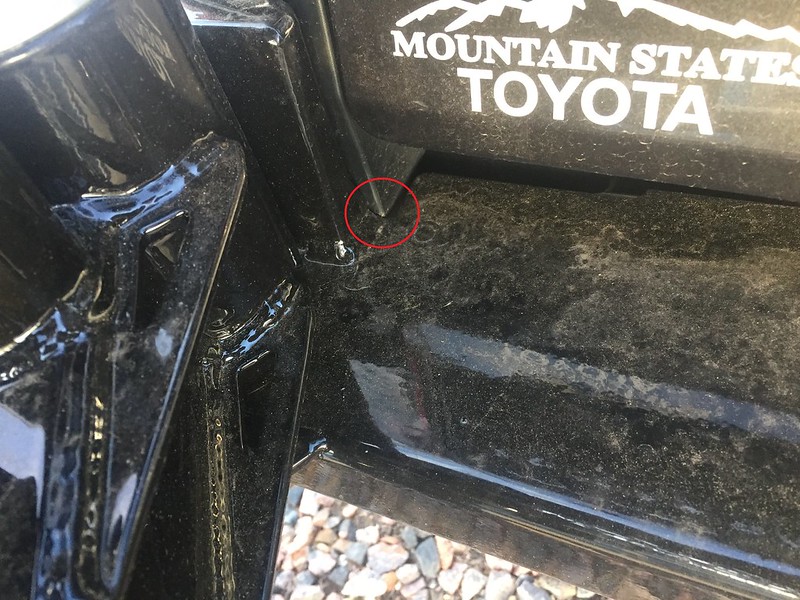
As is good practice for a fabricated component I test fit it multiple times prior to painting and had to remove some materials in the corners under the tail lights. Not a huge deal with some files, an angle grinder, and a dremel; certainly nothing out of the realm of expectation when considering the varying tolerances between trucks. It was more time consuming wrestling it on and off solo.

Spot in question.
BFF Bumper by Tim Souza, on Flickr

Assembly:

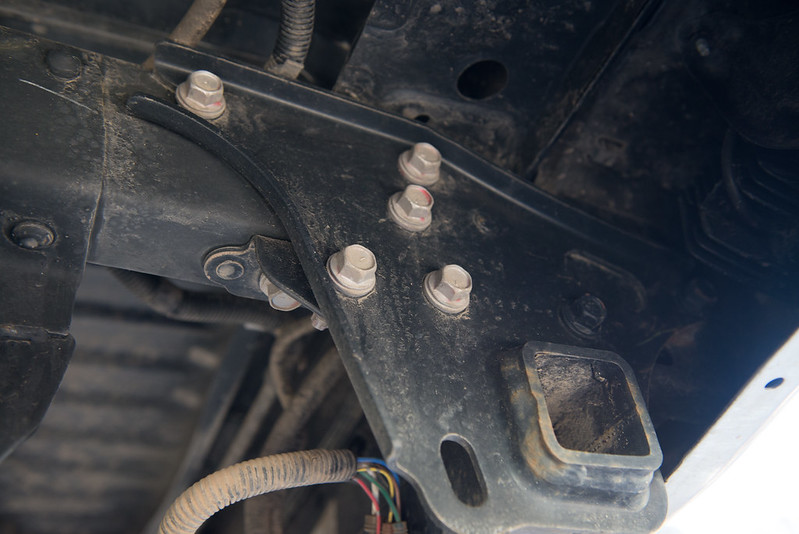
Before you can assemble you must disassemble! It's pretty easy on the Tacoma. 5 bolts per side, a swift blow and it will literally fall off. Watch your toes!

The 5 bolts in question are the unpainted ones in grey. Note that the side of the bumper plate has a pin on it that slides into a notch in the end of the Tacoma frame.
20170412-DSC_2243 by Tim Souza, on Flickr

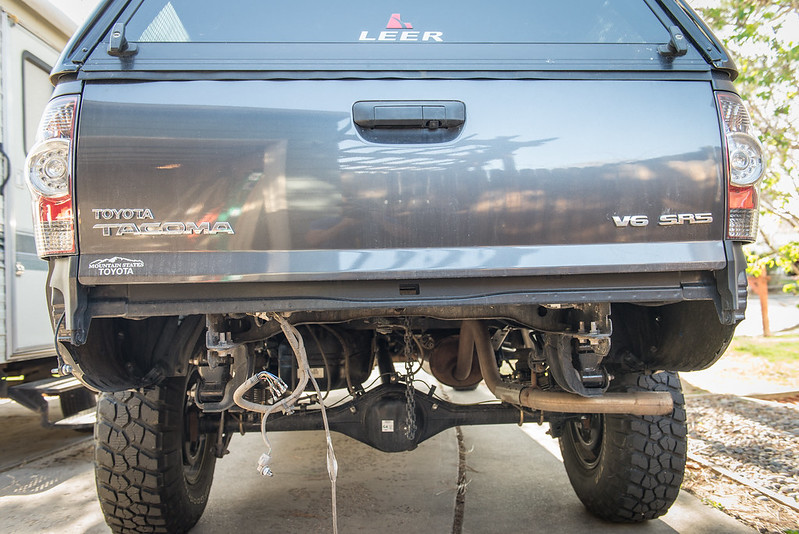
Make sure you disconnect your license plate lights and 7 pin tow connector before you drop the bumper or you will be fixing those. The truck looks awfully naked now.

20170412-DSC_2245 by Tim Souza, on Flickr

Everything went together as it should. Period. Bolt holes lined up, no issues with buggered threads, warped components, or anything of the matter. It's hard to ask for a more straightforward installation and once again his attention to detail is evident when you see how well designed something as simple as the spare tire carrier is. The only issue I encountered was due to my powdercoater not masking off the holes in the spring pin sleeves well enough and having paint clog up the threads. For reference, it is a 3/4-16 tap.

As with any rear bumper with a swingout the handy little backup camera on the tailgate has its new view obscured by the spare tire. It was fairly easy to relocate it, once you take off the tailgate skin it simply unbolts from the tailgate handle. After unplugging the wiring harness from the camera itself you can snake it out through a hole in the bottom of the tailgate. The majority of the harness is already loomed, so it was easy enough to run it along the passenger side swingout about as far as the OEM harness will allow for. The BFF bumper included a nice little camera bracket that I secured the camera into and then zip tied it to the rectangular tube. Eventually I will drill and tap or do a nutsert into that portion of the bumper to give the camera a little bit more solid of an attachment point.

Customer Service:

I had several questions after installation that I asked via text and once again he was prompt and helpful. We worked through the problems which were due to the powdercoater getting overspray in several holes. Again, stellar customer service in my opinion.

Overall Experience:

10/10

I don't personally know Billy and am receiving nothing from leaving this. I thought it was important to give credit where it's due and I must say it is well warranted in this situation. I would not hesitate to purchase from him again and strongly encourage others to give him the opportunity to earn your business. I will upload pictures of my bumper at a later date.

And the goods!

20170520-DSC_2361 by Tim Souza, on Flickr

20170520-DSC_2356 by Tim Souza, on Flickr

20170520-DSC_2351 by Tim Souza, on Flickr

20170520-DSC_2349 by Tim Souza, on Flickr

20170520-DSC_2348 by Tim Souza, on Flickr

I fully intend to update this a little bit later with some additional pictures, so tune back in for more eye goodies!

Side Note: I'm trying to solve how to get my 4 gallon Rotopax cans to mount to the second swingout. May just say screw it and get some Scepter cans and not bother screwing around with rigging something up. Unless of course someone knows of a ready made solution.
 
Last edited:

Adventurous

Explorer
Ouch! At least your insurance is taking care of you. Now comes the hard part, picking a body shop that doesn't cut corners and does the job right from start to finish.

Due to the hail storm all of the body shops are booked well into the future. I have an estimate with a reputable shop scheduled for 6/19 and the guy was clear that they were booked out until November or December. That doesn't bother me so much as I didn't want to have 2-3 weeks of downtime during prime camping season with my truck in the shop. Anyway, we'll see what they have to say about the repairs, I'm kind of hoping they can fix the roof as I foresee problems in my future if they have to cut this one out and put a new one on.

Be glad your truck is worth enough to not get totaled. I've seen jeeps get totaled from hail like you had. Maybe they can throw some sound dampening material in there while they're at it :agree:

There is that yep! I fully intend to take this opportunity to work with the shop and make sure I'm satisfied with the remedy. Hopefully they don't mind me picking the extra cost for an OEM hood (~$75) as well as I'm thinking the new topper will have windoors. I see no reason I shouldn't spend the extra dollars to get what I really want.
 

Adventurous

Explorer
After 5 years of living in CO our time here is growing shorter. Not because of a lack of desire persay (the Front Range has grown noticeably more crowded over that time period however), more because both of our families are back on the East Coast and there is always the desire to spend quality time with our parents as they grow older. That said, neither of us are 100% sold on the prospect of moving back. What does this have to do with this post?

My Tacoma is my primary vehicle that needs to serve more duties than just Expo rig. I have been mindful to retain it's utility when carrying lumber, sheet goods, mountain bikes, and the likes, I have added a new duty to that roster, the duty of tow rig.

Now, I know what you are thinking. Dude, why would you do that?! It looks dumb as hell! If you want to tow you should buy a full size! That's just not in the cards, nor do I want the size that comes along with a full size. To clarify, the travel trailer we acquired is well within the total weight and tongue weight range specified by Toyota. Why a travel trailer you may ask? The idea is that we will sell our house next year and use a part of the proceeds to fund an extended road trip. While I would have preferred to take just the truck, or the truck and a tear drop trailer, our 3 dogs will be coming along with us. I can imagine that after several months it would get a bit cramped, so I made the concession to get a travel trailer to drag in exchange for more time out and about.

With that in mind I decided that safety was paramount and I should equip the truck properly to pull the trailer. My truck came spec'd with the towing package, so I already have the necessary coolers in place as well as wiring for the 7-pin trailer harness. This meant I really only needed to add 3 things, a brake controller, some form of engine/transmission monitoring, and provisions for towing mirrors.

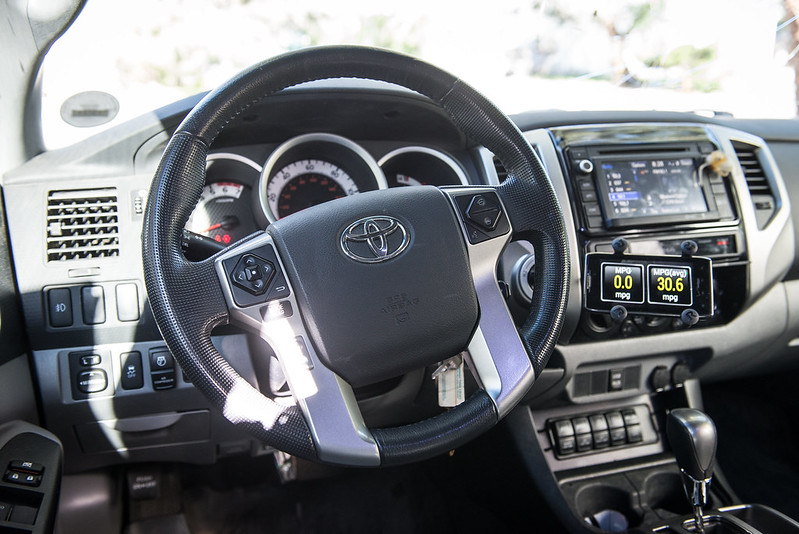
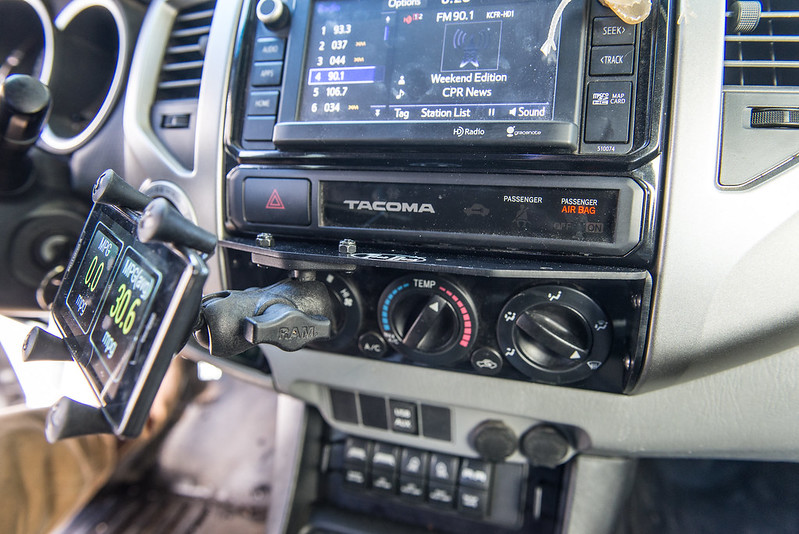
Up first was the engine/transmission monitoring. Scan gauges are cool and all, but I decided to go the Torque Pro/OBD2 adapter route. At some point down the road I will upgrade to a tablet which will contain maps, maintenance documents for truck + trailer, music, and of course the Torque app. For now I'm just running Torque through an old cell phone. I have it mounted to a Techdeck, which I was pleasantly surprised by. It is quite a bit more rigid than I expected and will have no problems holding a tablet even over rough terrain. I won't get into the installation because their site does a great job with installation instructions, so here's a picture of the final configuration as visible from the driver's and passenger's perspective.

20170520-DSC_2363 by Tim Souza, on Flickr

20170520-DSC_2364 by Tim Souza, on Flickr

I programmed a custom PID into Torque to read the transmission temperature. Details of how to do so are well documented on Tacomaworld, so I won't get into that here either other than to say I set an alarm temperature of 220F. My research so far tells me that I shouldn't go too much above this without fear of transmission fluid degradation and the resultant grenading of the transmission. I'll be vigilant about watching it this summer towing up I70 to the tunnel, if it stays within range through that I'll have reasonable confidence the current setup will suffice. If not, I will add a secondary transmission cooler.

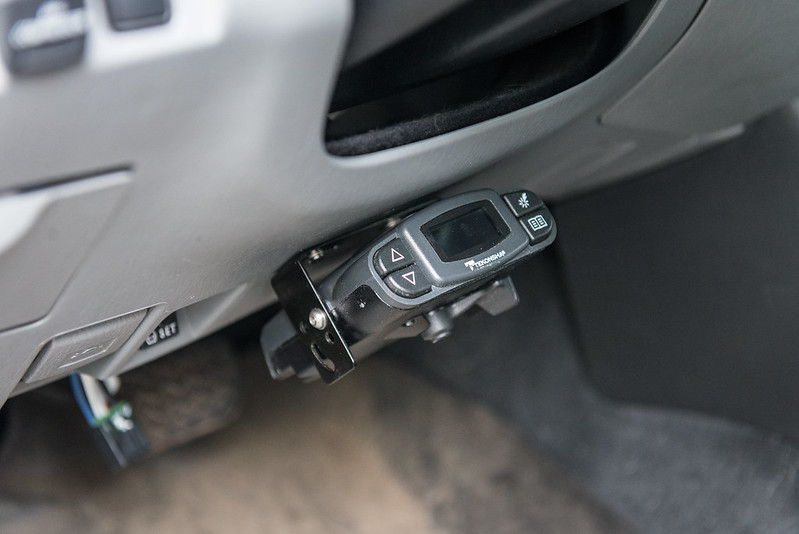
Next up was the brake controller. It's too bad the truck doesn't have an integrated, but given that I rarely if ever see a Tacoma dragging anything I can understand why Toyota felt it was unnecessary. There are plenty of choices on the market but Tekonsha kept popping up as being tops for handling trailer braking duties. I found a gently used P3 model on craigslist for $75 and happily took it off the PO's hands. One big upside to the Tekonsha stuff is their vehicle specific wiring harnesses which are plug-n-play. I wish I had a picture of where the connector is by the driver's side kick panel but I was already doing gymnastics to reach it and didn't feel like stopping to document that part of the installation. Trust me, it's up there and it's hidden well.

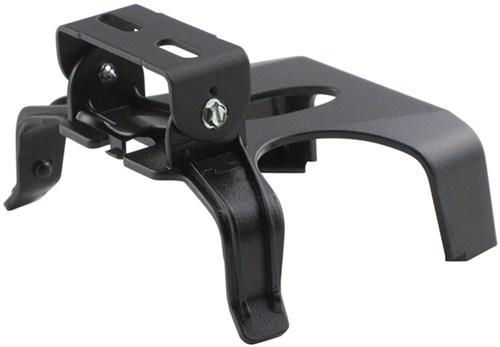
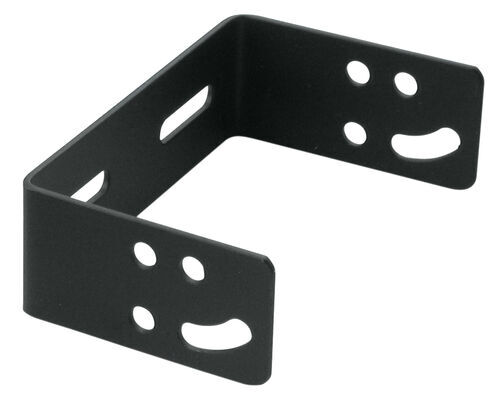
The mount that came with the P3 was a bit clunky. It is a two piece deal that looks like such:

TK5906_500.jpg


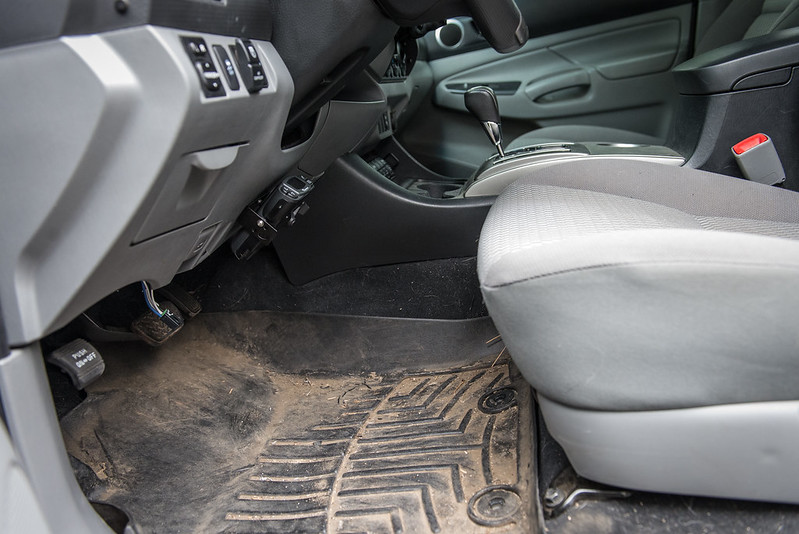
I'm sure this is fine if you have the space for it or the need to regularly disconnect the controller, but I had neither the space nor the desire to regularly disconnect it. I went off in search of another option and wasn't turning up much. Tekonsha doesn't offer another mount for the P3 and I started exploring making my own before stumbling upon a Tekonsha mount advertised for the Voyager series controllers. It mostly fits the P3 with a few strategically placed washers, but most importantly, it satisfied my desire to have it tucked up and out of the way. After mulling over it a bunch the best place to mount turned out to be under the steering wheel. It is out of sight while driving, doesn't consume one of the storage compartments, and I have yet to boot it getting in and out.

Mount used:
2178_500.jpg


Final:
20170522-DSC_2378 by Tim Souza, on Flickr

20170522-DSC_2379 by Tim Souza, on Flickr

The last piece of the puzzle was the towing mirrors. There are two main options, stick on mirrors that extend off of your current ones or replacing the OEM units with an aftermarket assembly. All of the stick-on options were rated okay with the main complaints being vibration and lack of adequate view with the main advantage being low cost. These would suffice for occasional towing duties, but given that I anticipate being hooked up to a trailer for 6+ months I thought replacement mirrors would be the better option.

I went with Spec-D mirrors for the Tacoma. There are a few companies on the market, but they satisfied my desires for a power adjust mirror in black with the heated mirror provisions. The wiring is there to hook up into the OEM mirror wiring, however, the heat will require a bit more work as the Tacoma did not come with provisions for heated mirrors. Bear with me as time was with me last night to take adequate pictures of the process.

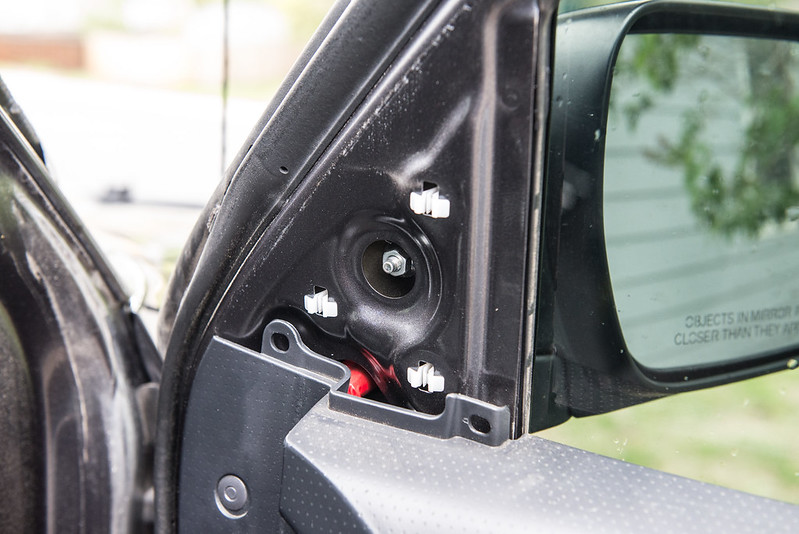
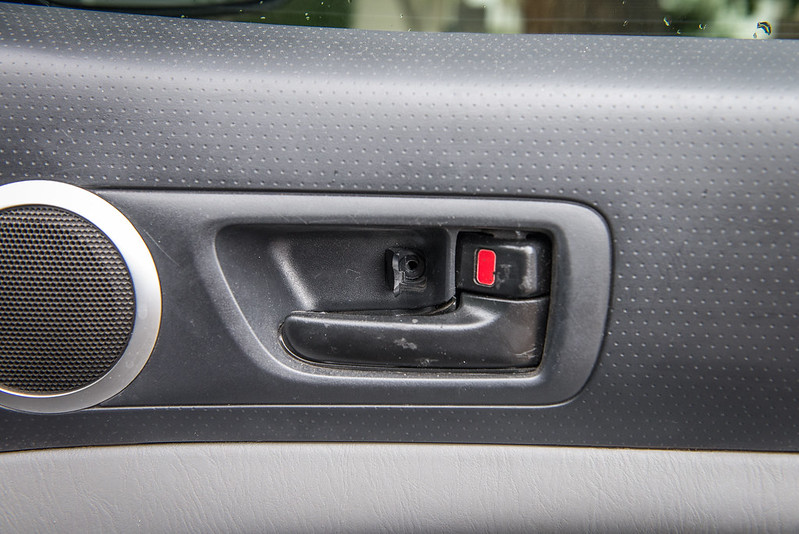
Step 1: Pull the triangular trim piece inside the door (simply pulls off) and remove the plastic pop rivet in that corner. Depress the button in the center of the rivet to loosen it then you can get your fingernail or small flathead screwdriver behind it to wiggle it out.

20170522-DSC_2368 by Tim Souza, on Flickr

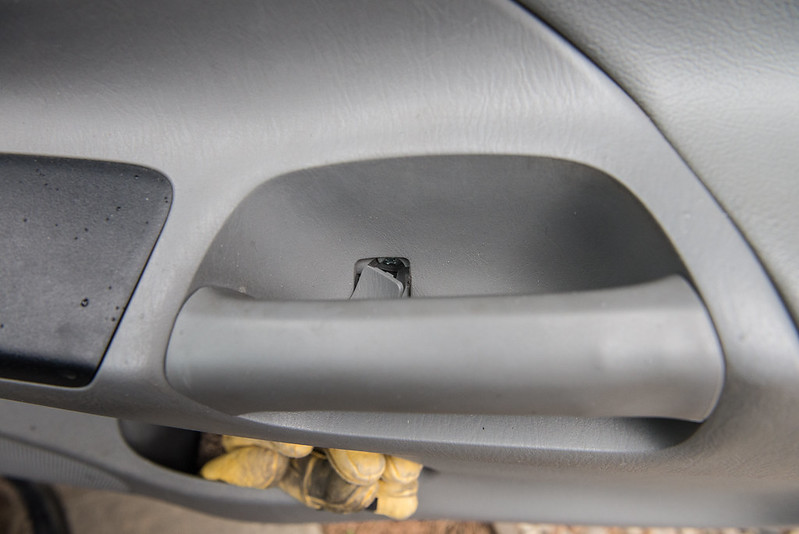
Step 2: Pull both screws holding the door skin on. One is behind a hatch near the door release, the other is behind a hatch near the door grab handle. With these removed you can give the door skin a solid yank at points along the perimeter to pop it away from the sheet metal. You don't have to remove the entire skin to get to the mirror apparatus but it helps. If you do remove the whole thing be aware you'll have to disconnect the harness to the window and lock controls.

20170522-DSC_2369 by Tim Souza, on Flickr

20170522-DSC_2370 by Tim Souza, on Flickr

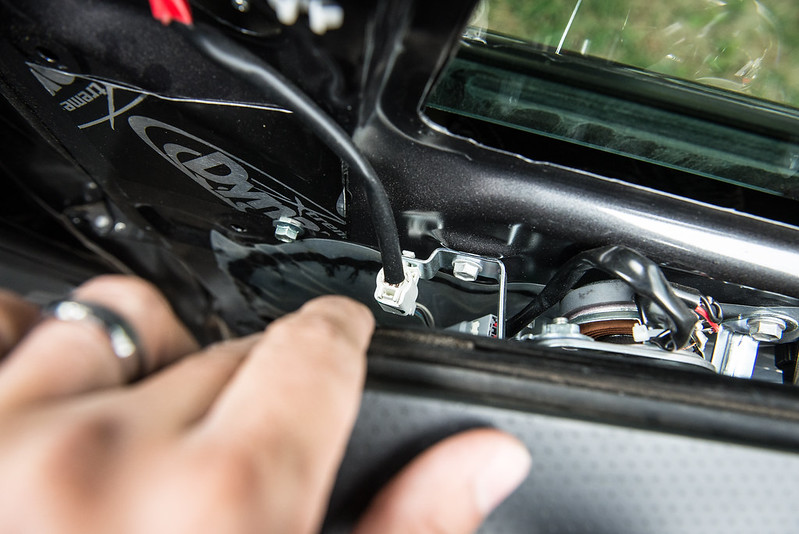
Step 3: Unplug the mirror. Remove 3 10mm nuts and viola! You can pull the mirror off the vehicle. Simple as that.

20170522-DSC_2372 by Tim Souza, on Flickr

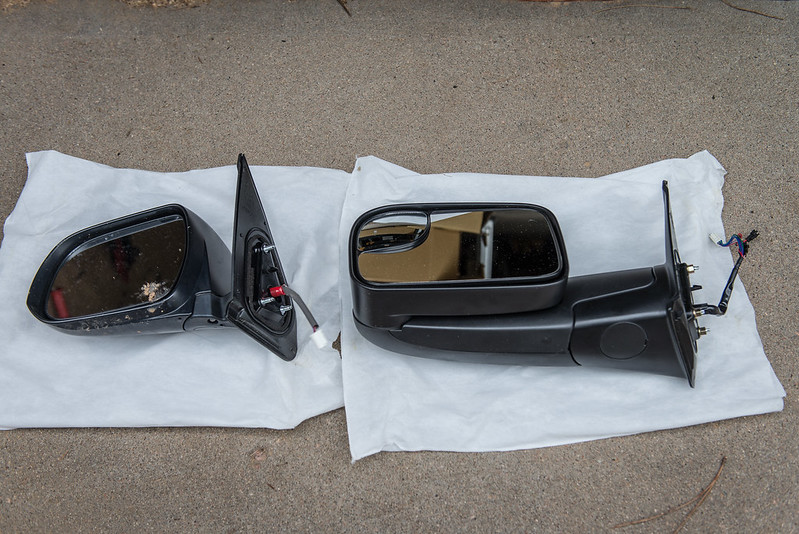
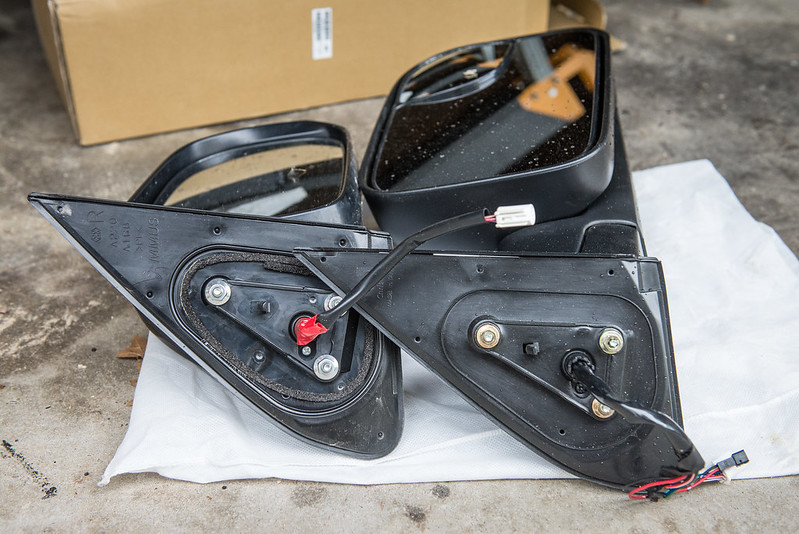
Here's a side by side comparison of the two to show relative size, the addition of the smaller more convex vision mirror, and the difference in length between the two. Also pictured is the inside of the mounting flange. Both have a rubber inner panel that should compress against the door to adequately seal it off from the elements.

20170522-DSC_2365 by Tim Souza, on Flickr

20170522-DSC_2373 by Tim Souza, on Flickr

Installation is straightforward and the opposite of the disassembly phase. I couldn't find torque specs for the mirror bolts so I used my calibrated touch to get them just right.

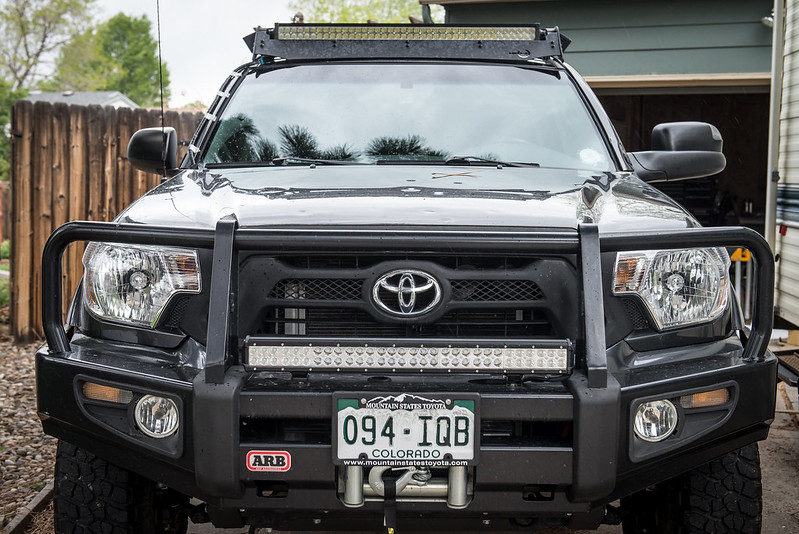
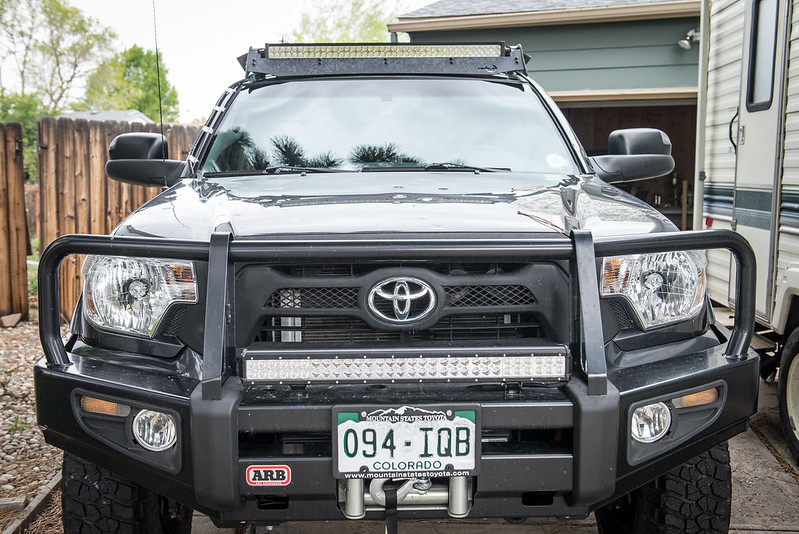
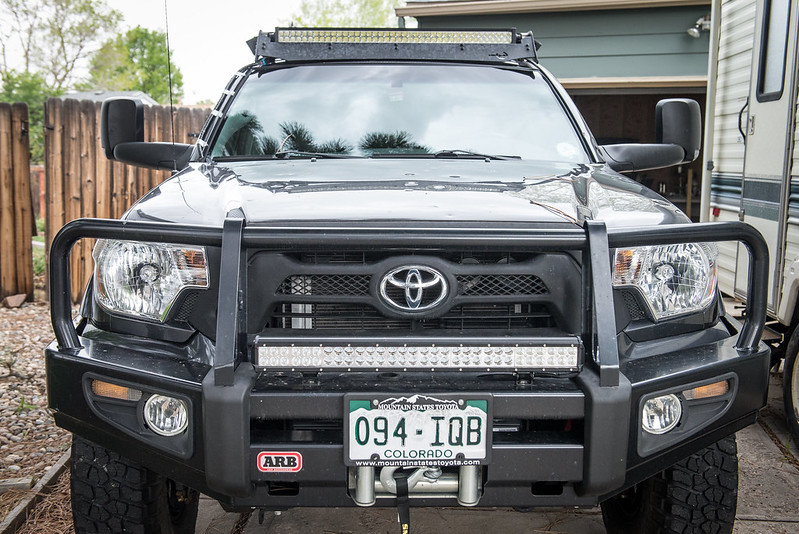
Pictured is the installed product. Pictured is Spec-D on the driver's side vs. OEM on the passenger, both towing mirrors installed, then both in the towing configuration.

20170522-DSC_2367 by Tim Souza, on Flickr

20170522-DSC_2374 by Tim Souza, on Flickr

20170522-DSC_2375 by Tim Souza, on Flickr

And fit at the door, since this is where most aftermarket mirrors seem to show their weakness.

20170522-DSC_2382 by Tim Souza, on Flickr

20170522-DSC_2381 by Tim Souza, on Flickr

Pretty damn good! After my morning commute I can say that they accomplish what I was seeking in providing a better view of what is behind me. I haven't towed the trailer so I cannot comment on their performance there, but I can only imagine I'll be able to dial them in to see properly. Bringing the travel trailer home with the stock mirrors was a bit of a mental chore noting when windows would open up to pass since it was tough to see anything within say 15 car lengths off the back of the trailer. As is common with any towing mirrors, OEM included, there is increased vibration that is noticeable. It does not inhibit my ability to see, but it is there none the less.

I won't get into the towing aspects much more than this. The travel trailer could have it's own build dedicated to it as it needed some TLC after water damage that turned out to be more severe than expected and the hitch is something of personal preference though I chose to go with a weight distributing sway control model. I may change out gears in the future to account for the larger tires I have plus the added weight to get some pep back, but for the time being I'll stick with the 3.73s and see how it does.
 
Last edited:

Forum statistics

Threads
188,360
Messages
2,903,721
Members
230,227
Latest member
banshee01
Top