Adventurous
Explorer
This winter I decided to tackle a makeover of my auxiliary electrical system. Why? Two reasons. One, I have 3 accessories that run off of relays. I didn't like having to find space in the engine bay to securely mount three relays and run all of the associated wiring to and from it for power, ground, and signal. Secondly, with the addition of the winch I had another item that needed to be wired in. It took me so long to get that wired up because I couldn't reconcile running a cable straight to the battery without a fusible link somewhere in there.
So those were the goals. Clean up the wiring I had going on (Blue Sea panel worked fine, it was just a little messier than I wanted), consolidate relays, and add provisions to fuse the winch circuit.
In the end the Bussmann blocks worked out the best for my needs. 5 relayed circuits, 5 fused circuits, it should be plenty to handle my current and future needs. I didn't take any pictures while building it because, honestly, the tutorial put together by Bodenzord does a FAR better job than I would have been willing to dedicate the time to.
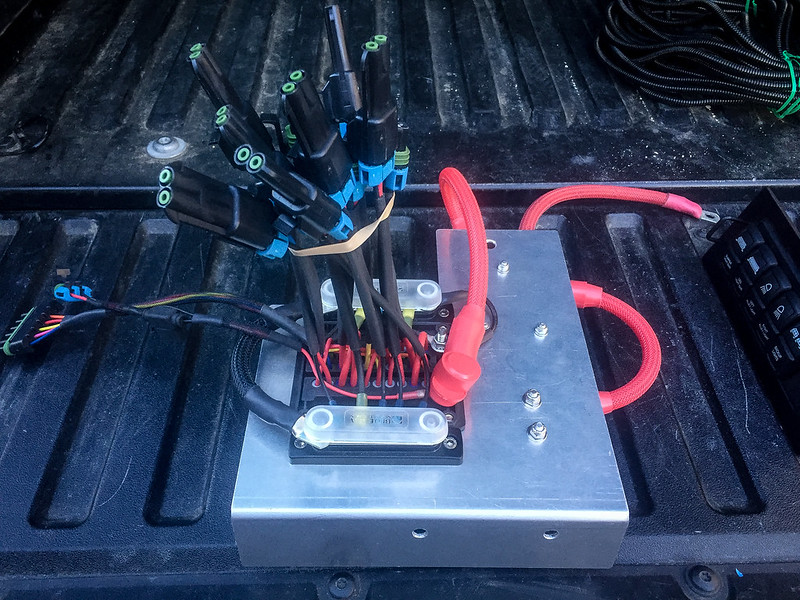
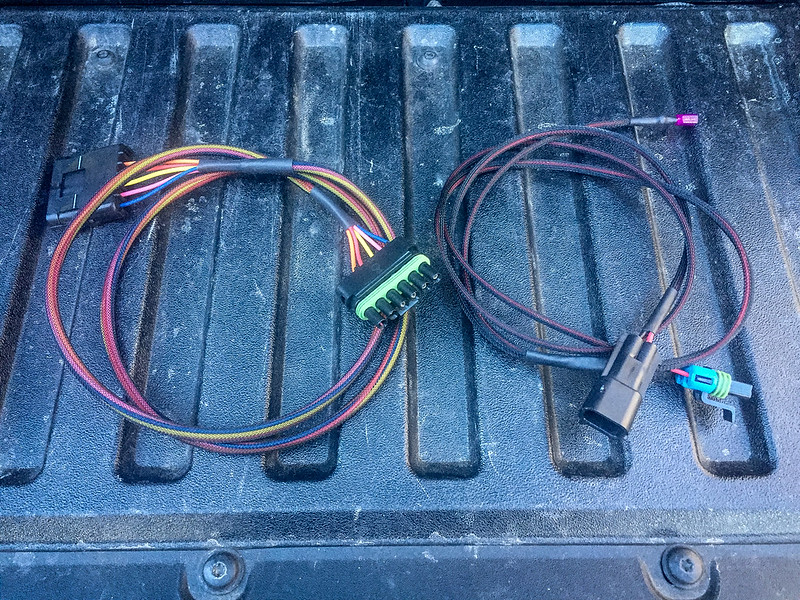
Backside of the block showing where the magic happens. Each circuit has a pig tail that you simply plug into a wiring harness that feeds power and ground to your accessory. Relay circuits have a signal wire coming out which has been consolidated into a single signal harness to run into the cab. Power and ground feeds to the switches have also been consolidated into their own harness as well, so there are only two total wire bundles running into the cab.
 IMG_2217 by Tim Souza, on Flickr
 IMG_2214 by Tim Souza, on Flickr
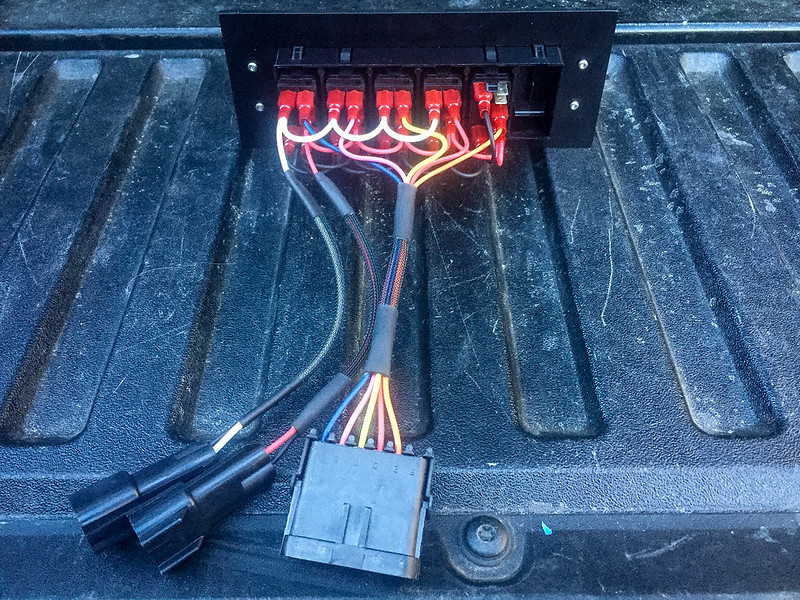
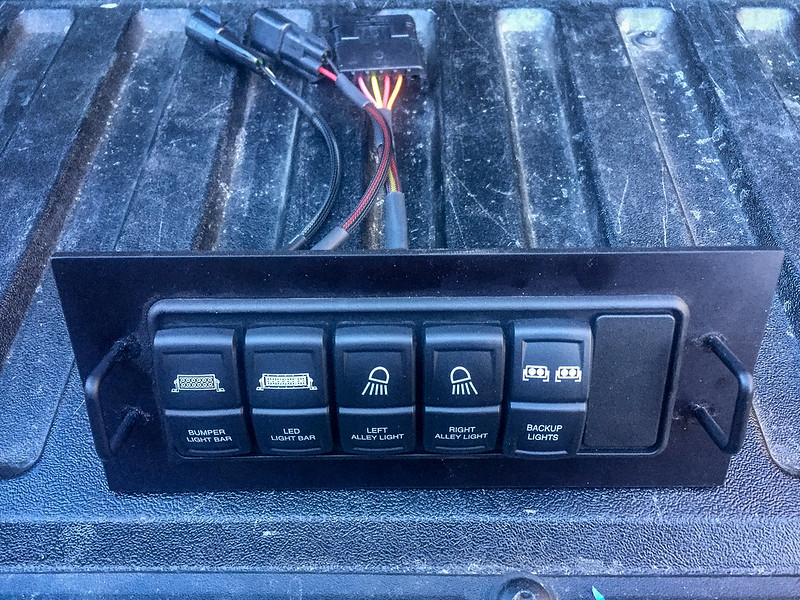
I used an Iggy switch panel to tuck the switches in the cubby in front of the cup holders. This meant dumping the CB radio, but given that I usually wheel alone, that was no big loss. 4 SPST switches from OTTRATW to control the roof light bar, the bumper light bar, the right camp lights and the left camp lights. I have one SPDT switch for the rear bumper lights that still needs to be hooked up which is why you'll see a free terminal. The second wiring harness with the white wires runs the switch illumination and independent ground.
 IMG_2216 by Tim Souza, on Flickr
 IMG_2215 by Tim Souza, on Flickr
Here's the finished product installed in the engine bay. A while back I had cleaned up the corrosion on my battery terminals only to have it come back again a few months afterwards. Not cool, I needed to do something before the infection spread into the wiring and compromised it. I went ahead and brought my truck to Matt at Offgrid Engineering who cut off the OEM terminals and crimped on some ring terminals. At the same time he installed some mil-spec terminals to make wiring in my additional power and ground cables easier. The other thing to note is the jumper wire coming off of the Blue Sea 100A breaker. The breaker protects the Bussmann block with the jumper feeding a 400A ANL fuse for the winch. Figured the shorter the lead before the fuse the better. I preferred the winch to a disconnect only because I would hate to get into the death spiral of the winch pulling more current than it should, the wires heating up and losing conductivity leading to the winch pulling more current and melting the whole thing with the only stop being me manually flipping the disconnect. Might be overkill, might not be, better safe than sorry. Anyway, all wires loomed and tucked away as to look as OEM as possible.
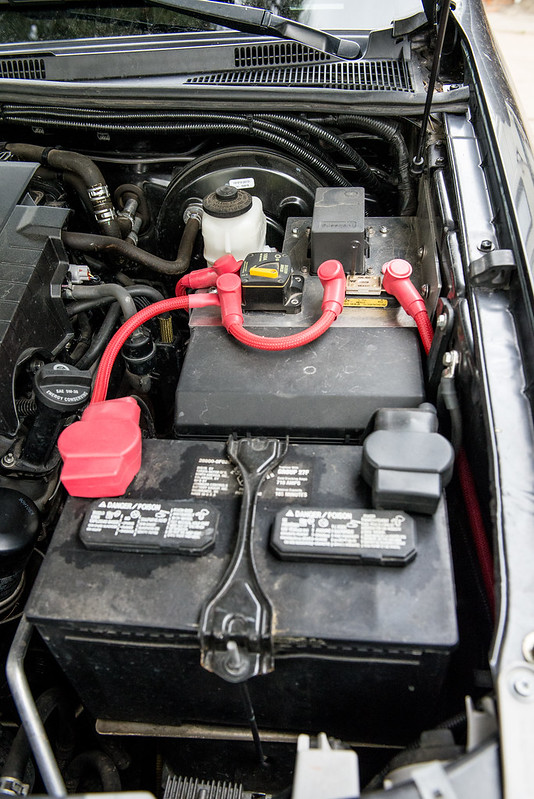 20170525-DSC_2528 by Tim Souza, on Flickr
So those were the goals. Clean up the wiring I had going on (Blue Sea panel worked fine, it was just a little messier than I wanted), consolidate relays, and add provisions to fuse the winch circuit.
In the end the Bussmann blocks worked out the best for my needs. 5 relayed circuits, 5 fused circuits, it should be plenty to handle my current and future needs. I didn't take any pictures while building it because, honestly, the tutorial put together by Bodenzord does a FAR better job than I would have been willing to dedicate the time to.
Backside of the block showing where the magic happens. Each circuit has a pig tail that you simply plug into a wiring harness that feeds power and ground to your accessory. Relay circuits have a signal wire coming out which has been consolidated into a single signal harness to run into the cab. Power and ground feeds to the switches have also been consolidated into their own harness as well, so there are only two total wire bundles running into the cab.
 IMG_2217 by Tim Souza, on Flickr
 IMG_2214 by Tim Souza, on Flickr
I used an Iggy switch panel to tuck the switches in the cubby in front of the cup holders. This meant dumping the CB radio, but given that I usually wheel alone, that was no big loss. 4 SPST switches from OTTRATW to control the roof light bar, the bumper light bar, the right camp lights and the left camp lights. I have one SPDT switch for the rear bumper lights that still needs to be hooked up which is why you'll see a free terminal. The second wiring harness with the white wires runs the switch illumination and independent ground.
 IMG_2216 by Tim Souza, on Flickr
 IMG_2215 by Tim Souza, on Flickr
Here's the finished product installed in the engine bay. A while back I had cleaned up the corrosion on my battery terminals only to have it come back again a few months afterwards. Not cool, I needed to do something before the infection spread into the wiring and compromised it. I went ahead and brought my truck to Matt at Offgrid Engineering who cut off the OEM terminals and crimped on some ring terminals. At the same time he installed some mil-spec terminals to make wiring in my additional power and ground cables easier. The other thing to note is the jumper wire coming off of the Blue Sea 100A breaker. The breaker protects the Bussmann block with the jumper feeding a 400A ANL fuse for the winch. Figured the shorter the lead before the fuse the better. I preferred the winch to a disconnect only because I would hate to get into the death spiral of the winch pulling more current than it should, the wires heating up and losing conductivity leading to the winch pulling more current and melting the whole thing with the only stop being me manually flipping the disconnect. Might be overkill, might not be, better safe than sorry. Anyway, all wires loomed and tucked away as to look as OEM as possible.
 20170525-DSC_2528 by Tim Souza, on Flickr

