Blender, My LX450/FZJ80 + FJ45esk + GM + Land Rover crazy concoction

Metcalf

Expedition Leader

Metcalf

Expedition Leader
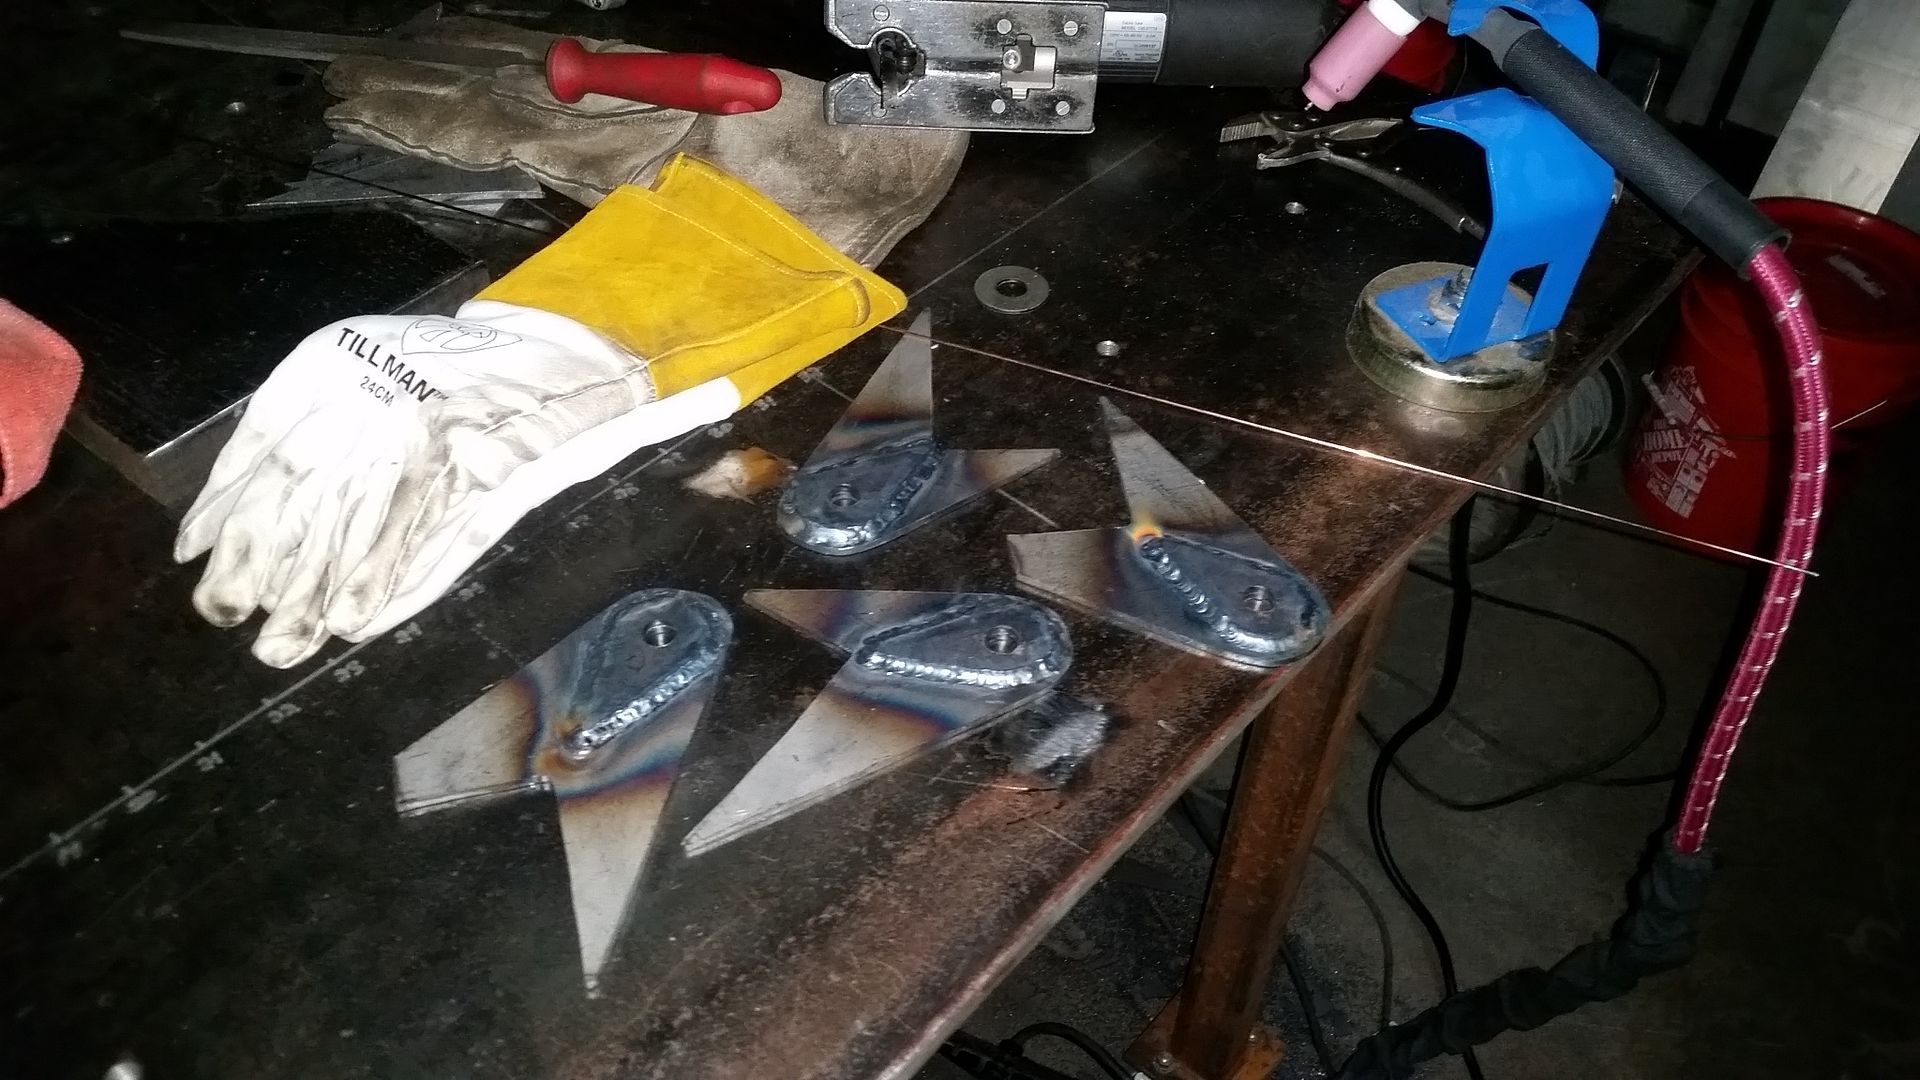
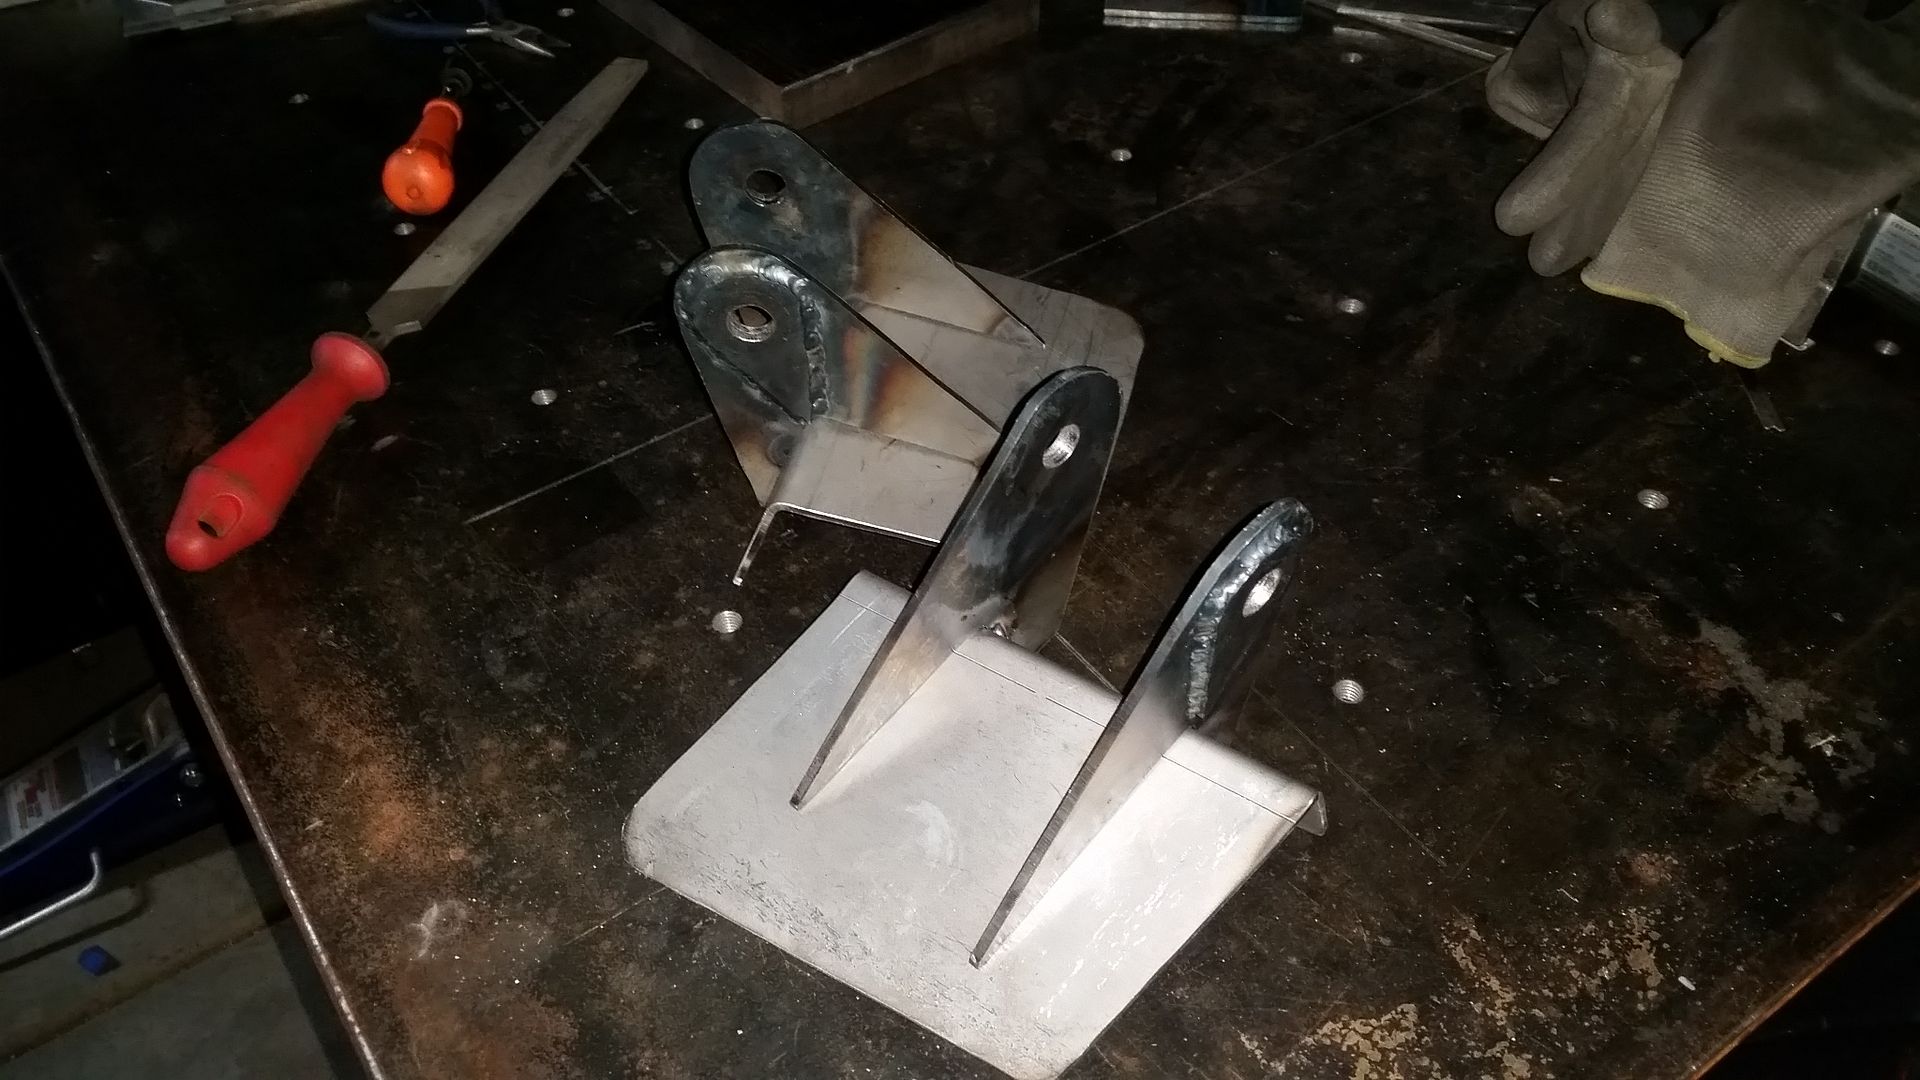
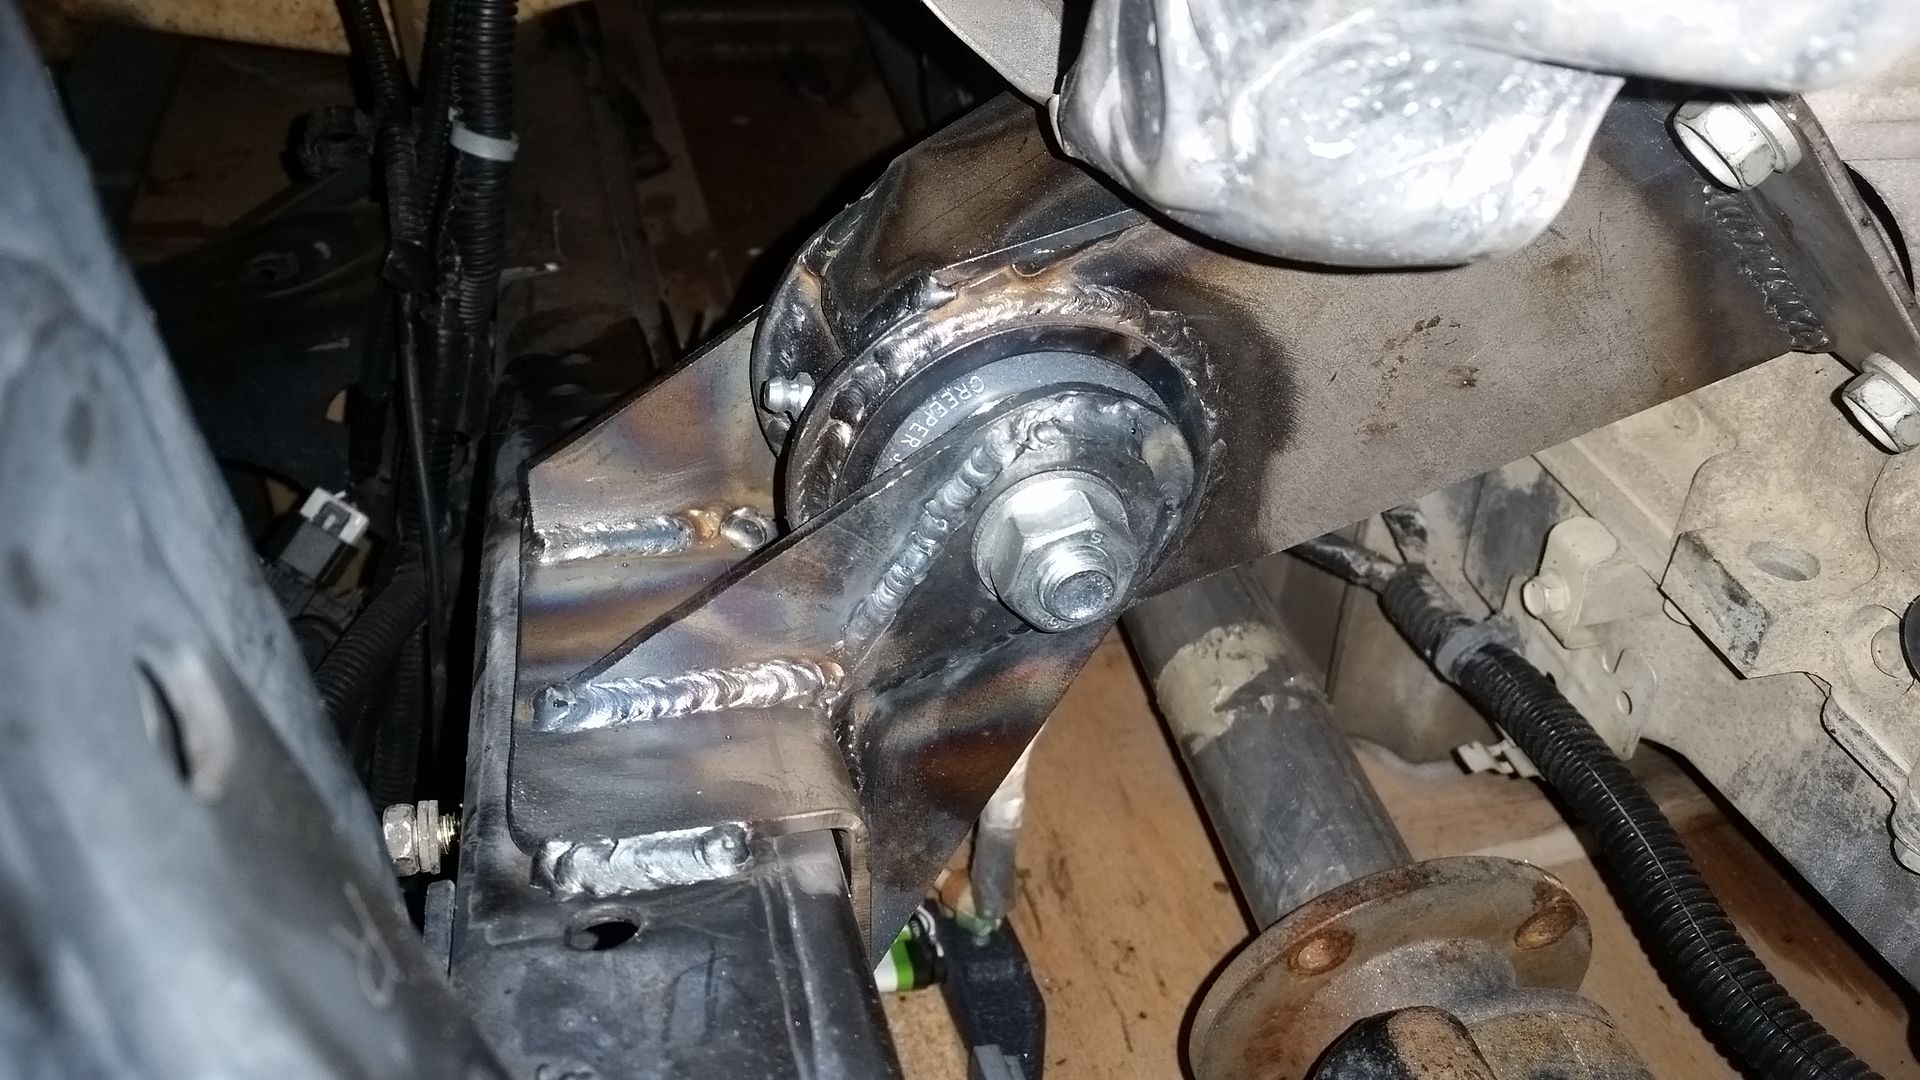
Tonight I made the motor mounting plates that connect the engine mounts to the frame....or at least almost finished them.


I also decided to TIG weld these parts. I think I was running a little hot, but I was rusty and the thin edges on the outside edge of the weld washers was kicking my rear end. I just need more practice.....

Tomorrow I will ream them out to the proper bolt mounting size and fit them in the car.

Fun stuff!
 

Metcalf

Expedition Leader
Just a quick evening in the shop tonight after work.


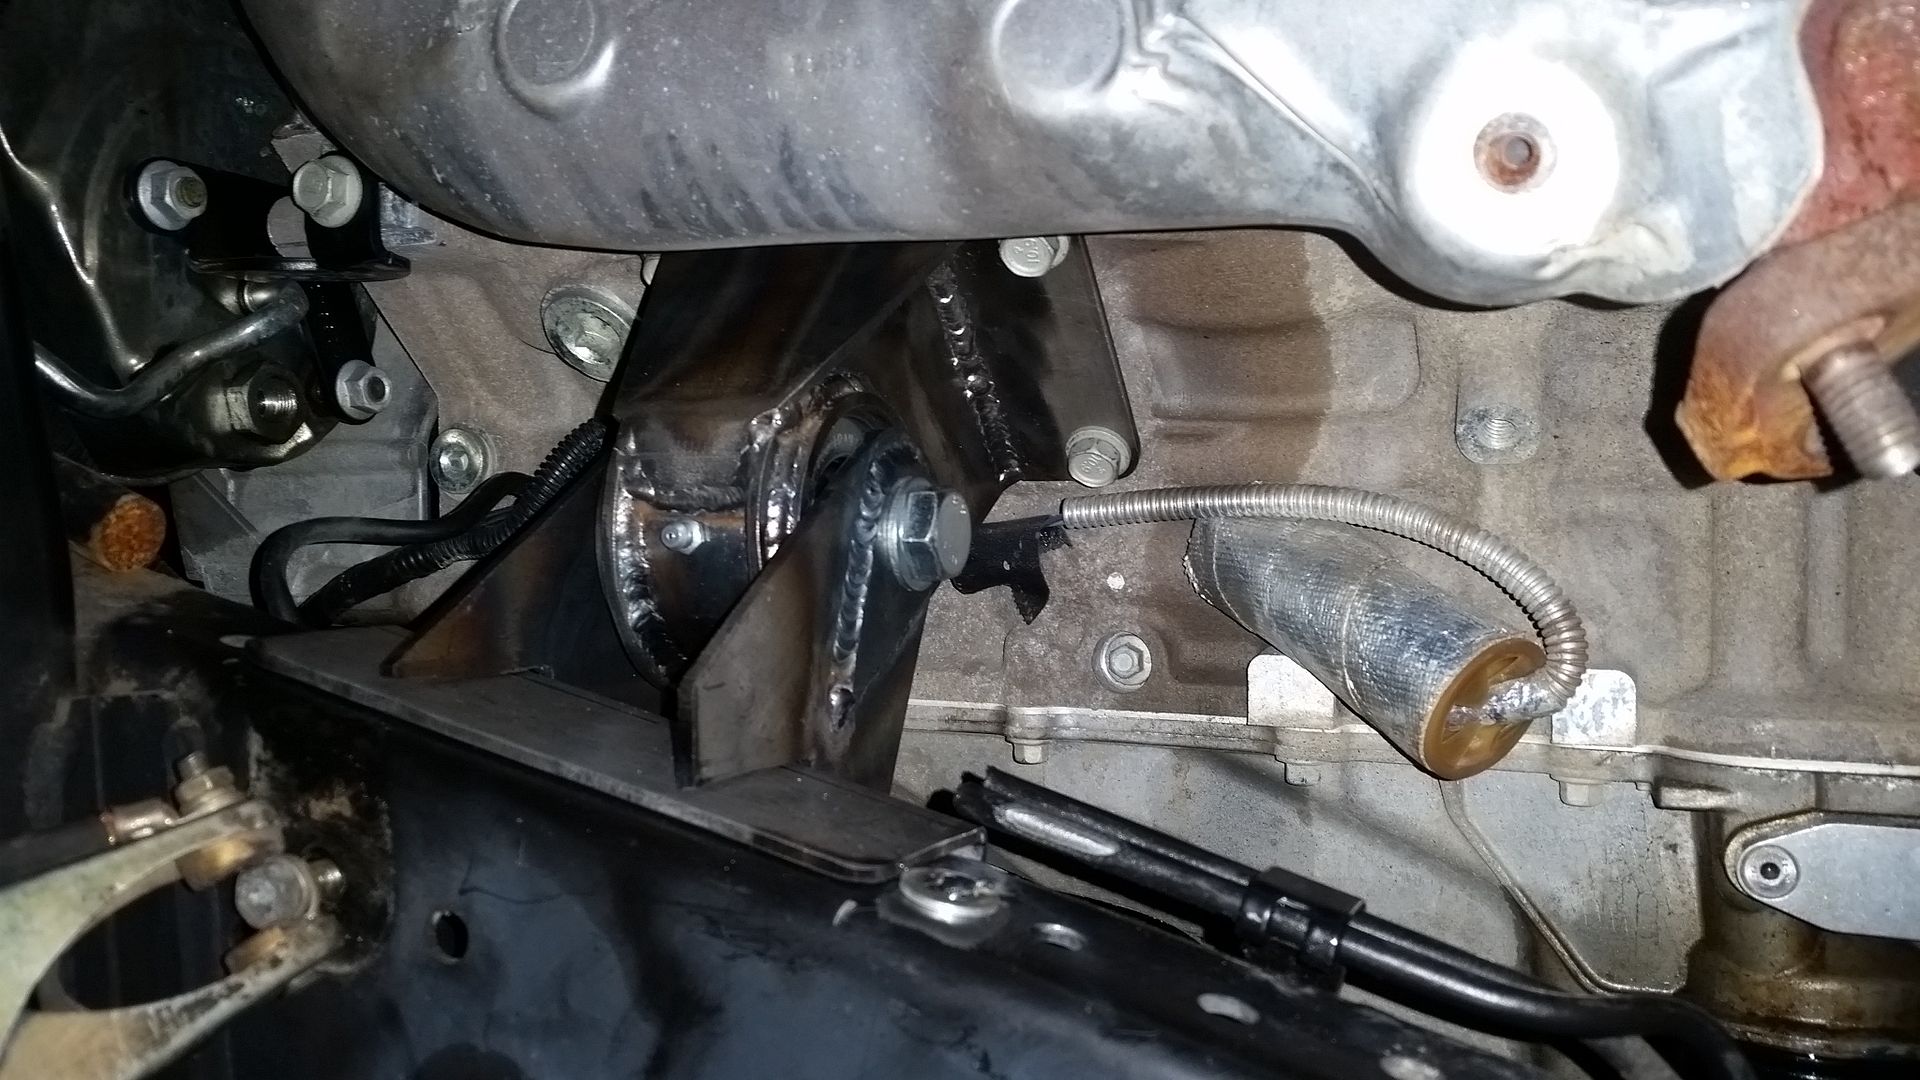
I was able to fit the frame side of the motor mounts to the frame pads. Overall that went pretty good. I left them a TOUCH high to account for some compression in the bushings with the full weight of the engine.

For about 10 minutes I think the engine was actually resting its weight on the frame rails. I couldn't have that, so once everything was heavily tack welded in place I took things back apart and removed the frame side mounts for final welding.

I need to make a sleeve for the mounting holes that is about .030-.060" longer than the engine side mount. That should give me a little clearance once everything is fully welded.

I am trying to decide what to do about bracing the mounts to the pads also....
 

Box Rocket

Well-known member
You might rethink the factory locked axles. The rears tend to twist the splines when they break (usually wheeling hard with 37" or bigger tires). This prevents you from removing the broken axle shaft and requires you to cut the housing open to cut out the shafts. The process usually trashes the locker shift fork as well. You may have a lower risk of this being a bit lighter, but the 40" tires are pretty extreme for those shafts. An easy solution might be to trade somebody for a non locked rear....
Poly Performance has replacement axle shafts that are quite a bit stronger than the factory shafts if that's a concern. Should be plenty strong. Heck Slee Offroad was running 42's on their Shortbus project with stock axles for quite a while. I know they upgraded chromoly birfs/shafts in the front but don't know if they ever upgraded the rears.
.
My guess is this truck will be lighter than a full body 80 which will also put less strain on the shafts. I would run it how you've planned.
 

Metcalf

Expedition Leader
Poly Performance has replacement axle shafts that are quite a bit stronger than the factory shafts if that's a concern. Should be plenty strong. Heck Slee Offroad was running 42's on their Shortbus project with stock axles for quite a while. I know they upgraded chromoly birfs/shafts in the front but don't know if they ever upgraded the rears.
.
My guess is this truck will be lighter than a full body 80 which will also put less strain on the shafts. I would run it how you've planned.

Thank you for the feedback. I share the same general thoughts.

I will get it driving with the stock shafts, and then swap in alloy shafts front and rear when I go through the axles and freshen them up.

Most full bodied J80's seem to be running 5000-6000lbs full loaded. I am hoping to come in about 4000-4500lbs depending on how much gear I am carrying. I hope I can keep the weight bias front heavy so that when it is loaded down for longer trips, the weight bias is still 50/50 or slightly front biased. The big tires and beadlock wheels are not light however. I think the aluminum LS engine should be significantly lighter than the stock engine, but the 6L80E automatic and LT230 transfer case are not light weight units! Other than the fuel tank and the winch most of the weight is going to be between the axles. The FJ45-esk tub is jut about centered front to back. The front fenders, top panel, rear window panels, doors, and bed are all going to be aluminum I think....

Stay tuned.
 

Box Rocket

Well-known member
I like where you're headed. Although I suspect that a fully loaded J80 is beyond 6,000 lbs quite easily when loaded. I know mine is and it's nowhere near as "kitted-out" as some. So weight wise if you hit your goal weight I believe you'll have a strong setup that will work well, depending on how much you like the skinny pedal. :)
 

Metcalf

Expedition Leader
Something other than motor mounts to think about....

I thought I would post up about something other than motor mounts. Those are not that exciting to watch.


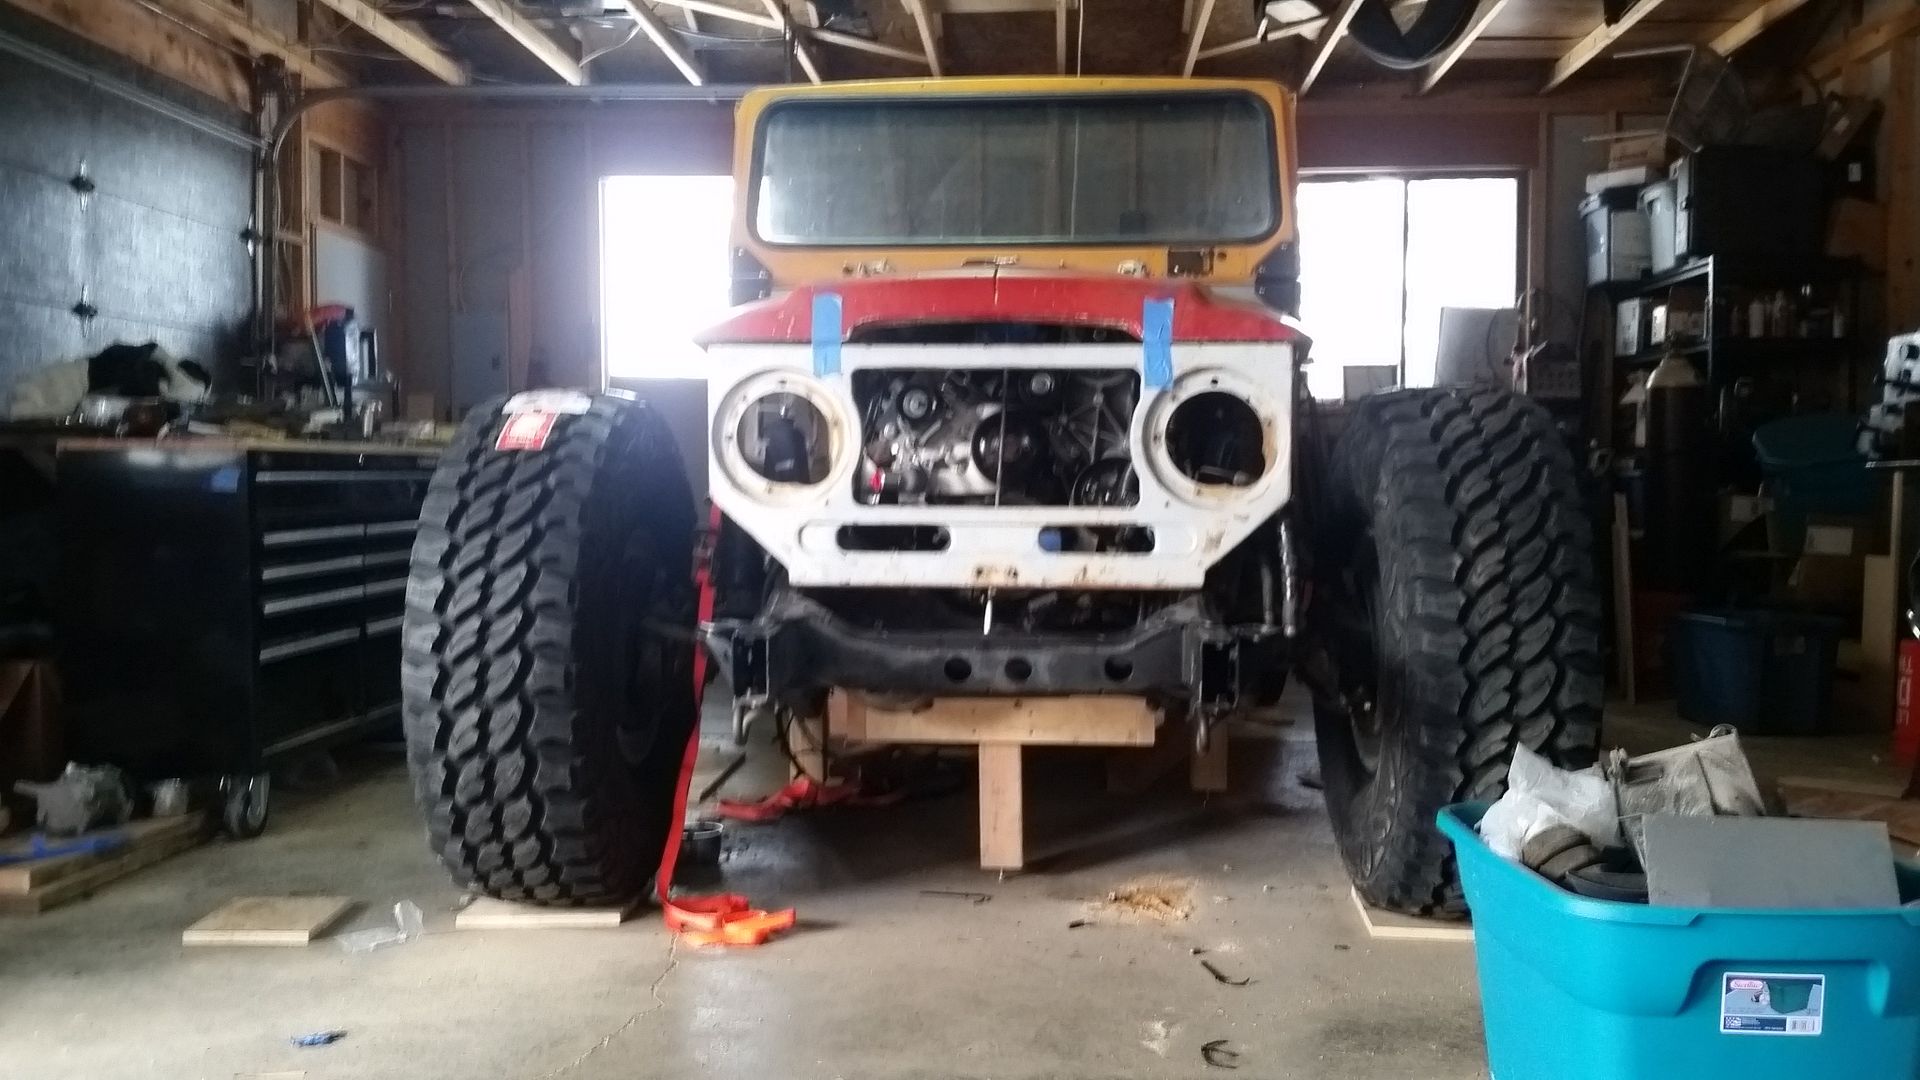
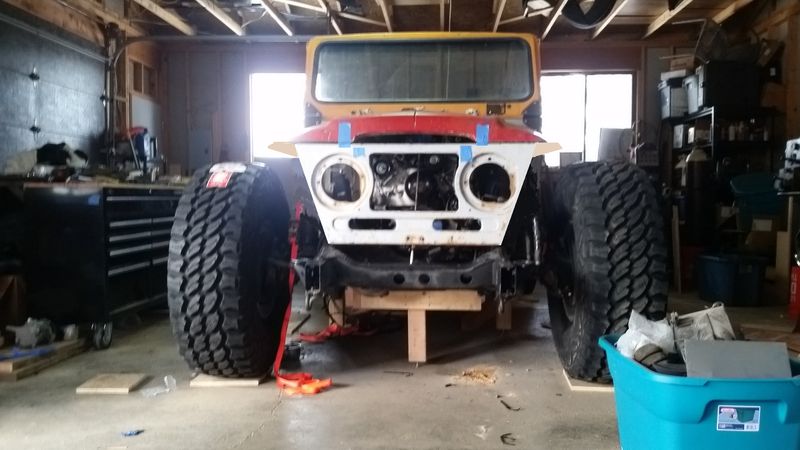
Here is what the front end roughly looks like with a stock FJ40 style grill.

With the 40" tires and low stance the stock grill shape just won't work. The tires turn directly into the corner below the headlight on the factory grill shape. I am lucky enough to have full lock to lock steering available in this chassis and the large tires. I want to preserve that as much as possible. With the 112" wheelbase I would like to have all the steering angle available as possible. I will be building some simple aluminum front fenders that will be raised so that the top of the fender is about the same level as the bottom of the hood. This is about a 4" fender lift from a stock FJ40. That will allow me to run the large tires without adding any lift to the J80 chassis. This should promote some decent road manors since the chassis will essentially have all stock 'geometry' other than the change to larger tires.


Here is basically what I am proposing for the change to the grill design.

Essentially, I will be moving the headlights inboard about 2-2.5" per side. This will let me have a simple trapezoid shape to the grill that will give me the most clearance possible for the tires when turning.

The smooth simple slope/angle on the side of the grill will make the fabrication of the front fenders MUCH easier. The grill opening will be slightly reduced, but I think it will still work ok. The top and bottom of the grill are still the same width so it will blend into the stock hood width well.

Now....how in the heck to make this..
Note: I don't have the headlight/grill bezel shown. That will get narrowed also.
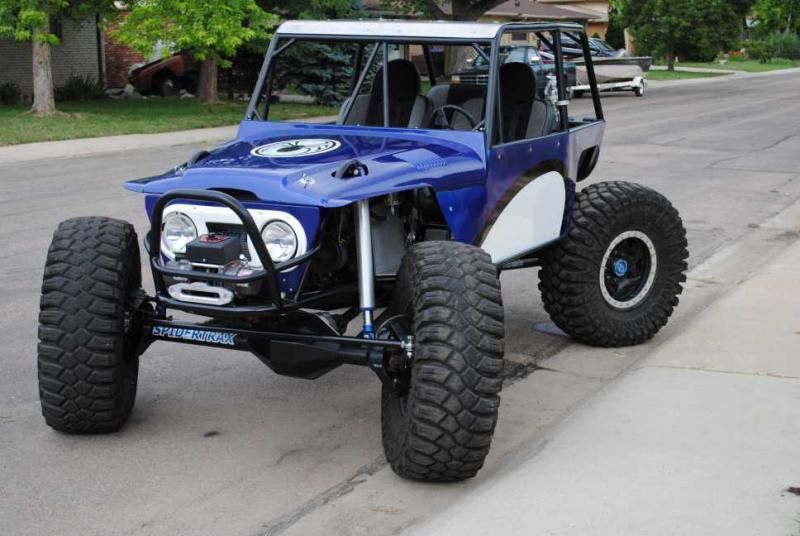
In the end it should look kinda like this....


But not as extremely small. This fiberglass version has been cut WAY down in size because the hood shape was pie cut/narrowed.

Anyone have any ideas or thoughts?
 

Metcalf

Expedition Leader
I like where you're headed. Although I suspect that a fully loaded J80 is beyond 6,000 lbs quite easily when loaded. I know mine is and it's nowhere near as "kitted-out" as some. So weight wise if you hit your goal weight I believe you'll have a strong setup that will work well, depending on how much you like the skinny pedal. :)

That is 'good' news with the typical J80 weight....well not for you...but for me! :)

I will be getting some corner weights once it is sitting back on the tires. I am interested to see where things are at now. It will be nice to track the weight through the buildup a little bit. It could allow me to change the position of a few things to have a positive effect on weight balance. The frame/axles didn't really feel that heavy when I was moving things around. I would SOOOOOOO like to come in under 4000lbs for a final weight. I doubt I can do that wet with fuel and loaded with people, but it is a good target to keep in mind.
 

Metcalf

Expedition Leader
Nothing amazing....


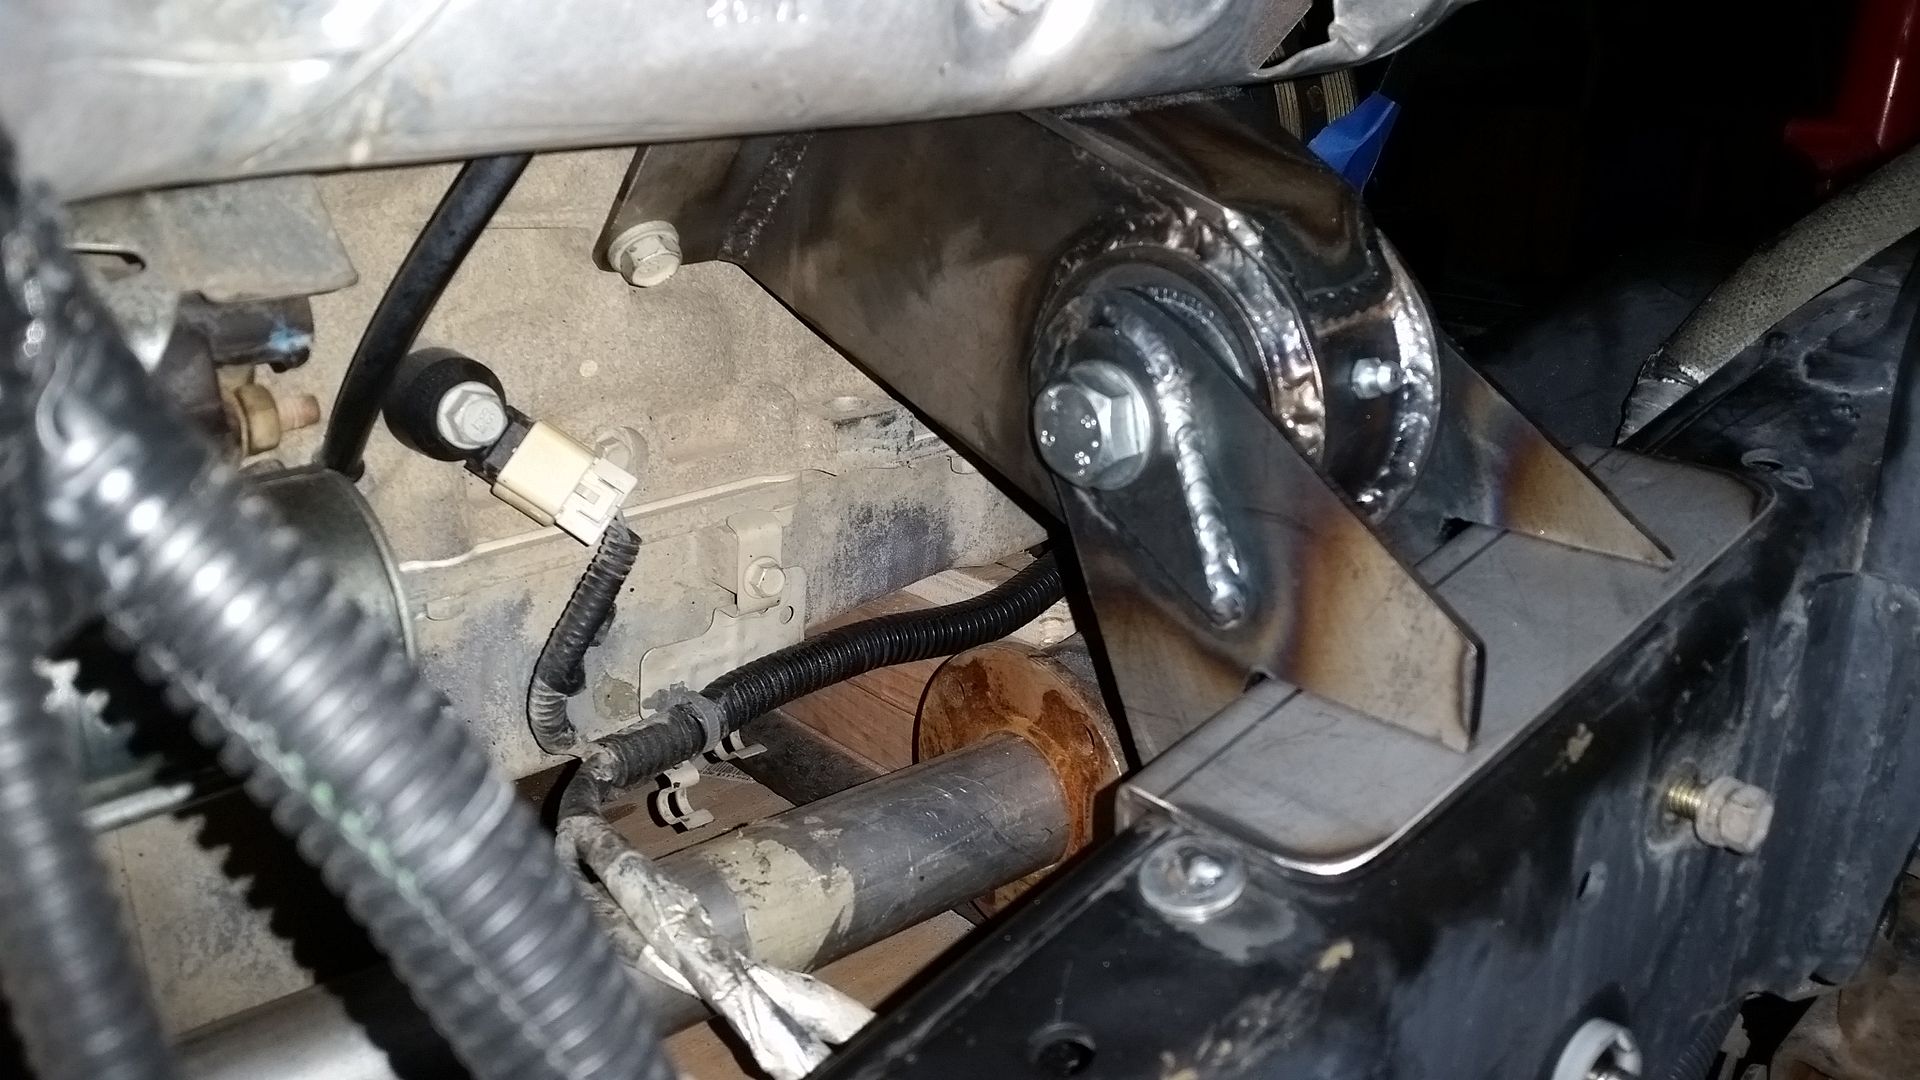
But the motor mounts are now welded and installed on the frame with a few inches of weld. There is some weight on the frame now!

I decided not to do any bracing on the engine mounts, yet. I played around with paper models for hours last night and couldn't come up with anything that didn't get in the way, or was so minimal that it wouldn't really do anything. I welded both sides of the mounting brackets all the way around. They are not going anywhere. I even remembered to sand the paint off the frame before welding. I just stuck a few inches of weld on the mounts to hold things in place. When I pull the car apart after mockup, or if I have to pull the engine out any time soon(?), I will weld up the rest of the engine mount pads.


Then it was time to tear the car down a little bit again. I need to pull the body off so I can tackle the next few projects. I had to pull the windshield and hood back off to make it manageable. I need my helper to get home so she can help me lift the body up onto the welding table.

It looks so sad again all stripped down....

The next project is going to be the transfer case crossmember. After that is finished I will be tackling the exhaust, at least from the manifolds to just past the crossmember. That is where the y-pipe merge will be approximately.

Looking further out, I need to rough in enough of the rear section of the body so that I can think about building body mounts which will be integrated into the rocker guards.
 

Arya Ebrahimi

Adventurer
Very cool build! I was reading along and saw where you got to that boss on the bell-housing that was in your way. I ended up doing the same thing on my L92/6L80 swap into a '94 80. Unfortunately that's about the last progress I made which was over a year ago :(

Definitely loving the LT230. I'm a sucker for that transfer case. Mind if I ask how much the adapter ran? That adapter didn't exist when I started and I ended up ordering a Mark's adapter to run the stock 80 case.
 

Metcalf

Expedition Leader
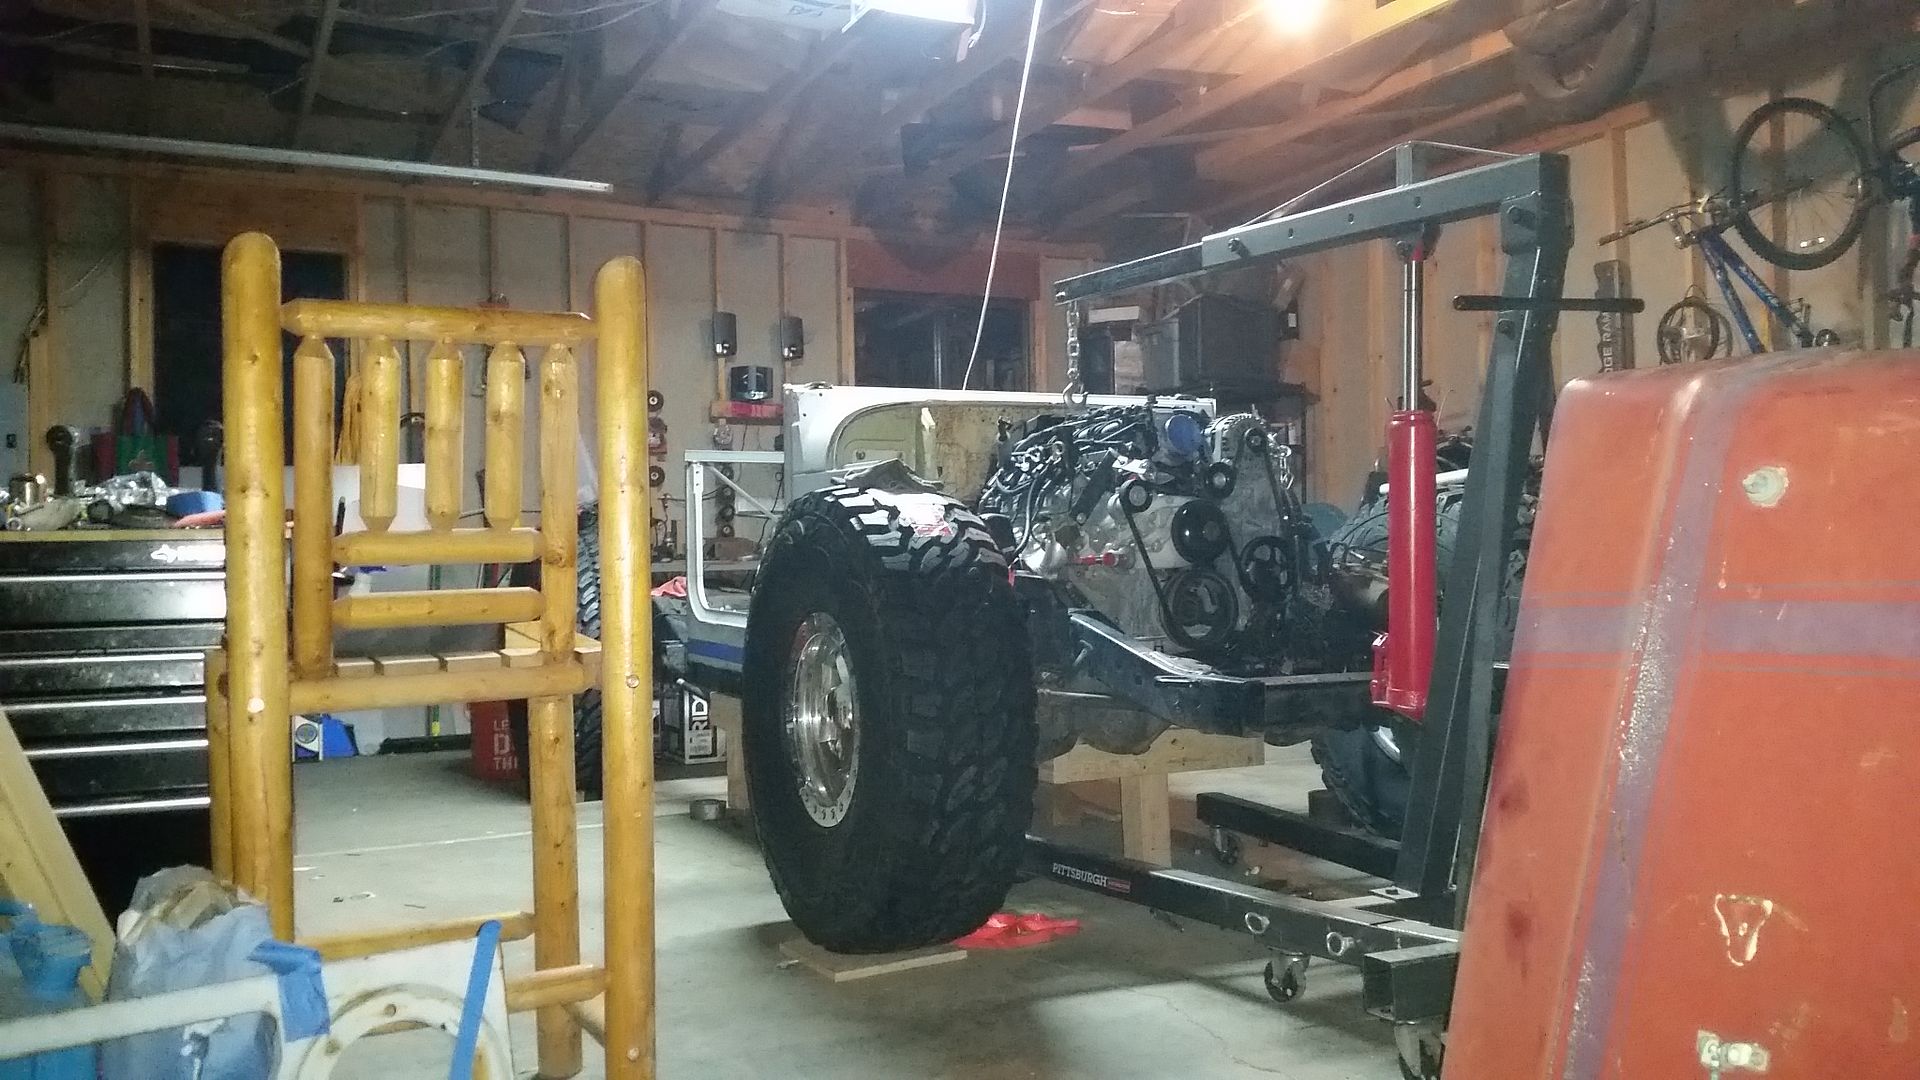
This evening I got the body stripped off the chassis again in preperation for building the transfer case crossmember along with the front half of the exhaust.
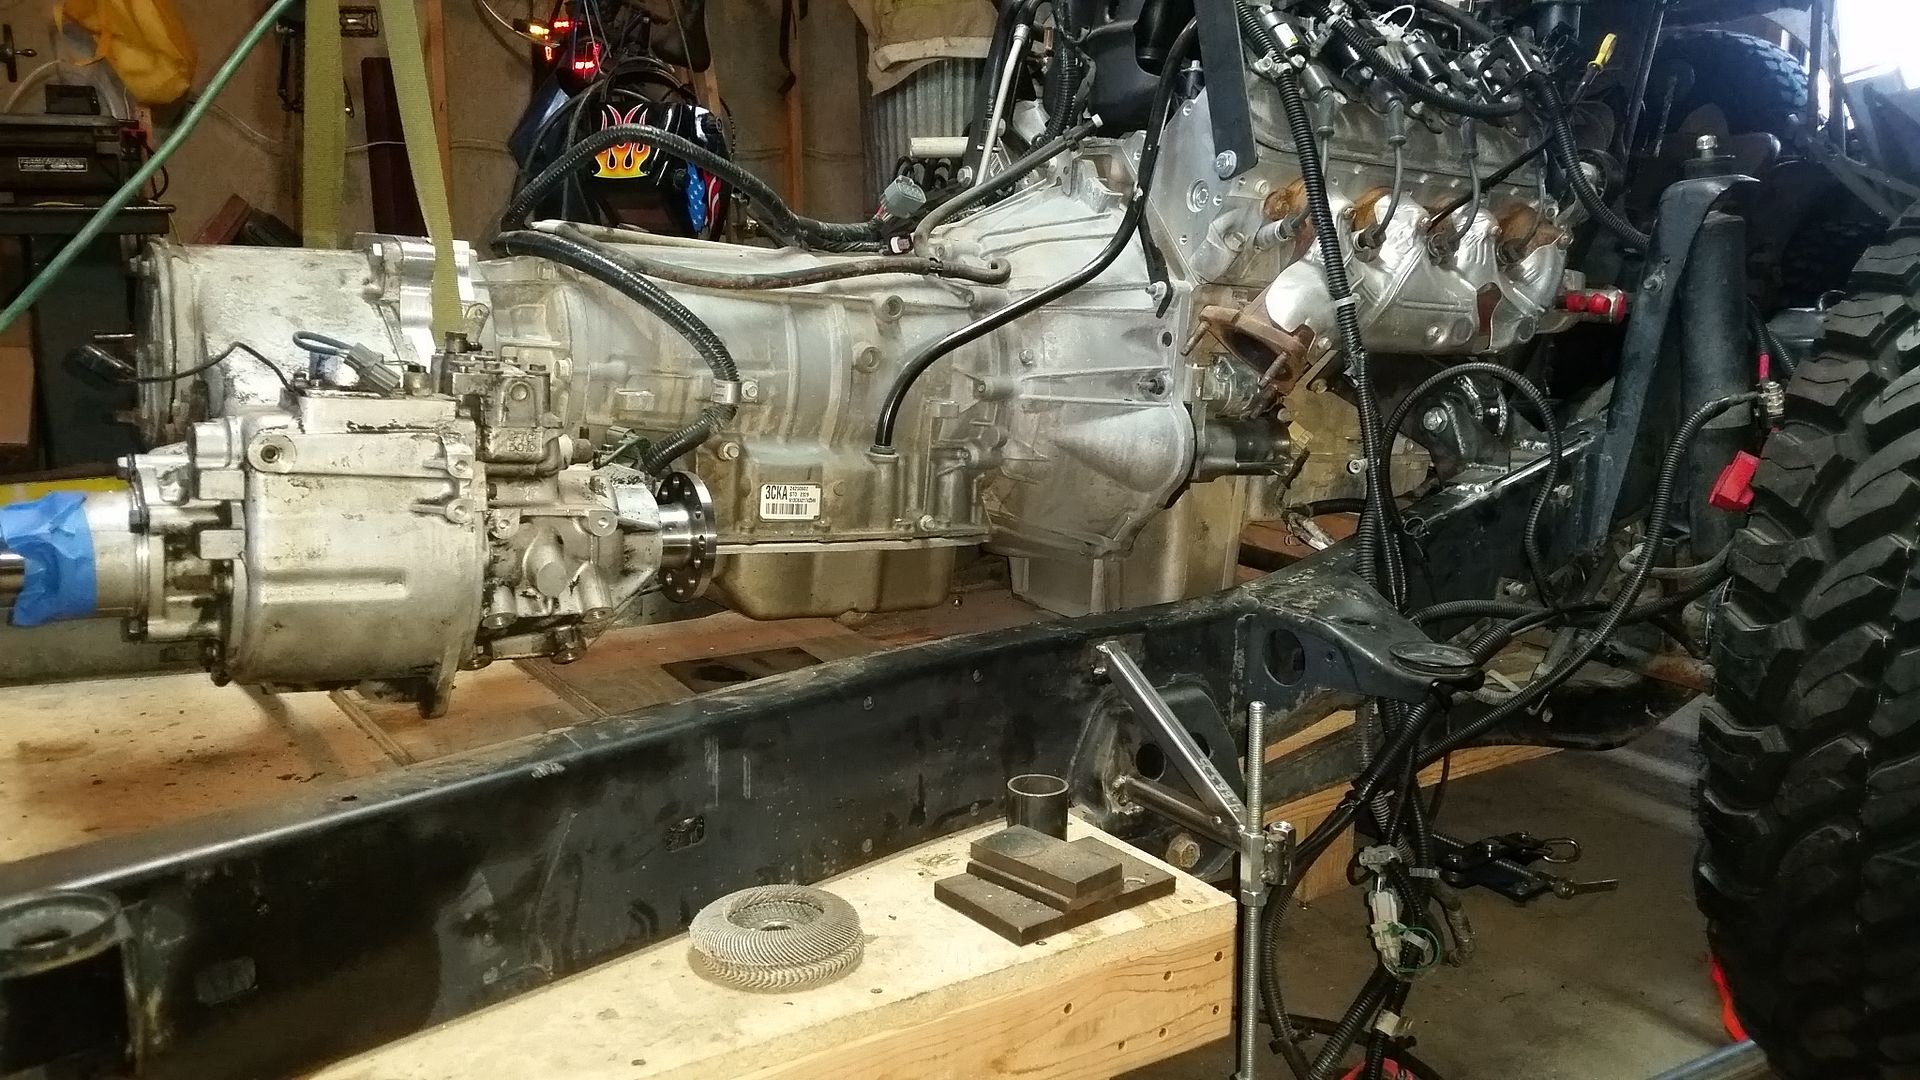


Those engine mounts that can pivot came in handy. I needed to lift the back of the transfer case to provide enough space to pull out the cribbing. Once that was done I reset the position of the transfer case by just using some smaller squares of material under the transmission pan. Now I have just the engine table surface, which is level with the bottom of the frame.

The transfer case crossmember/mount, will need to sit right on the engine table. That crossmember will also provide some support for the belly pan.
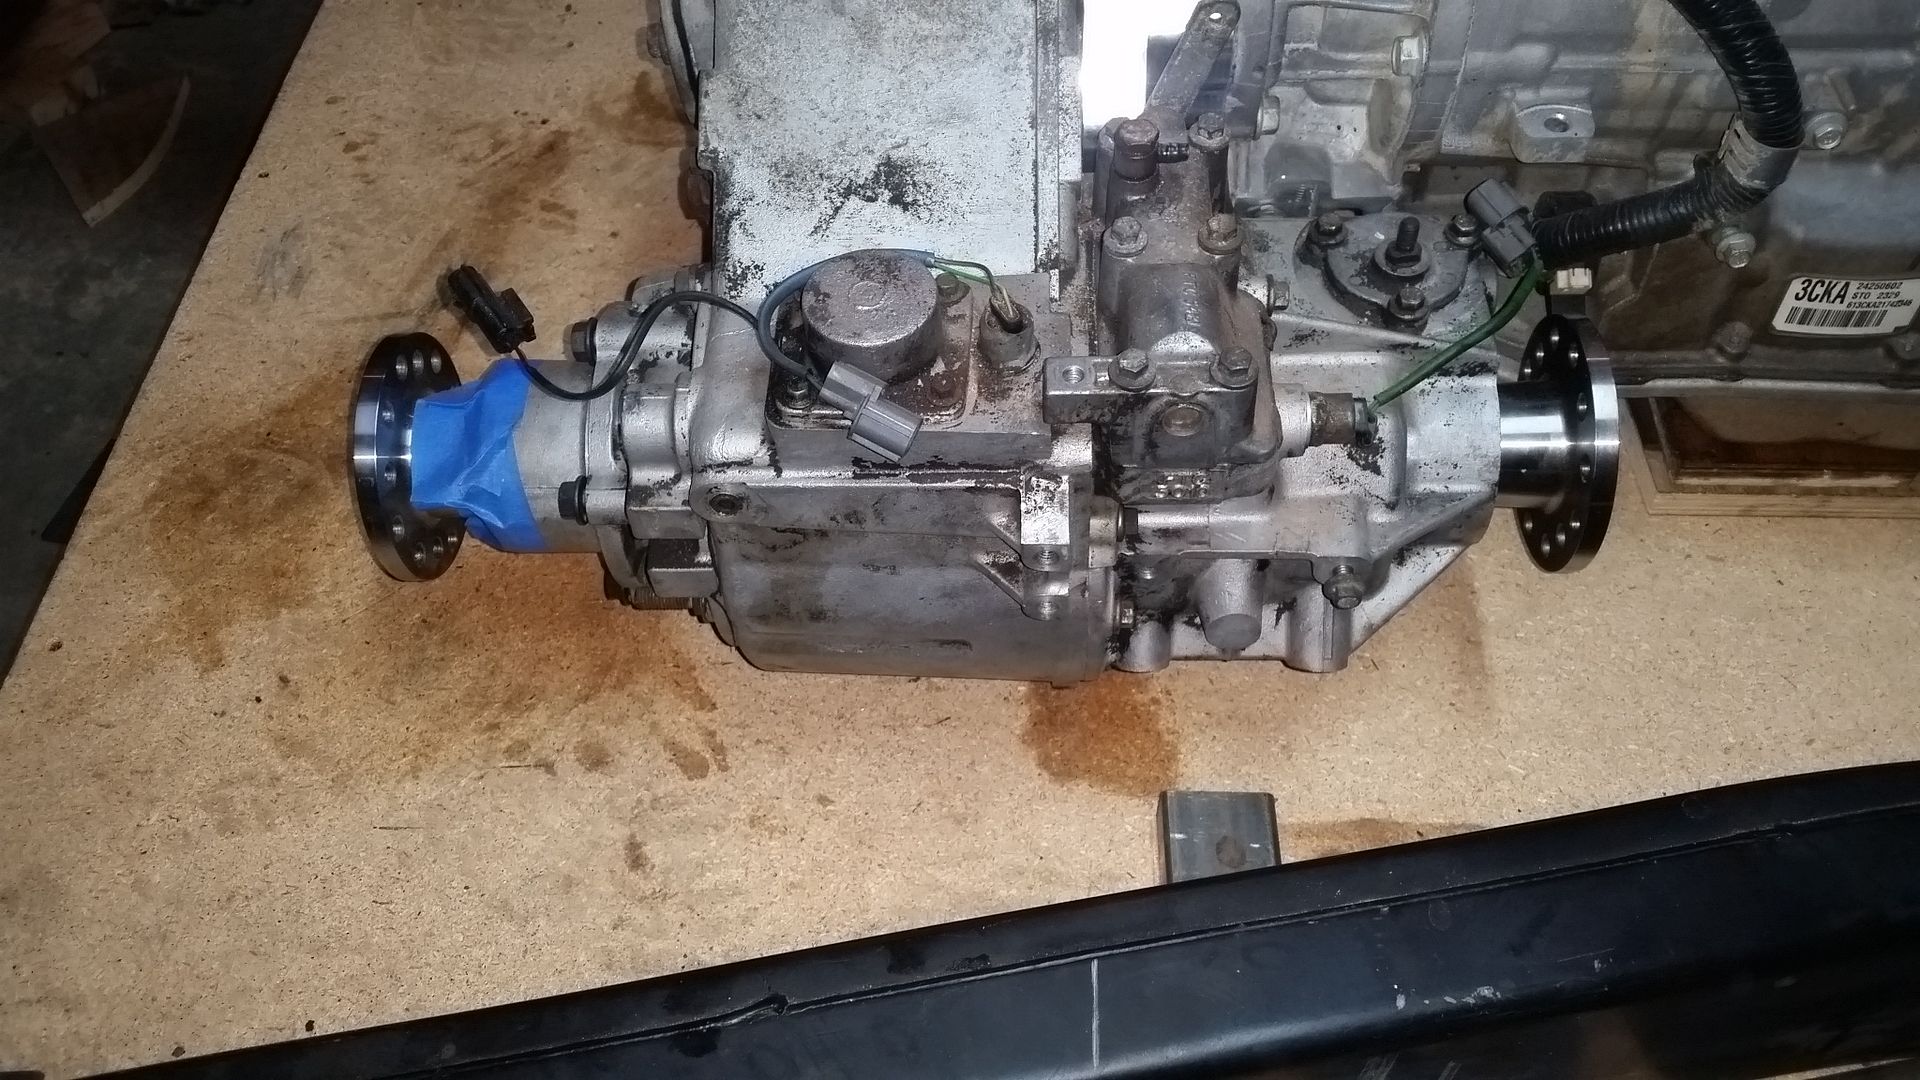


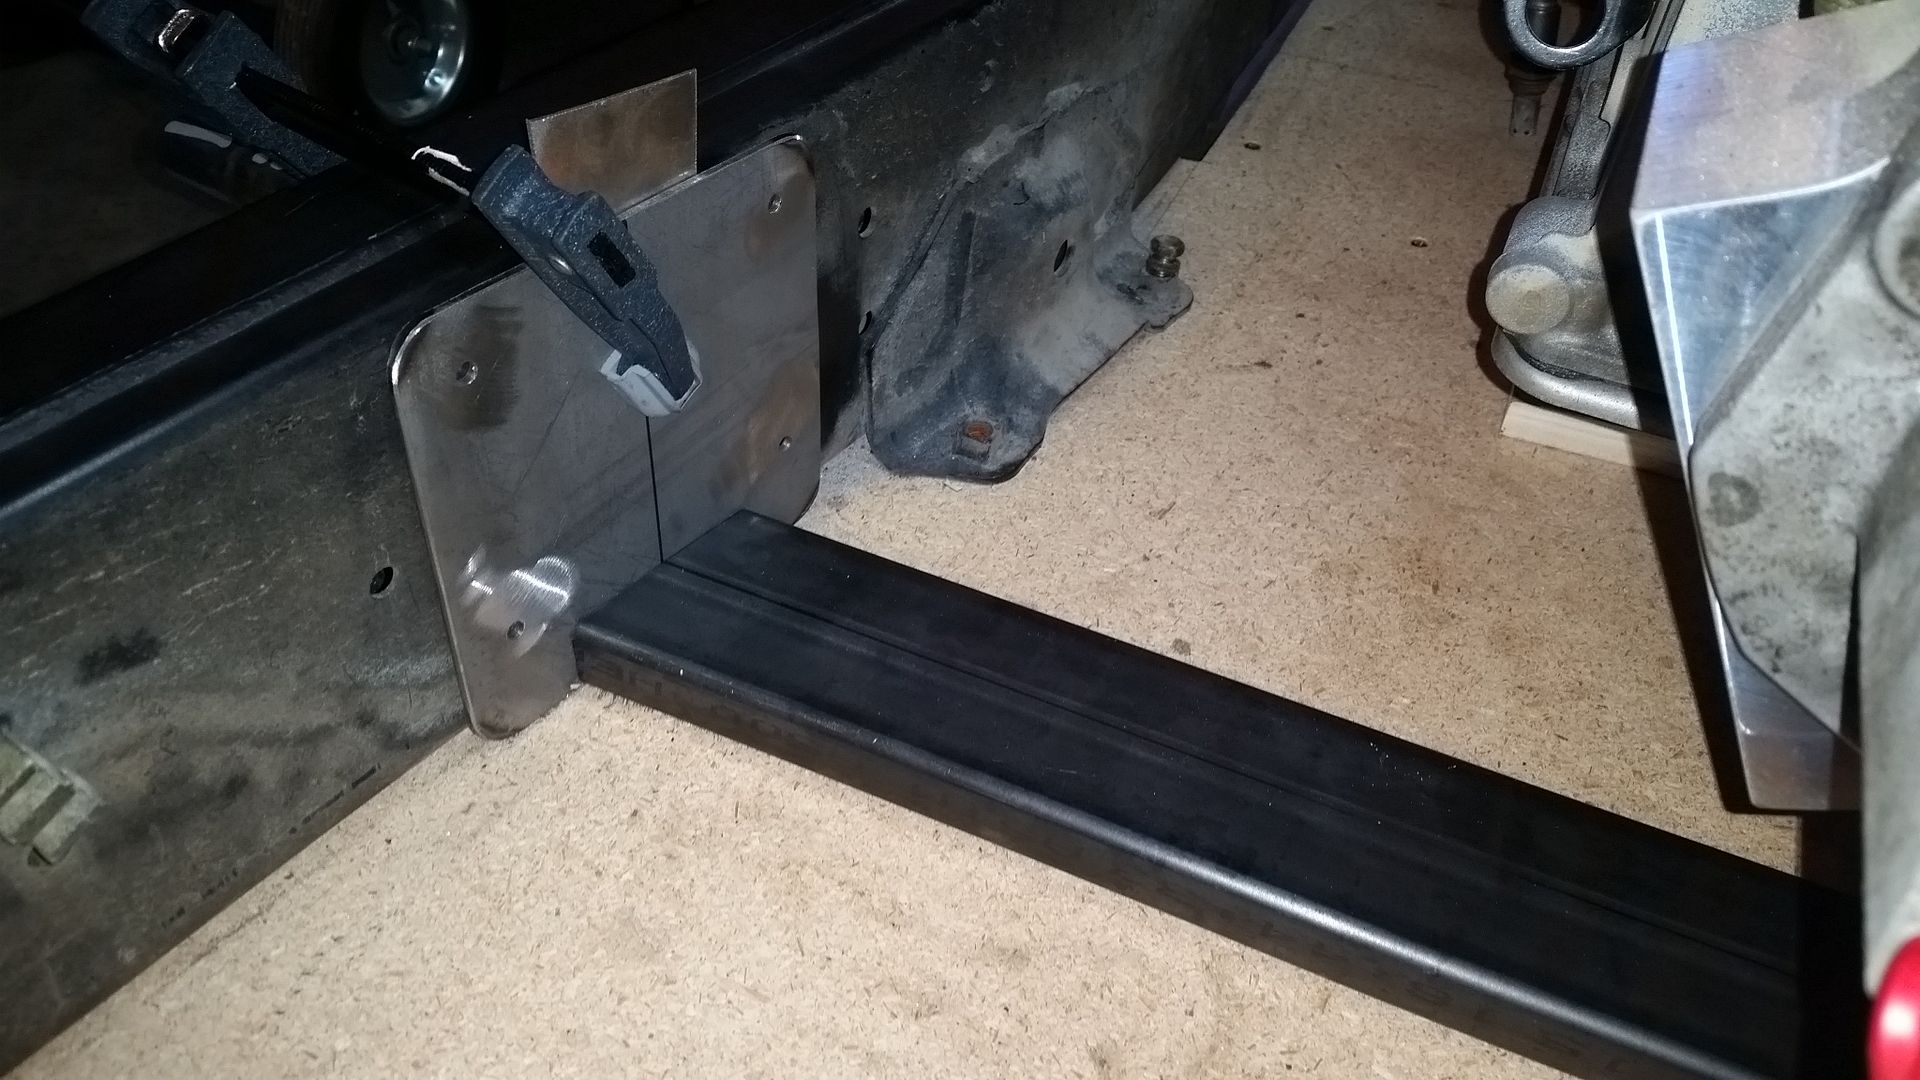
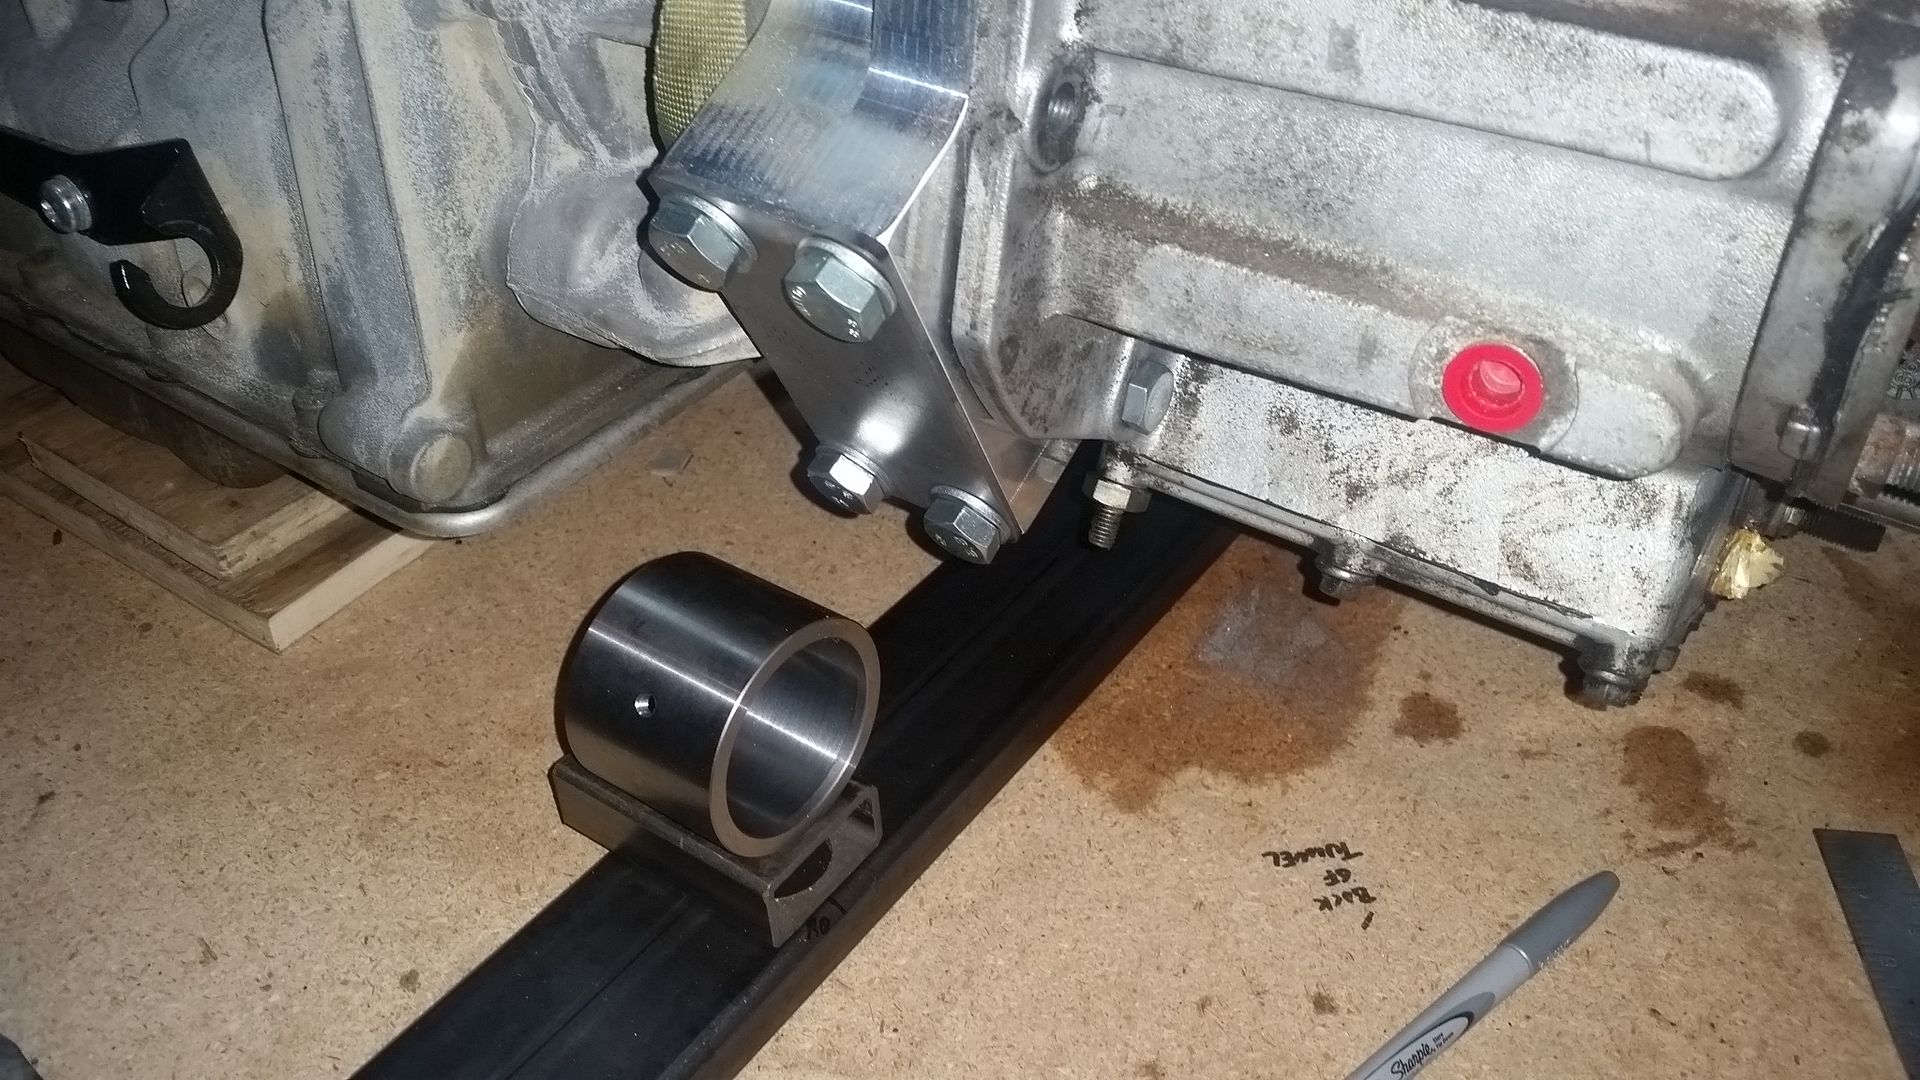
This is the passenger side. You can see a little stick of 1x2 material. I will likely be using 1x3 material for that crossmember. The 3" wide tubing will make adapting to the 2.63" mounting width of the bushings/joints very easy. You can see the mounting pads on the front output housing for the mount, they use 4 12mm fasteners. There is also another 2 8mm bosses that I can grab.
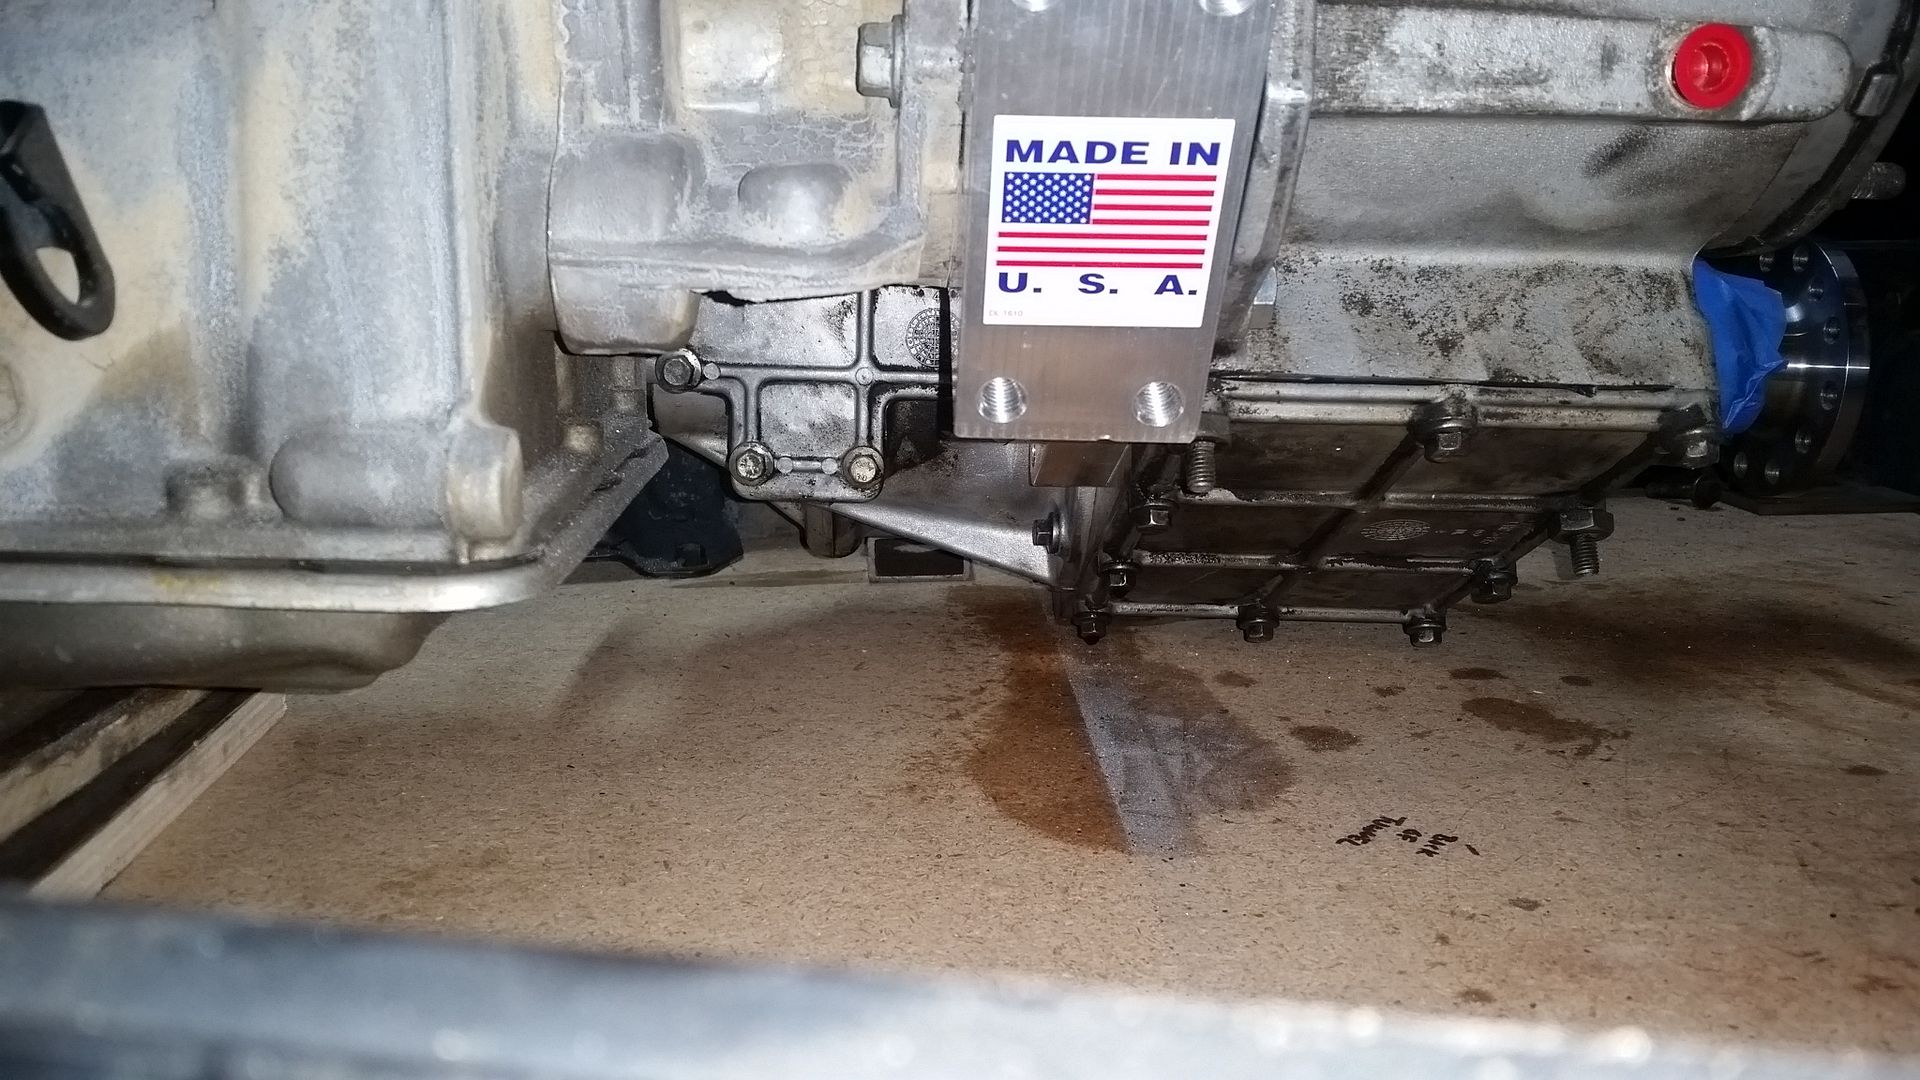


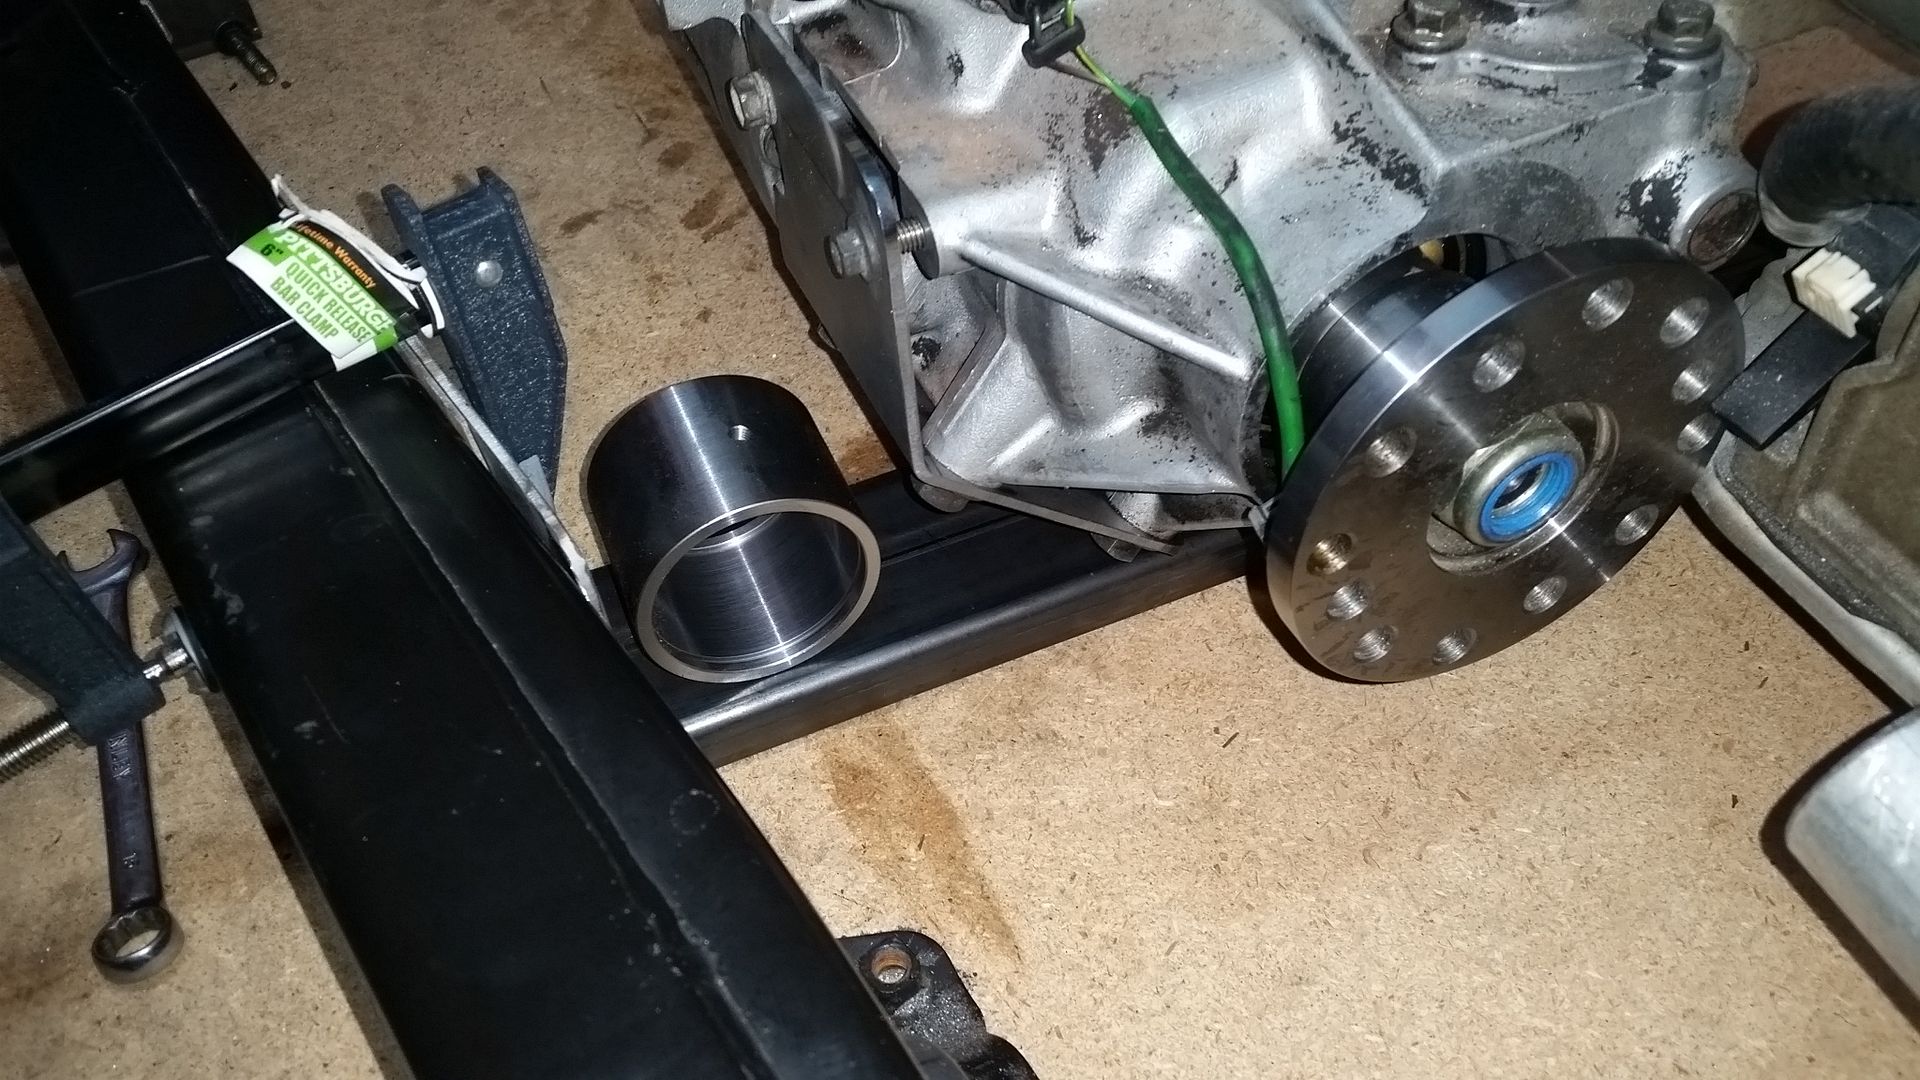
Here is the view from the drivers side. The mounting pad for the drivers side mount is on the adapter. It uses 4 12mm fasteners.

One issue is that the pads for the drives side and passenger side are not in the same position front to back. They are in slightly different spots. I think I can make it work, but the drives side bracket will be a little more complicated than I wanted.
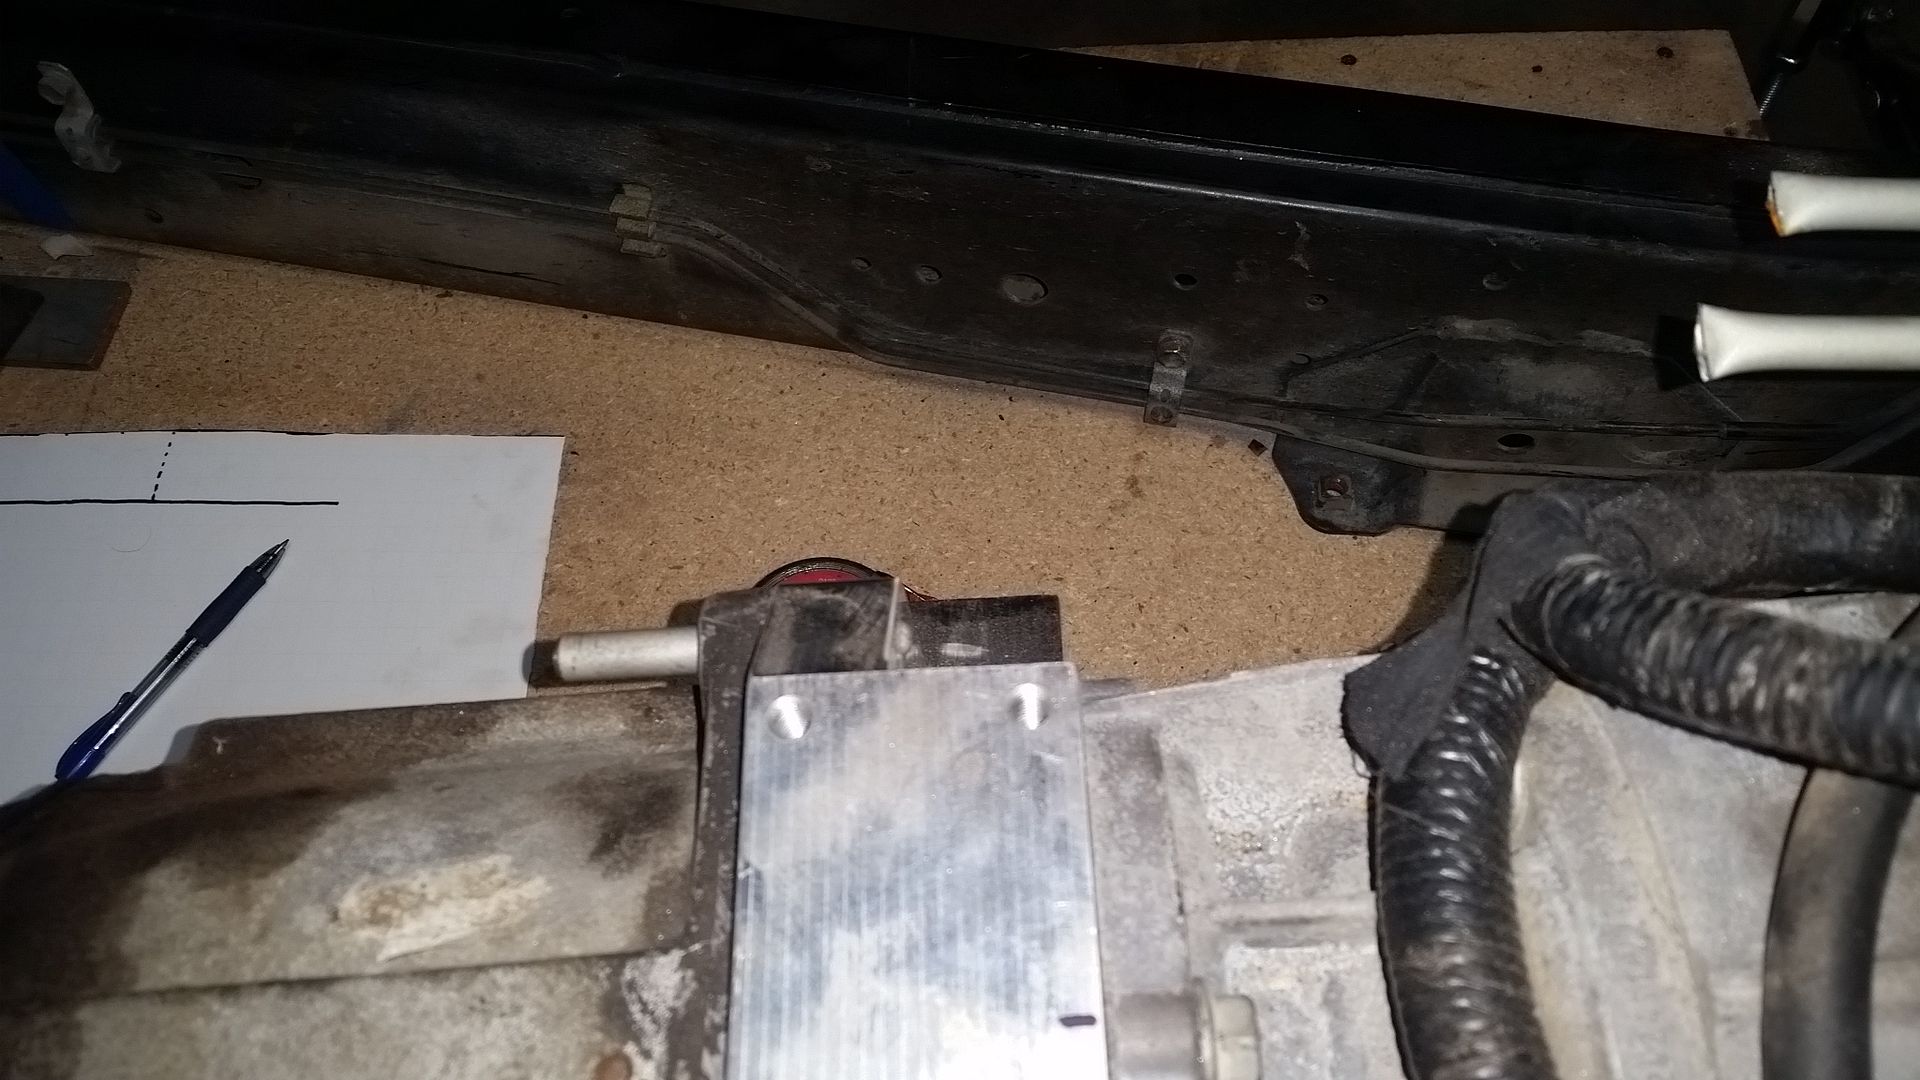


Also, the factory brake lines on the frame are in a pad place. Looking at the brake lines. The load proportioning valve combines the two lines into one near the rear axle. I wonder if it is worth keeping the load proportioning valve or just replace it with an aftermarket adjustable unit? Since the rear brake lines to to a single unit I might as well pull the factory twin lines and replace them with a single line. I can likely use most of the factory mounts which would be nice.

Overall it shouldn't be too bad. I just need to connect it all together...

After the crossmember I will work on the exhaust. I have some neat tricks for that I have been working on that I will be sharing.

Fun Fun.
 
Last edited:

Metcalf

Expedition Leader
Very cool build! I was reading along and saw where you got to that boss on the bell-housing that was in your way. I ended up doing the same thing on my L92/6L80 swap into a '94 80. Unfortunately that's about the last progress I made which was over a year ago :(

Definitely loving the LT230. I'm a sucker for that transfer case. Mind if I ask how much the adapter ran? That adapter didn't exist when I started and I ended up ordering a Mark's adapter to run the stock 80 case.

I'd rather not comment on the adapter cost. I would contact Nick at Rover-Works. It is not a cheap part, but not THAT much worse than what you see from Novak or Advance Adapters. It is a very nice billet aluminum adapter.

The LT230 should be pretty interesting. The gearing works out really well. I think I might be cost negative on transfer case vs regearing the axles. I would have had to buy an adapter anyways for the most part. Some less expensive than others. Gearing the axles is never cheap.

I do have to admit that I wanted something with the capability to front dig with the longer wheelbase. The ability to open the center diff might be neat to play around with. I don't know how long the transfer case would survive, but it should 'dig' the front axle with the rear brakes locked up.
 

locrwln

Expedition Leader
I would lose the lspv. I plan to on my 4Runner as we are taking them in a direction where I think a traditional adjustable dial proportioning valve will work better.
.
Also, I used my loaded/built/factory locked 80 on 35's pretty hard and I never had a problem with the rear axles. Of course I was aware of the potential problem and wheeled accordingly.
moab%20%202008%20033-L.jpg

.
Jack
 

Metcalf

Expedition Leader
Not a ton of progress this weekend, but some.


I was able to get most of the big parts cut and fitted for the transfer case crossmember. I made frame plates, cut and fitted the section of box tube, marked the frame for all the needed holes, and made the mounting plates on the transfer case. Now I just need to connect everything together. I see much poster board and foam board in my near future. I also made a set of mock up bushings for the large joints, but I forgot to take any pictures of those in the spinny round part maker.

I'm waiting on an order from McMaster for some metric 'stuff'.

The crossmember is going to attach to the inner surface of the frame with M10 steel rivet nuts. The belly pan is going to attach to the crossmember with M10 tube style clip nuts ( along with the rest of the belly pan attachment points). I also lucked out in that the stock transmission crossmember weld nuts are also M10 so I can use those also and have a common hardware size. My hope is that the belly pan will be 1/4-3/8" 6061 or 7075 aluminum plate. Once everything is bolted together, that should add a decent amount of structure in the middle section of the frame.
 

Metcalf

Expedition Leader
I would lose the lspv. I plan to on my 4Runner as we are taking them in a direction where I think a traditional adjustable dial proportioning valve will work better.

Also, I used my loaded/built/factory locked 80 on 35's pretty hard and I never had a problem with the rear axles. Of course I was aware of the potential problem and wheeled accordingly.

Jack

Any idea on the weight of your old J80?

I don't really see a reason to keep the LSPV. I do hate to go to an aftermarket proportioning valve that requires npt conversion fittings.....
I do wonder if the factory LSPV will work right with only one input line? I don't see a reason to run twin lines to the rear like OEM only to combine to one line going to the axle.
 

Forum statistics

Threads
188,362
Messages
2,906,034
Members
230,117
Latest member
greatwhite24
Top