Blender, My LX450/FZJ80 + FJ45esk + GM + Land Rover crazy concoction

Metcalf

Expedition Leader
We all are.
Well some of us are.
No offence to some people but some people's "cool stuff" is cooler than others.

I thought I was doing some cool stuff with my 4x4 Vanagon conversion then I checked out some of the things you were working on and I was "maaaan, why didn't I think of that.

Just got my TIG welder up and running and will be building an aluminum fuel tank sometime soon so I was excited to see the progress on your tank.

You even took the time to show us your progress on learning to weld aluminum.

Again, Thank you. One of my overall goals with these build threads is to get people to close the catalog and get out in the garage to make what you really want. I'm SOOOO tired of seeing the same thing over and over again. This isn't rocket science. Sure, I might be slightly more gifted at it than some, but I feel that everyone can get to where I am. The cost of decent workable tools has come down so much in the last decade or two. The other problem is that I think people are almost afraid to ask questions these days. There is definitely some boards that are worse than others for some of those questions. I always try and answer every question I get and most of the time you don't even need that thick of skin to read my answers. I wish I could poke my nose in every thread, but I just don't have THAT much time. I try and keep up on a few like yours.

Cheers.
 

vwhammer

Adventurer
Initially I had a deadline of late spring/early summer now I am crossing my fingers that I get to do some off road camping this fall.
Lets see where both of us are in 3 to 5 months.
 

Metcalf

Expedition Leader
Initially I had a deadline of late spring/early summer now I am crossing my fingers that I get to do some off road camping this fall.
Lets see where both of us are in 3 to 5 months.

Yup. I have a rough goal of October, but that doesn't seem to be very far away!
 

Loubaru

Adventurer
Again, Thank you. One of my overall goals with these build threads is to get people to close the catalog and get out in the garage to make what you really want. I'm SOOOO tired of seeing the same thing over and over again. This isn't rocket science. Sure, I might be slightly more gifted at it than some, but I feel that everyone can get to where I am. The cost of decent workable tools has come down so much in the last decade or two. The other problem is that I think people are almost afraid to ask questions these days. There is definitely some boards that are worse than others for some of those questions. I always try and answer every question I get and most of the time you don't even need that thick of skin to read my answers. I wish I could poke my nose in every thread, but I just don't have THAT much time. I try and keep up on a few like yours.

Cheers.
Great statement. You have definitely done what you sought out for. With the lower price of decent tools and the age of free information from the internet (if you are bright enough to decipher through the BS) IMO there isn't much you can't teach yourself now a'days if you have the time and patients. I've definitely stolen some ideas from you for my dumb welding/fab projects that I'm teaching myself to weld on....and surprisingly, almost everything I've done so far looks much closer to professional that I thought it would.
 
Not only do the right tools make the job easier, they make it possible in the first place. I remember the days of cutting steel scraps with my sawzall and bending steel brackets with a hammer in my 4" bench vice.
 

Metcalf

Expedition Leader
Not only do the right tools make the job easier, they make it possible in the first place. I remember the days of cutting steel scraps with my sawzall and bending steel brackets with a hammer in my 4" bench vice.

I think there is a lot a guy can do with some pretty basic tools. I basically built my flat fender with some pretty cheap tools, mostly all from Harbor Freight. I don't want to scare people away from gabbing because they think they need 10k in tools to build a bumper.

I fins the more I fab the more efficient I get. There is a learning curve for sure.
 

NCFJ

Adventurer
I agree 100% I tell my wife all the time that I get a bunch of the work I get simply because I am willing to do the work. None of it is Rocket science and all the information is out there. If an old guy like me can take the plunge and play with multi port fuel injection motors and all the differences they bring to the table, so can anyone willing to spend the time to learn something new. I'm not happy unless I am challenging myself :)

Loving the build!
 
I Always looked at the pickup/taco threads.
So glad to find this. Amazing. Great work and planning. I agree. Get out in the garage and made junk! Learn something. Teach yourself. Get some skills.
 

Metcalf

Expedition Leader
A really good weekend for the Lexus project....


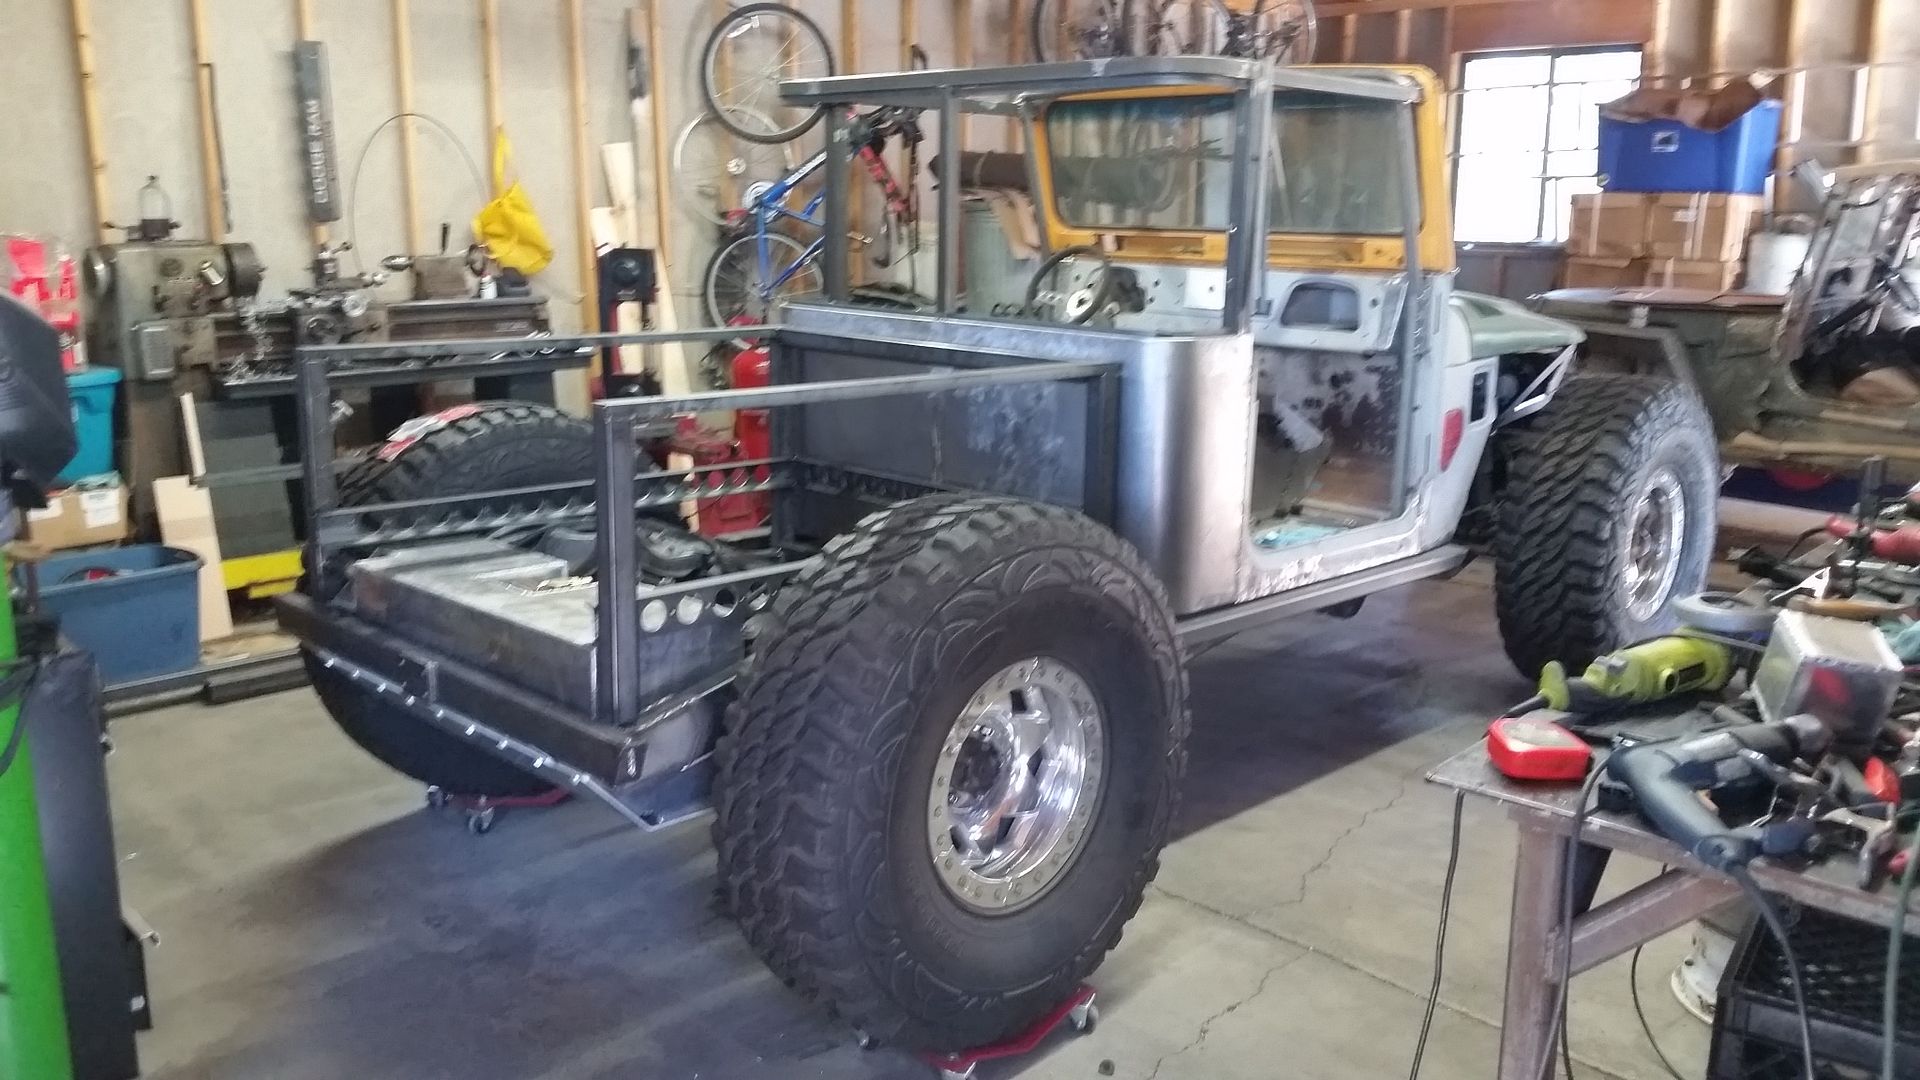
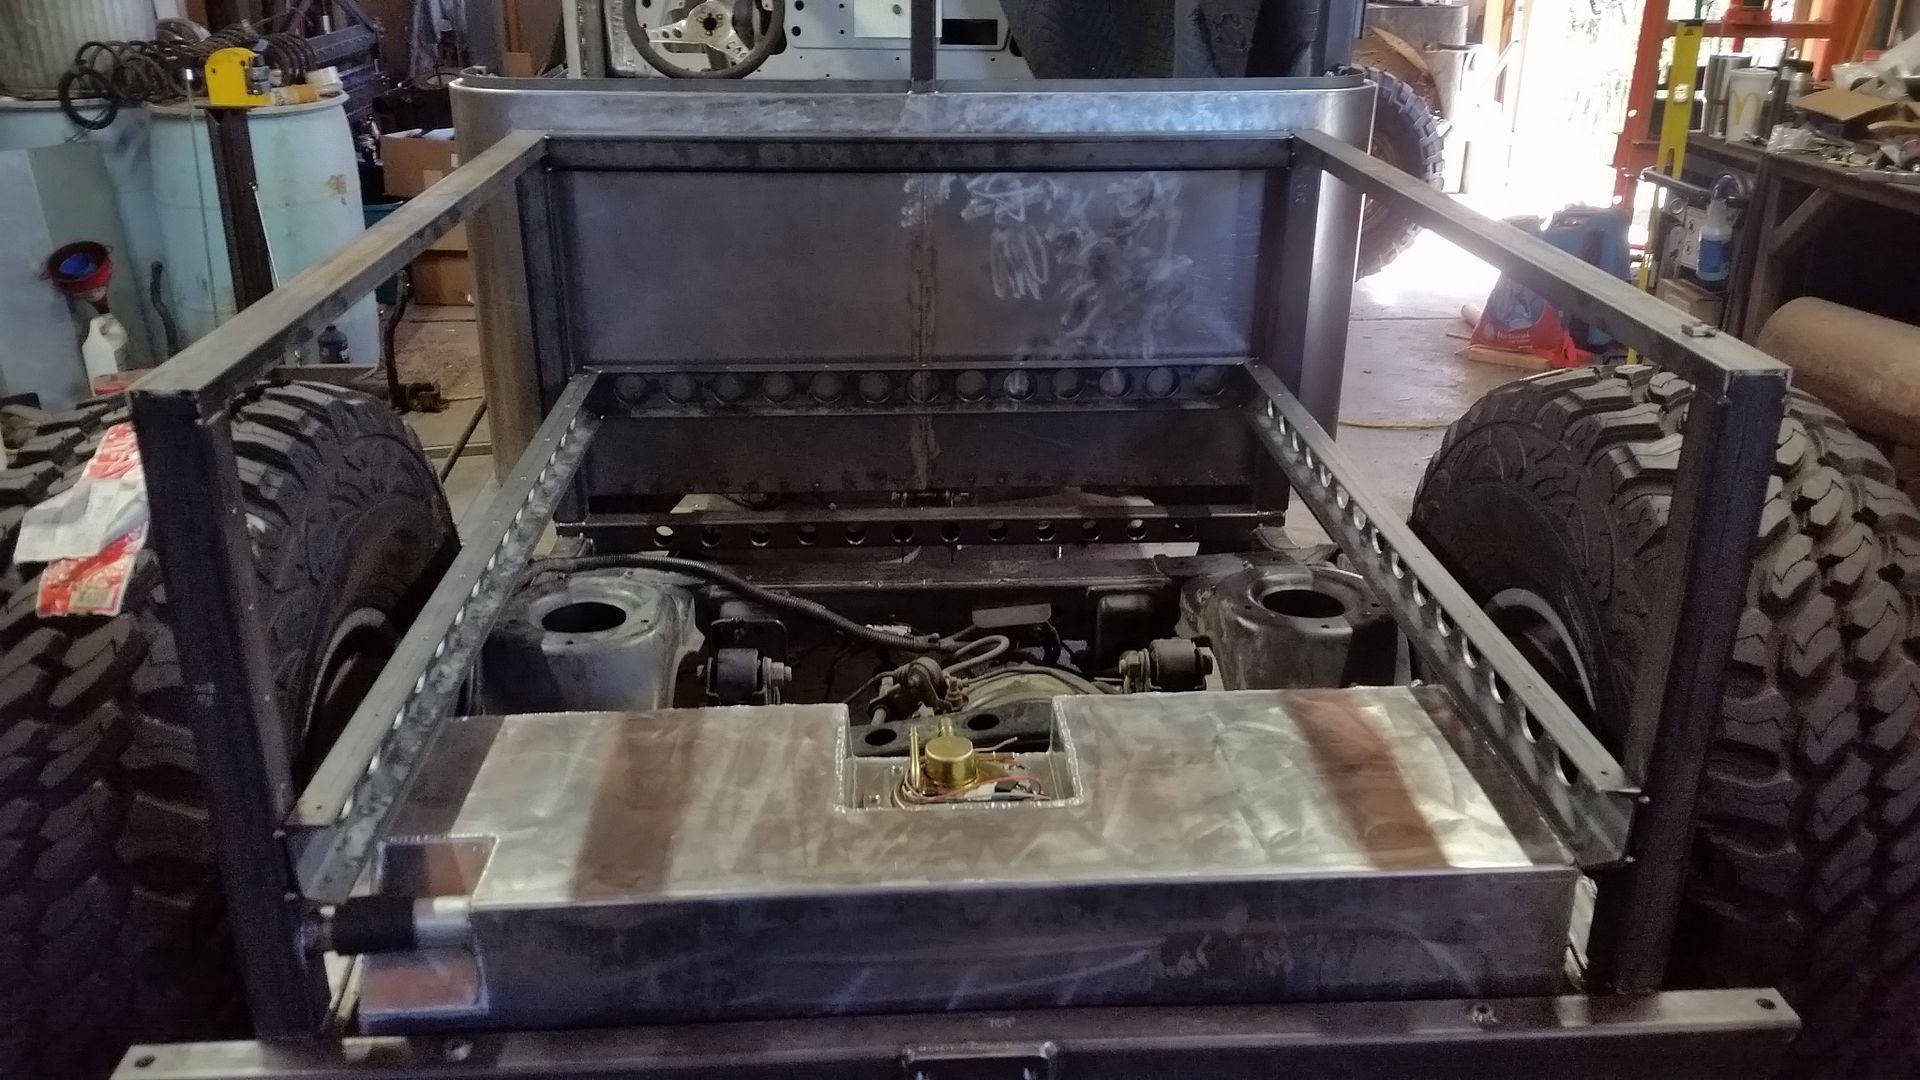
The project is now ready to move onto the next phase. I was able to get all the structure of the bed frame all fabricated and heavily tacked into place. This was all done while the chassis was leveled to the belly plane of the frame. That was the last assembly that had to be built like that however, so it was finally time to pull it off the blocks and get ready to spin it 90 so I can reorganize the garage for the next phase.


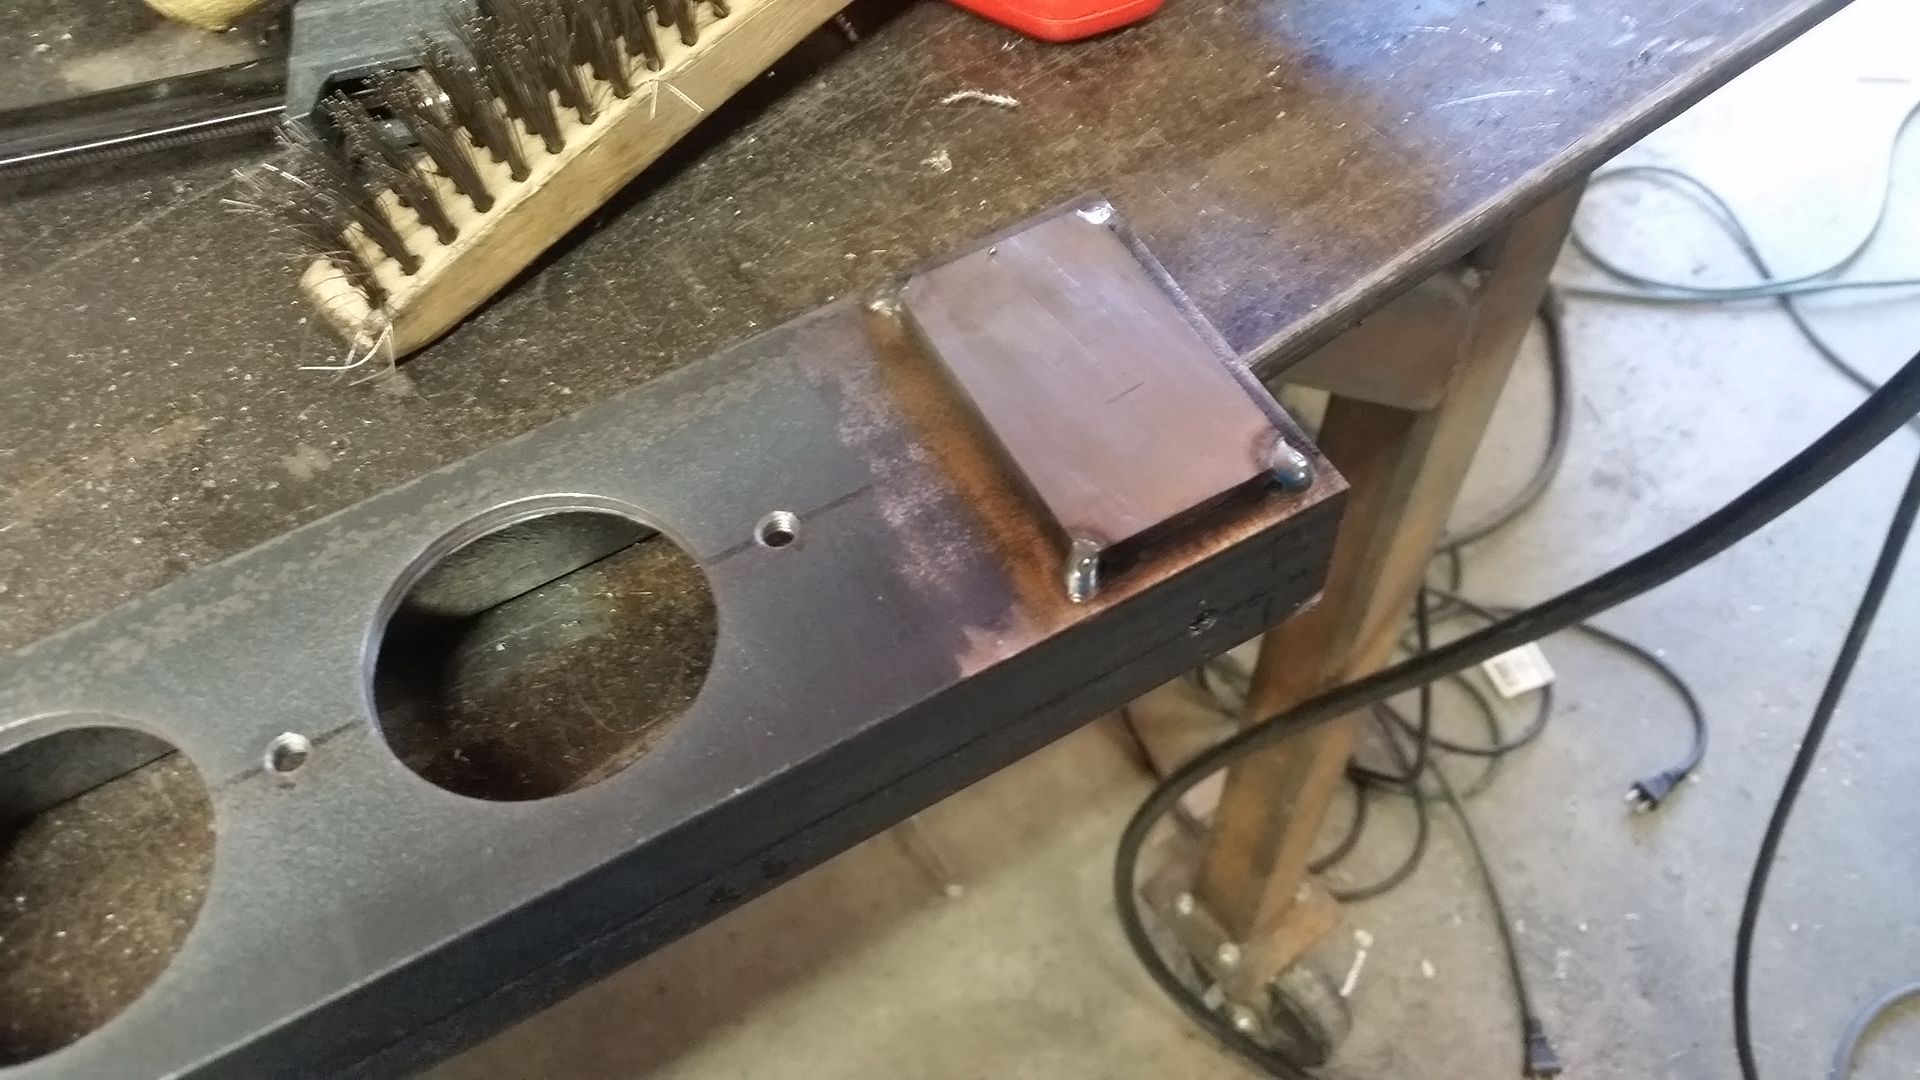
This is most of the structure for the bed frame. I still have to build the steel panel that will be under the tailgate. That will also hold the lights, hinges, gas tank straps, and a few other things. The C-channel is going to provide a flange for mounting the bed floor along with acting like a basic drawer slide for the window storage.


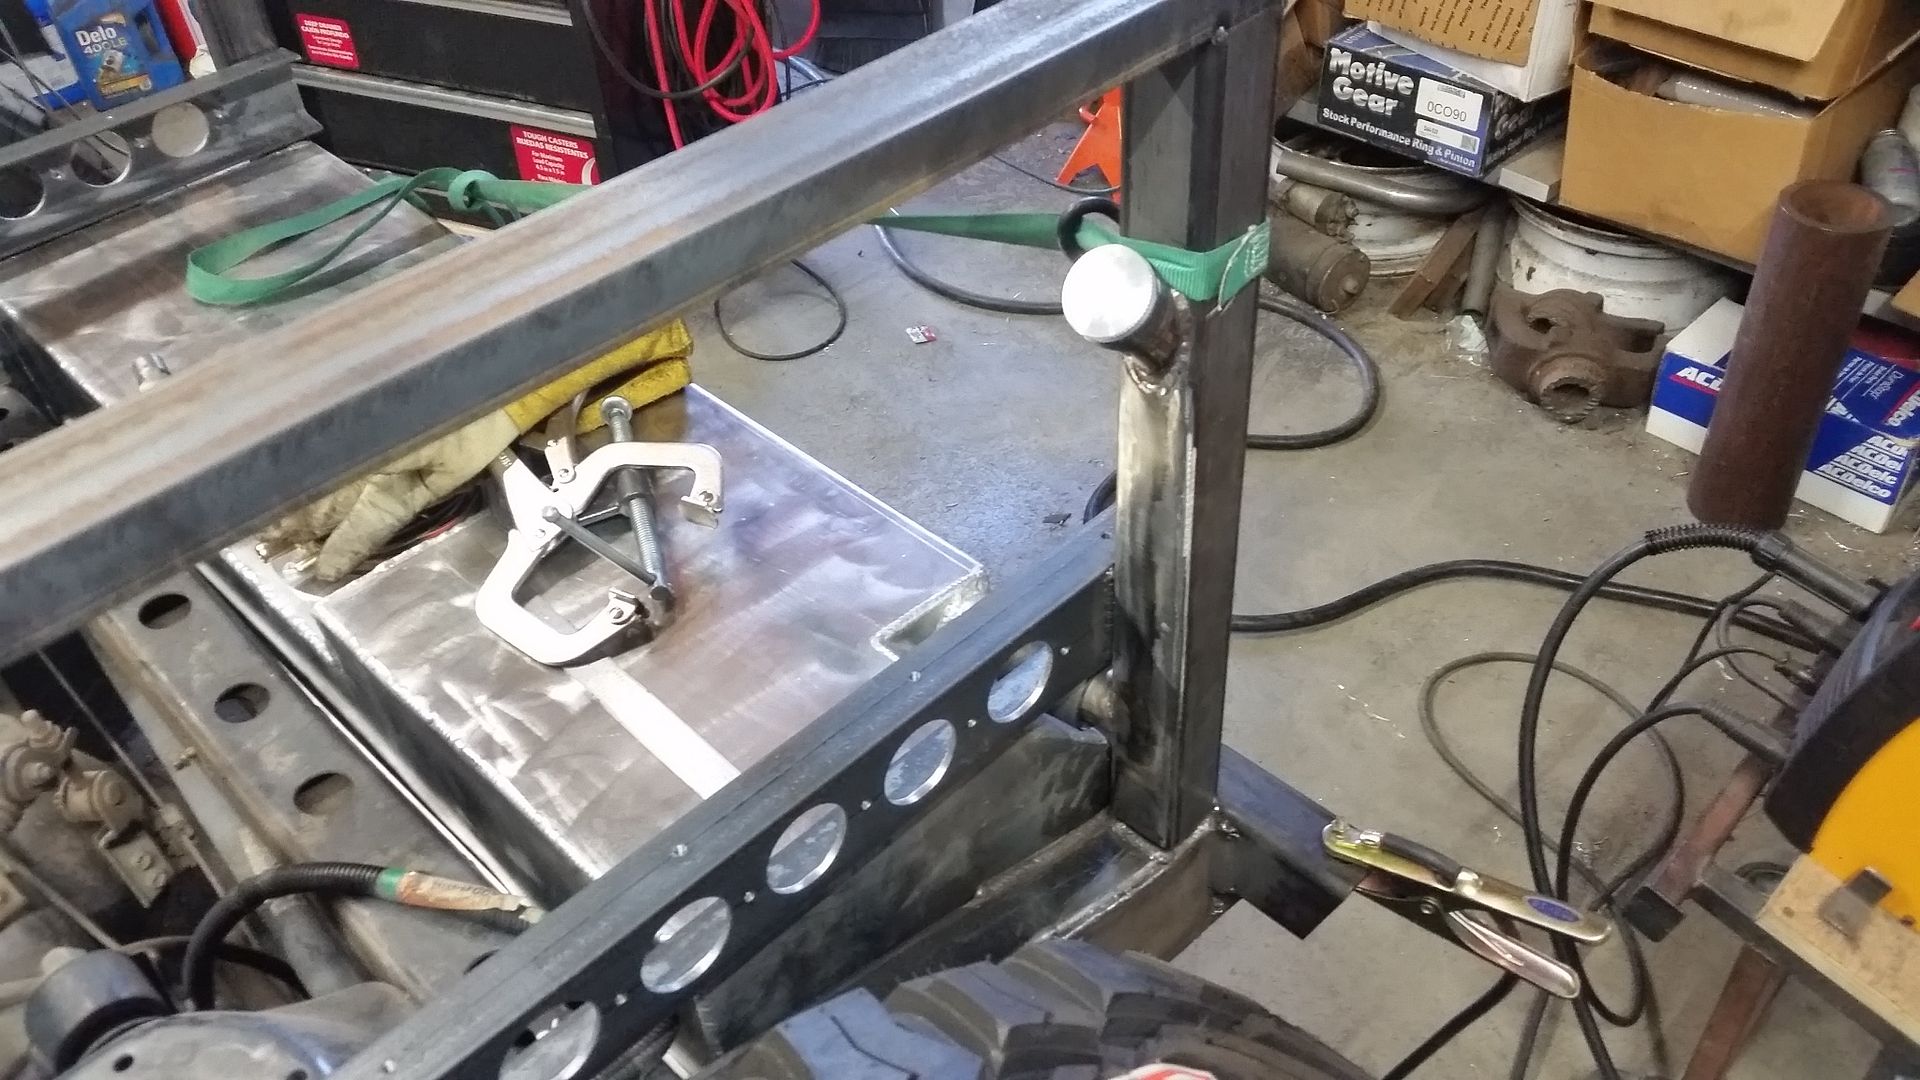
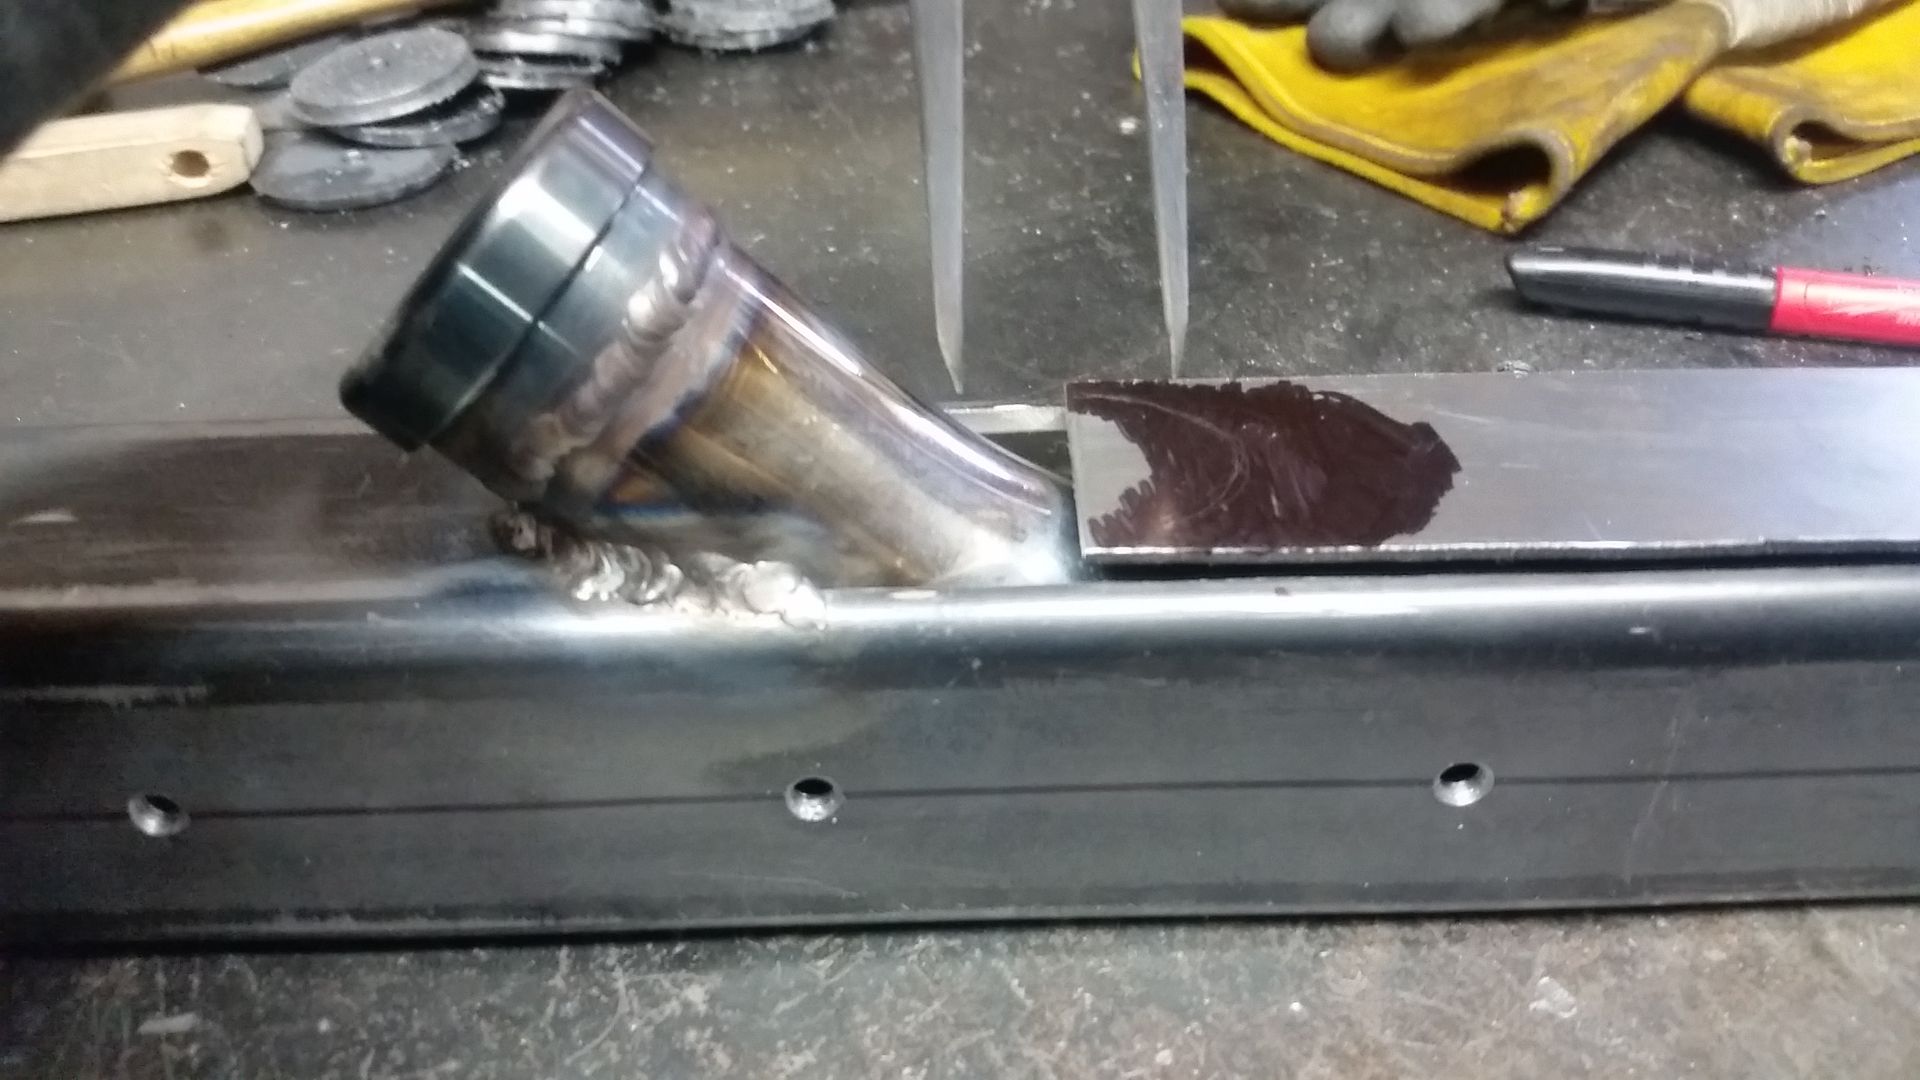
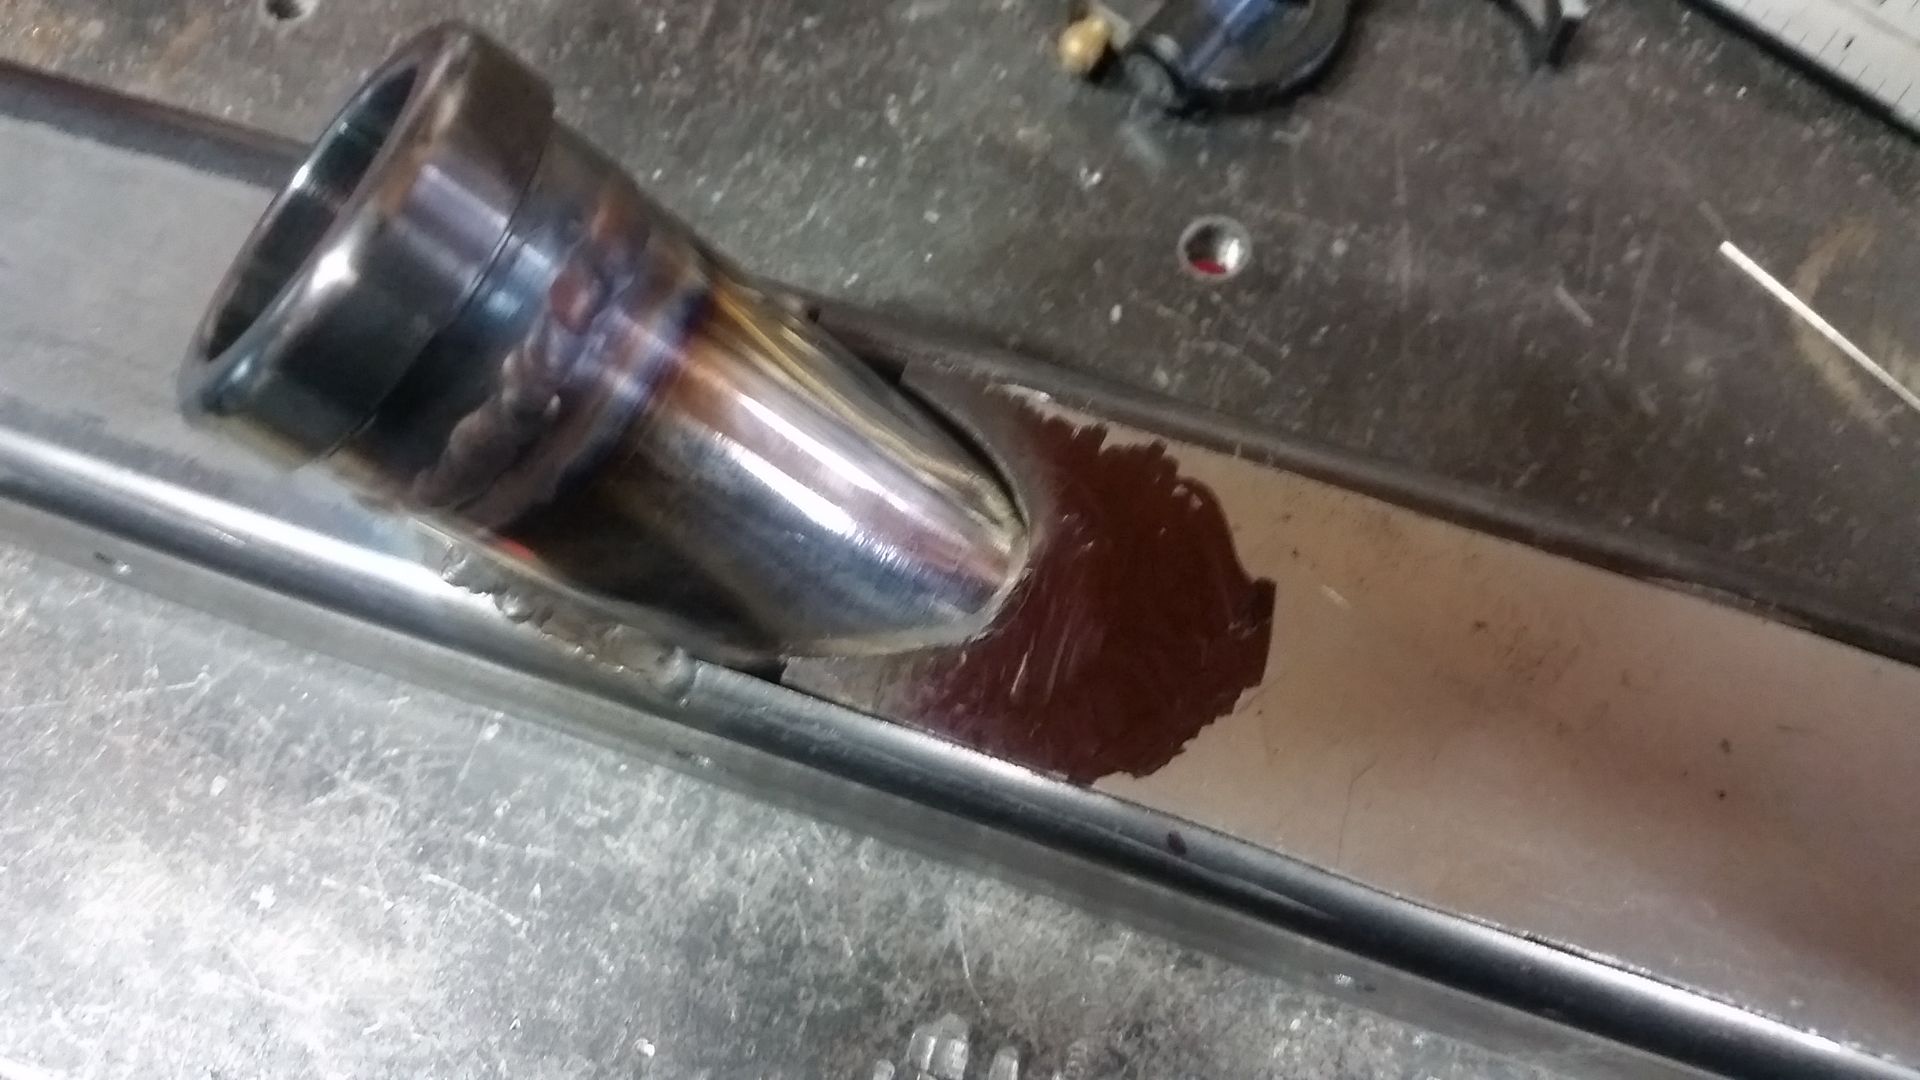
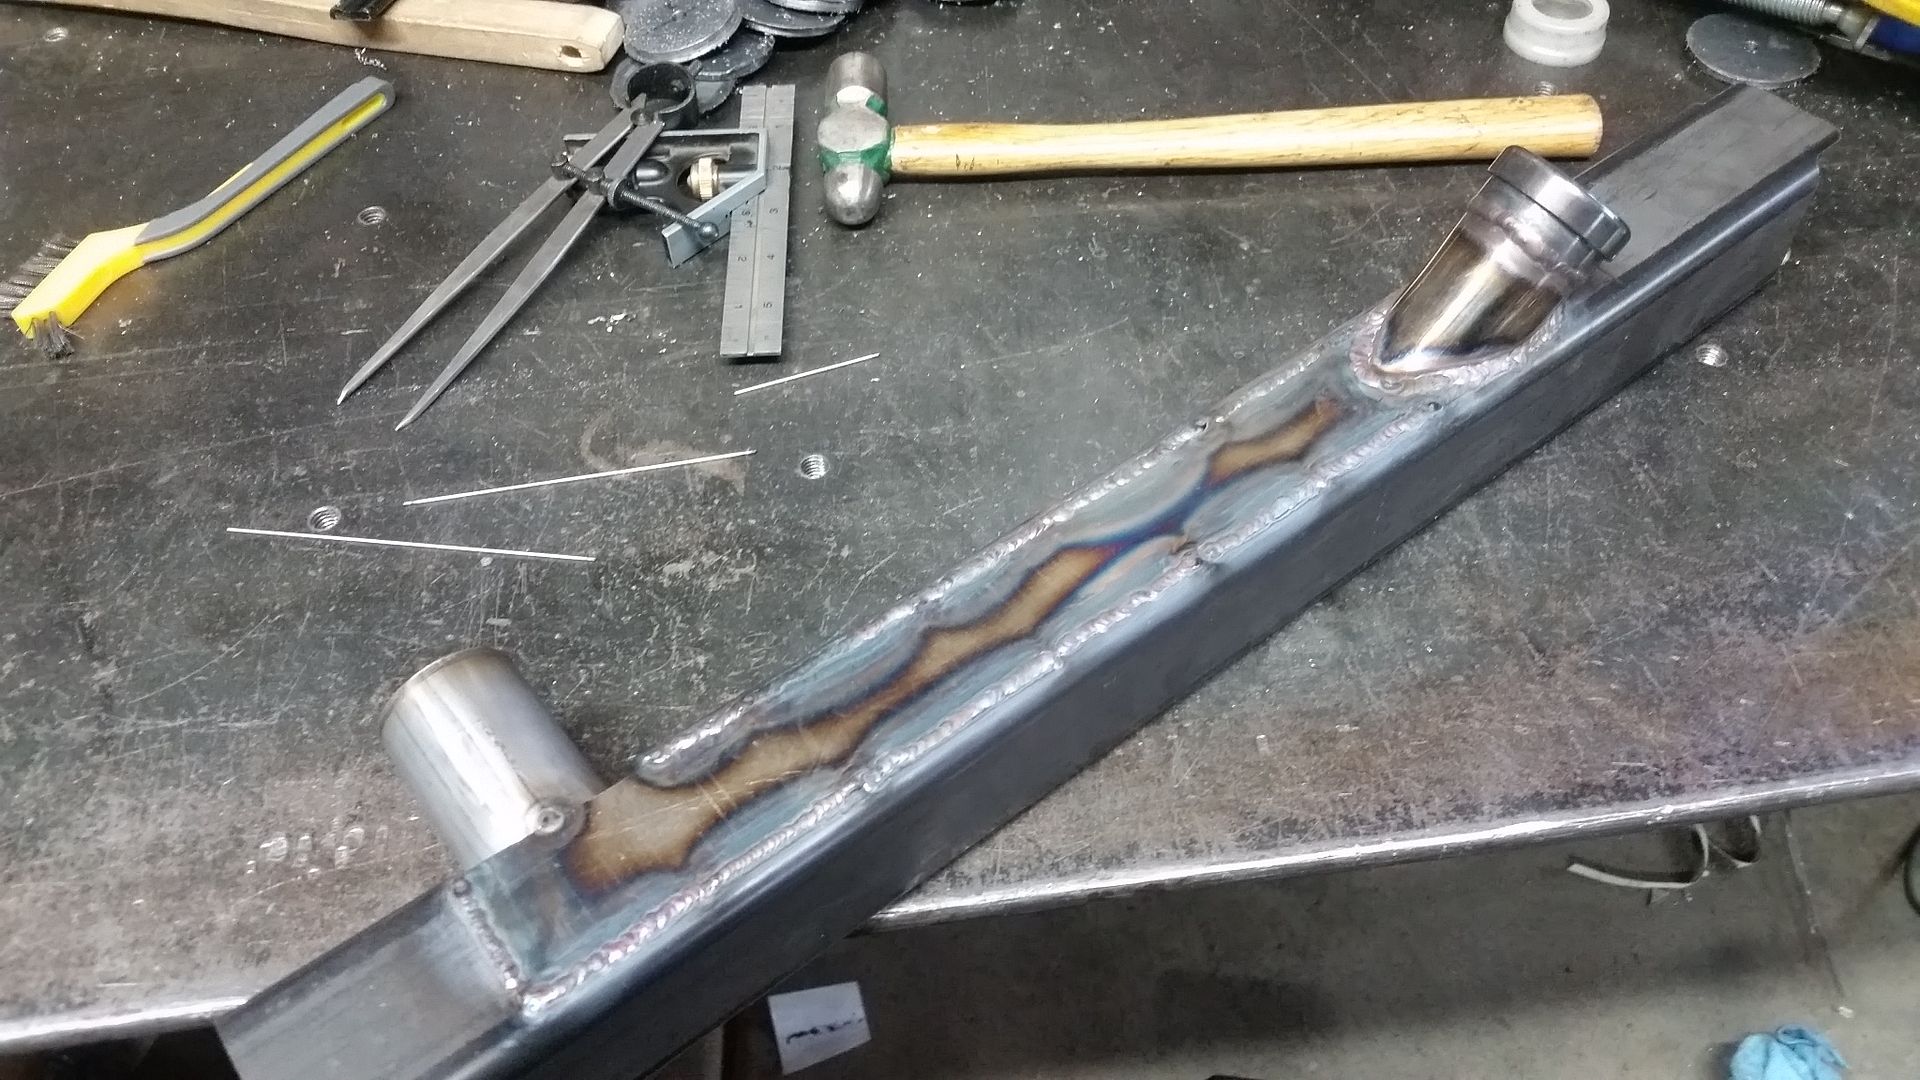
The hidden fuel filler tube in the rear bed post turned out pretty neat. It was a total pain, but worth it in the end. I think it will be one of those neat little details people don't see the 1st time.

Some misc shop tips and stuff....


Pretty simple way to mark a complex curve close enough to tig welding. Use a little/lot of Sharpie and then scribe the line using the offset from the 1st point of contact.


It isn't perfect, but close enough to weld up with the TIG.


Then you spend a lot of time TIG welding the fill panel back in place. I decided to do the entire thing in 309 Stainless filler only .040 thick. This stuff worked great for this. A stubby 8 cup with a gas lens and 1/16 Tungsten worked really well for reaching down into some of the tight corners when I had to hang things out pretty far.


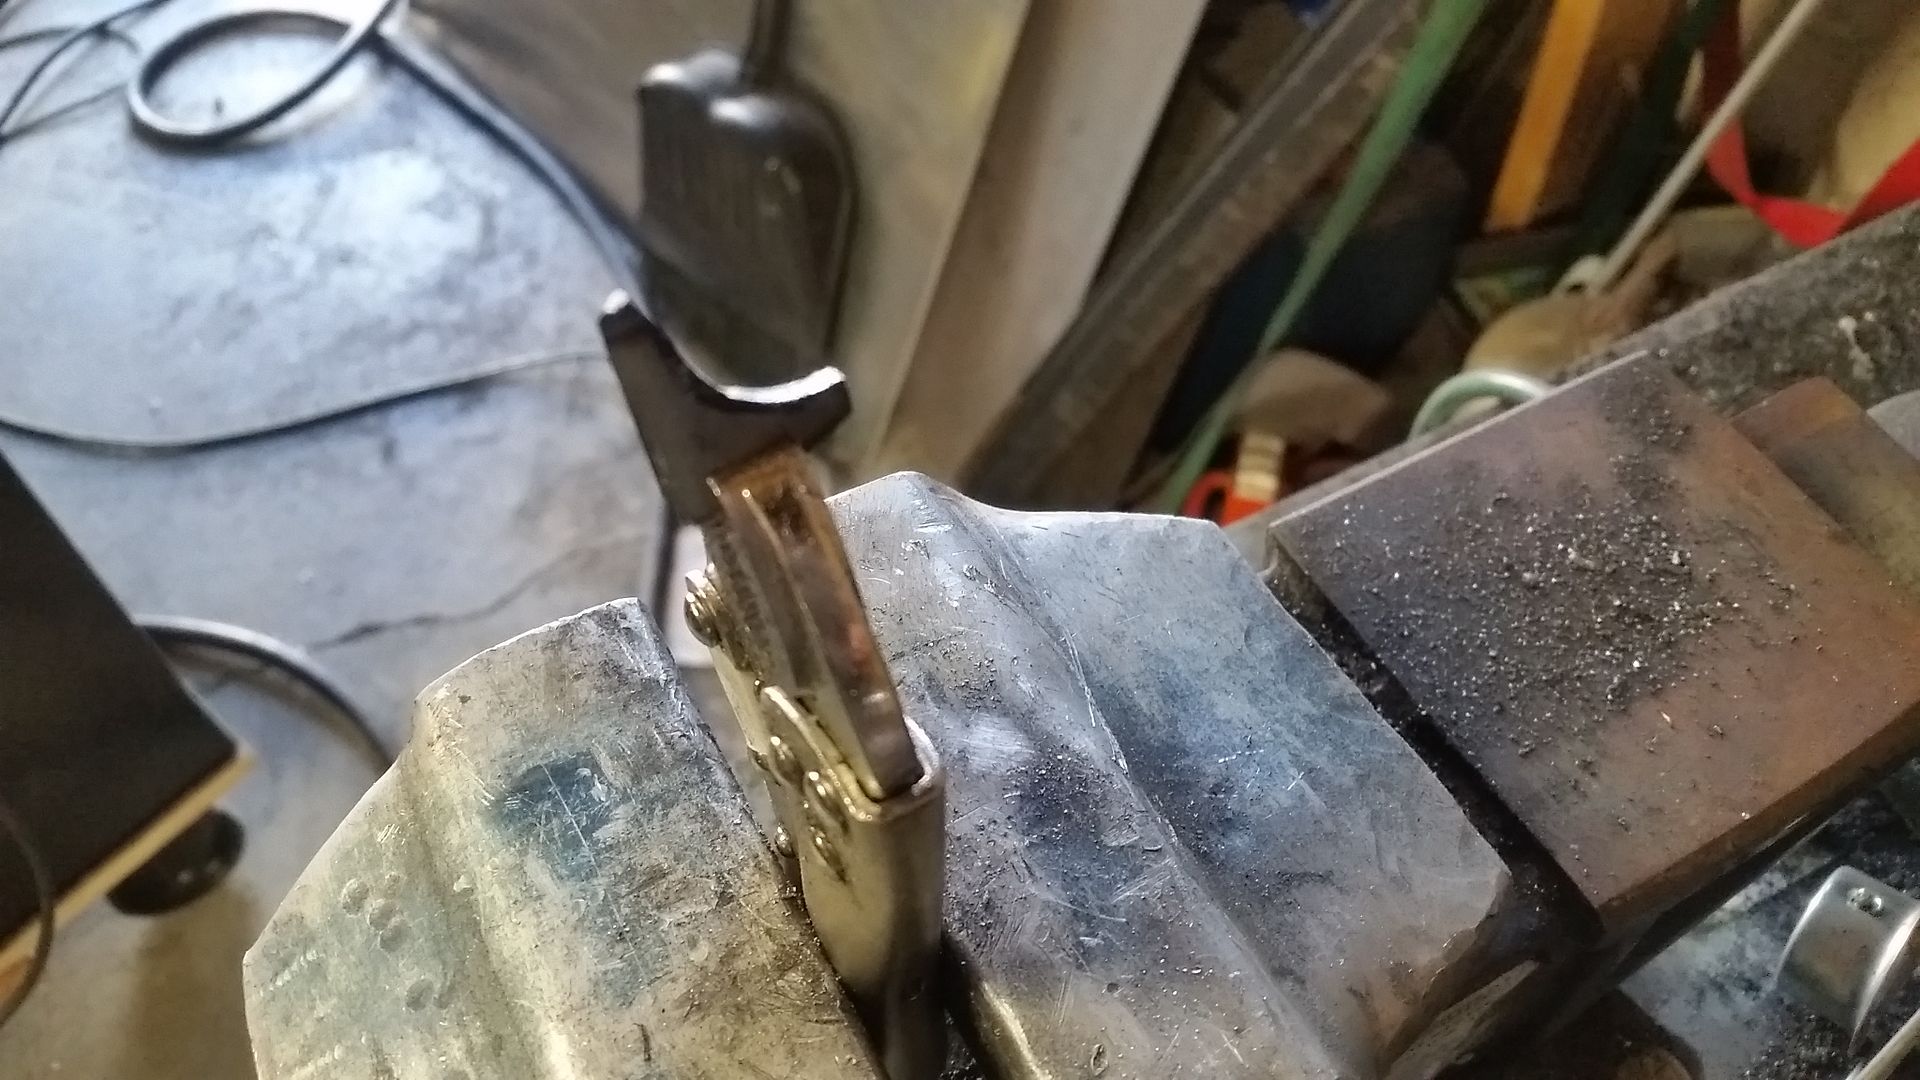
Need to hold a really small fill panel for a little filing.....


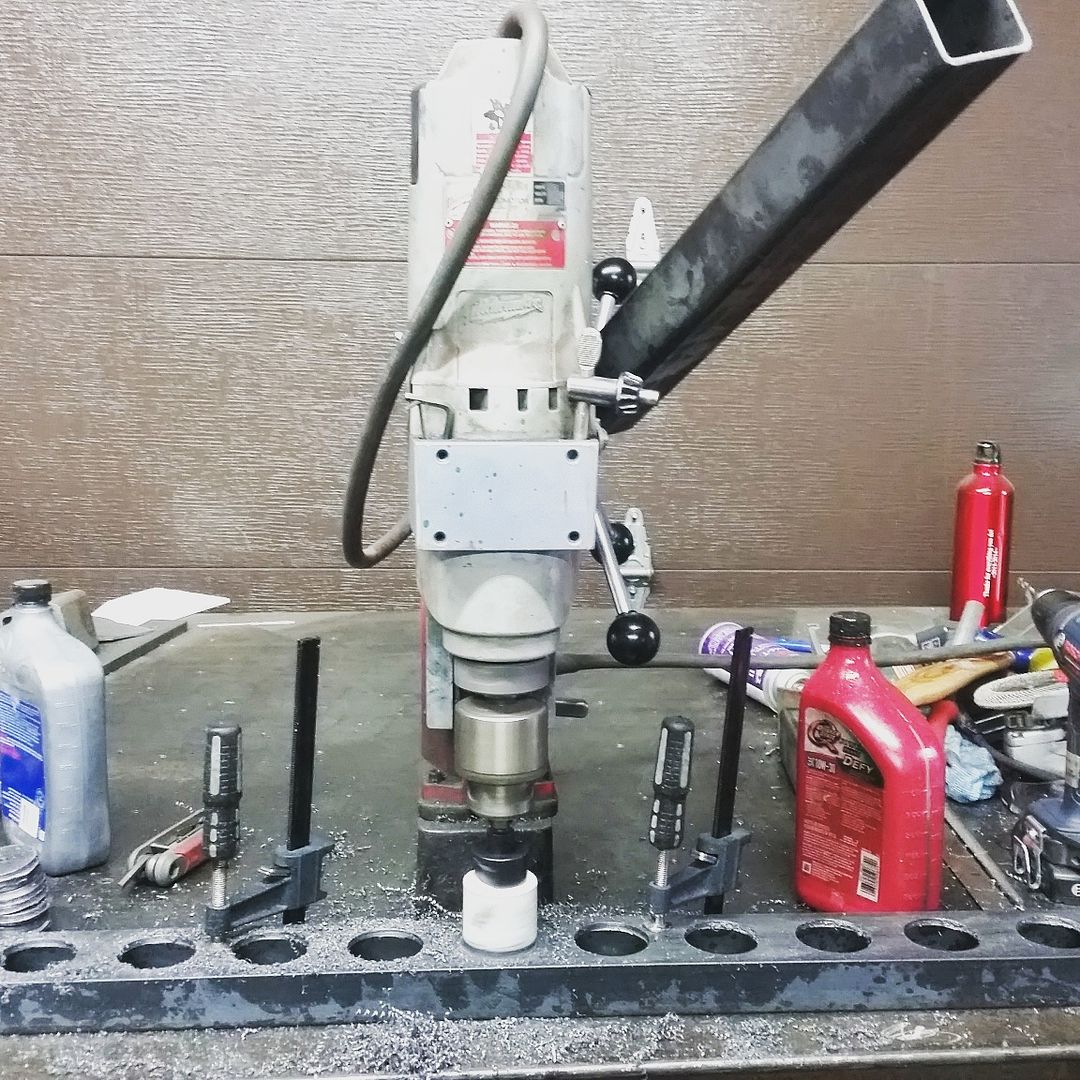
If you need to drill LOTS (43!) 2" holes to add some lightness, a big mag drill is the way to go. I need to keep an eye out for one of these things. This was a loaner from my work for the weekend. The best part was that I only used ONE cheap Milwaukee hole saw from Home Depot for the all these holes. Using a nice low speed, some light autofeed pressure from the box tubing, and some secret sauce cutting fluid really makes the difference!


Something I didn't document that well. Opps. I added these small 3/16" blocks to the C-channel to offset it from the top rail a bit. This way the vertical wall of the bed will be able to bolt onto both surfaces without being tilted in or out. There should be just enough extra space for a little rubber gasket material in there. The C-channel was also drilled and tapped between each lighting hole for that same bed panel.

My goal for the next week is to spin it and roll it out into the light. If my new bumpstops show up I should also be able to get the springs in it for the 1st time!
 

Metcalf

Expedition Leader
A big milestone!


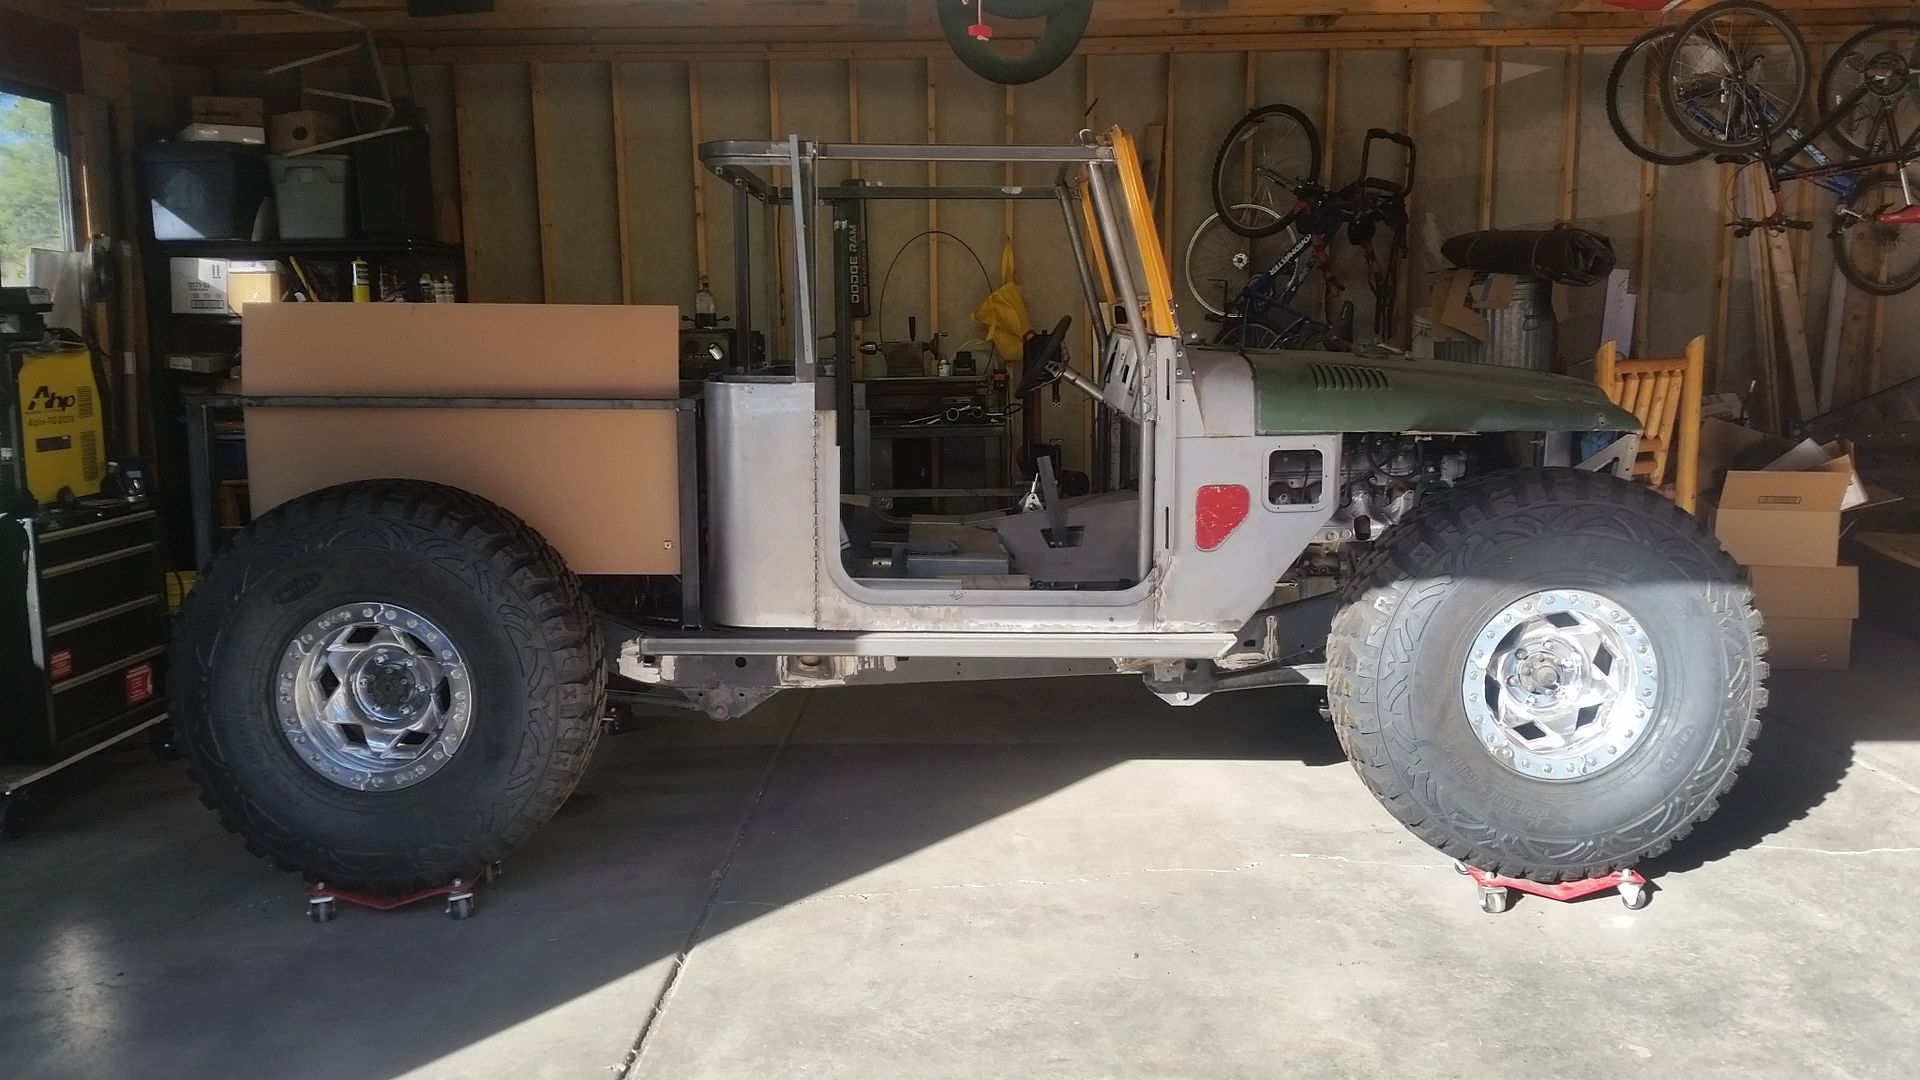
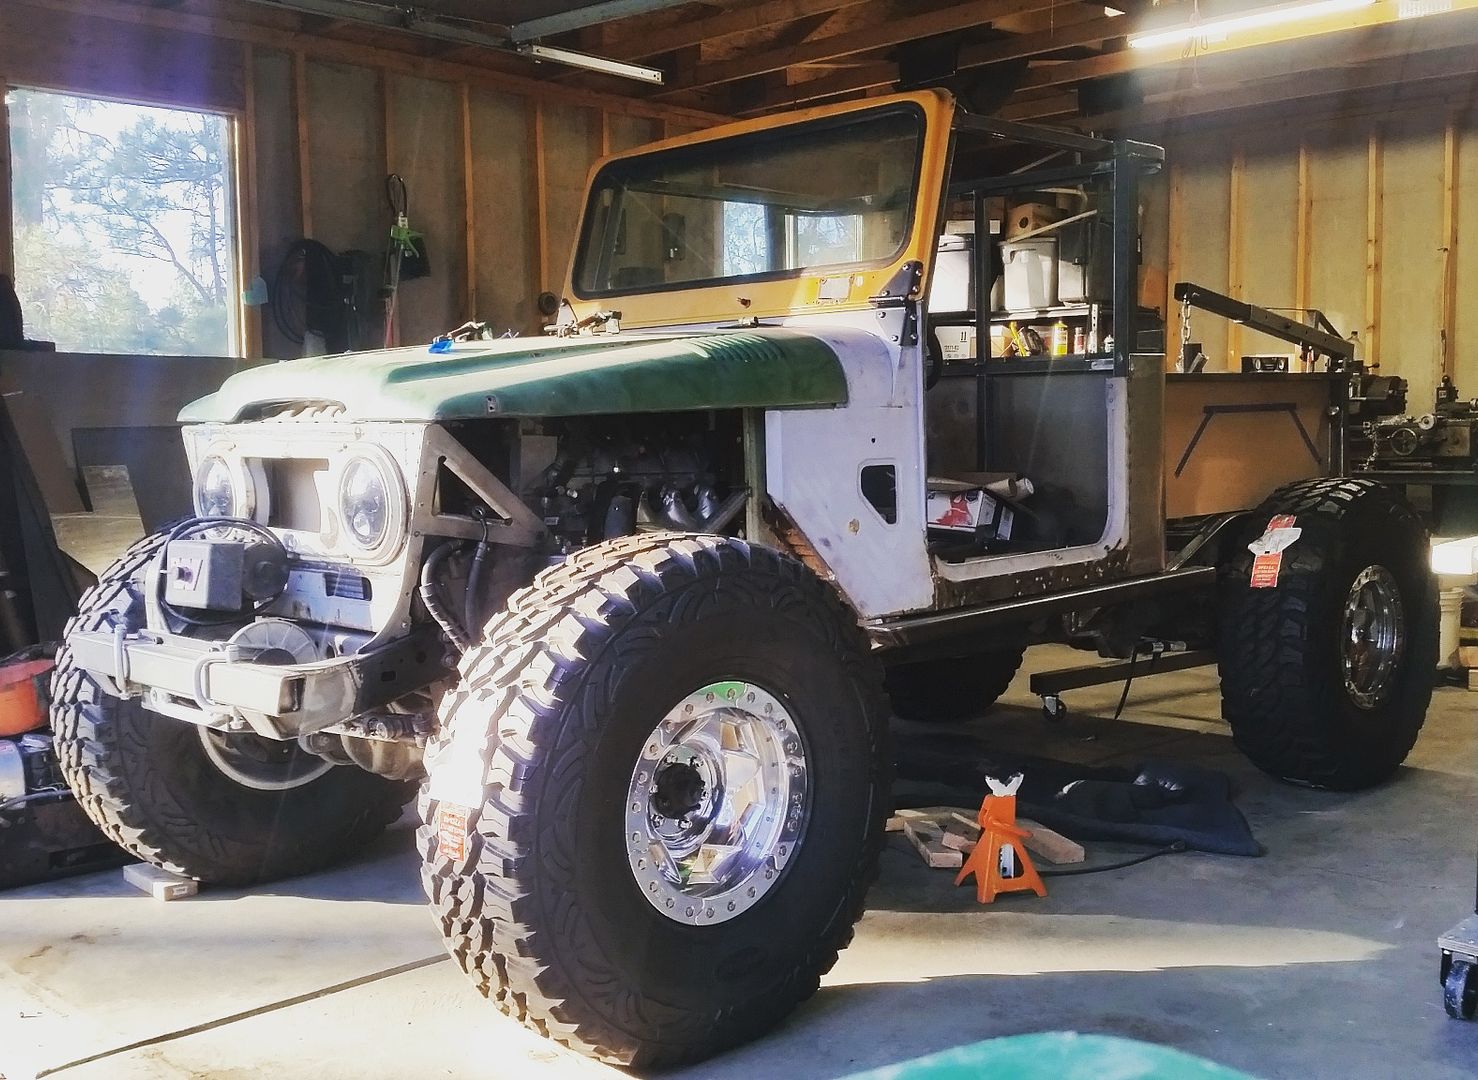
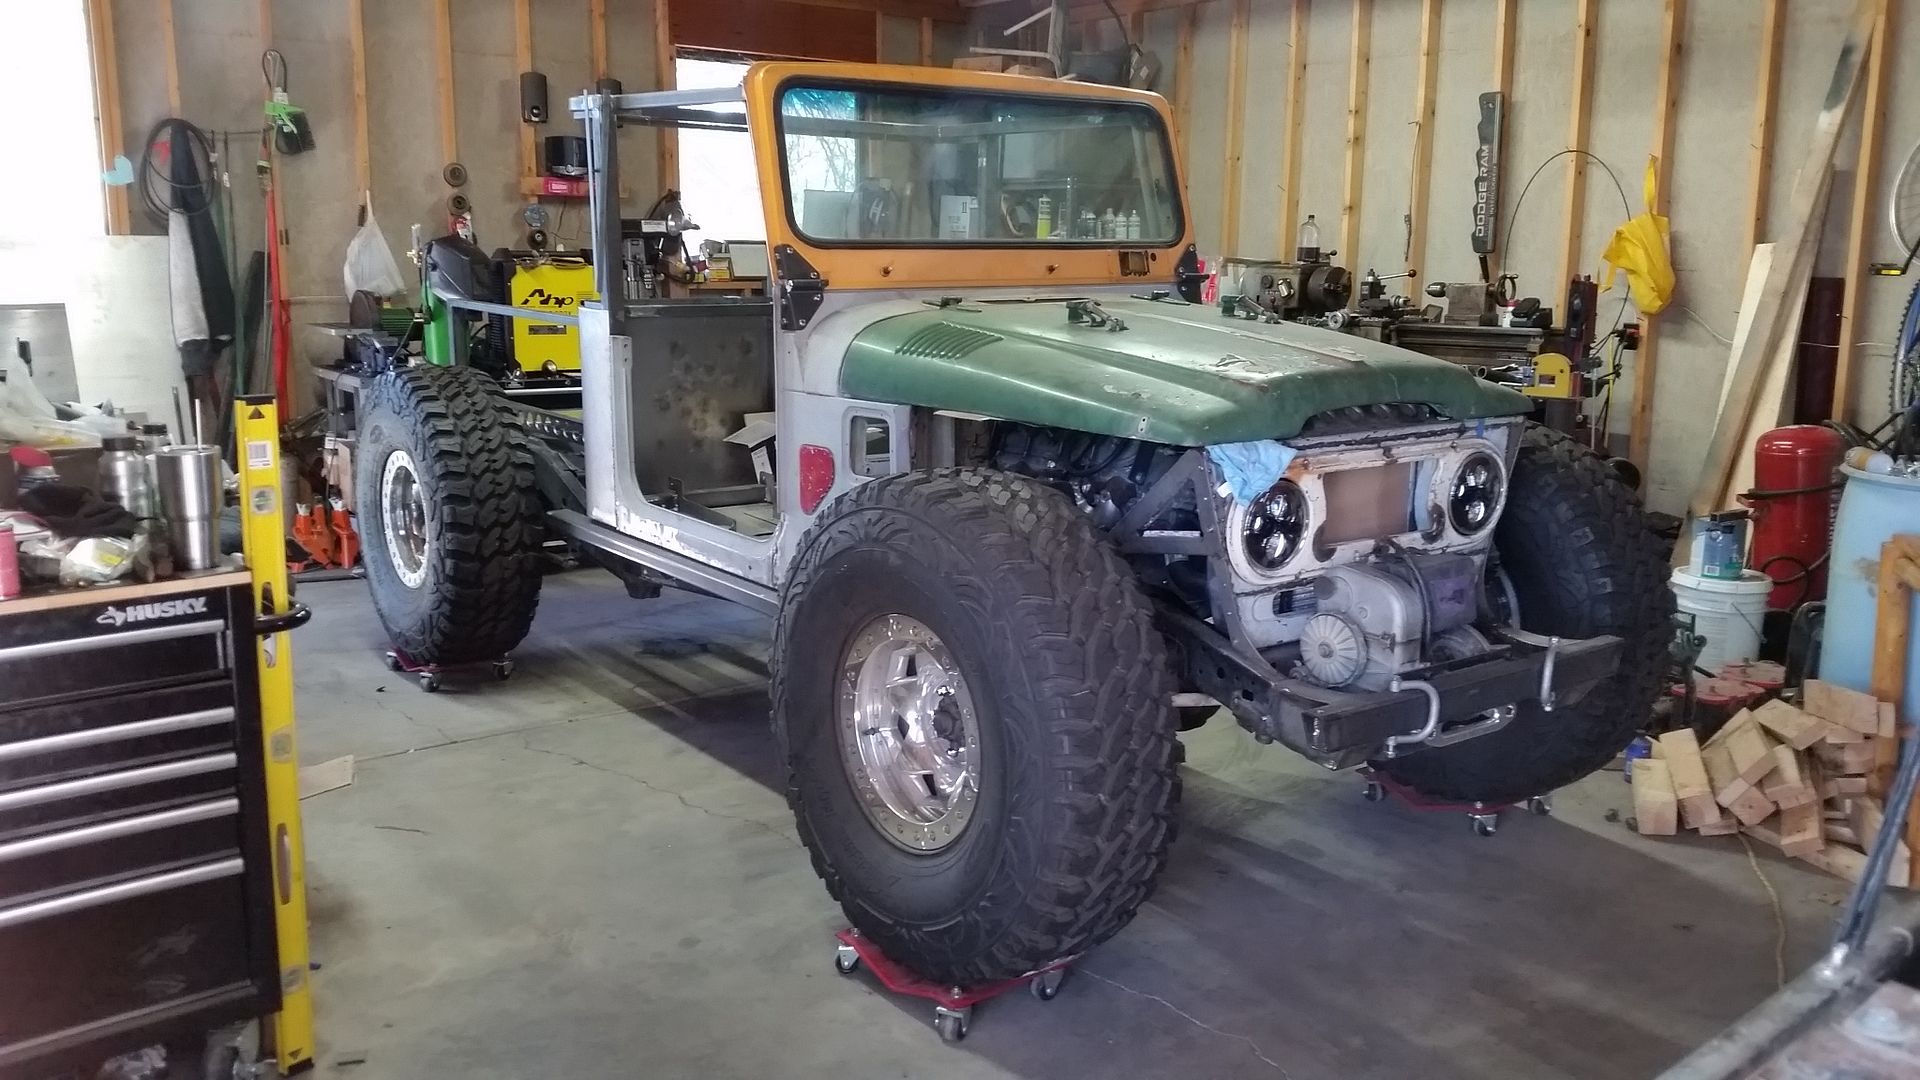
I was able to pull the chassis off the blocks and stick it on some dollies to spin it to point out the door! Everything in the shop got moved around too so I was finally able to get a picture from more than 5 feet away.

The next part of the puzzle....


I need to get the springs back in it to see where things are roughly going to sit. I am probably at about 80-90% of the final sprung weight now and that last bit will come pretty quick, with most of it on the rear suspension.

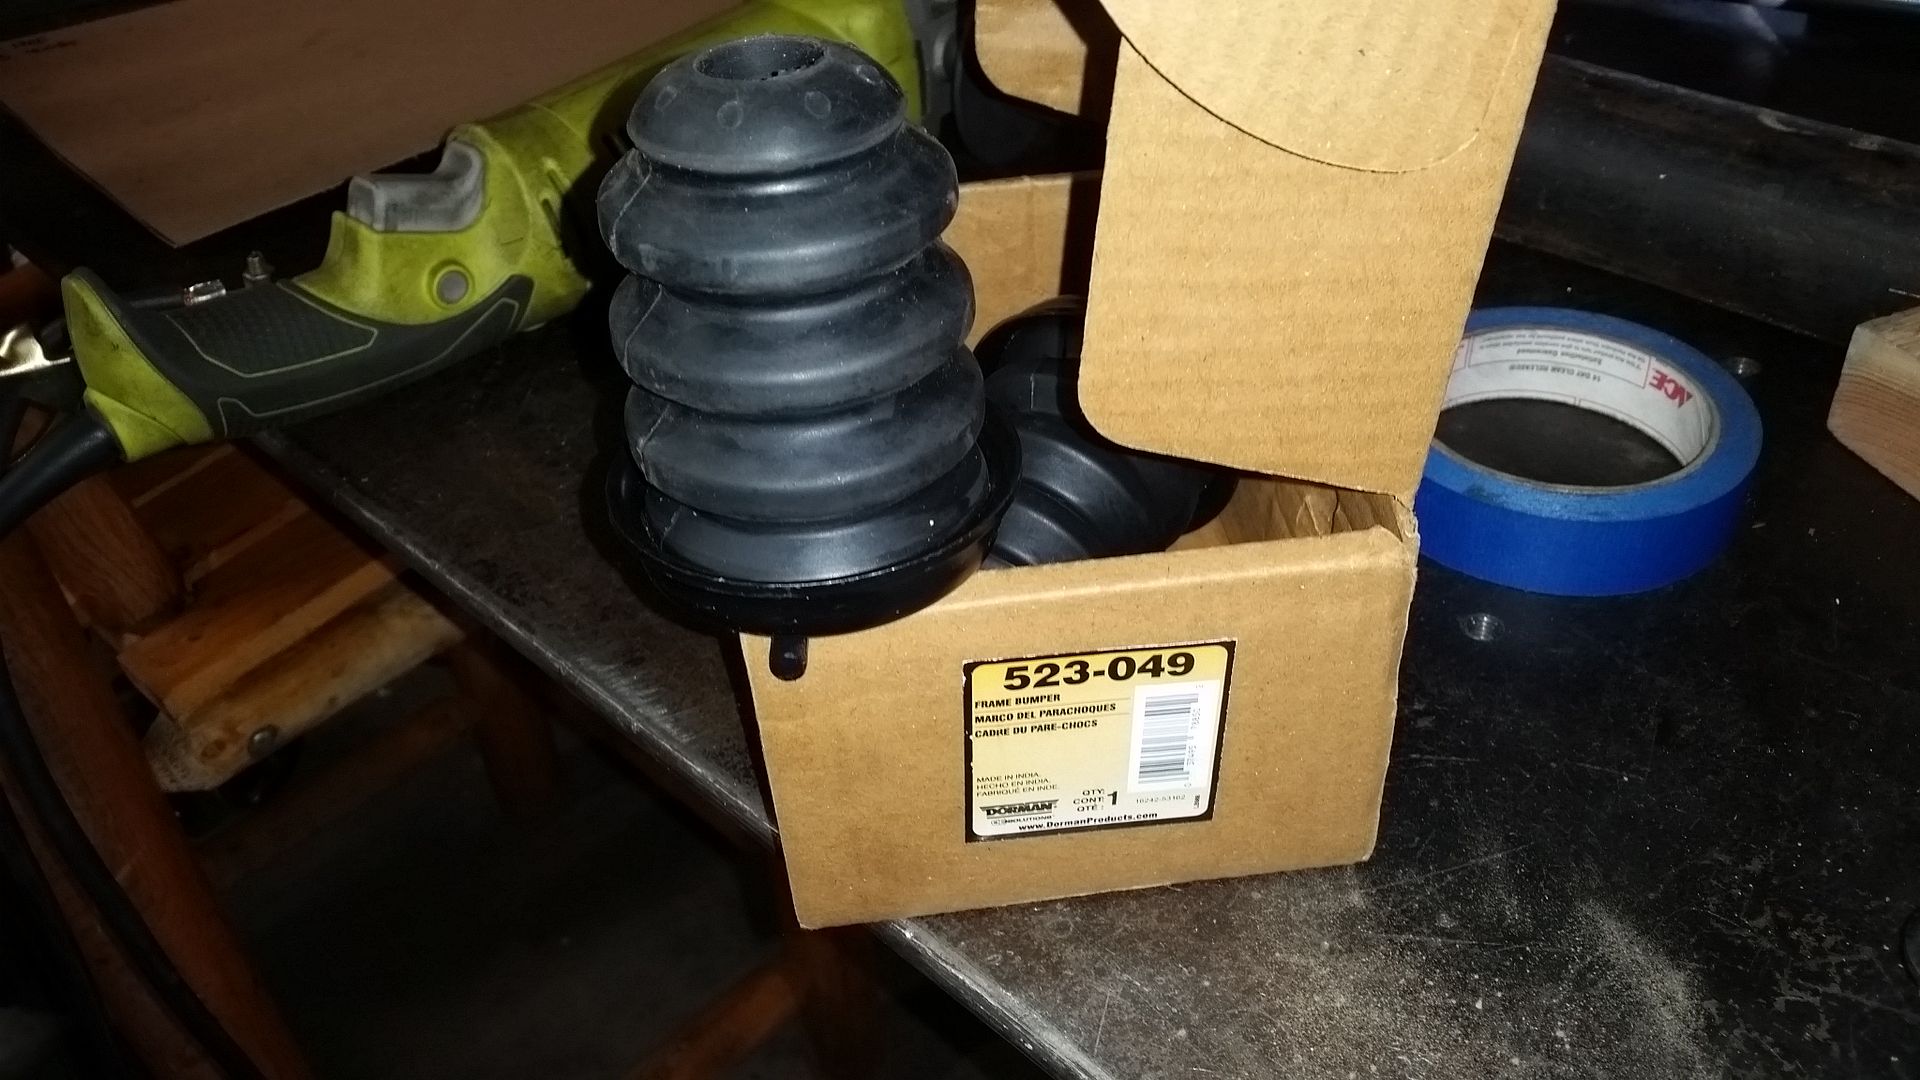
The bumpstops from Toyota are pretty dang stiff/tall rubber units. I don't want to spend the money on fancy air bumps (yet). A few people have recommended the more modern OEM Foam style bumpstops, specifically the ones from the rear of a 2000ish or newer GM full size truck. GM still sells them new....and they are bright yellow. I recently noticed that Dorman is making a replacement now for about 1/2 the price of the OEM unit and are a much more stealthy OE black.


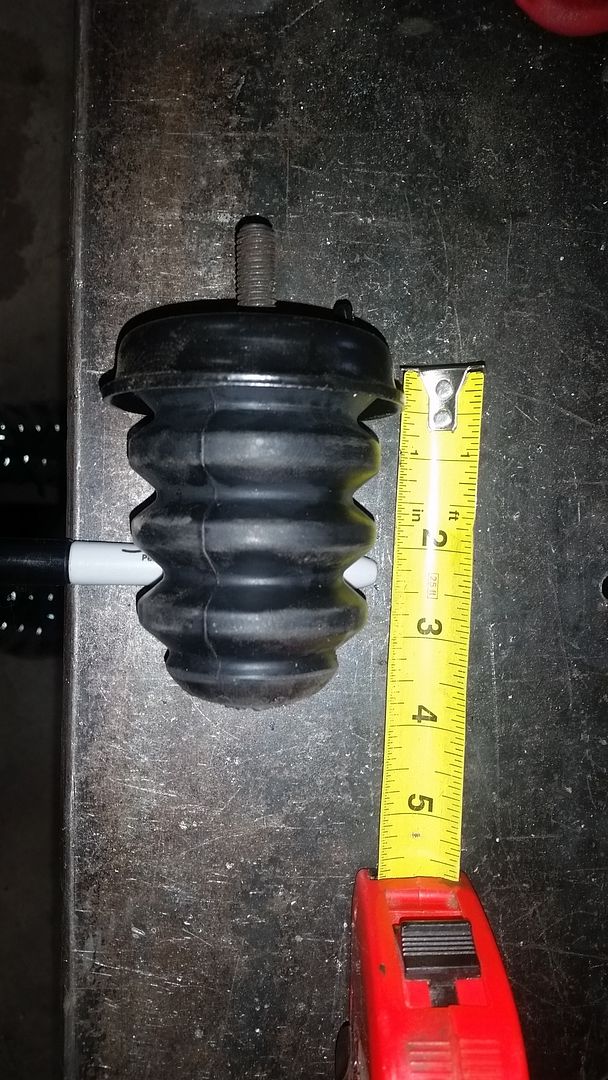
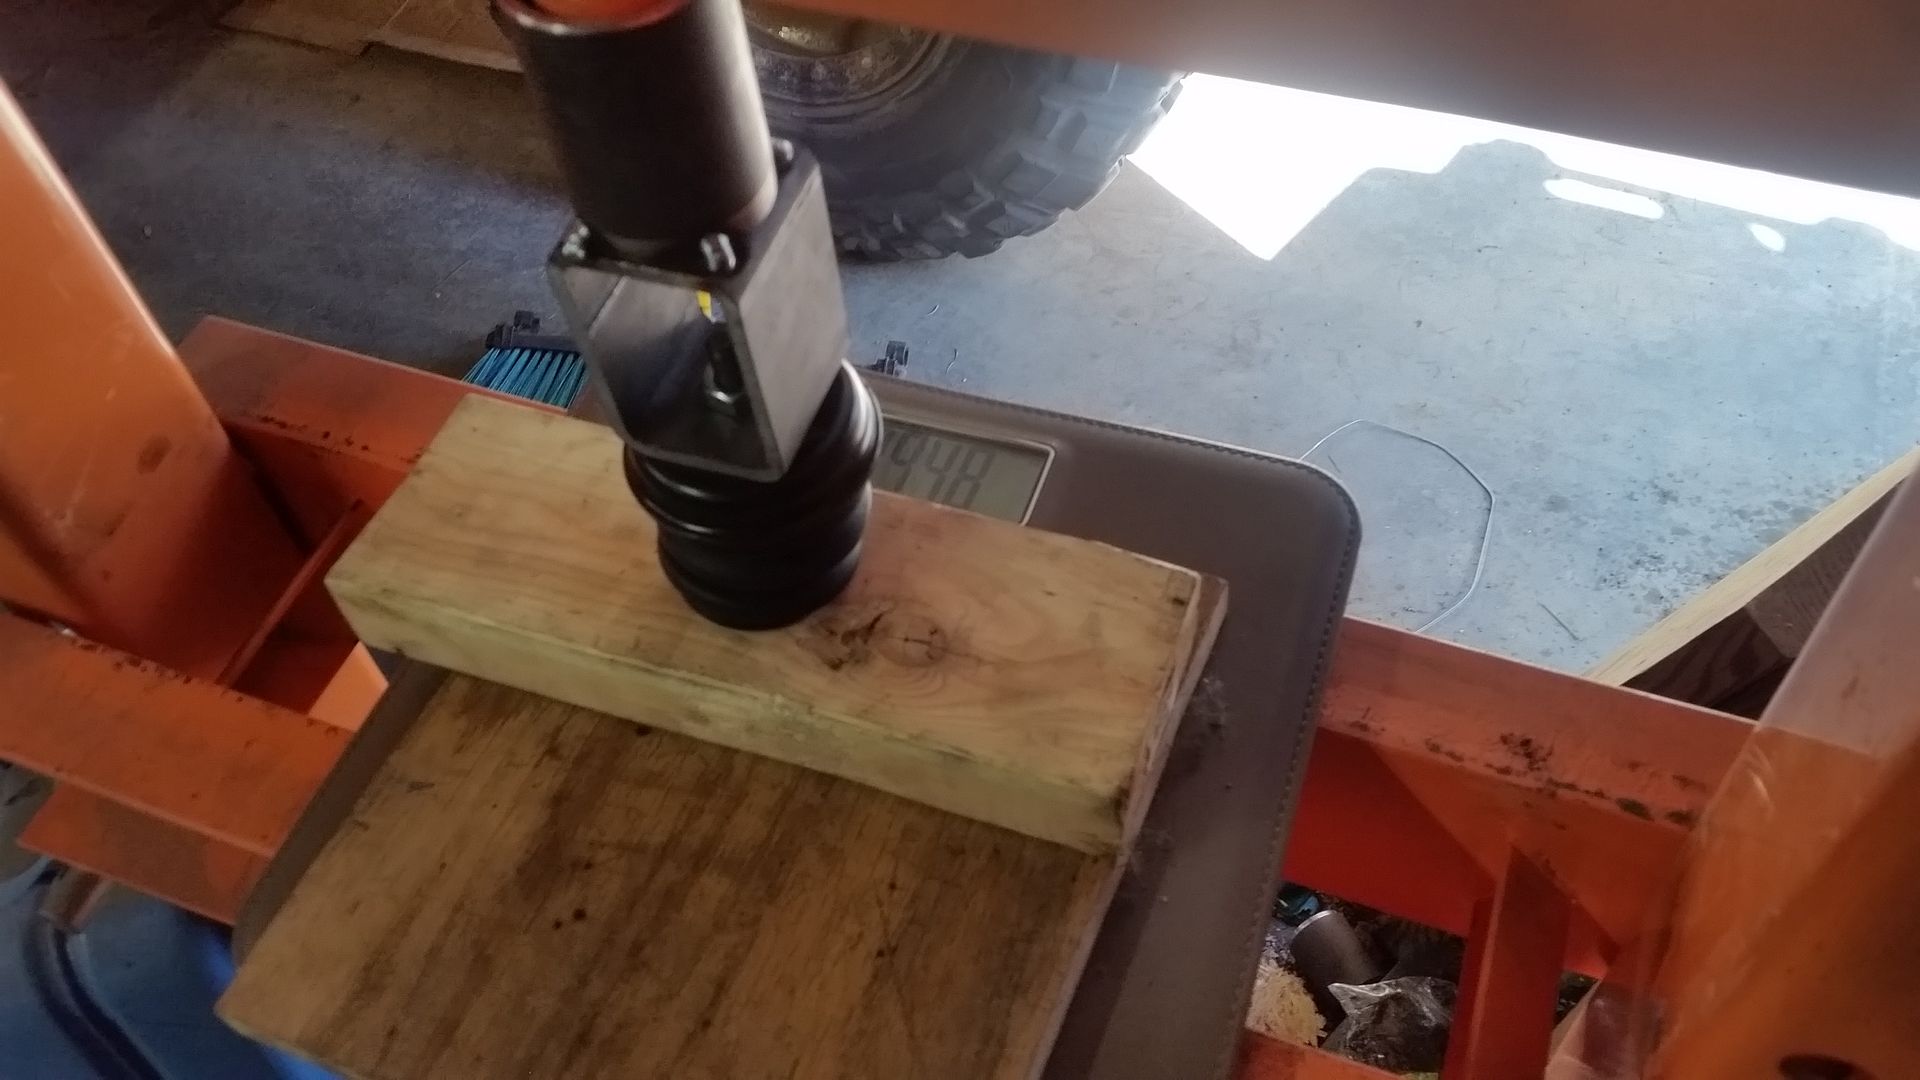
I decided to test these things a little bit to see how soft they are. In general, they feel much softer than OE stuff for sure. I can put my weight on these onto a bench, and get them to deflect a noticeable amount. The stock ones didn't seem to move at all.


I made a little jig to hold them and stuck them in the press to see what they do. The bathroom scale goes to 400lbs. This made the bump stop compress about 1". I don't know if these things have a linear spring rate, maybe I can find a scale with more capacity to check.....


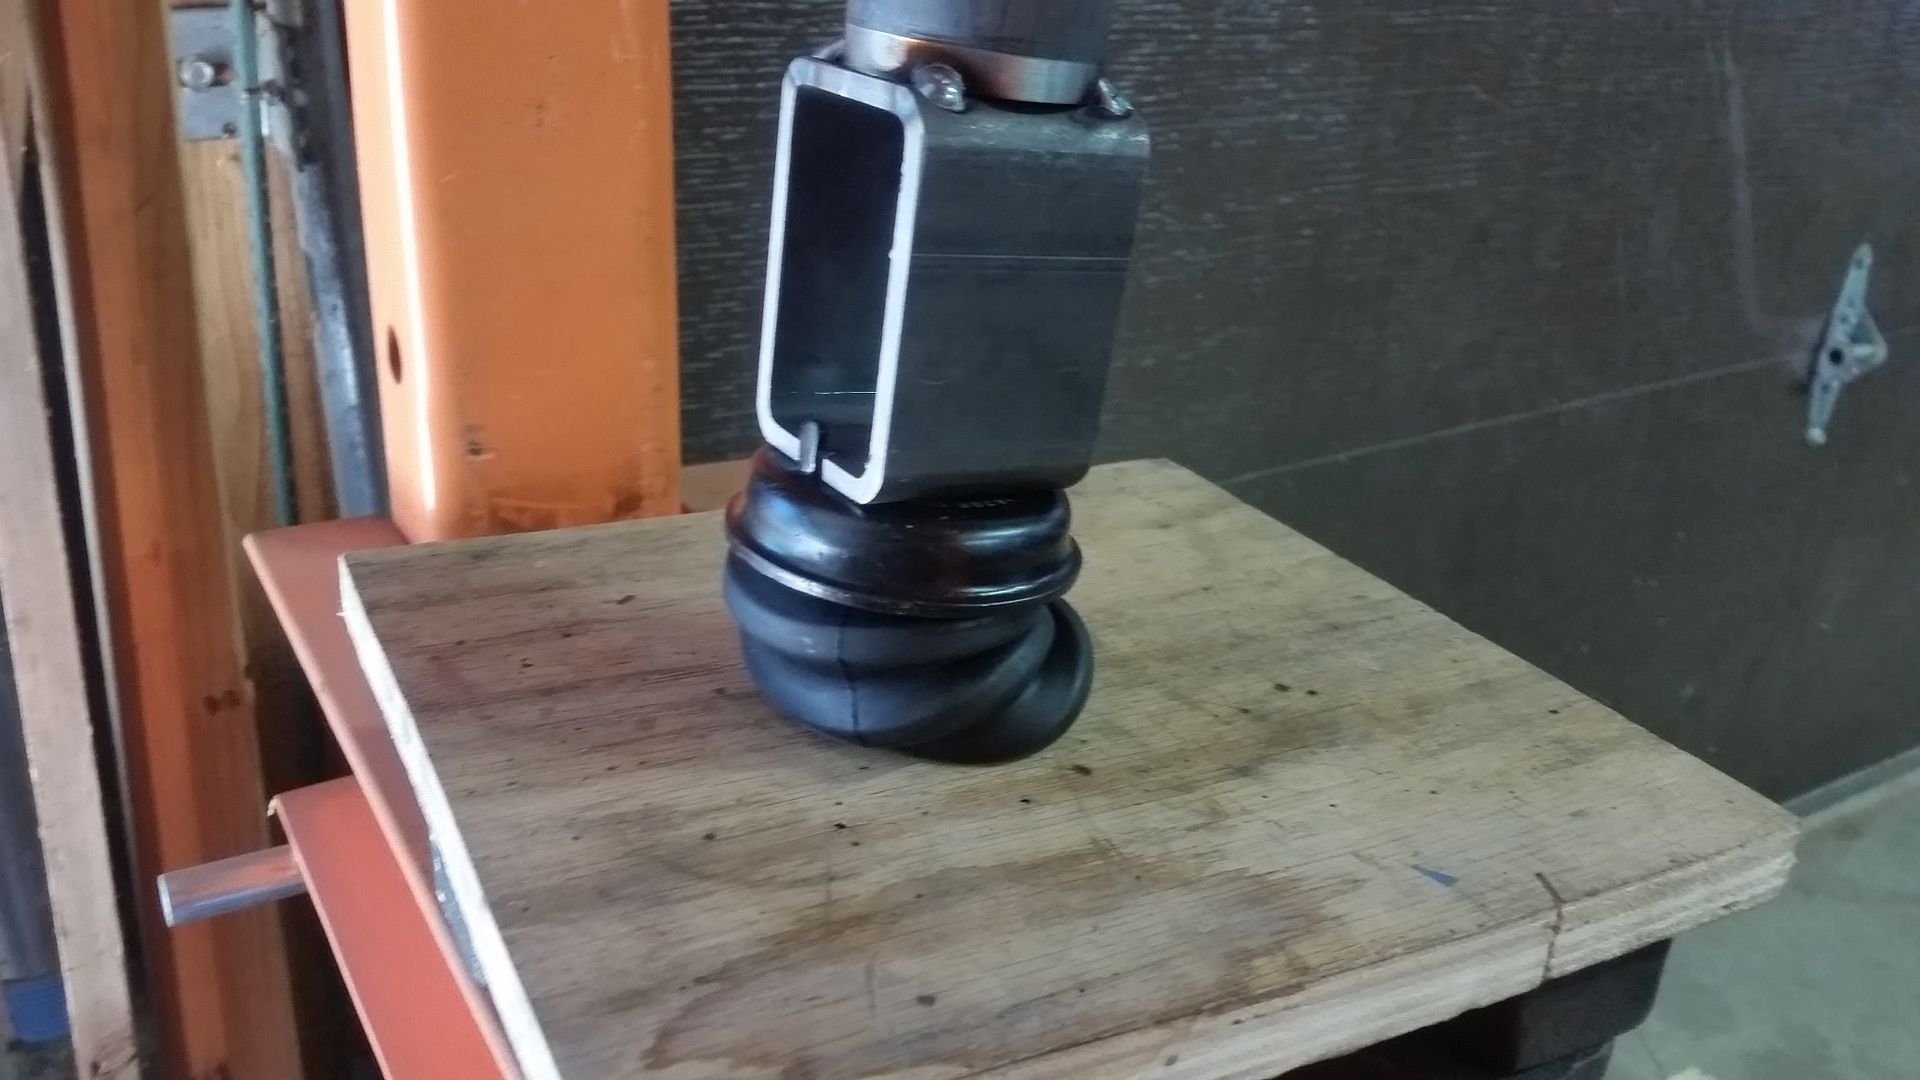
I also mashed them in the press. This is about 50% compression, which didn't seem to take THAT much force, but the bump doesn't always compress perfectly since there is a little slop in all the press parts and things start to get wonky. I am pretty sure they will compress generally all the way into the steel cup....or at least that seems like the logical reason why they have it.

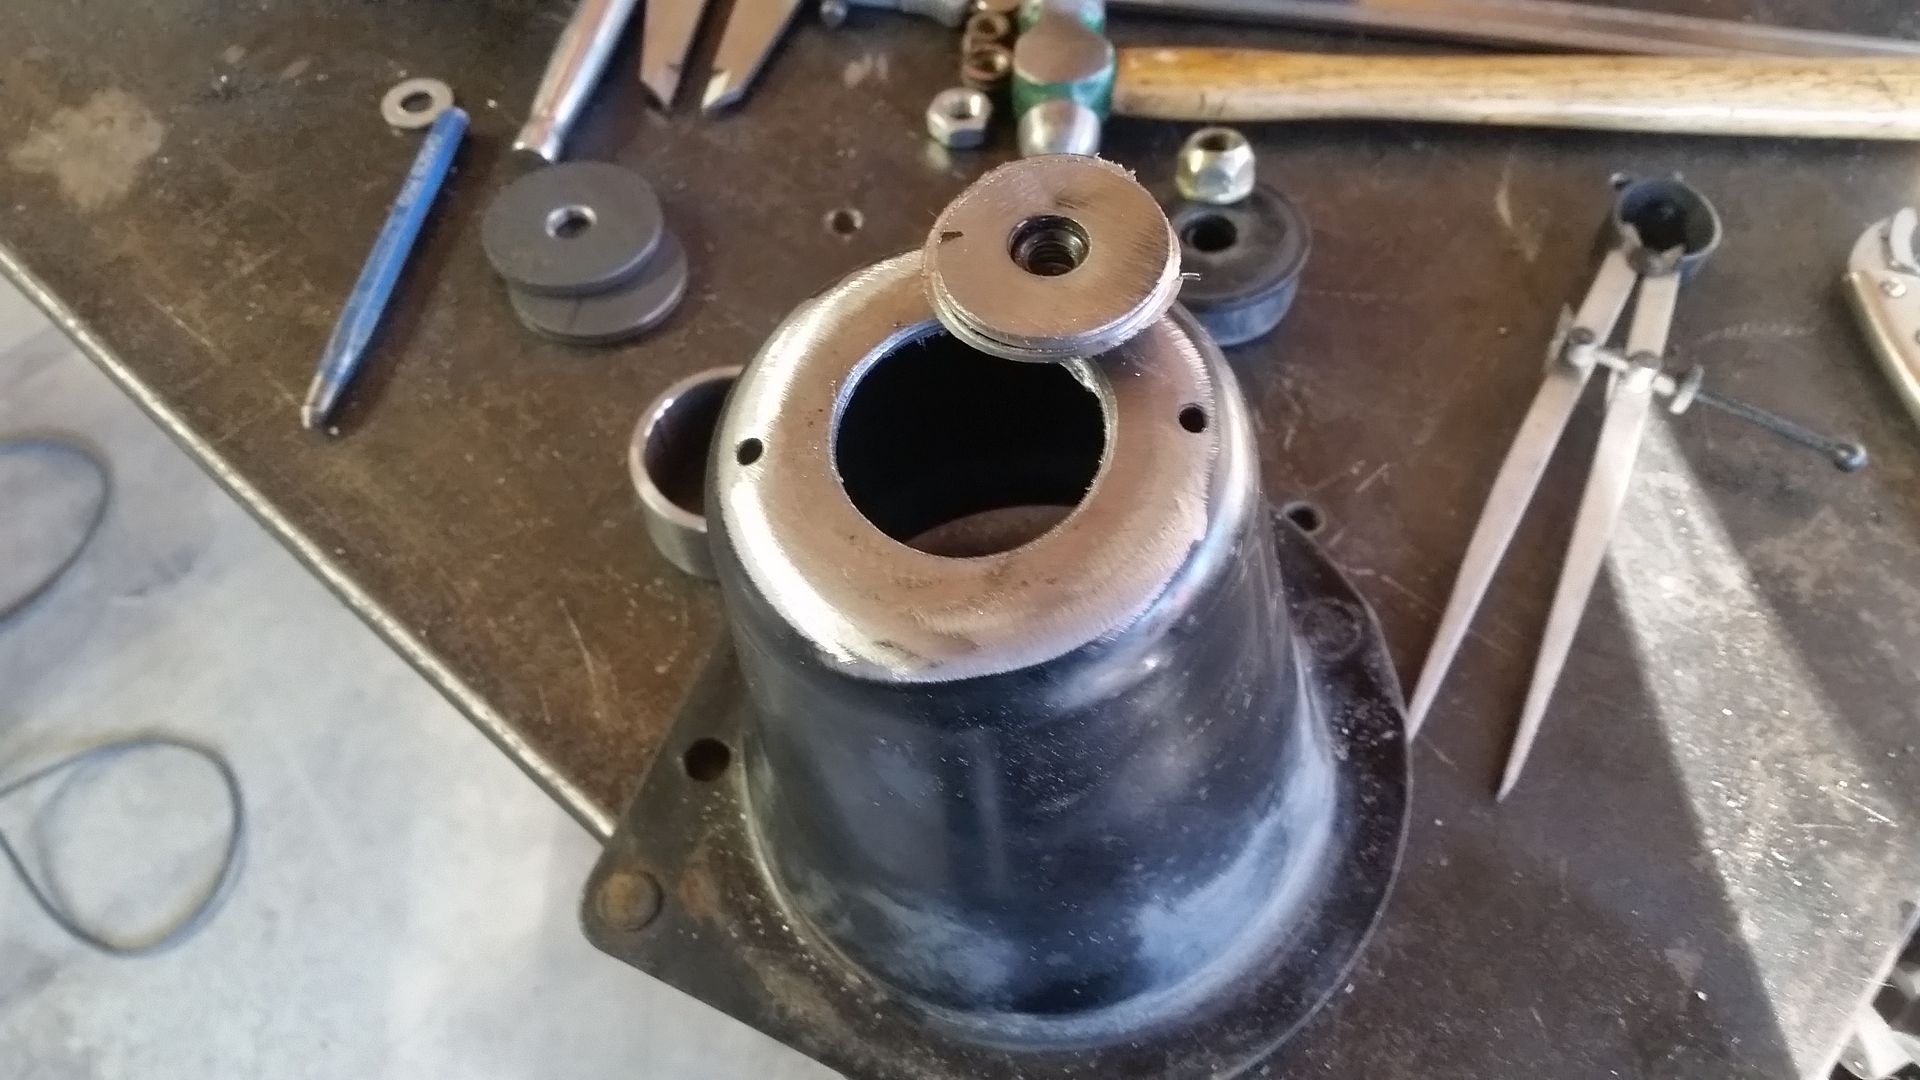
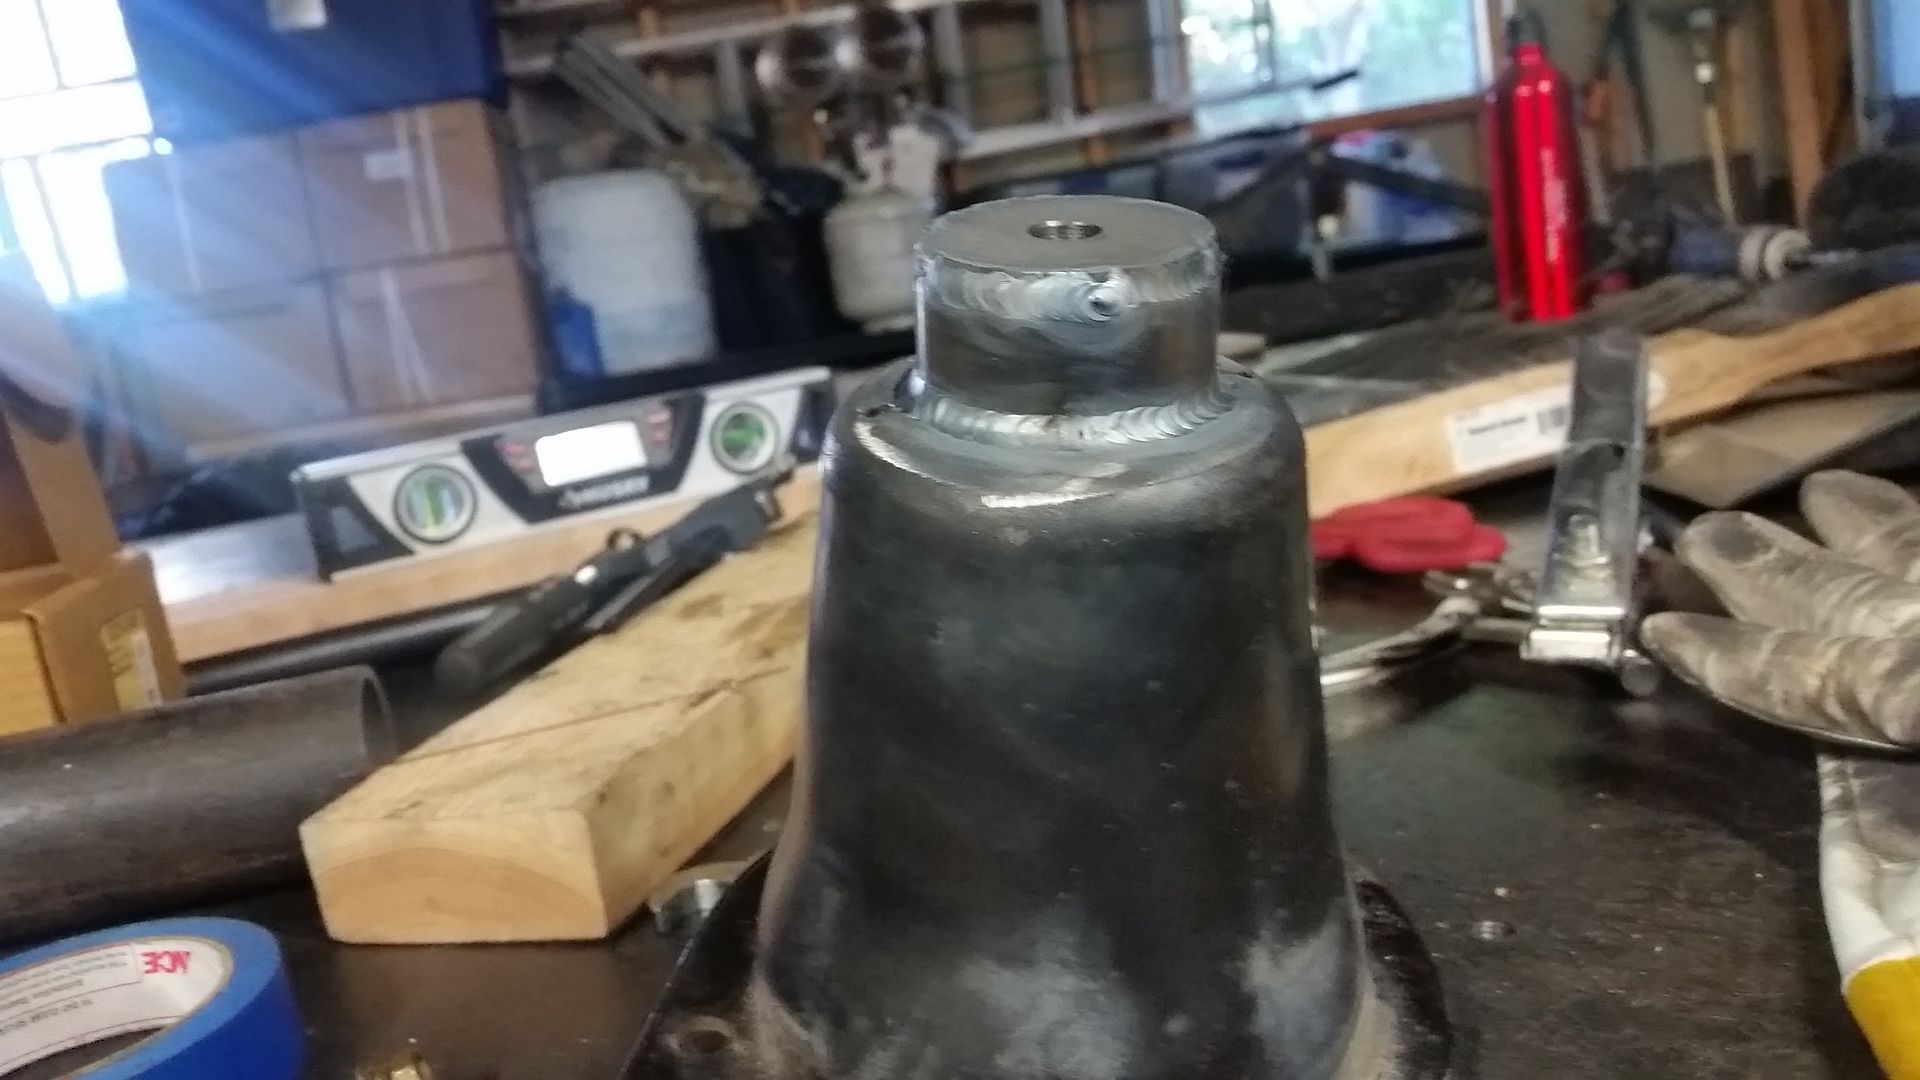
This cup is a different height than the Toyota cup however. The GM bump is a male stud vs a female bolt also...and different sizes. I believe the front suspension is designed to use the metal cup as the 'hard' stop. I decided to add a little standoff to the bottom of the factory 'cone' on the front suspension to adjust the height of things.


A little paint and it will be ready to go back in the chassis with the new bumpstop and a spring!
 

locrwln

Expedition Leader
Looking good and I like the bumpstops. I used the ones from the rear of the S10 4door blazer all the way around on mine. They are pretty good for the fast dirt road hits up to a point and then they are what they are.
.

Jack
 

Metcalf

Expedition Leader
Looking good and I like the bumpstops. I used the ones from the rear of the S10 4door blazer all the way around on mine. They are pretty good for the fast dirt road hits up to a point and then they are what they are.
.

Jack
What are you running for shocks? How much uptravel from ride height?
 

Metcalf

Expedition Leader
I got a bug and wanted to stick the stock LX450 springs in it to see how things where going sit....


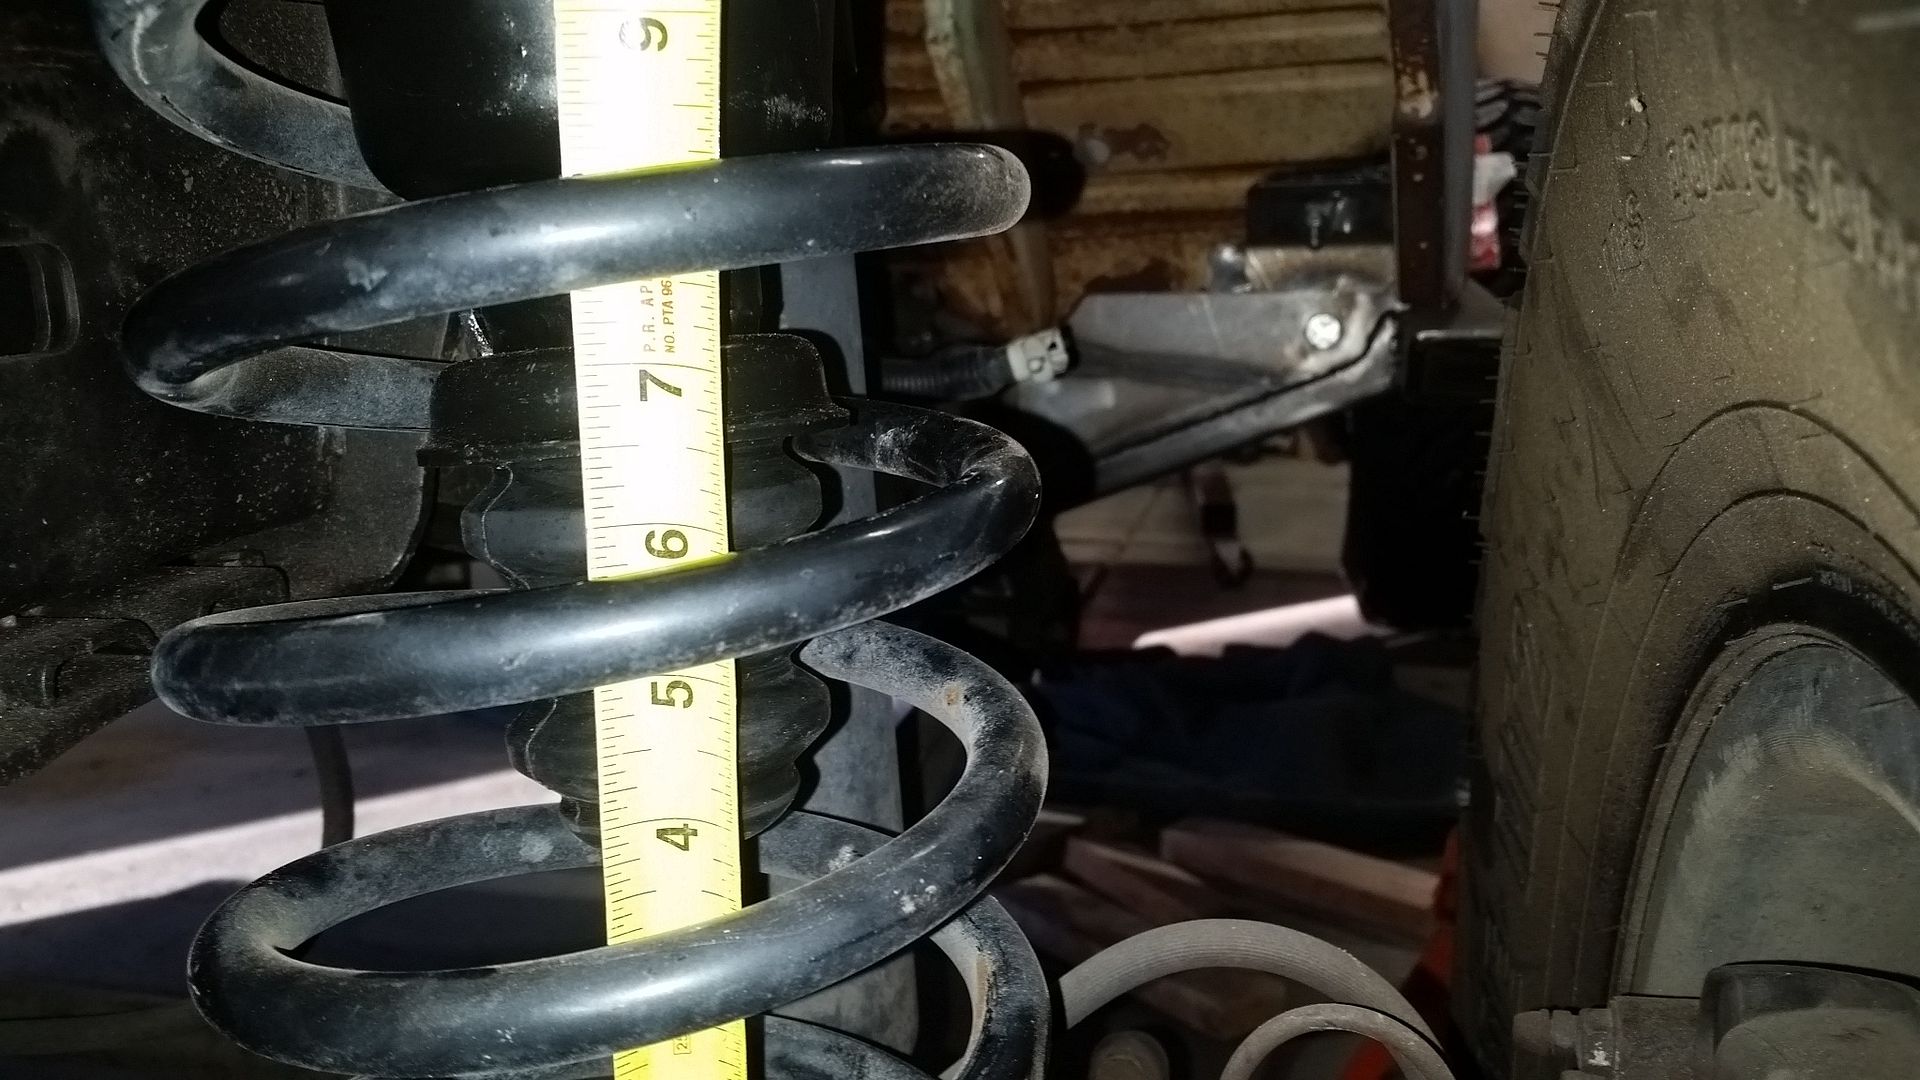
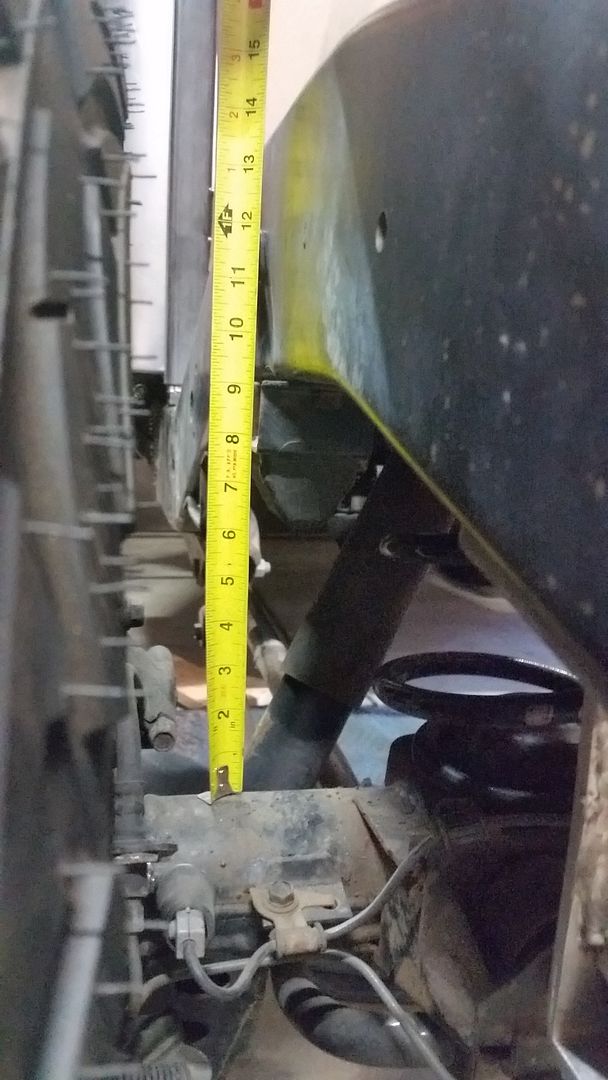
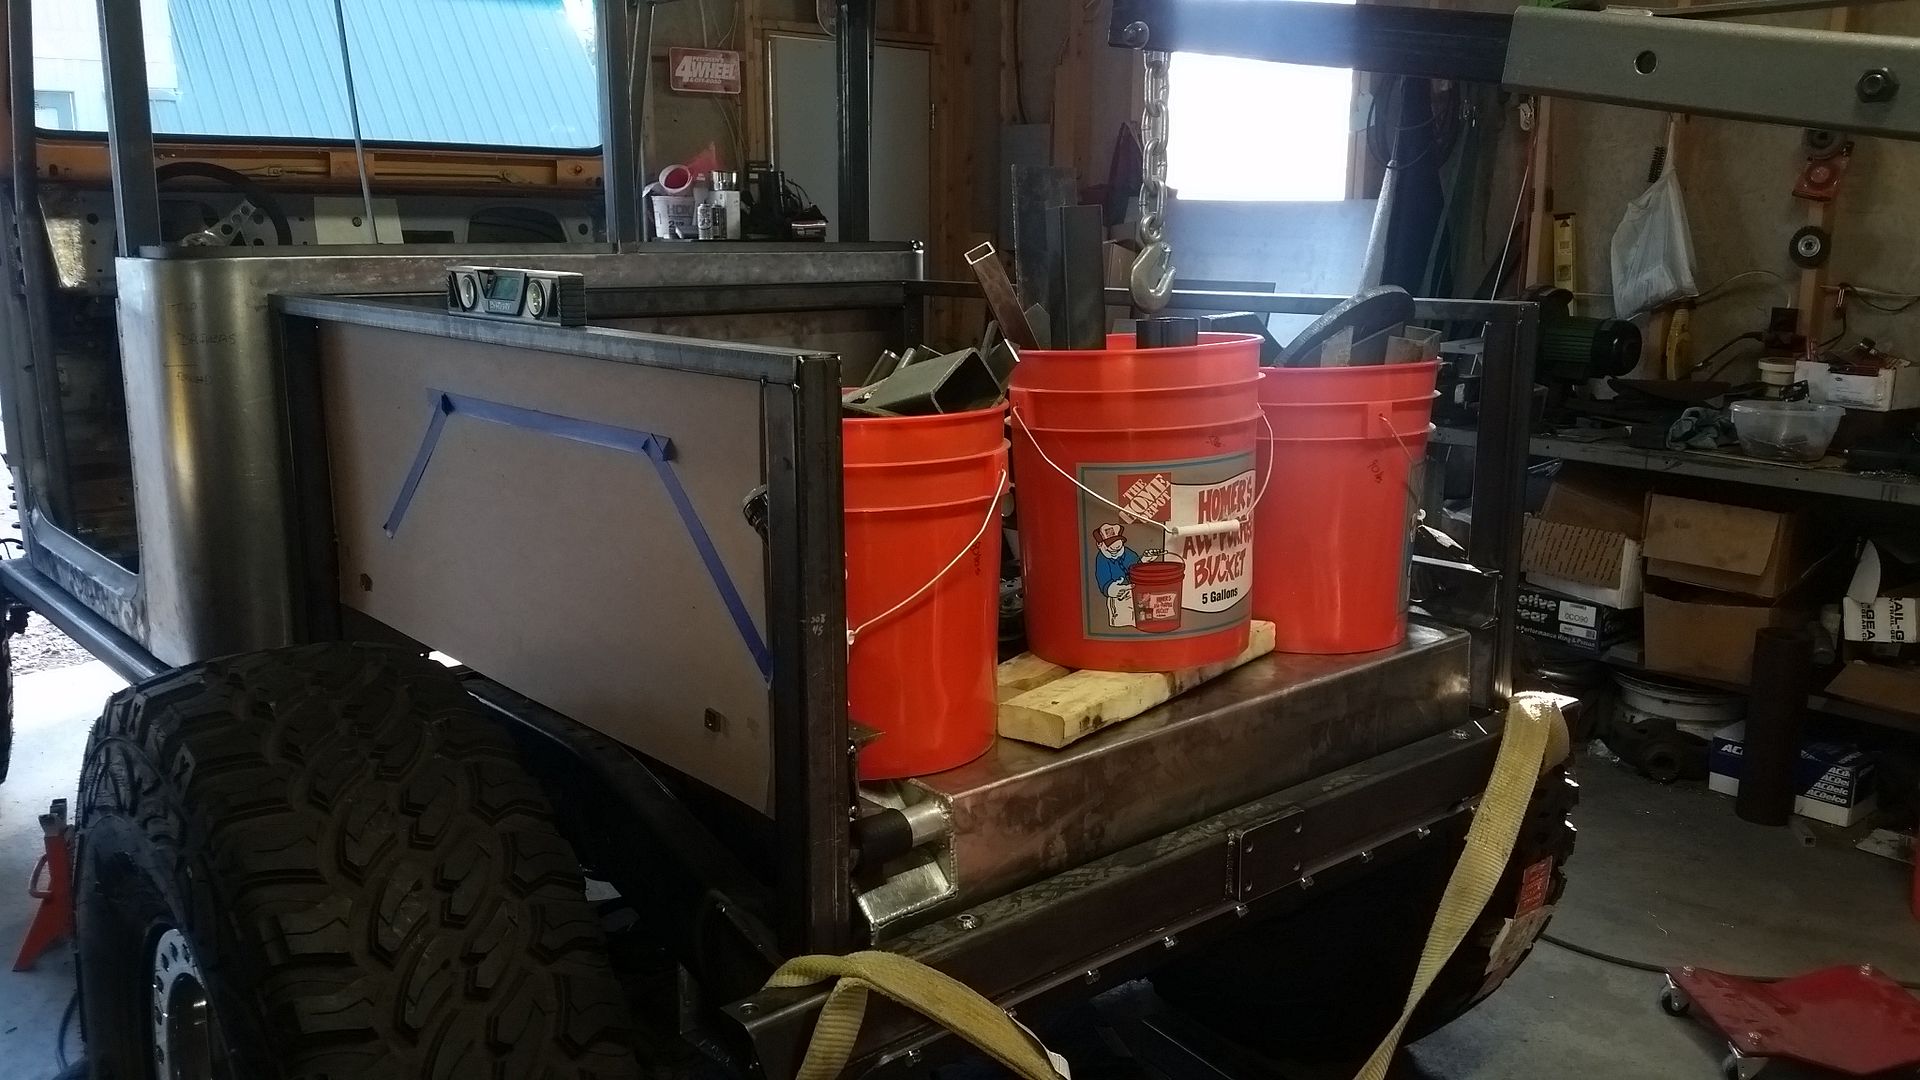
Stock spring ride height on the LX45. It's still a bit light on the body. I stuck 220 lbs of steel scrap in buckets on the fuel tank to get the butt end closer to final weight. The front is is pretty close. Still need top, interior, bellypan, etc. That stuff is in the middle. Also needs a battery, air compressor, and exhaust. Right now it has 6.5 uptravel in front and about 6.25 on the rear. 21 inches under the belly. It needs to drop about 1 inch in the rear suspension to be level enough. I think at final weight it might be pretty close...


Front uptravel from ride height.


Rear uptravel from ride height.


I knew those buckets of scrap steel would come in handy some day! That is about 220lbs which should be close to the added weight for fuel and the body panels.
 

Forum statistics

Threads
188,289
Messages
2,904,957
Members
229,961
Latest member
bdpkauai
Top