Boden Build - 2015 Tacoma DCLB 4wd

Awesome build. It seems that every upgrade so far has been functional. Keep up the good work!

How bad is it wheeling the LB? I haven't done any crazy wheeling yet, but can definitely tell its a bit of a boat.
 

tacozord

Adventurer
How bad is it wheeling the LB? I haven't done any crazy wheeling yet, but can definitely tell its a bit of a boat.

The two main shortcomings of the long bed are turning radius and break-over angle. I've sacrificed a bit on both of these points. The turning radius hinders me in tight navigation and the lower break-over angle has made me high-center on occasion. But with that said, I've pushed this truck further than I had originally expected. So it's been fun.

I've asked myself if I was to do it over again, would I get the long bed? Well...I can't answer that just yet. I need to continue building out the storage and camping related things first. After using it for a few years I think I'll have a better feel overall.

Thanks for the input. At times I wish I had a short bed for the above mentioned, but I am more than satisfied with the room the 6' bed provides. I guess its the trade-off.
 

tacozord

Adventurer
Under hood LED strip lighing

2015-08-20_TacomaUnderHoodLighting_Z2A4477_web600.jpg


I never understood why lighting in the engine compartment of a vehicle wasn't a standard option. After all, with LED lighting so inexpensive and with low power requirements, it just makes sense to have it standard on all vehicles. But alas, that's not the case. So with my 2015 Toyota Tacoma, I recently added LED strip lighting under the hood, and I'm going to show you how I installed it.

This post will outline the parts I used and where they can be purchased. Additionally, I'll show you how I put this together.

As a word of warning, if you choose to do this on your vehicle, you need to be careful. We are working with electricity, so for your own safety, you should begin by disconnecting the cable from the negative battery terminal. Once everything is complete, you can re-attach the cable.

PARTS

LED strip lighting

The waterproof flexible LED strip lighting I used is made by Triangle Bulbs and available at Amazon. This LED strip is rated at 4.8 watts per meter. Therefore, my project will consume about 400mA at 12 volts since I'll be using about one meter or less. These are pure white and have 60 LEDs per meter.

2015-08-20_TacomaUnderHoodLighting_Z2A4316_web600.jpg


Pin Switch

This installation will have the LED strip controlled by a pin switch. This will automatically turn on the lighting whenever the hood is opened and shut off when closed. I purchased a heavy-duty adjustable pin switch by Directed Electronics from Amazon.

2015-08-20_TacomaUnderHoodLighting_Z2A4283_web600.jpg


Wire

I used two colors of wire, red and black for power and ground respectively. As I mentioned earlier, one meter of strip lighting uses only 400mA. So when selecting wire size, I could have used 24 AWG wire safely. I typically don't use wire smaller than 18 AWG for accessories in my projects, however, I actually used 16 AWG wire, as crazy as that might sound. I chose this size simply because I wanted to connect an additional ground wire from the pin switch to my fuse block, and the only correctly sized ring terminal I had was for 16 AWG. So, I used a larger gauge wire than I technically needed. No big deal.

Anyway, I'll talk more about this additional ground wire and ring terminal next.

Wire.jpg


Heat shrink ring terminal

I used a heat shrink ring terminal to connect the pin switch to ground. Many people omit this additional ground wire because the pin switch is bolted to the body, which should provide an adequate ground. However, I felt that grounding the circuit in this manner on a painted surface was insufficient. Therefore, I added a ground wire from the pin switch to my fuse block. Because of the size of the pin switch, I needed a ring terminal with a 5/16" hole. As I mentioned earlier, I only had a 16 AWG ring terminal with this sized hole, so this was what I used instead of purchasing a smaller size for 18 AWG. These can be purchased at Amazon.

2015-08-20_TacomaUnderHoodLighting_Z2A4286_web600.jpg


Quick Disconnect Terminal

A female quick disconnect terminal connects the ground wire from the LED strip to the pin switch. Ideally, I would have preferred using a heat shrink terminal, but I didn't have any on hand. Therefore, I used the following terminal along with adhesive-lined heat shrink. You'll also notice that the terminal is insulated. This is not required, because this is a ground wire and not a power wire. These can be purchased at Amazon. Fully insulated heat shrink female quick disconnect terminals can be purchased at Amazon as well. And standard heat shrink terminals are here.

2015-08-20_TacomaUnderHoodLighting_Z2A4289_web600.jpg


Adhesive-lined heat Shrink Tubing

I used adhesive-lined heat shrink tubing to seal the quick disconnect terminal at the pin switch. Additionally, heat shrink tubing was used where the wires attach to the LED strip. It also helps to hold braided sleeving in place. This project used 3/8" diameter tubing that is available at Waytek Wire.

2015-08-20_TacomaUnderHoodLighting_Z2A4300_web600.jpg


Braided Wire Sleeving

I used 1/4" braided sleeving to group the wiring together and protect it. You can also use split wire loom if you have that available. Braided sleeving can be purchased at Amazon.

2015-06-25_Parts_Z2A3010_web800.jpg


Cable Tie Mounts

To attach the wiring to the underside of the hood, self adhesive cable tie mounts along with zip ties are an excellent option. These are made by Startech and available at Amazon.

2015-08-20_TacomaUnderHoodLighting_Z2A4306_web600.jpg


Zip Ties

I used small 4" zip ties to attach the wiring to the cable tie mounts. These are available at Amazon. I also used a single heavy duty zip tie to attach the wiring at the hood hinge as you'll see later.

ZipTies.jpg


Double Sided Mounting Tape

The last thing needed is strong double sided tape. I used 3M Super Strength Molding Tape, which can be purchased at just about any auto parts store. But it's also available at Amazon.

2015-08-20_TacomaUnderHoodLighting_Z2A4265_web600.jpg
 
Last edited:

tacozord

Adventurer
Under hood LED strip lighing - Installation

INSTALLATION

Now that all the parts and supplies were in order, it was time to install the lighting.

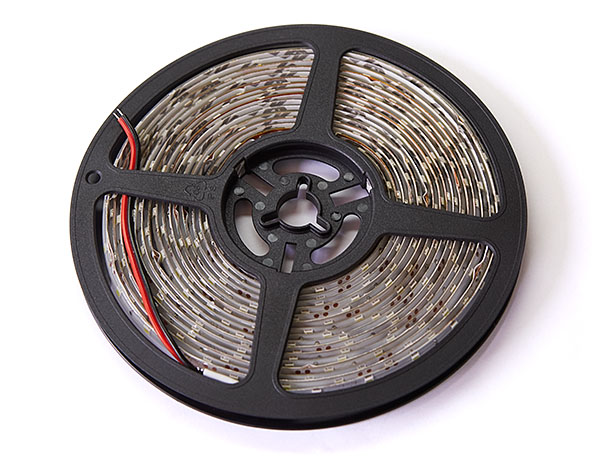
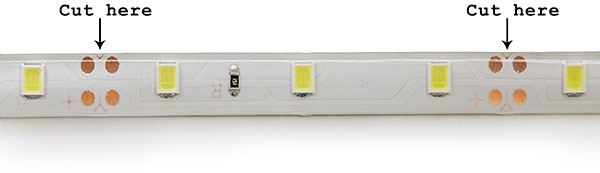
The first thing I did was to cut a length of LED strip. I simply held it up in place under the hood, marked and cut. If you look at the following picture, I've indicated the correct locations to cut. You'll notice that there are three LEDs between each cut line. Therefore, you have great flexibility in how long you want the strip to be. However, if you were to cut in locations other than where I've indicated, then you'll end up with a few dark LEDs.

2015-08-20_TacomaUnderHoodLighting_Z2A4330_web600.jpg


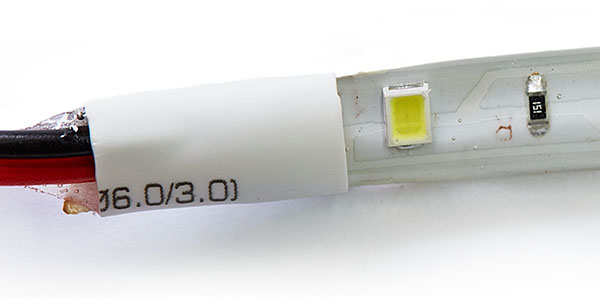
When purchasing the LED strip in a reel, one end will have short lengths of wire already attached. I removed these and soldered on my own. I removed the white protective tubing first and then cut off the wires.
2015-08-20_TacomaUnderHoodLighting_Z2A4320_web600.jpg


To fully remove the wires and access the solder points, I used a utility knife to remove the clear spongy weatherproofing and used a soldering iron to remove the stock wiring.

2015-08-20_TacomaUnderHoodLighting_Z2A4331_web600.jpg


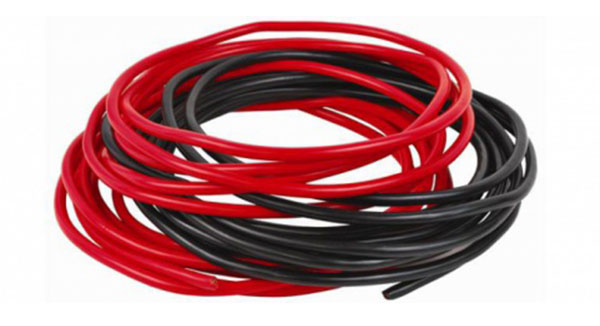
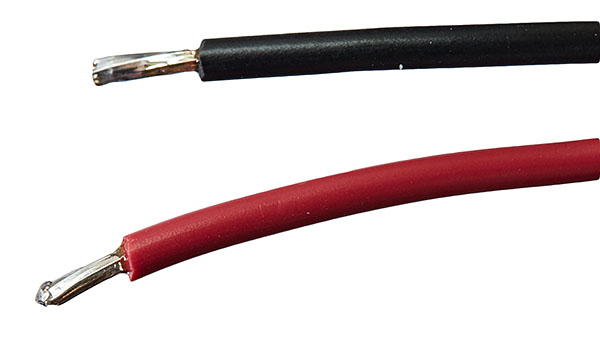
Next, I cut two lengths of wire. I eye-balled the length and gave myself some extra. The LED strip will be attached at the top of the hood, so I needed wire to span the length of the hood down to the hood hinge and then forward to the front of the vehicle. About eight feet of each wire gave me plenty to work with.

I stripped one end of each wire about 1/4" and tinned with solder.

2015-08-20_TacomaUnderHoodLighting_Z2A4345_web600.jpg


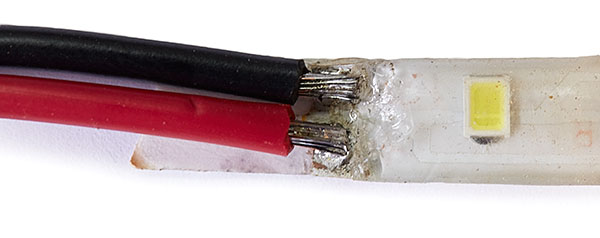
I soldered the wires to the connection points on the LED strip. Make sure you pay attention so that the wires are soldered to the correct points. There is a small positive '+' sign that tells you which pad to solder the power to. If you do this backwards, the lights will not illuminate.

2015-08-20_TacomaUnderHoodLighting_Z2A4350_web600.jpg


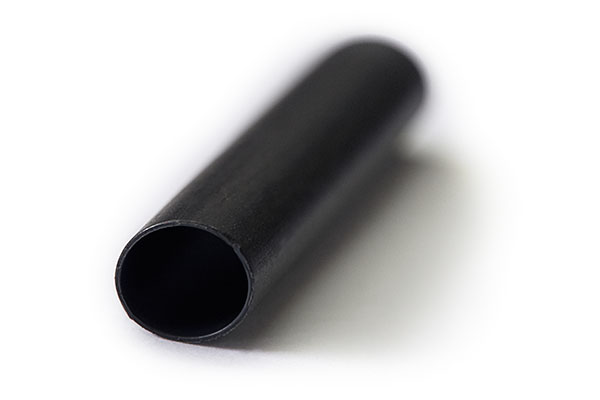
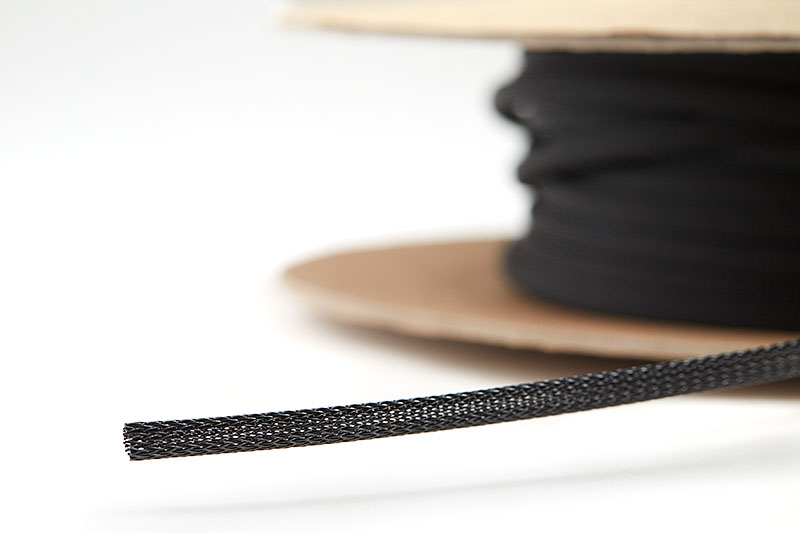
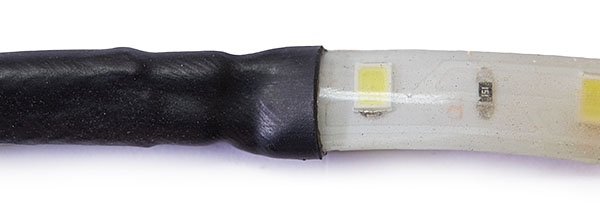
After soldering on the wires, I cut some braided sleeving and slid it up over the wiring all the way up to the LED strip. I then cut a 2" piece of adhesive-lined heat shrink tubing and slid this over the sleeving. This needed to cover the end of the sleeving, exposed wiring, and part of the LED strip. Finally, I used a heat gun to shrink and seal in place.

2015-08-20_TacomaUnderHoodLighting_Z2A4361_web600.jpg


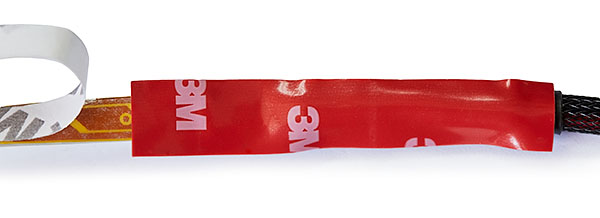
Next, I cut a short piece of 3M double sided tape and attached to the underside of the LED strip at this connection point. Although the LED strip has an adhesive back and I'll be using cable tie mounts for the wiring, I wanted an additional attachment point directly at the wire connection. This will help to minimize any vibration, which might weaken the connection.

2015-08-20_TacomaUnderHoodLighting_Z2A4368_web600.jpg


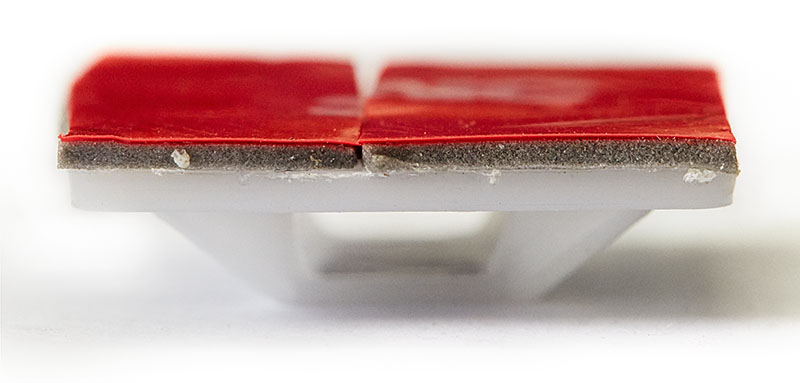
My experience with cable tie mounts is that the adhesive is not very strong. Therefore, I removed the sticky adhesive that came with the mounts and added my own using the 3M double sided tape. I ended up using four cable tie mounts so this isn't very tedious.

2015-08-20_TacomaUnderHoodLighting_Z2A4411_web600.jpg


Next, I attached the flexible LED strip. Of course, I needed to make sure that the location where I was placing it was perfectly clean. I started with a degreaser to remove any dirt and grime. Then I wiped down the area with denatured alcohol. As you can see in the following picture, I didn't need to clean the entire hood, only the area necessary.

2015-08-20_TacomaUnderHoodLighting_Z2A4383_web600.jpg


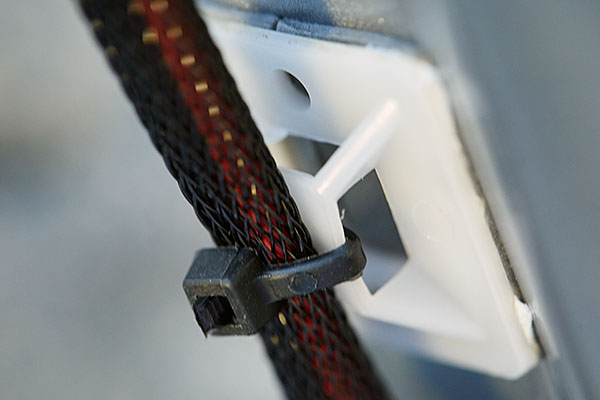
After this, I attached four cable tie down mounts spaced evenly down the hood from the LED strip towards the hinge.

2015-08-20_TacomaUnderHoodLighting_Z2A4388_web600.jpg


I used 4" zip ties to secure the wiring to the cable tie down mounts.

2015-08-20_TacomaUnderHoodLighting_Z2A4424_web600.jpg


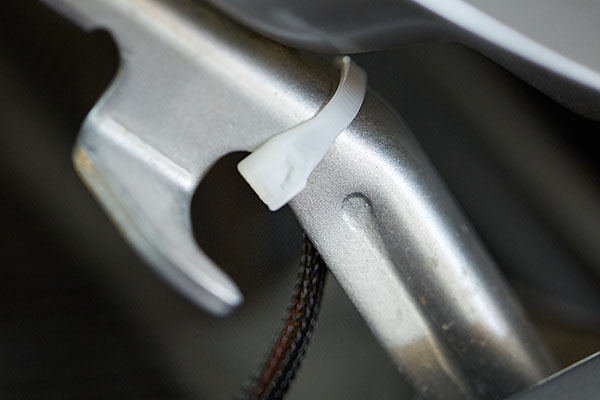
I used one heavy duty zip tie at the hinge.

2015-08-20_TacomaUnderHoodLighting_Z2A4433_web600.jpg


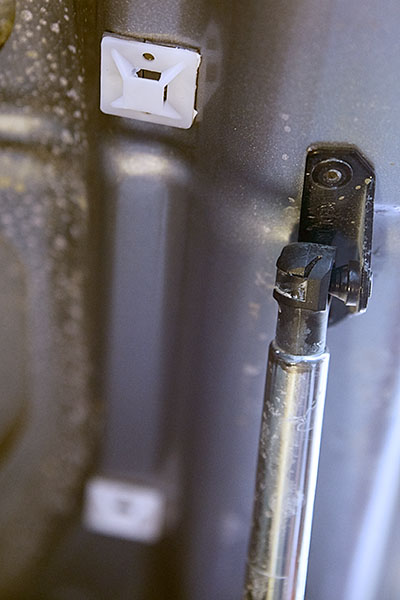
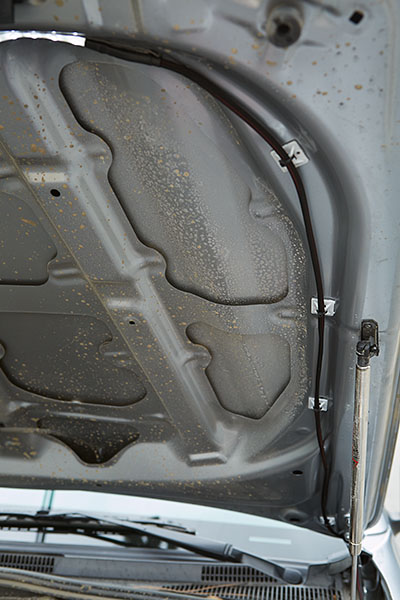
Next, I navigated the wiring under the grill and into the engine compartment. There was no need to remove the screw that attaches it to the body. There is ample space under it to slide the wiring through.

2015-08-20_TacomaUnderHoodLighting_Z2A4440_web600.jpg


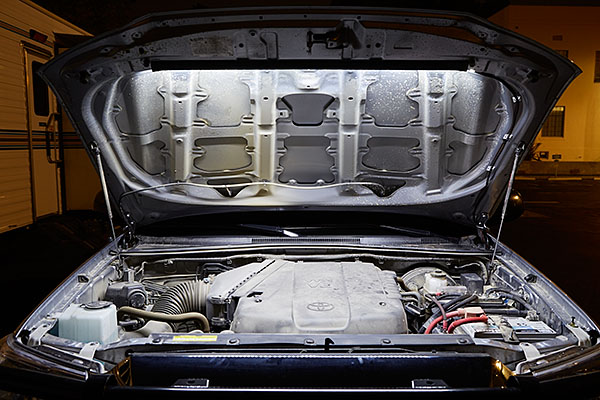
This is how it looked at this point.

2015-08-21_TacomaUnderHoodLighting_Z2A4480_web600.jpg


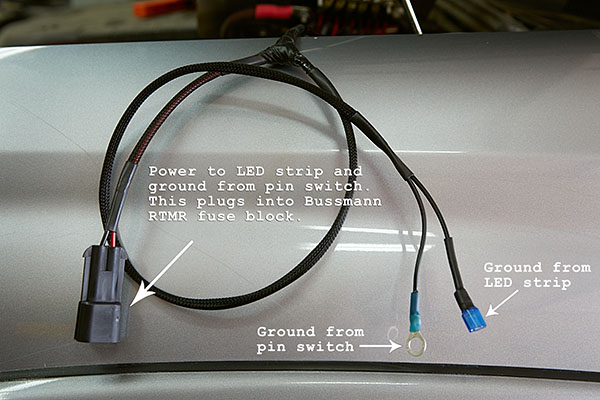
My vehicle has a Bussmann RTMR installed as a secondary fuse/relay block. This allows me to add electrical accessories to the vehicle without using the OEM fuse block. If you don't have one of these, then your wiring will be slightly different. But this is very easy to do. Use an appropriate connector to attach the red wire to your battery with an in-line fuse. The black wire will attach to the bottom of the pin switch, as you'll see in a moment. Finally, connect an optional ground wire from the pin switch to a suitable ground.

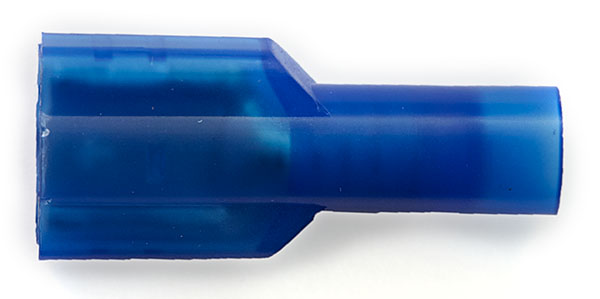
Anyway, I cut the wiring to length and attached my connectors, which are outlined in the following picture. I used a Metri-pack connector to connect to the Bussmann RTMR.

2015-08-20_TacomaUnderHoodLighting_Z2A4466_web6001.jpg


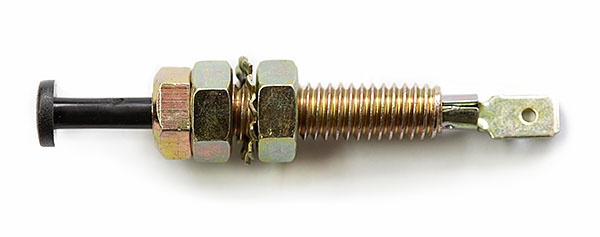
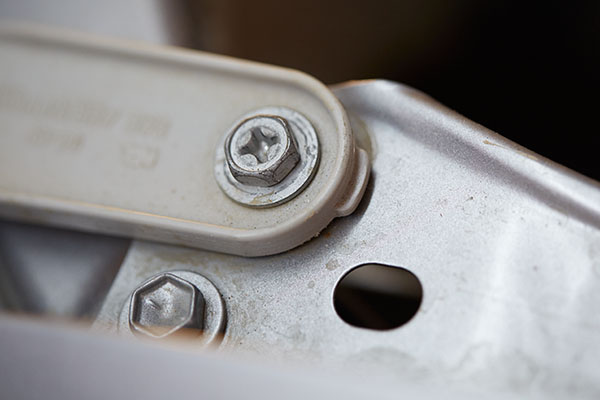
Now it was time to install the pin switch and complete the wiring. The easiest location for the pin switch in my 2015 Toyota Tacoma that didn't require any drilling was to use the headlight mounting bolt on the driver side. So I began by removing this bolt.

2015-08-20_TacomaUnderHoodLighting_Z2A4450_web600.jpg


Once removed, you'll see a plastic threaded clip underneath.

2015-08-20_TacomaUnderHoodLighting_Z2A4453_web600.jpg


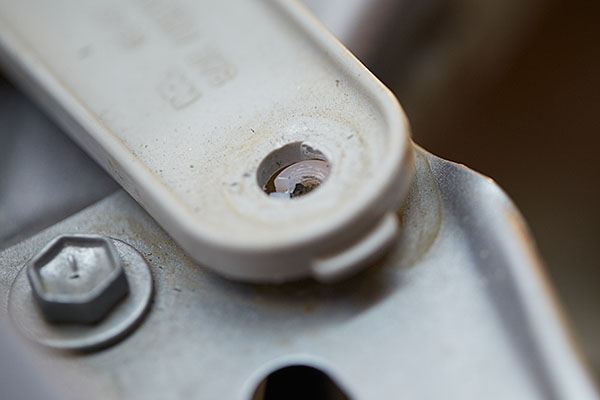
I removed this clip with a pair of needle nose pliers. I just had to squeeze the bottom, push it up, and then wiggle it out from between the body and headlight mount.

2015-08-20_TacomaUnderHoodLighting_Z2A4458_web600.jpg


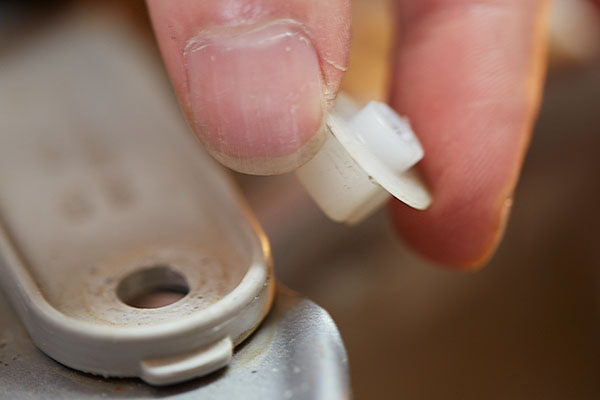
Finally, I dropped the pin switch down into the hole, but didn't secure it just yet.

Although I've recommended installing an additional ground from the pin switch to a better grounding point, this isn't required. Many people use the direct contact of the pin switch mounting bolt to the body of the vehicle as their ground. So if you're not installing an additional ground wire, you can secure the pin switch in place now with the lock washer and nut.

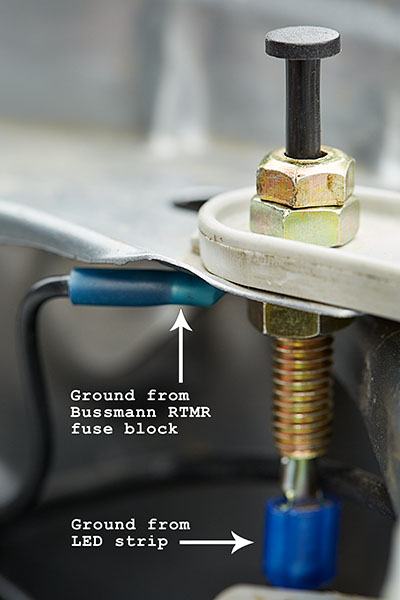
Otherwise, I first slipped the ring terminal from the additional ground wire onto the pin switch from the bottom. Then I tightened everything up with the lock washer and nut. The other end of this wire terminates ground within the Bussmann RTMR. Yours might connect directly to the battery, for example.

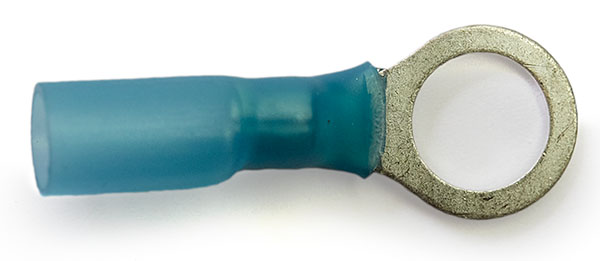
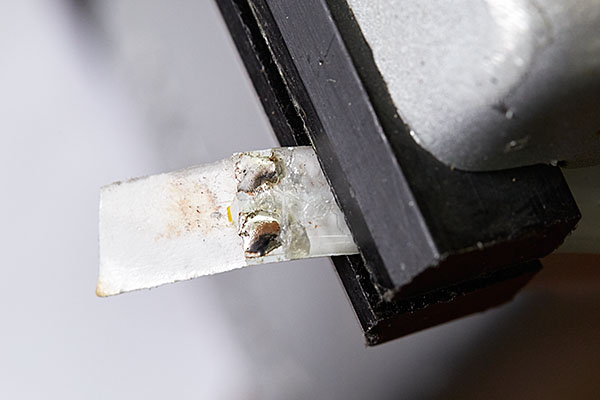
Last, I installed the ground wire from the LED strip to the spade terminal on the bottom.

2015-08-21_TacomaUnderHoodLighting_Z2A4489_web600.jpg


The installation was complete, so I reconnected my negative battery cable to finalize everything. I was immediately greeted with a wash of light in my engine bay. Awesome!

2015-08-20_TacomaUnderHoodLighting_Z2A4477_web600.jpg
 
Last edited:

tacozord

Adventurer
SUB'D nice work with the electrical.
also get a light meter on those ARB's!
Thanks! I definitely need to break out the light meter and measure. I turned them on the other day to show a friend of mine. It was daylight out and staring directly into the lights was blinding!

Great write up!
Thank you

Awesome write up. I used the same lights in my RTT and they have worked great so far. How is the quality of the sleeving?
Are you talking about the braided sleeving? Not sure if I've used it long enough to give an honest answer. But so far so good. Of course, split loom would be more durable.
 

mouse007

Explorer
Me too! I picked up the bumper yesterday. So the plan is to install today. We'll see how it goes.

Nice build man..!! I installed my Pelfrey H.C. a few weeks back. It's a very straight forward install. Can't wait to see how yours comes out.
 

tacozord

Adventurer
I got the bumper installed today, but I ran out of time to fine tune it. So I'll get back on it either tomorrow or Thursday. It was an easy install but took more time than I thought. That's mostly because I had to wait for my buddy to show up and help me lift it into place. There was no way I was going to get it installed myself, even though I tried. :eek:

Anyway, I started taking detailed pics along the way, but stopped due to time management. So I'll post what I got when I get around to it. Additionally, I ordered the bumper with cut-outs for rear lights. I still have to wire them up. Probably not until next week, though. Lots to do!!!
:Mechanic:

But so far, I really like this bumper. There's a lot more clearance than stock, and it matches the front bumper and sliders better.
 

Forum statistics

Threads
186,723
Messages
2,887,501
Members
227,160
Latest member
roamingraven
Top