jscherb
Expedition Leader
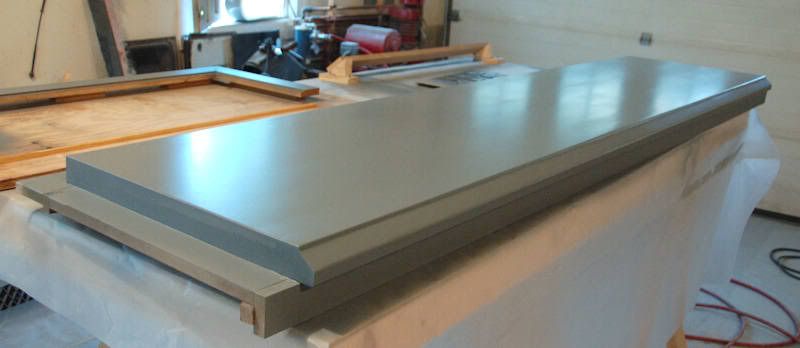
I haven't showed you too many construction photos so far in this thread, so here are some...
For the first phase of this project, I've been working on making 5 molds:
- tub side panel
- tub end panel with tailgate opening
- tub end panel with no opening
- tailgate outer skin
- tailgate inner skin
I'll also be making inner fender molds, but I'll do them after I've made the first set of tub sides and ends.
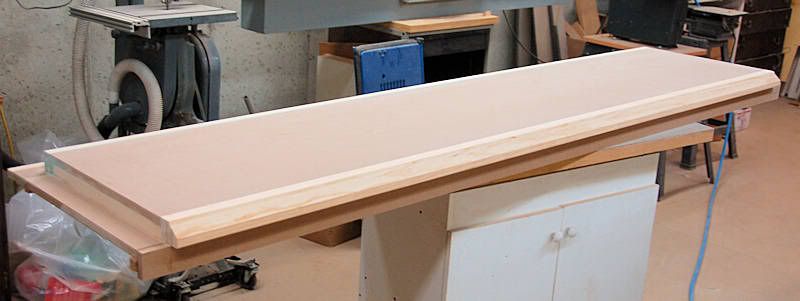
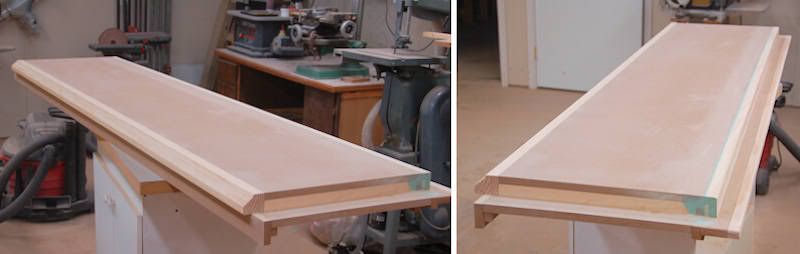
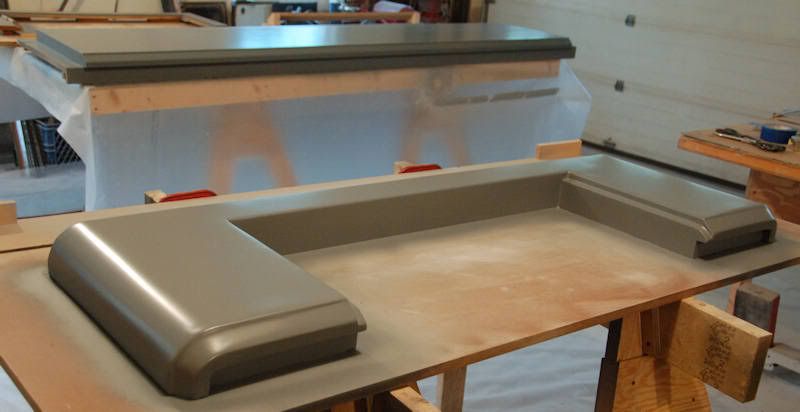
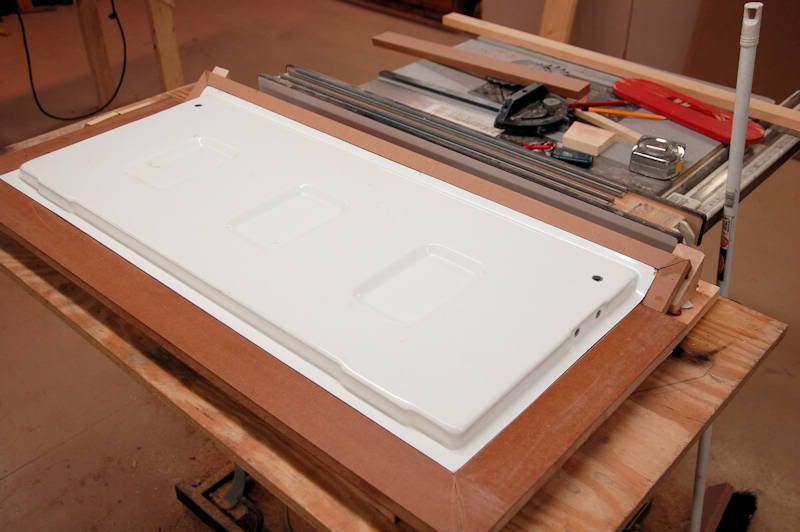
The mold-making process begins with a "master", often called a "plug", which is a complete version of the part to be molded. Usually the master part will have extra wide flanges to facilitate trimming the final part to the exact size. Once the masters are complete, molds are made from the masters. The masters need to be as perfect as possible, since even the tiniest imperfections will be reproduced in the mold and then carried to the final parts.
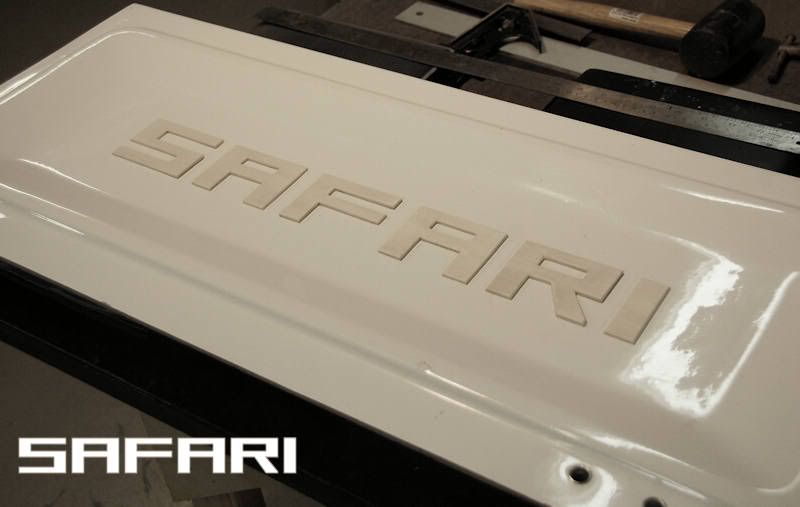
Here's how I'm making the master for the end panel with the tailgate opening. To get a start on this master, I picked up two OMIX tub repair panels:
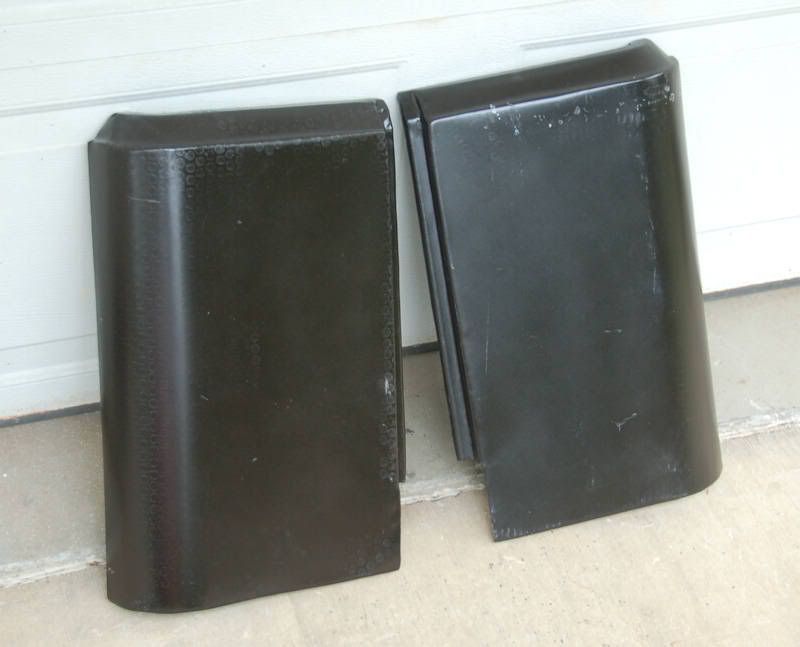
They look ok in this photo, but they're really low quality parts. (Side note: Crown also makes rear corner panels, and they're higher quality than the OMIX parts, but the Crown parts have all the holes pre-cut in them. I got the OMIX parts because I didn't want to have to fill the holes).
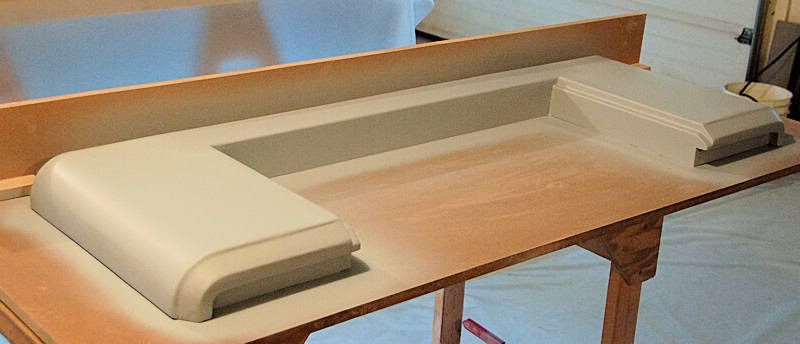
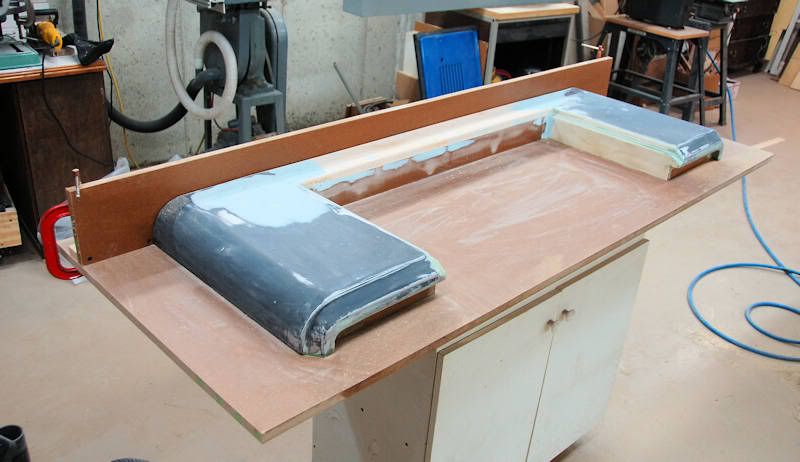
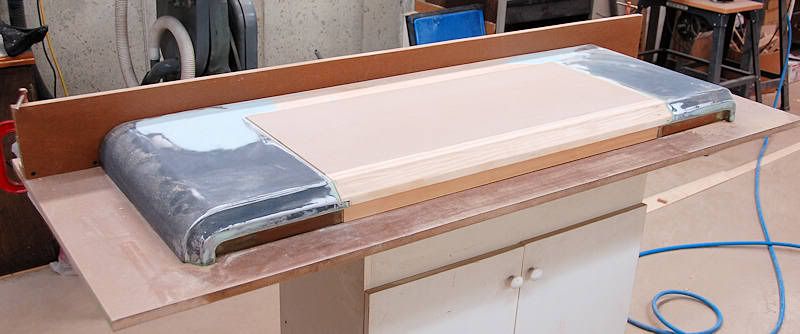
I think the OMIX parts may have been beaten to shape by hand in the Phillipines, rather than being made with accurate dies on a press. I had to spend quite a few hours making them accurate. First, the corner wasn't 90 degrees, I'd guess it only curved around 80 or 85 degrees. So first I fixed the curve to make it 90, and that resulted in the parts being too narrow. If I set the tailgate opening to the factory 36", the tub would end up being 1/4" too narrow. So I had to build up the tailgate jamb opening 1/8" on each side to get to the factory tub width. Once I had made the corner panels accurate, I mounted them on a board so I could make the entire end panel accurate. Being accurate to the factory dimensions in this project is important, so factory parts will fit these tub properly.
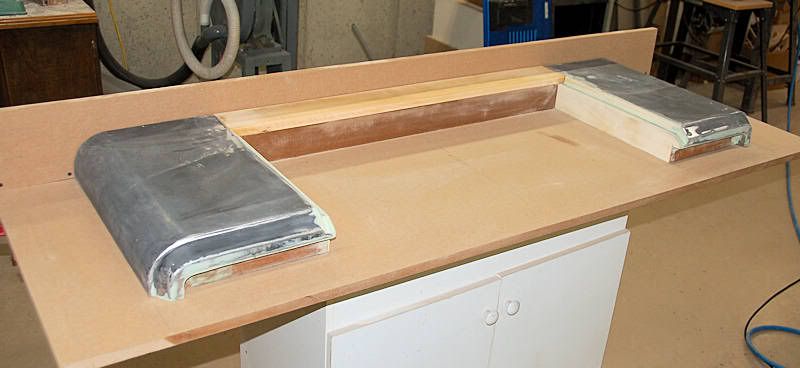
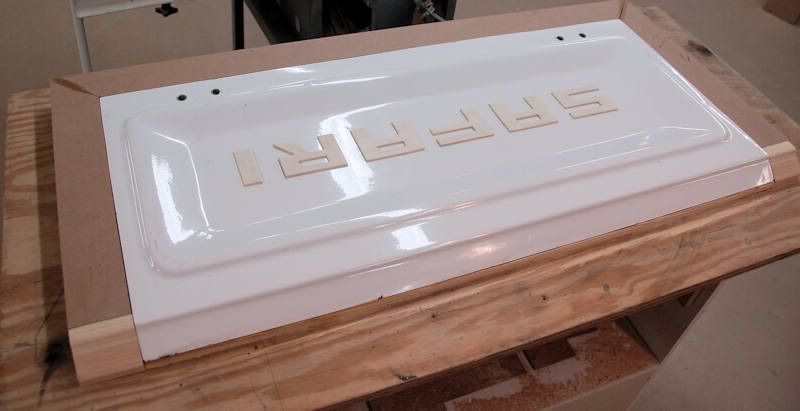
I connected to two corner panels with wood to make up the panel below the tailgate. The material I added to the jamb goes all the way to the base board; it will be trimmed on the final fiberglass part.
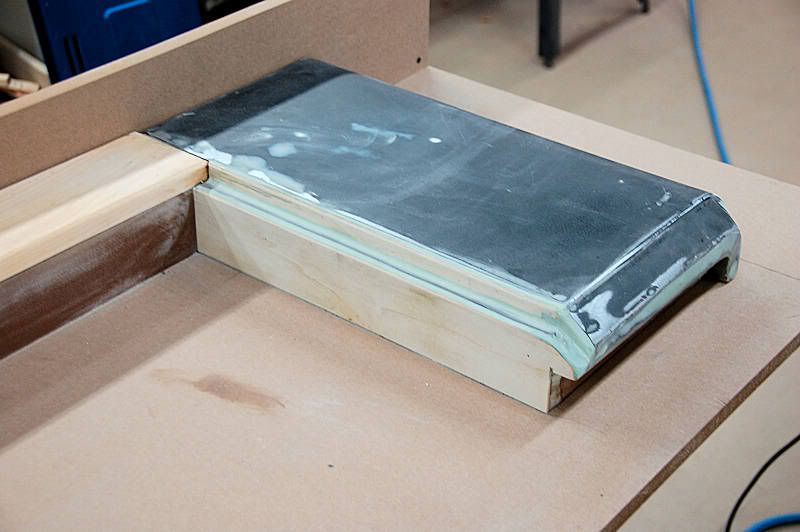
One of the nice things about making masters for molds is that you can use whatever material you like as long as the end result is a smooth surface. I'm using a mix of sheet metal parts and wood for these masters, sometimes wood is easier to work when building a master part. Once the bodywork is done and everything is sealed, smoothed and primed, the fiberglass molding process won't care whether the master was metal, wood or whatever.
This next photo shows a difference between making a mold master and making a final part - I made the inside of the tailgate opening extend all the way to the base board using wood (BTW, this was also part of making the tailgate opening size accurate because of the bad OMIX parts). Having these extend all the way will make the molding process easier, and the excess fiberglass will be trimmed off the final part.
 >>>>
>>>>
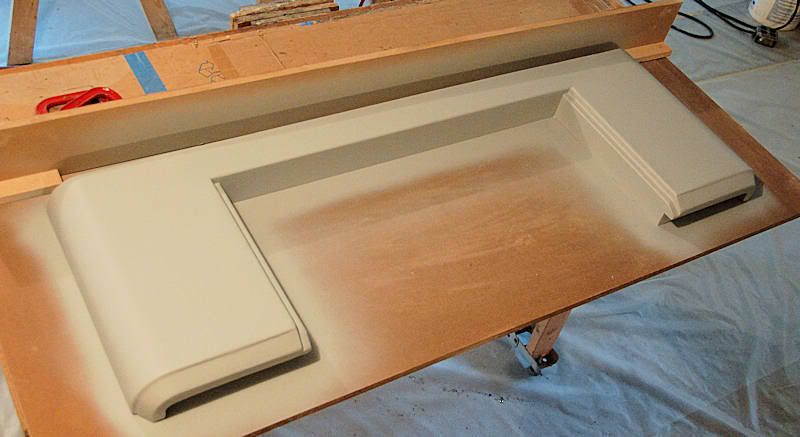
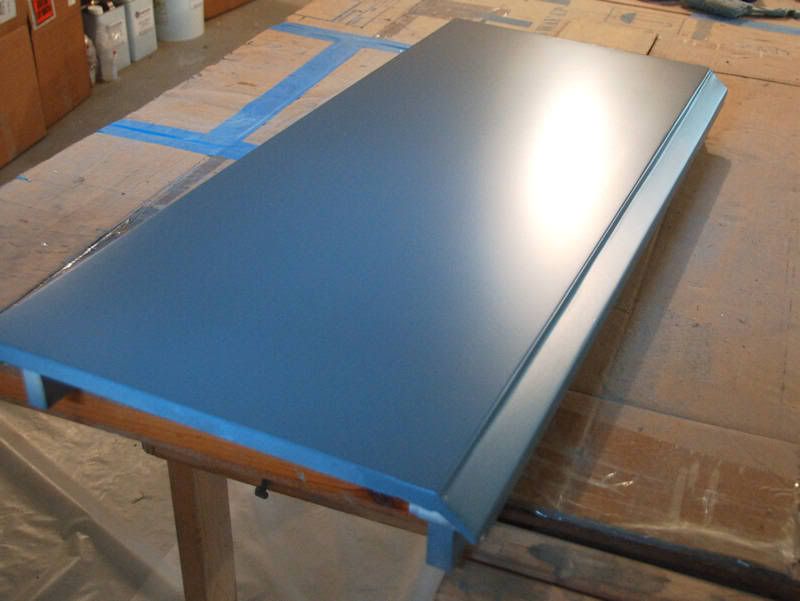
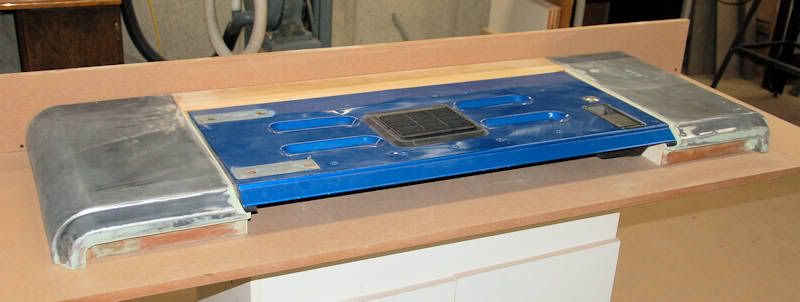
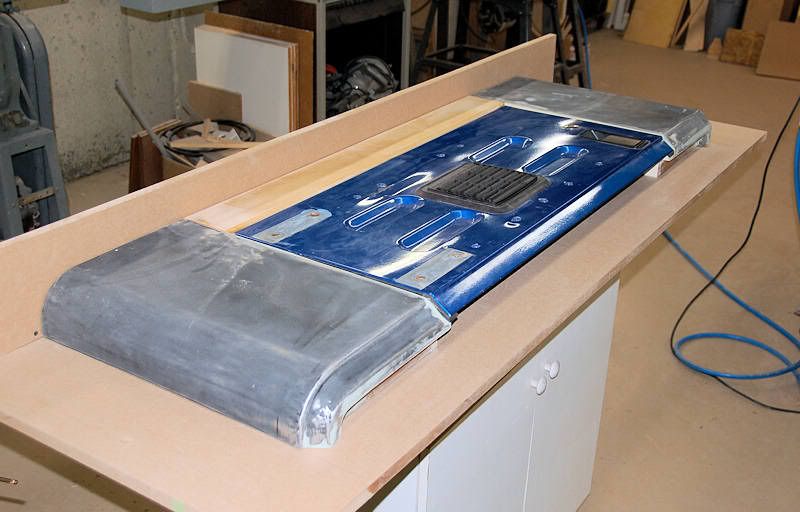
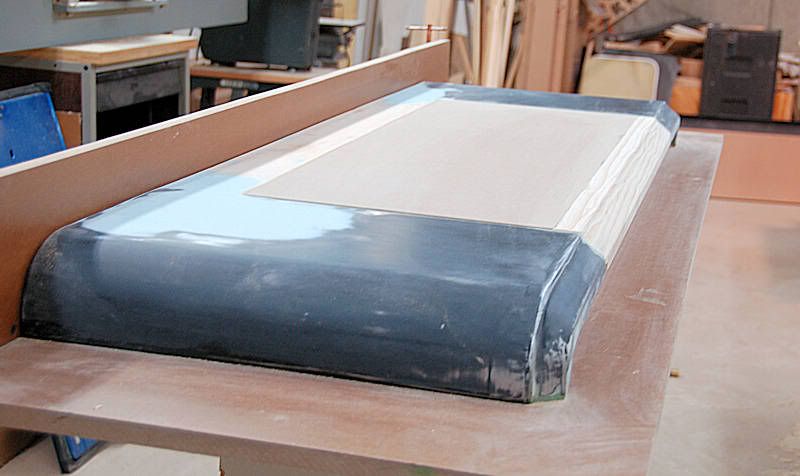
Now the part is accurate and faithful to the dimensions of the factory tub; a bit more bodywork is yet to be done to smooth everything together seamlessly, more photos to come.
For the first phase of this project, I've been working on making 5 molds:
- tub side panel
- tub end panel with tailgate opening
- tub end panel with no opening
- tailgate outer skin
- tailgate inner skin
I'll also be making inner fender molds, but I'll do them after I've made the first set of tub sides and ends.
The mold-making process begins with a "master", often called a "plug", which is a complete version of the part to be molded. Usually the master part will have extra wide flanges to facilitate trimming the final part to the exact size. Once the masters are complete, molds are made from the masters. The masters need to be as perfect as possible, since even the tiniest imperfections will be reproduced in the mold and then carried to the final parts.
Here's how I'm making the master for the end panel with the tailgate opening. To get a start on this master, I picked up two OMIX tub repair panels:
They look ok in this photo, but they're really low quality parts. (Side note: Crown also makes rear corner panels, and they're higher quality than the OMIX parts, but the Crown parts have all the holes pre-cut in them. I got the OMIX parts because I didn't want to have to fill the holes).
I think the OMIX parts may have been beaten to shape by hand in the Phillipines, rather than being made with accurate dies on a press. I had to spend quite a few hours making them accurate. First, the corner wasn't 90 degrees, I'd guess it only curved around 80 or 85 degrees. So first I fixed the curve to make it 90, and that resulted in the parts being too narrow. If I set the tailgate opening to the factory 36", the tub would end up being 1/4" too narrow. So I had to build up the tailgate jamb opening 1/8" on each side to get to the factory tub width. Once I had made the corner panels accurate, I mounted them on a board so I could make the entire end panel accurate. Being accurate to the factory dimensions in this project is important, so factory parts will fit these tub properly.
I connected to two corner panels with wood to make up the panel below the tailgate. The material I added to the jamb goes all the way to the base board; it will be trimmed on the final fiberglass part.
One of the nice things about making masters for molds is that you can use whatever material you like as long as the end result is a smooth surface. I'm using a mix of sheet metal parts and wood for these masters, sometimes wood is easier to work when building a master part. Once the bodywork is done and everything is sealed, smoothed and primed, the fiberglass molding process won't care whether the master was metal, wood or whatever.
This next photo shows a difference between making a mold master and making a final part - I made the inside of the tailgate opening extend all the way to the base board using wood (BTW, this was also part of making the tailgate opening size accurate because of the bad OMIX parts). Having these extend all the way will make the molding process easier, and the excess fiberglass will be trimmed off the final part.
Now the part is accurate and faithful to the dimensions of the factory tub; a bit more bodywork is yet to be done to smooth everything together seamlessly, more photos to come.

")