You are using an out of date browser. It may not display this or other websites correctly.
You should upgrade or use an alternative browser.
You should upgrade or use an alternative browser.
Boomer the Quadravan 4x4 Camper
- Thread starter spencyg
- Start date
A little bit more roof rack progress.
I need to trim the upper profile shape just a bit. The rack actually aligns with the peak profile perfectly, but that of course can't be seen from the ground. I'm altering the top perimeter rail to comform more closely to the forward profile which can be seen from the ground.
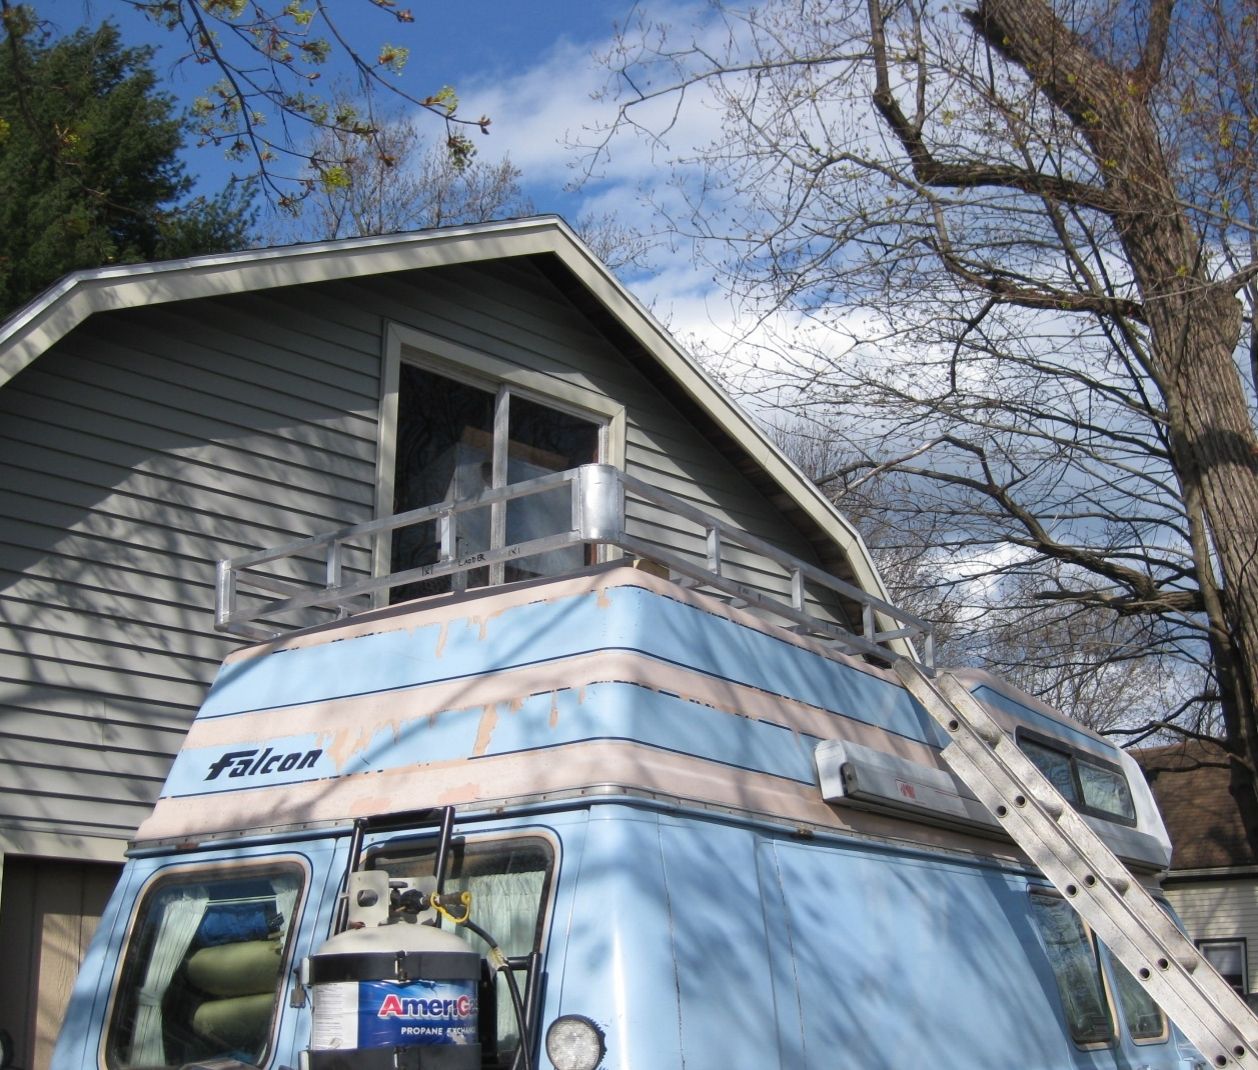
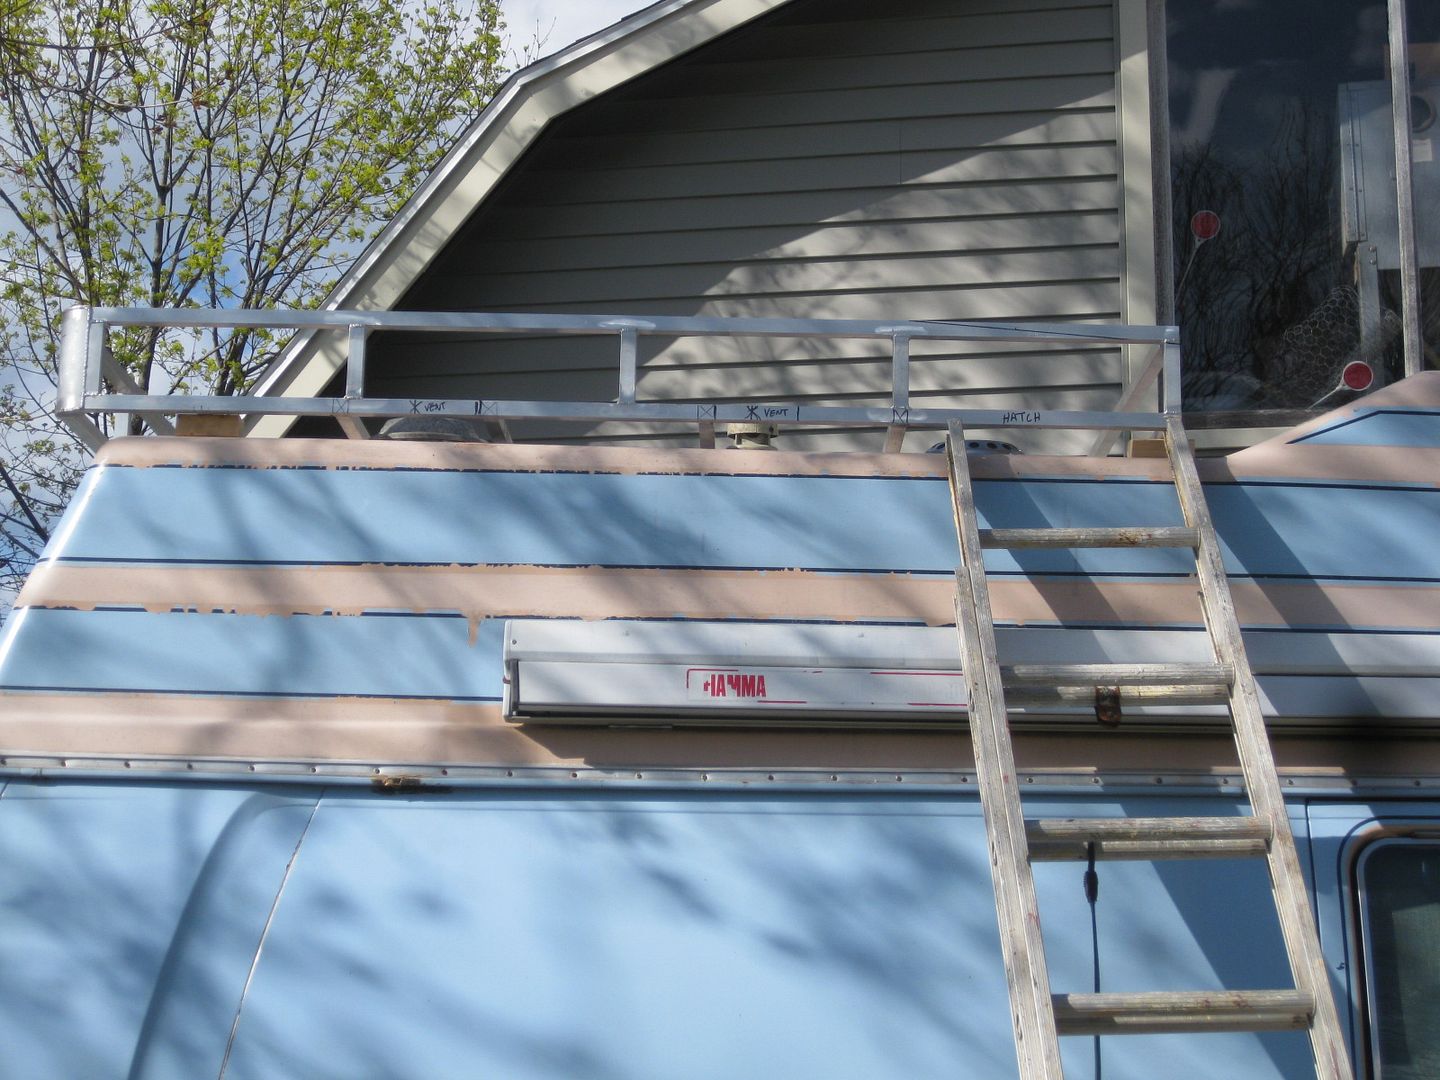
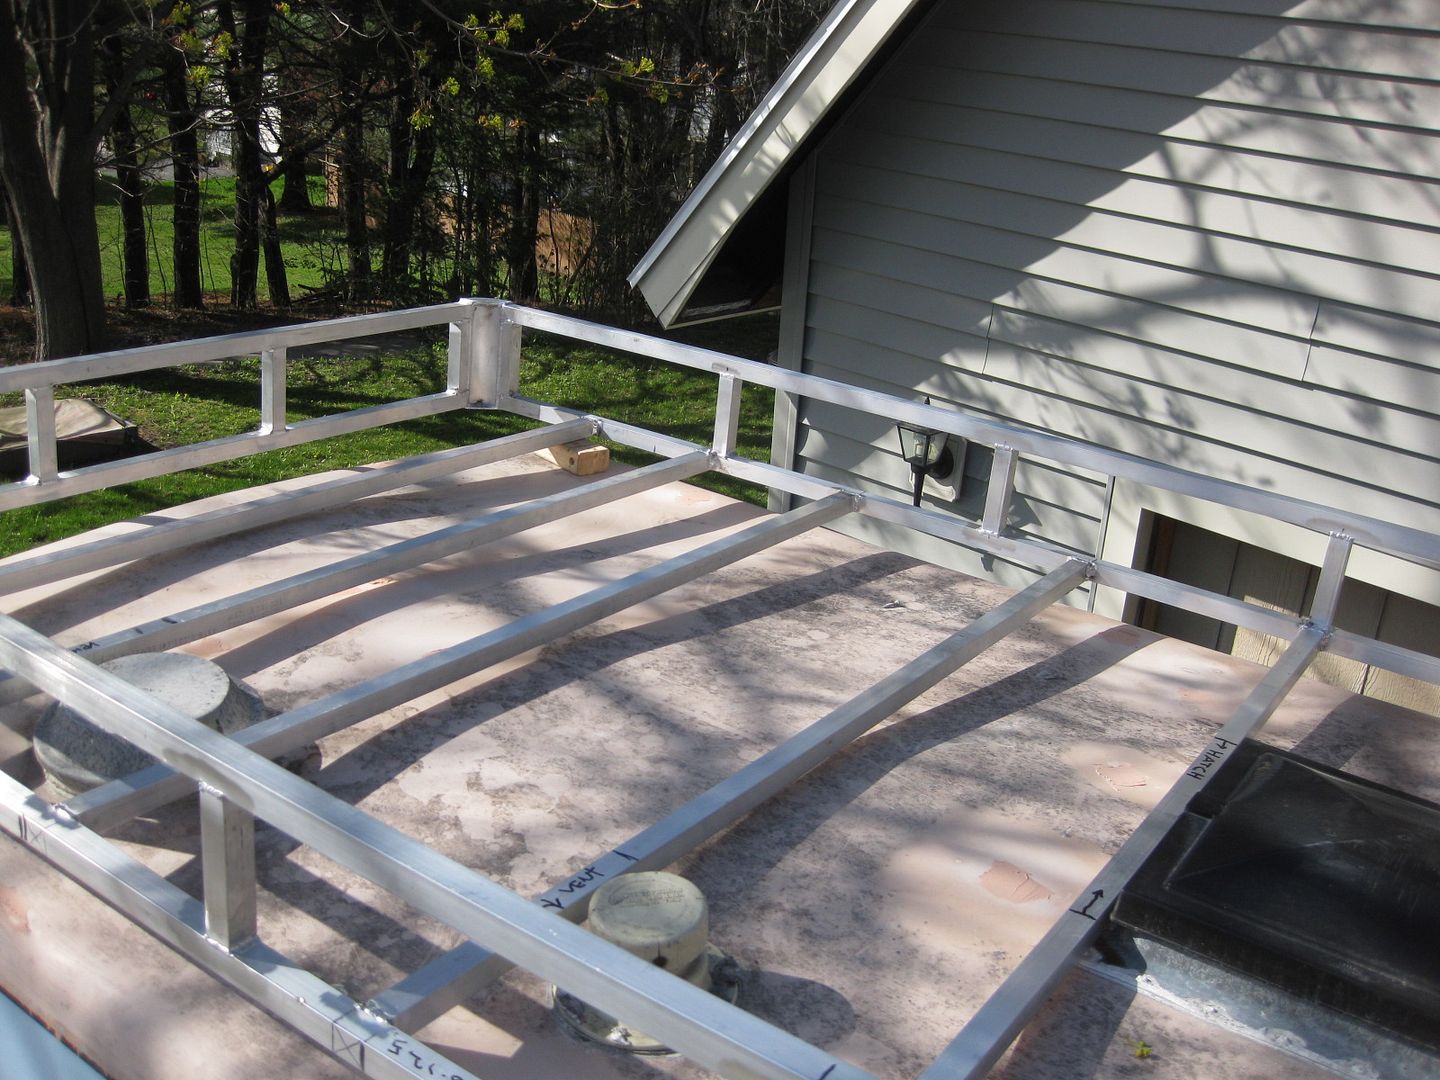
There are more cross bars going in and I've got poultry flooring coming from Farmtek to be a decent walking surface. I also split up the pipe today for the roof mounts and have tabs being waterjet cut to weld onto those for secure (and removable) rack fastening.
Getting the rack up and down...with a bad back...is...interesting.
I also sanded the primer up front and it looks good enough for government work.
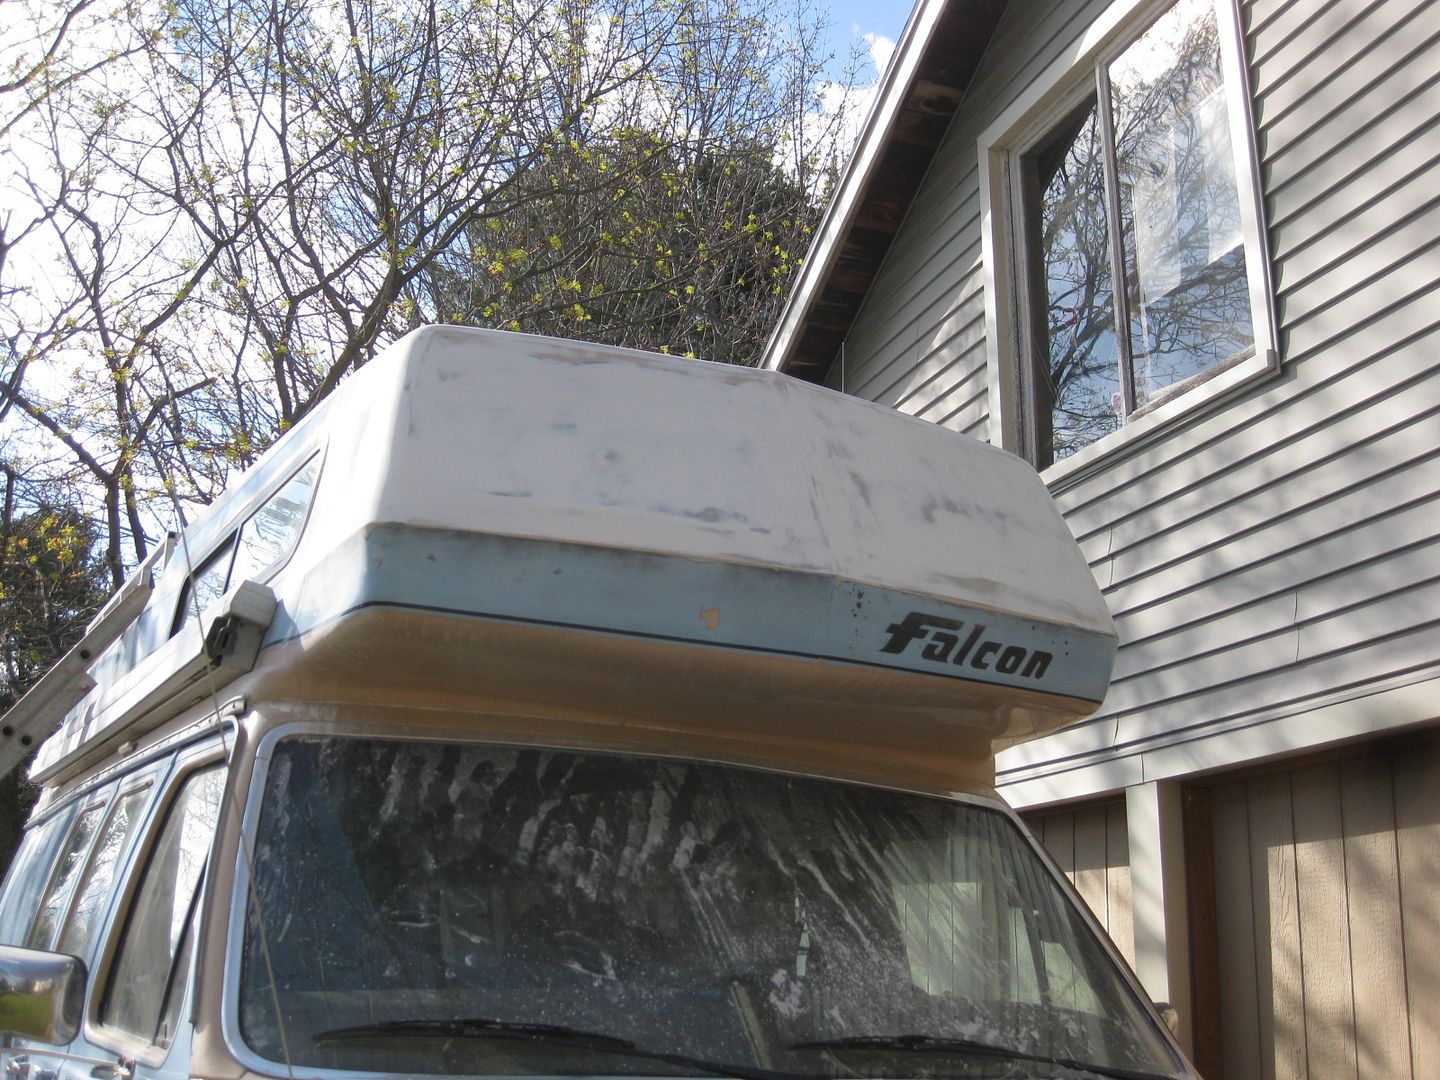
The whole top will get one more coat before paint.
More rack work tomorrow.
SG
I need to trim the upper profile shape just a bit. The rack actually aligns with the peak profile perfectly, but that of course can't be seen from the ground. I'm altering the top perimeter rail to comform more closely to the forward profile which can be seen from the ground.


There are more cross bars going in and I've got poultry flooring coming from Farmtek to be a decent walking surface. I also split up the pipe today for the roof mounts and have tabs being waterjet cut to weld onto those for secure (and removable) rack fastening.
Getting the rack up and down...with a bad back...is...interesting.
I also sanded the primer up front and it looks good enough for government work.

The whole top will get one more coat before paint.
More rack work tomorrow.
SG
Thanks! The rack will only be for lightweight items so I'm not concerned about the effect on driving dynamics. The rack as it currently sits only weighs around 35lbs. There is still more to go, but it will be light regardless. The lower ladder already exists in the passenger side swing out. The upper ladder will be fabricated from aluminum to align with the lower unit.
The urethane sealant has been ordered and is on the way.
SG
The urethane sealant has been ordered and is on the way.
SG
Mwilliamshs
Explorer
Just fyi there are metal vent covers in 14" square, like Fantastic Fan and the ordinary RV roof vents available. I know etrailer has them, likely others do as well.
Darkrider
Adventurer
Phew...just finished reading this entire thread. Started yesterday morning around 6 am...read till about 8 am till i fell asleep to get rest for my night shift...Left off around page 20 at that point i believe...resumed reading once i got home tonight....enough rambling...all i gotta say is awesome build so far man. Wish my part of Canada wasn't so restrictive in terms of mods that can be done to vehicles. Otherwise i would be looking more into doing a Ujoint style 4wd conversion to my Chevy G20 van.
Not many old G vans out there anymore...that would be a really cool rig!
Progress continues on the roof rack. This thing is consuming far more time than I had planned on....which is how all of these builds go. You'd think I'd learn.
After having the rack up on the roof for a test fit, it was clear I needed to tweak the upper rail a bit. It didn't require a whole lot of chopping to get the profile back where I wanted it.
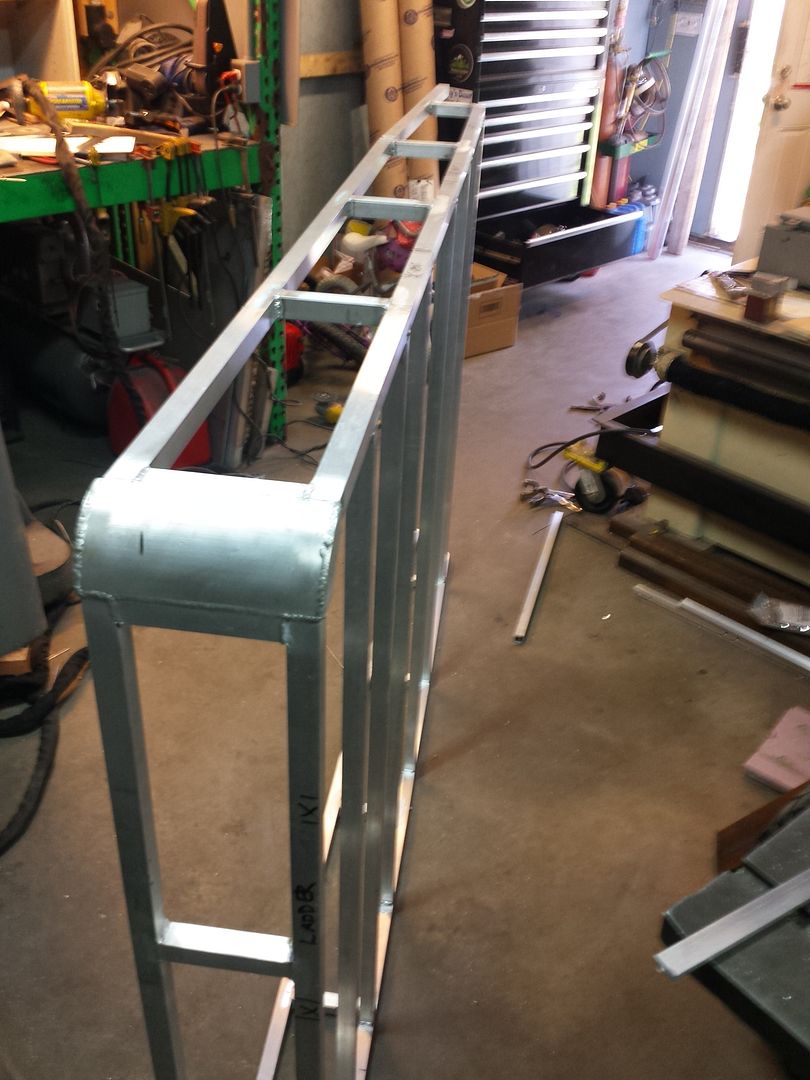
I then started adding tabs for perimeter lights, rear ladder mounting and all of the support rails for the Famtek flooring which was on the way...
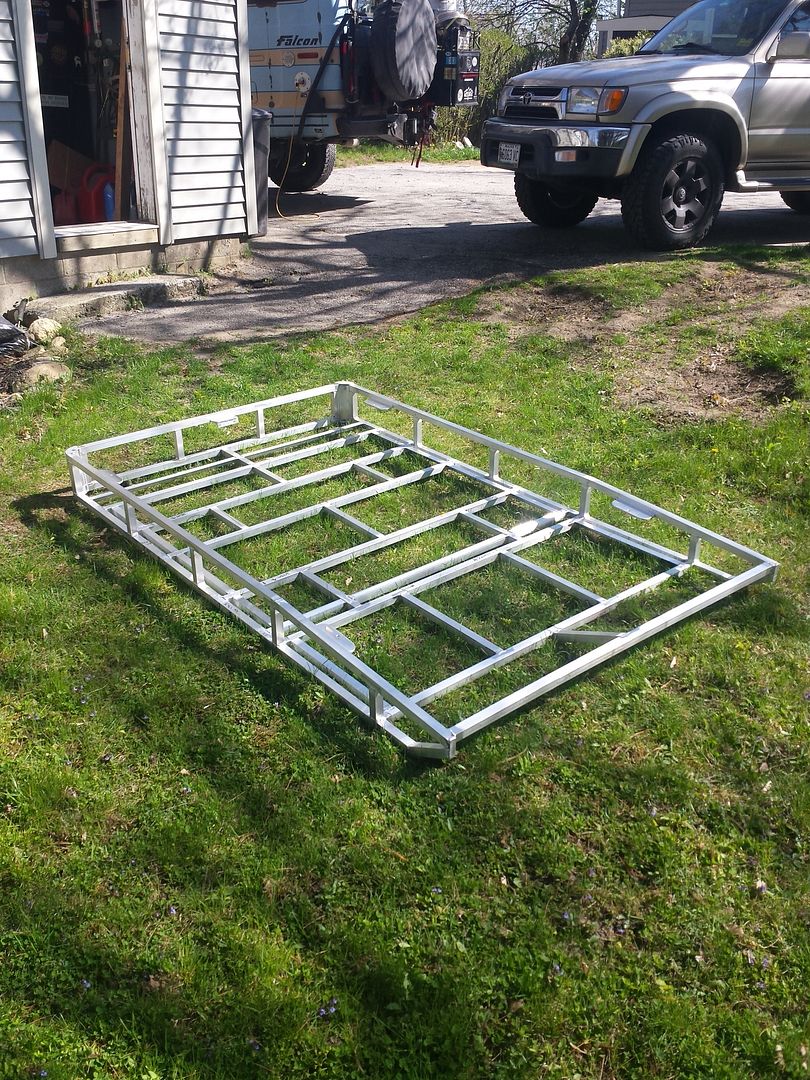
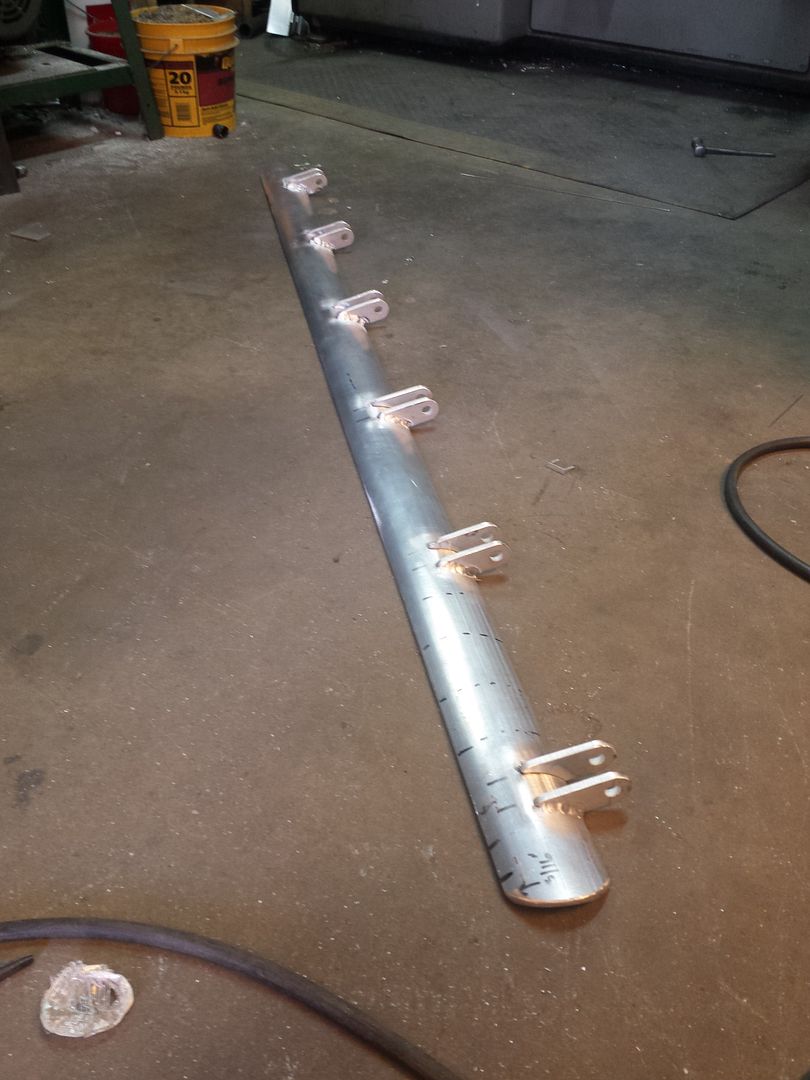
Once that was sorted, I started welding up the mounting rails which will be bonded with 3M 5200 to the roof as the primary anchor points for the rack. These rails started as 4" SCH40 aluminum pipe which was then split down the center. The tabs were cut locally at my waterjet vendor. Of course, I didn't order enough tabs so I'm waiting for a second cut to finish up the other rail.
7 P's sometimes sting (Proper Prior Planning Prevents Pitifully Poor Performance).
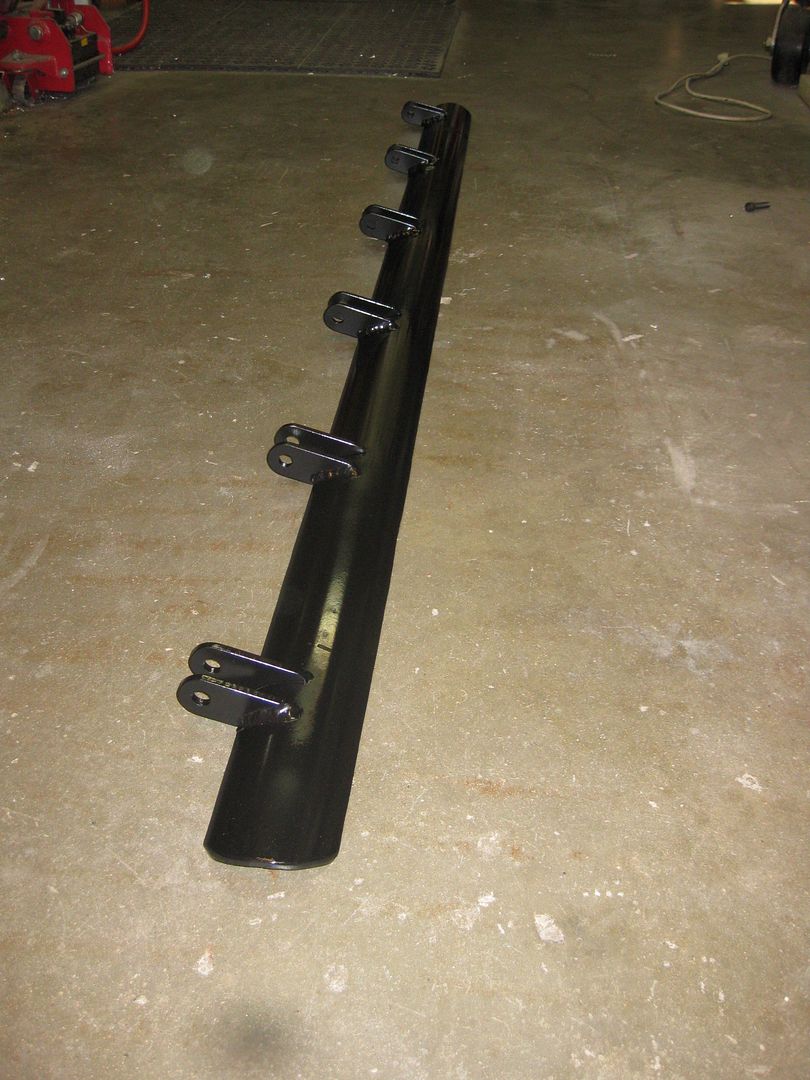
All painted up and ready to glue to the roof.
The plan here is to bond both rails to the roof, then (somehow) get the rack up there without destroying anything. I'll tack weld all the mounting points to the rack once it is located relative to the mounting rails, then pull it back down to finish welding and paint.
After that was done, it was back to the rack to fabricate the TRED mounts.
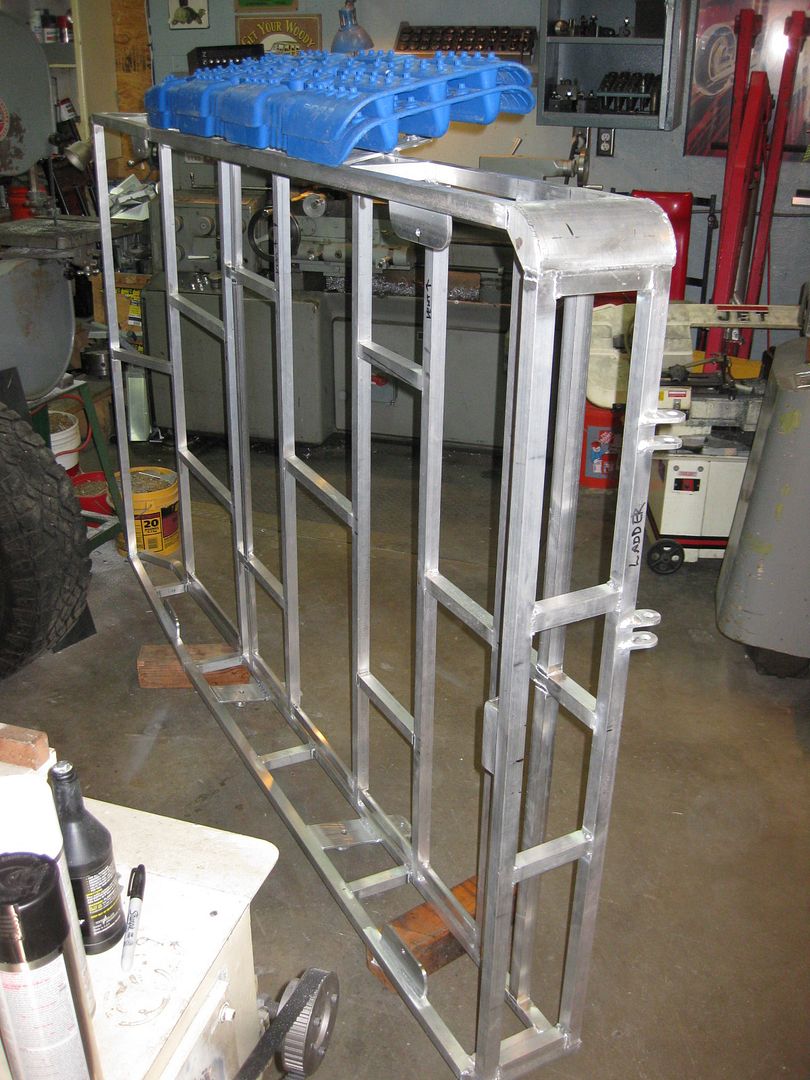
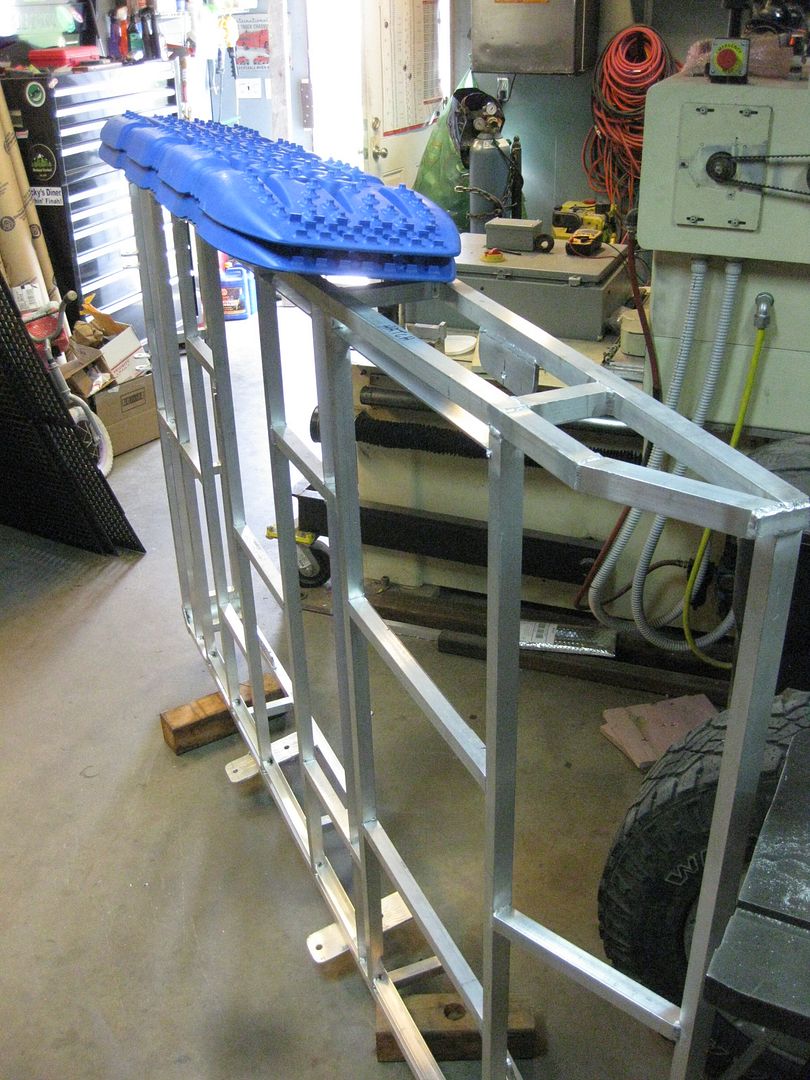
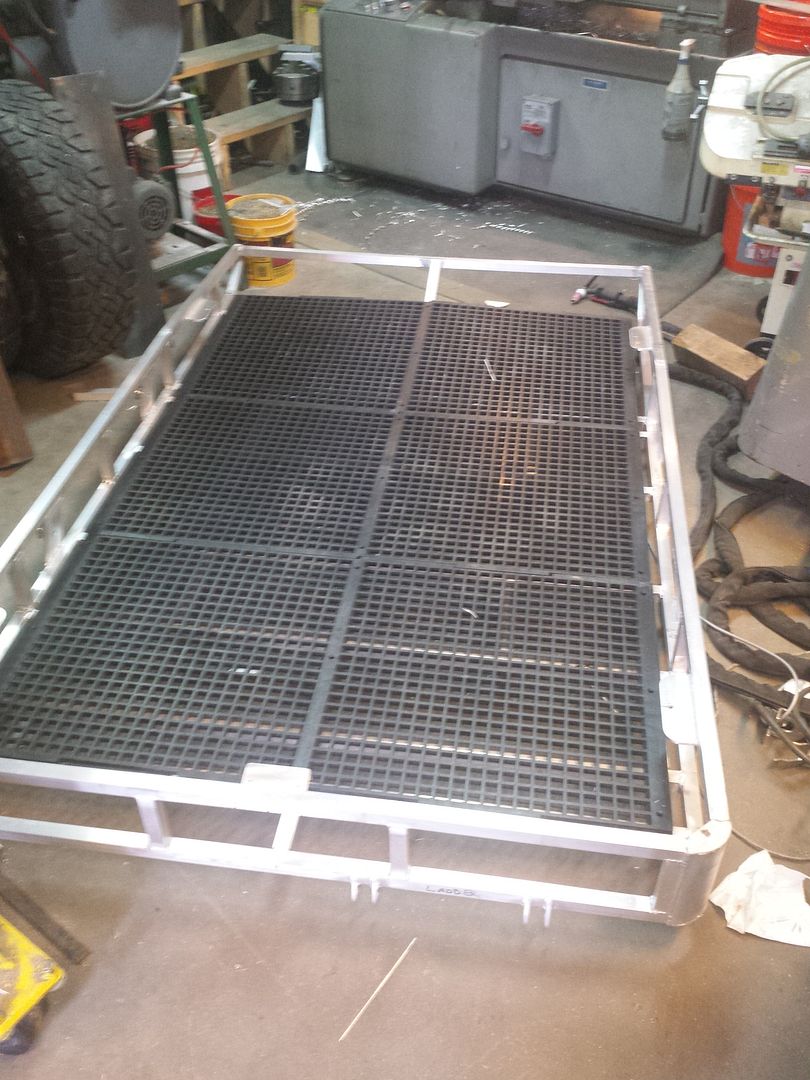
Then the Farmtek flooring showed up so I did a little test fit. There will be some trimming once the rack is mounted (for a couple roof penetrations). I've got a package of heavy duty zip ties coming which will be used to secure the flooring to the framework. I don't want to drill into the rack because every hole represents a water ingress point, and I don't want to also have to drill drain holes in various tubes to let water back out. Zip ties are rated to 90lbs of breaking force, and I'll be using a bunch of them to secure the floor. I think it is the best method for my needs.
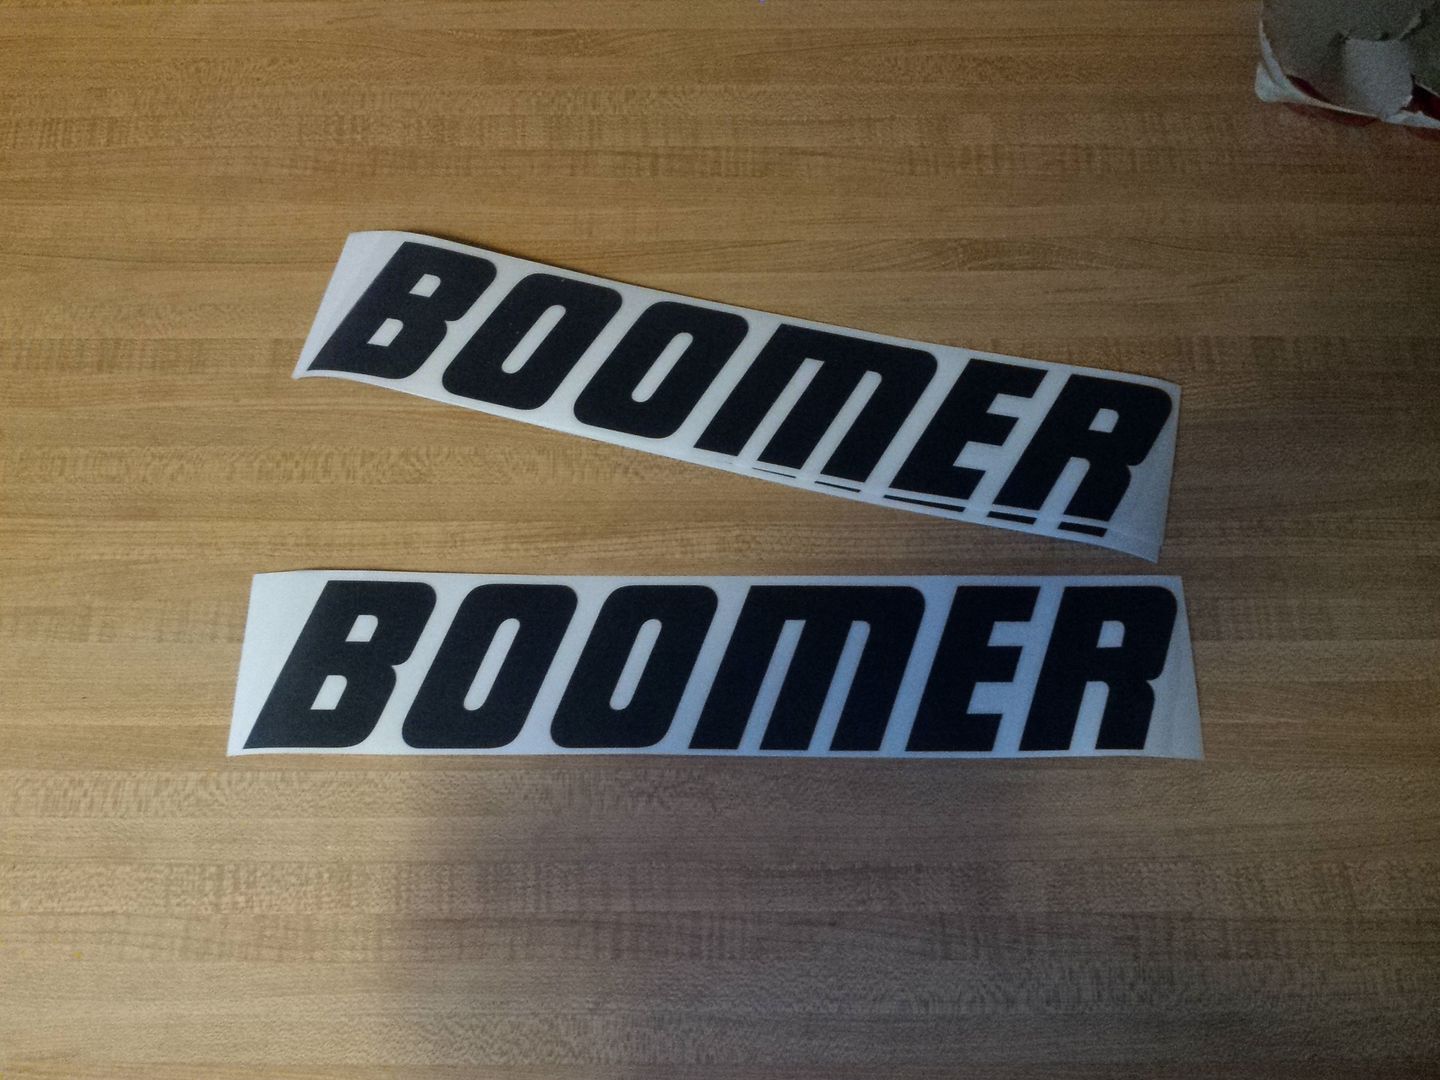
And as just a goofy fun side project, the Falcon stickers are going away and being replaced with these...
I've got just a few more support rails to weld to the rack and then we start the roof mounting work. I also have some electrical work to do for bringing power up to the roof thru water tight quick disconnects. Then some interior work, painting the fiberglass topper, some new fancy thermometers for indoor, outdoor, and fridge monitoring....I'm running out of time before the big trip at the end of the month!!!!
SG
Progress continues on the roof rack. This thing is consuming far more time than I had planned on....which is how all of these builds go. You'd think I'd learn.
After having the rack up on the roof for a test fit, it was clear I needed to tweak the upper rail a bit. It didn't require a whole lot of chopping to get the profile back where I wanted it.

I then started adding tabs for perimeter lights, rear ladder mounting and all of the support rails for the Famtek flooring which was on the way...

Once that was sorted, I started welding up the mounting rails which will be bonded with 3M 5200 to the roof as the primary anchor points for the rack. These rails started as 4" SCH40 aluminum pipe which was then split down the center. The tabs were cut locally at my waterjet vendor. Of course, I didn't order enough tabs so I'm waiting for a second cut to finish up the other rail.
7 P's sometimes sting (Proper Prior Planning Prevents Pitifully Poor Performance).

All painted up and ready to glue to the roof.

The plan here is to bond both rails to the roof, then (somehow) get the rack up there without destroying anything. I'll tack weld all the mounting points to the rack once it is located relative to the mounting rails, then pull it back down to finish welding and paint.
After that was done, it was back to the rack to fabricate the TRED mounts.


Then the Farmtek flooring showed up so I did a little test fit. There will be some trimming once the rack is mounted (for a couple roof penetrations). I've got a package of heavy duty zip ties coming which will be used to secure the flooring to the framework. I don't want to drill into the rack because every hole represents a water ingress point, and I don't want to also have to drill drain holes in various tubes to let water back out. Zip ties are rated to 90lbs of breaking force, and I'll be using a bunch of them to secure the floor. I think it is the best method for my needs.

And as just a goofy fun side project, the Falcon stickers are going away and being replaced with these...

I've got just a few more support rails to weld to the rack and then we start the roof mounting work. I also have some electrical work to do for bringing power up to the roof thru water tight quick disconnects. Then some interior work, painting the fiberglass topper, some new fancy thermometers for indoor, outdoor, and fridge monitoring....I'm running out of time before the big trip at the end of the month!!!!
SG
Mass_Mopar
Don't Litter
Looking good Spence!
RE: zip ties
There are stainless steel ones out there that are awesome for outdoor use, we use them at work quite a bit. Easy to cut and replace if you need to take things apart too.
The puller tool makes it easy... just bend the tie around what you're fastening, get both loops onto the hook and pull! They make 8, 10, and 12" ties on bulk rolls of 500 or 1000.
Google "wire loop rebar ties", they come in a few different finishes too. I could send you a box with the tool if you want some for the roof rack.

Neat idea Nick. I've seen those stainless ties before and I agree that their strength would be superior to nylon ties. I will be painting the rack, but IdaSHO is likely on to a potential issue with stainless vs aluminum. It isn't a marine environment where cathodic erosion will likely set right in, but it is certainly a possibility. I'll give these HD nylon ones a go first and if they present a problem I'll take you up on your offer to borrow that tool...
SG
SG
It seems as though once you start bonding pieces of metal to the roof with an elastomer product marketed as "permanent" and "extremely strong", the potential for spectacular failure rises exponentially.
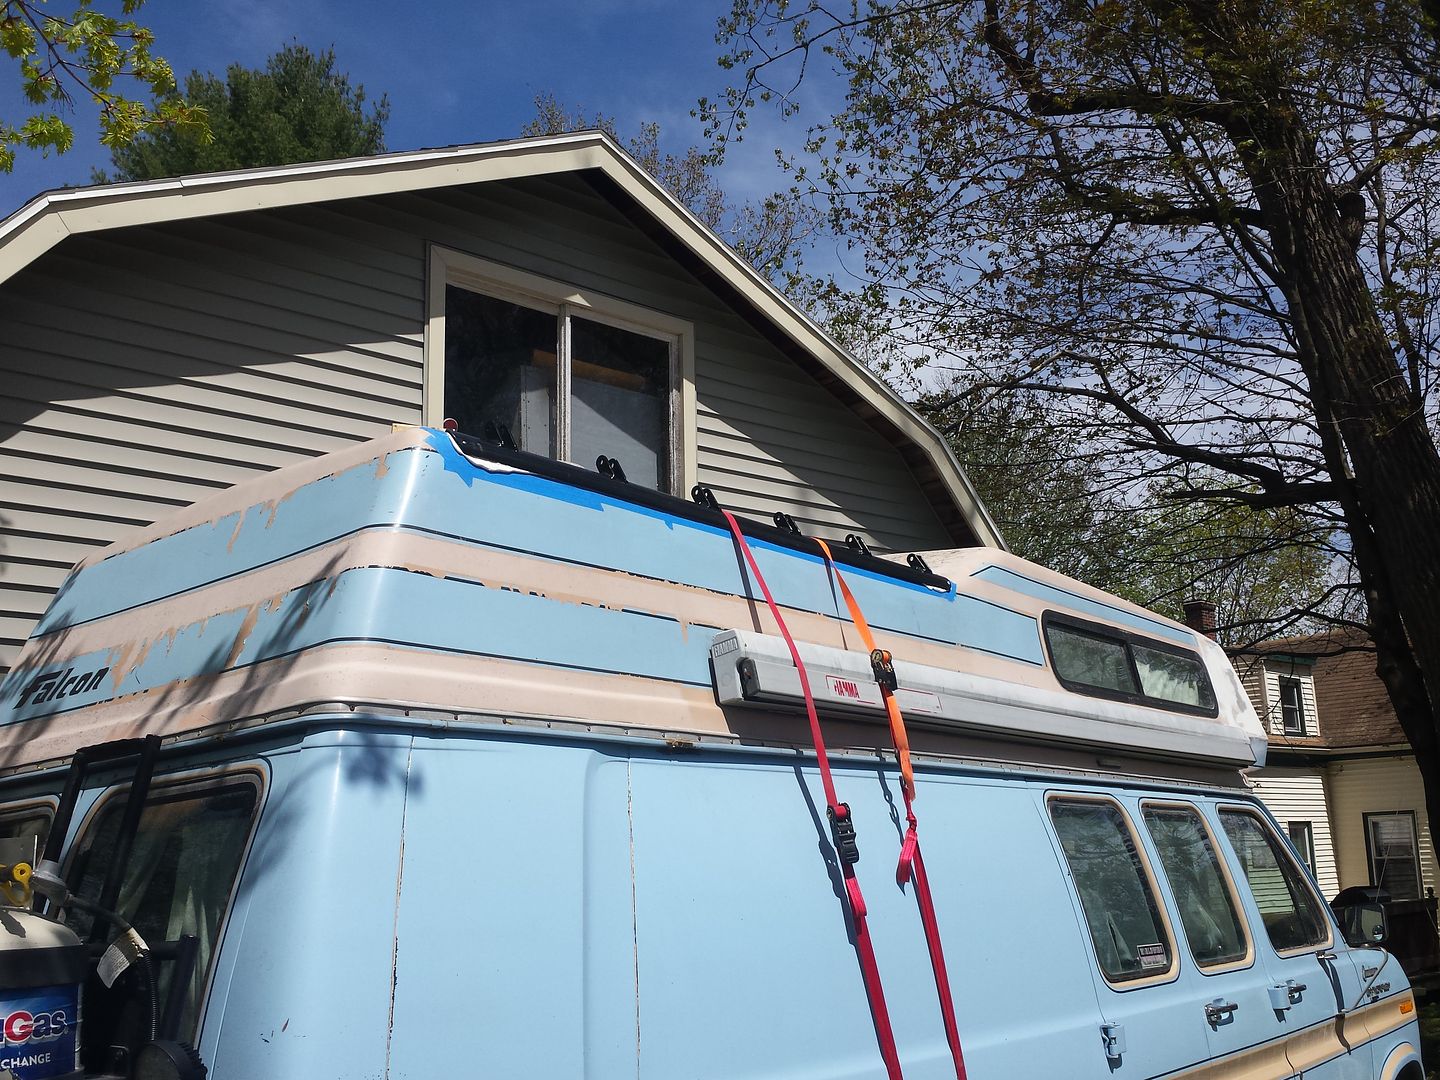
Side one, complete. The adhesive has cured and that rail "ain't goin' any'were". The waterjet house hasn't finished up the second round of tabs which were the result of an impressive miscount on my part. Mathematics, apparently, factor in to overland vehicle fabrication.
While the glue was drying, this happened.
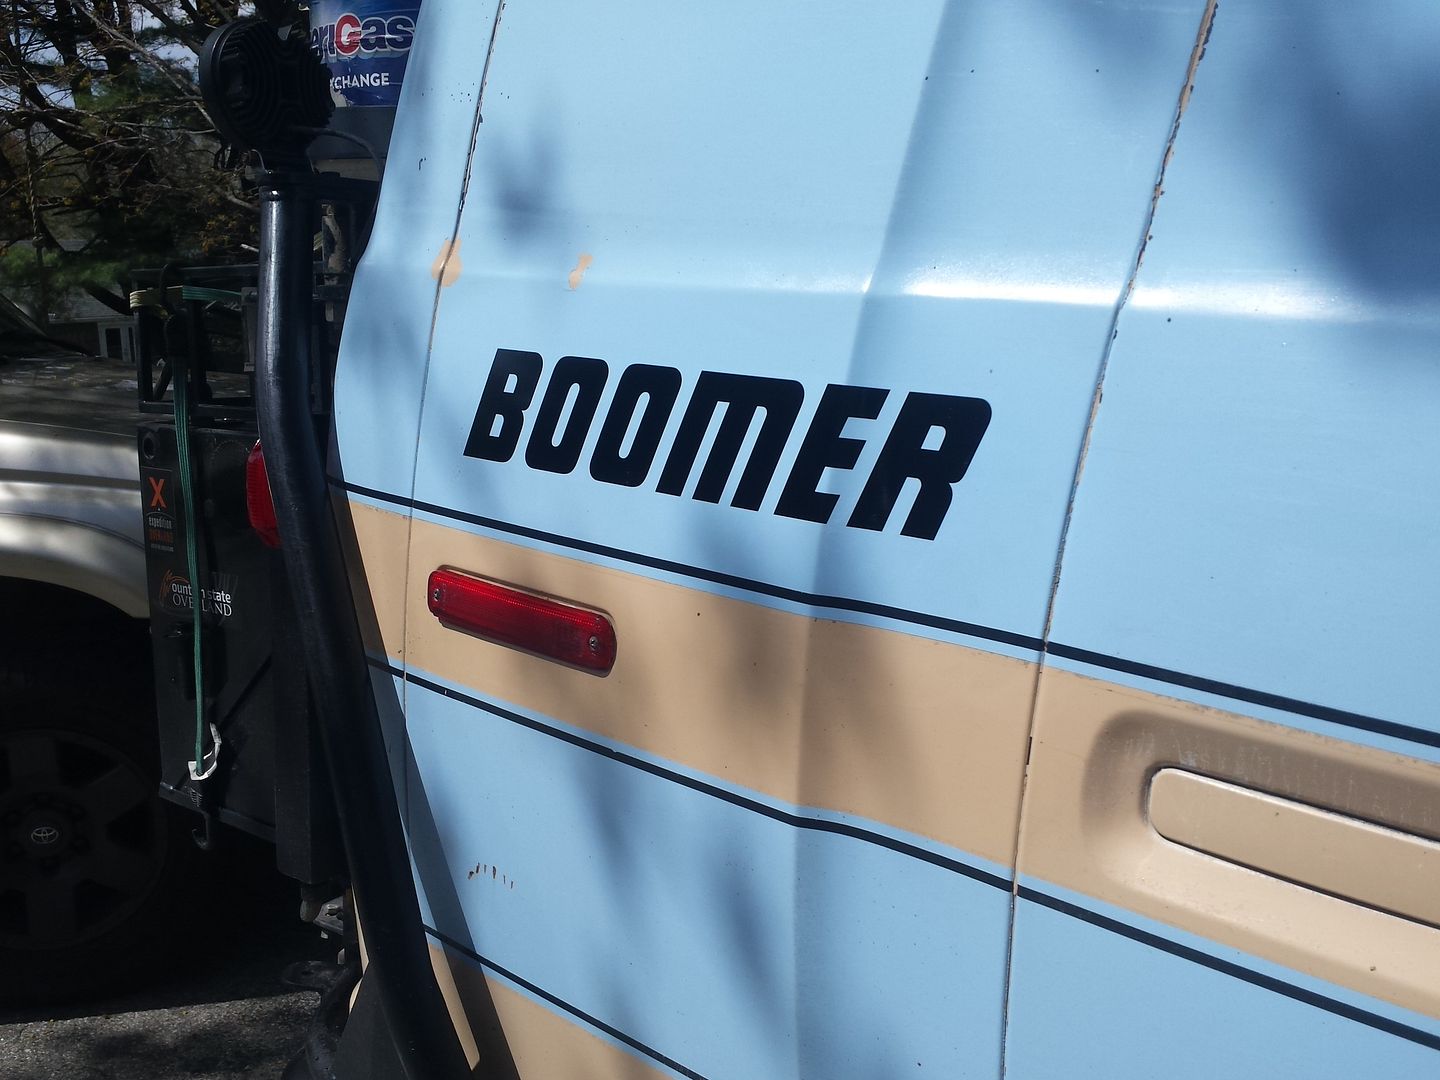
I think it looks awesome. I coaxed my wife over to have a look, and the "Boomer" sticker looked so much like the old "Falcon" sticker, that I eventually had to point it out after she gave me that look of "what the hell do you want???".
Sweet.
SG

Side one, complete. The adhesive has cured and that rail "ain't goin' any'were". The waterjet house hasn't finished up the second round of tabs which were the result of an impressive miscount on my part. Mathematics, apparently, factor in to overland vehicle fabrication.
While the glue was drying, this happened.

I think it looks awesome. I coaxed my wife over to have a look, and the "Boomer" sticker looked so much like the old "Falcon" sticker, that I eventually had to point it out after she gave me that look of "what the hell do you want???".
Sweet.
SG
I'm confused. Did something "permanent" fail, or did you end up with something inadvertently super glued to your roof, or what? Did you get some on your hands right before a potty break and end up permanently attached to your Hootus (google it. Seriously)?
"Potential for spectacular failure" sounds as if something might have gone south.
"Potential for spectacular failure" sounds as if something might have gone south.
Similar threads
- Replies
- 16
- Views
- 2K
- Replies
- 5
- Views
- 2K
- Replies
- 12
- Views
- 3K
