Buying & Building a Medium Ambulance into an RV – The FAM-BULANCE

rlrenz

Explorer
Folding downward sounds like a good idea - you can limit the bend to 90 degrees fairly easily. I suggest that instead of a highly conductive chain, you use something like PVC covered 1/16" SS wire rope -- the kind of stuff they sell at West Marine for sailboats. The drawback I see is that you have a very large panel, and the sheer number of wires will give you problems. I suggest that you avoid one large bundle of wire and instead have multiple "groups" -- maybe one per sub-panel. For the maximum in flexibility, the wires in each bundle should not be tie-wrapped, but held in a flexible loom, like the woven stuff they sell at Del-City (http://www.delcity.net/navi?action=...city&mp_mt=p&gclid=CN3jz9nRwcYCFQqQaQode70AYw). When I saw that some of my Amazon orders were supplied by them, I looked them up, and I've bought from them. No minimum, and very fast shipping. If you do order, click on the box that asks if you want a "starter kit" - the kit is a very useful catalog that's about 1/2" thick.

Regarding the squad bench - I have several ideas, but as they say, it will take some cogitating to figure it out. Right now, I'm leaning toward a folding base with a queen sized inflatable mattress, with the glitch being that the squad bench is too short by about a foot. I'm tossing around a way to make the arm rest on the bench fold down to make an extension so the mattress will fit. I don't want to chop out the rear corner since it has drawers that store a lot, but that may have to be PLAN B. Gonna take some thinking, it will.
 

patoz

Expedition Leader
I suggest that instead of a highly conductive chain, you use something like PVC covered 1/16" SS wire rope -- the kind of stuff they sell at West Marine for sailboats. The drawback I see is that you have a very large panel, and the sheer number of wires will give you problems. I suggest that you avoid one large bundle of wire and instead have multiple "groups" -- maybe one per sub-panel. For the maximum in flexibility, the wires in each bundle should not be tie-wrapped, but held in a flexible loom...

My thoughts exactly, but I didn't know what the 'loom' stuff was called or where to get it...now I do! I'm also considering putting a strain relief loop in the bundles of wires as they transition from the panel board to the cabinet wall.

I have the same problem with my squad bench. It's exactly 6' in length, with a tall (for backboards) external compartment in the right rear corner of the body. My plan is to use this compartment to store shovels, axes, high lift jack, any tent/awning/flagpoles, etc. so it will remain no matter what.

IMAG0196.jpg


I don't like sleeping on an air mattress, so I'm planning on having some custom cushions made that will function for both couch and bed. I hope to be able to make it the width of at least a twin size (38"x74"), and preferable a full (54"x74") size which can sleep two snuggly. This way I can use standard fitted sheets on it, which are easy to remove and wash.

I'm 6'1" and sleep mostly on my side, so I can probably get by with a 6" long bed, but adding a fold down leaf/arm rest at the end near the side door should be easy enough. It will narrow the useable width of the doorway when in use, but there shouldn't be anyone coming in or out once the bed is deployed anyway. Right now, the best thing I see is to use the slat system to widen the couch when it's time to convert it into a bed.

IMAG0324.jpg
 
Last edited:

rlrenz

Explorer
Slats will work - I've also seen a folding structure with "backboards" on it. One of my problems is that I come to this project from a vehicle restoration background, so I inherently want to change as little as necessary - plus, what I have now is built like a brick phone booth, and far from ready for the trash can. I bought a top of the line folding camp cot from REI last year that is PLAN-B for a bed right now -- I'm still trying to figure out PLAN-A.

One thing's for sure, though, I will never loose any storage space unless there's no other alternative.

The classic ambulance wiring cover is split convoluted tubing, but it really works best on a continuous run. The woven loom is kind of that way, too. The trick with that stuff is to cut it with a hot knife (like nylon rope), then fold the cut end into itself so it's out of sight. If you want to have wires running in/out along the length, then the spiral warp (kind of like a coiled phone cord) woks well (with a tie-wrap at each end to hold things together). Regardless, if the wires aren't tied together along their length with tie-wraps, they are free to shift as the panel is folded back into place. Five or six small bundles will fold a whole lot easier than one big honkin' cable will fold. If you leave the wires long enough that the loop with the panel closed is close to full height, (the loop hangs down as far as the panel is high), you should be in pretty good shape. The other trick to remember is that you won't be opening the panel every 15 minutes, so the wires won't see a lot of flexing.

I don't see a lot of challenge from a folding headrest on the end of the squad seat - when I turn in, I turn in -- that's it. Come back tomorrow!

Take a look at the Pacific Emergency Vehicles web site - they deal with MedTEc ambulances, and they have a MedTec parts catalog on their site: (http://www.pacificemergencyvehicles.com/wp-content/uploads/partbook.pdf). As an idea source, I've plowed through it from time to time -- note that they list a squad bench end with a removable arm rest. Something like that could be built so the armrest is pulled up out of the socket, and a separate headrest is then slid into place. It can live in a drawer or something until I need it.
 

patoz

Expedition Leader
Slats will work - I've also seen a folding structure with "backboards" on it.

...I bought a top of the line folding camp cot from REI last year that is PLAN-B for a bed right now -- I'm still trying to figure out PLAN-A.

One thing's for sure, though, I will never loose any storage space unless there's no other alternative.

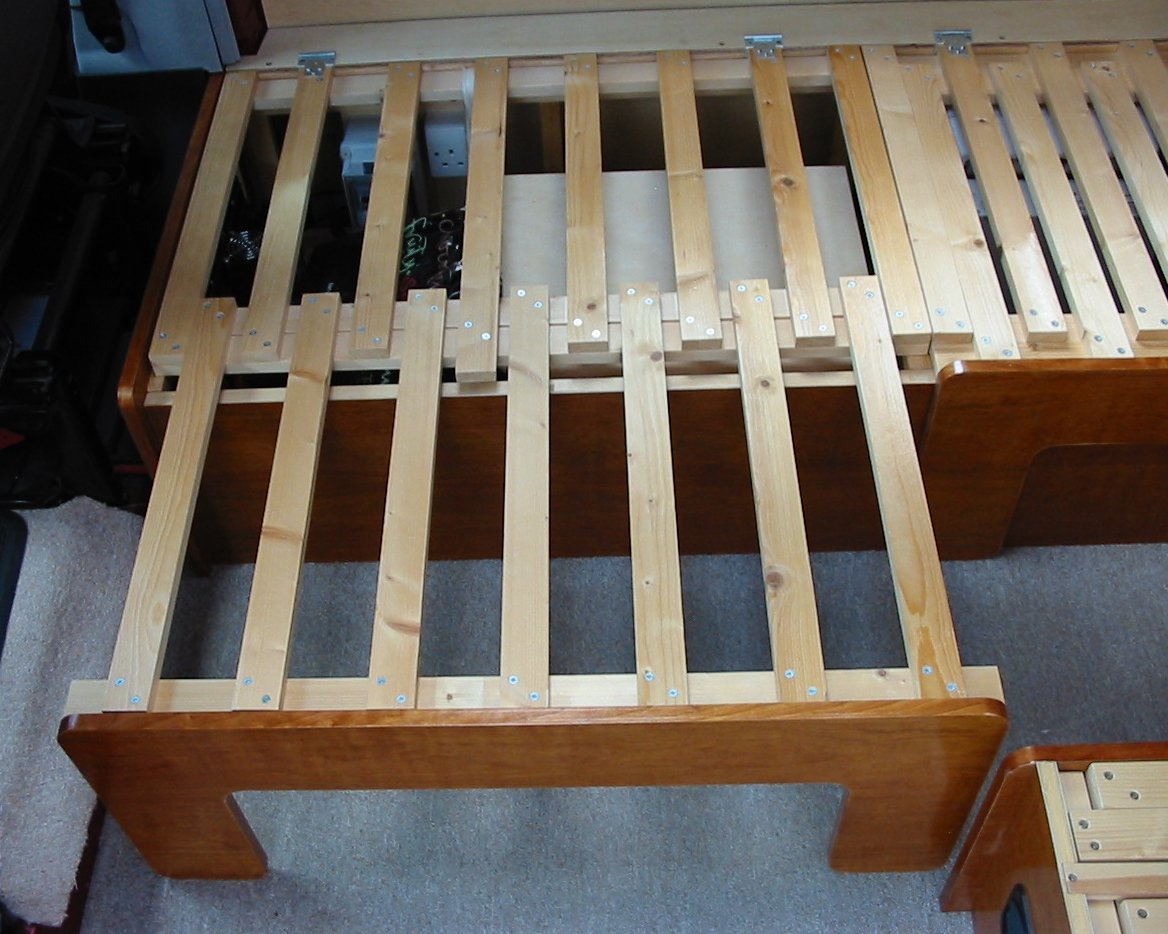
This is a design I was considering. It can be built right over top of my existing bench once the very uncomfortable vinyl covered seat pad is removed, only adds a couple of inches to the overall dimensions, and I will not lose any storage space underneath, which is only about 6" deep. It will still open upward for access also.

I could even use my existing top doors to make the slats out of, by drawing it all out first, then attaching the cross braces which I will make out of aluminum instead of wood, and then cutting them apart on the table saw. That way spacing and alignment will remain perfect. I would also use the existing piano hinge instead of the separate ones shown here.

bed11.jpg


You can see more details here: http://deepredmotorhome.com/bed.php

I also have a heavy duty military style cox, but it has an aluminum frame and legs instead of wood, and is a little wider. To go on top, I have a large size Therm-a-Rest BaseCamp self-inflating air & foam mattress. I could probably get by with this setup for a night or two, however I haven't used it in several years and given my back issues, I'm not sure that would even work anymore.


Take a look at the Pacific Emergency Vehicles web site - they deal with MedTEc ambulances, and they have a MedTec parts catalog on their site: (http://www.pacificemergencyvehicles.com/wp-content/uploads/partbook.pdf). As an idea source, I've plowed through it from time to time -- note that they list a squad bench end with a removable arm rest. Something like that could be built so the armrest is pulled up out of the socket, and a separate headrest is then slid into place. It can live in a drawer or something until I need it.
I went all through that catalog and found lots of goodies. I was able to see better details about some of the products than what is on the manufacturer's sites.

I like the 'socket' idea for adding additional length to the couch/bed. That concept could be adapted for several other uses also.
 
Last edited:

patoz

Expedition Leader
I built a slat bed on my ambulance to replace my heavy and cumbersome jack-knife style bed. I couldn't be more happy with the outcome. I had to tweak the initial design as I needed the slats to slide as far into the wall as possible so I could get the motorcycle side by side.

There a couple of photos in my build thread on the first page: http://www.expeditionportal.com/forum/threads/140469-The-Husky-Hauler-(another-ambulance-build)


Yes, I remember seeing that on your threat and we discussed it then. Good to hear it's working out OK.
 

rlrenz

Explorer
I'm greedy. I don't want to give up anything that I have. I like all the storage, and the general layout is a proven design across years of EMTs stashing stuff so they can get to it fast. A bed will wind up going where it fits, somehow....

I finished my electrical panel today - all the wiring is now connected to labeled terminal strips, so once I reinstall the cabinet, I can find what and where without a major archaeological dig. Tomorrow, I'll reinstall the cabinet, then it's on to installing a 30 amp power inlet that feeds the cabinet. The battery IOTA battery charger will also be transferred over as well, and the Vanner inverter will also be connected. PROGRESS!!

Another project I'm scratching my head over is where to carry a spare tire. My options are in a cabinet (a difficult fit in the only available cabinet), under the ambulance (royal PITA), or on the rear bumper on a swing-away mount. Right now, the rear bumper sounds like a plan - I need a new shorter rear bumper to give me more room in my garage, and adding a tire carrier to it will be straightforward when it's being welded on the bench. The problem is that a spare tire will stick out as far as the original bumper, but I can store the spare off the ambulance. I'm not worried too much about here in-town, it's on the road that I'd like a spare, so hanging one when I need it is workable (plus my shop has a gantry crane and a hydraulic lift, so I'm not stuck arm-stronging it). Gonna take some pondering, it will.
 

rlrenz

Explorer
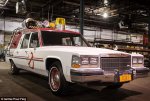
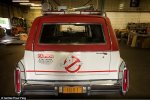
For all you combination ambulance fans, and Ghostbuster's fans, I herewith present some photos of the new Ecto-1 that will be used in the Ghostbuster's movie remake. The vehicle is a 1980's Cadillac SS Victoria, commonly seen as a hearse.

Ecto-1.jpg

Ecto-11.jpg

Me? I'm happy with a non-ghost catching Medic Master.
 

patoz

Expedition Leader
Haha, I saw that this morning.

From what I understand it's a remake of the old Ghostbusters movies, but with an all female cast. Comments to the articles about it so far, have not been good.
 

rlrenz

Explorer
Progress - slowly. but occasionally steadily.

The old radio cabinet has evolved into the new electrical cabinet. It is held in place with three, 10-32 x 2 1/2" oval head screws with finishing washers, so I cheated a bit and pointed the screws a little so they'd make it through the layers of plywood, Formica, and aluminum. All OK. I have some urethane body seam sealer on order so I can caulk the vertical seams similarly to what they originally had.

DSCN4907.JPG

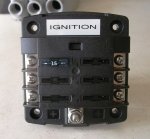
I did some checking, and found that of the three wires that had originally gone to buss bars in the cabinet, one was labeled IGNITION, while the other two come on when the module is powered up. They now go to fused Blue Sea fuse blocks. I'm one of those radicals who labels things - with the vitamins that I have in the battery bank, I prefer not to make very many mistakes.

DSCN4904.JPG

Overkill? Maybe, but I don't think so. Stuff has a way of happening.

Next up - reconnecting the various wires that ran through the cabinet, looping and securing the various radio antenna leads that also ran through the cabinet, then it's time to install a new 30 amp power inlet. I can't use type GXL wire despite it's excellent abrasion resistance - GXL is limited to only 65 volts. Instead, I'll use marine cable. It's rated to 125C, and it can handle the vibration. I'll also install a LED indicator light next to the inlet - the indicator will be fed from the receptacle that the battery charger uses, so if it's on, then I have 120 power to the charger (which also means that the circuit breaker hasn't blown).

At the same time, I have to leave provisions for the components of the Hoseline air conditioner. Right now, I think the converter (120 VAC to 12 VDC) will probably be installed in the electrical cabinet for improved cooling, but the rest of the electrical bits and pieces may be installed in the old oxygen cabinet adjacent to the battery charger, etc.
 

patoz

Expedition Leader
Man, that looks as good, if not better than factory! Having the electrical panels recessed, makes it look like it was part of the original design.

That's really making me have second thoughts about the panel I bought, but I don't have that cabinet or the space to build one there. I'm going to see if I can build out the cabinet that runs across the top, about 4" and mount it there. I might even do the recessed mounting thing also. :)
 

rlrenz

Explorer
Thanks, Pat.

I was originally going to surface mount the panels, but then they'd be more likely to be bumped. I thought about surface plus a 3/4" flange to protect them, then I decided to recess them. The drawback to recessed is that I wound up installing terminal strips for the final connections since I'd have to either remove individual panels, or the entire panel module, to connect anything. With the interconnections between panels that are there, I'd realistically have to remove the entire panel assembly, which would be a giant PITA. The terminal strips handle the problem nicely.
 

EXPO365

Adventurer
Wow!!!!! That panel install is super clean!!!!

My panel and power is next on the list of "to do's" so I'll be asking you for some advice soon
 

rlrenz

Explorer
Wow!!!!! That panel install is super clean!!!!

My panel and power is next on the list of "to do's" so I'll be asking you for some advice soon

Thanks.

The Blue Sea equipment I used is downright pricey, but it is beautifully built. If you go with Blue Sea, check Amazon's price - it's the cheapest place I ever found. I figure out what I want using the Blue Sea web site, then I go into Amazon and search for Blue Sea XXXX. Typically about 40% off retail.

If you have room, a swing out panel simplifies things a bit - the panel can open for connections to the breakers. In my case, the cabinet only measured 10" wide outside, and 8 1/2" wide on the interior, so I was limited on what I could do. Murphy's Law also set it up so the load side connections on the circuit breakers faced the back of the cabinet and not the front, which is why I wound up using terminal stripe for the panel connections.
 

EXPO365

Adventurer
I picked up the 8023 panel.
ca218b50a6e037996c9eb5f96ad14d9d.jpg

We're not planning on installing a ton of electronics so the 8 beakers should be good for us. Next is trying to figure out where it's gonna go.

+1 on the quality of the blue sea products. This is my first purchase of they're equipment and I was blown away.
 

Forum statistics

Threads
186,649
Messages
2,888,461
Members
226,767
Latest member
Alexk
Top