You are using an out of date browser. It may not display this or other websites correctly.
You should upgrade or use an alternative browser.
You should upgrade or use an alternative browser.
Buying & Building a Medium Ambulance into an RV – The FAM-BULANCE
- Thread starter rlrenz
- Start date
patoz
Expedition Leader
Bob, that panel and cabinet is going to look great! The recessed mounting is a great idea, and I've thought about doing that also. You could even put a clear or lightly smoked plexiglass door over the panels for even more protection.
Seeing that almost makes me wish I'd bought separate panels instead of one big panel. Lots more mounting options.
Seeing that almost makes me wish I'd bought separate panels instead of one big panel. Lots more mounting options.
Thanks, Pat. There are good points and bad points to single panel / multiple panel systems. At the cost in material and time to modify standard panels, I got exactly what I wanted. Duplication of features happened - I have several panels that all want to tell me if my polarity is reversed, but a clipper solved that. I had to do a bunch of fiddling to get them all to line up. After I had purchased a 120 panel with slide lockouts for shore/generation or inputs, I decided to use a separate selector switch instead. I revised the panel to add 4 more breakers.
Thanikfully, I have done up fitting on emergency vehicles, so I have a large electrical in vent or to draw from.
Thanikfully, I have done up fitting on emergency vehicles, so I have a large electrical in vent or to draw from.
patoz
Expedition Leader
Well, you know the main reason I bought the panel that I did, even though it's overkill. It has the breaker lockouts also, but I really do like the the selector switch much better, which was my original plan. I will probably buy one anyway, and use the lockout breakers as normal ones. It will require a little modification of the wiring because they were set up for Shore 1, Shore 2, and Generator, with divided output breakers.
I want Shore Power, Generator, and Inverter, which will each power all AC output breakers, depending on which one is selected.
I want Shore Power, Generator, and Inverter, which will each power all AC output breakers, depending on which one is selected.
rlrenz
Explorer
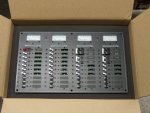
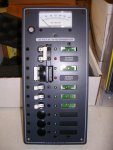
Pat, here's what I started with for an AC panel:
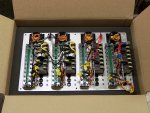
And here's what it turned into:
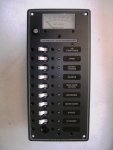
The red and yellow wires are for the 12 volt LED lighting on the breaker labels. The two flat bussbars are for neutral and ground
You may notice that the bussbar wasn't quite long enough, so a short chunk of 10 gauge was used to make up the difference. I stock small LEDs, so the red POLARITY REVERSED indicators on the original panel were replaced with green LEDs to match the existing.
By the way - if you need any 30 amp, 2-gang breakers, check with me first - I have some leftovers that will go into the parts bin otherwise.

And here's what it turned into:


The red and yellow wires are for the 12 volt LED lighting on the breaker labels. The two flat bussbars are for neutral and ground
You may notice that the bussbar wasn't quite long enough, so a short chunk of 10 gauge was used to make up the difference. I stock small LEDs, so the red POLARITY REVERSED indicators on the original panel were replaced with green LEDs to match the existing.
By the way - if you need any 30 amp, 2-gang breakers, check with me first - I have some leftovers that will go into the parts bin otherwise.
Last edited:
patoz
Expedition Leader
patoz
Expedition Leader
Like I said...overkill, but the price was right!
I sure will, thanks!
By the way - if you need any 30 amp, 2-gang breakers, check with me first - I have some leftovers that will go into the parts bin otherwise.
I sure will, thanks!
Last edited:
rlrenz
Explorer
Wow i really like the panel
Thanks!
rlrenz
Explorer
Before I brought the ambulance to the 4x4 shop for new brake lines, I removed the radio cabinet so I could rework it into an electrical cabinet. I had been stockpiling Blue Sea electrical components since last fall, so I bought a piece of 1/8 aluminum for a mounting panel, laid out the components, and attacked the panel with my jig saw. Even with a sharp blade, it was a PITA since Blue Sea likes little insets for bolt holes - all of which are a headache to cut. Some trial fittings, some filing, a bit of self-etching primer, and some satin black finished the panel. Due to the unavailable side access required for connecting to the Blue Sea panels, I had decided to bring all the wiring from the panel to readily accessible terminal strips that will be installed below the electrical panel. I also have to be careful where things are installed in the cabinet since I have to leave room for the components needed to build a 120 volt add-on air conditioner -- a temperature/fan control, a 12 / 120 volt relay panel, and an 80 amp converter to supply 12 volts to the system while the ambulance is parked.
My panels have always been solid - lots of tie-wraps, cable straps, & crimp-on terminals. I use a ratchet crimper for the little stuff, and a hydraulic crimper for anything larger than #6. I finished the wiring today, and assembled the panel. Tomorrow, I'll start installing terminal strips.
The change-over circuit that will be used to select either shore power or the generator. The switch is designed so the terminals will do their job with bare wire ends, but I didn't agree, so I used a crimp-on fork terminal on these connections, with crimped ring terminals for the rest of the connections.

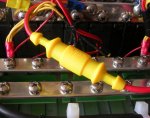
I added a 2 amp fuse to the 12 volt feed for the panel legend LED lights, and another to the feed for the "circuit is on" LED. Overkill? Maybe, but stuff has ways of happening...
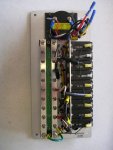
Rear view of the completed panel. The 12 volt panel at the bottom will be fed only from the deep cycle battery, so to handle the LED lights on the 120 volt panel, I bought a regulated 2 amp power supply from Amazon. The power supply is wired directly across the 120 volt input to the panel (one more fuse), so I'll have pilot light LEDs whenever the panel has power.

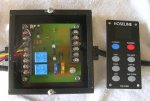
The Hoseline temperature controller. It controls the AC/heater blower speed, and tells the system whether heat or AC is required. The existing system uses a straightforward thermostat and about 6 relays to control the fan speed, to select heating/cooling, to open the heater water valves, and to run the AC compressor. I've been tunneling through the system to identify what has to be changed, and stocked up on type GXL wire for the changes.
The blower speed relays:
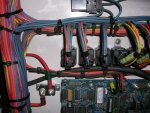
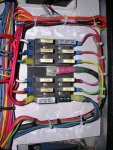
Fuses/circuit breakers for the blower circuit and the condenser fan:
A GOOD day - they called me to come and pick up my ambulance, so my wife and I took a field trip to the shop. Even better, the price was a lot better than I had been expecting. As soon as I get the electrical cabinet reinstalled, and the Hoseline temperature controller installed, it's off to an ambulance dealer I found who has take-off 120 volt ACs available for about half the cost of buying a new unit.
My panels have always been solid - lots of tie-wraps, cable straps, & crimp-on terminals. I use a ratchet crimper for the little stuff, and a hydraulic crimper for anything larger than #6. I finished the wiring today, and assembled the panel. Tomorrow, I'll start installing terminal strips.
The change-over circuit that will be used to select either shore power or the generator. The switch is designed so the terminals will do their job with bare wire ends, but I didn't agree, so I used a crimp-on fork terminal on these connections, with crimped ring terminals for the rest of the connections.

I added a 2 amp fuse to the 12 volt feed for the panel legend LED lights, and another to the feed for the "circuit is on" LED. Overkill? Maybe, but stuff has ways of happening...

Rear view of the completed panel. The 12 volt panel at the bottom will be fed only from the deep cycle battery, so to handle the LED lights on the 120 volt panel, I bought a regulated 2 amp power supply from Amazon. The power supply is wired directly across the 120 volt input to the panel (one more fuse), so I'll have pilot light LEDs whenever the panel has power.

The Hoseline temperature controller. It controls the AC/heater blower speed, and tells the system whether heat or AC is required. The existing system uses a straightforward thermostat and about 6 relays to control the fan speed, to select heating/cooling, to open the heater water valves, and to run the AC compressor. I've been tunneling through the system to identify what has to be changed, and stocked up on type GXL wire for the changes.

The blower speed relays:

Fuses/circuit breakers for the blower circuit and the condenser fan:

A GOOD day - they called me to come and pick up my ambulance, so my wife and I took a field trip to the shop. Even better, the price was a lot better than I had been expecting. As soon as I get the electrical cabinet reinstalled, and the Hoseline temperature controller installed, it's off to an ambulance dealer I found who has take-off 120 volt ACs available for about half the cost of buying a new unit.
Last edited:
patoz
Expedition Leader
You Sir, do some great work!
Seriously, your stuff looks better than the factory work. I can't wait to see the panel all together and lit up.
Since my panel is going to have to be mounted so that it can swing open somehow, I'm considering doing the same thing and have all wiring from the panel go to the strips, which will be mounted on the door, then jump across to another set of strips mounted inside the cabinet. That way there will be no strain on any of the components on the Blue Sea panel or the relay/breaker board inside the cabinet as the door is opened and closed.
Seriously, your stuff looks better than the factory work. I can't wait to see the panel all together and lit up.
Due to the unavailable side access required for connecting to the Blue Sea panels, I had decided to bring all the wiring from the panel to readily accessible terminal strips that will be installed below the electrical panel.
Since my panel is going to have to be mounted so that it can swing open somehow, I'm considering doing the same thing and have all wiring from the panel go to the strips, which will be mounted on the door, then jump across to another set of strips mounted inside the cabinet. That way there will be no strain on any of the components on the Blue Sea panel or the relay/breaker board inside the cabinet as the door is opened and closed.
rlrenz
Explorer
Thanks, Pat.
If your wiring will have to bend when the door is opened, remember to leave plenty of slack - maybe a J bend in the cable bundle. You might want to use marine wire for the terminal strip connections - the stranding is much finer than normal automotive wire, which may help a bit.
The good news/bad news about a Blue Sea circuit breaker panel is that they use standard circuit breakers, but they are designed for side access to connect to the terminal. If the entire panel swings out, fine, but if access is limited, the only option is to either remove the entire panel, or to use a terminal strip.
I'm using barrier terminal strips for the breaker output connections (12 volt (Blue Sea 2608) and 120 volt (Blue Sea 2510)). The 12 volt negative is a straightforward multiple screw buss bar from Blue Sea (#2105). The 120 volt neutral and ground is a dual buss bar with an insulator dividing the neutral from the ground (Blue Sea 2702 with cover).
Any strips that don't have covers will wind up under a 1/4" plexiglass cover, as will all the breakers.
rlrenz
Explorer
Today, I am a very happy puppy - (photo courtesy of "Chester")
First, I installed new longer output leads on my Onan generator - before I bought it, someone had trimmed the output cable to about 10 inches (possibly since it was used as a trade show exhibit) - I needed about 36". I almost used type GXL (polyurethane insulation) automotive cable, but I suddenly remembered that GXL is a 60 volt rated wire, so I used 10 gauge marine cable (300 volt rating). Oddly enough, all the cable connections were via 1/4" tabs, but I stock a heavy duty 3M nylon insulated version, and with the aid of my ratchet crimper, the terminations came out fine. The finished job even started and generated power! I installed a new fuel filter and air filter at the same time.
I had left some gas in my Evinrude 6 gallon marine gas tank, and found that the tank oozed a bit in the sun, which means new valve O rings are needed. They are on order.
I did a layout of all the terminal strips for my AC & DC panels - they'll go in tomorrow, and I'll start stringing wire. I need to leave space in the cabinet for the AC equipment, but I can install everything additional I need in the bottom 12" of the cabinet. As soon as it's wired, the cabinet goes back in place.
When I drove the buggy back from Rochester on Thursday, I figured that the batteries would be down from sitting for about 3 weeks. They were. The ammeter showed a 100 amp charge for the first half hour of the return trip,t hen it dropped to about 50 amps. This morning, I plugged in my Iota charger installation to see what it would do. It sat at 14.6 volts for a few hours, then it dropped to 14.2 volts. I decided to get my Fluke AC/DC clamp meter to see just what it was putting out. I clamped the meter around one of the charger's leads, and saw only 1 amp. A check of the voltage showed that the charger had shifted to the next step in the charging program, and was now sitting at 13.6 volts. Instead of leaving it plugged in, I pulled the plug so I can measure the voltage daily to get an idea of just how much leakage I have. I want to see if my planned 1/2 amp solar charger can handle the leakage (I think it can, but I'm going to measure it anyway). Right now, I'm guessing that I'll probably just leave it plugged in continually (and let the charger do it's thing).
Moving along, I pulled my Hoseline temperature control parts out of the box and decided to see what it would do. Thankfully, I have a box of misc. Hoseline parts, and I was able to build up what I needed. I used a CM-3000 control panel, with an RCB-3000 control board. All are new, and after a little fiddling, they all work together like they should. The CM-3000 is a pushbutton station that selects heating, cooling, temperature, and fan speed (manual or automatic).
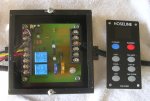
It's used with a Hoseline RCB-3000 control board - this connects to the hot water valves, the hot water booster pump, the condenser fans, the module air conditioning compressor clutch, the ultraviolet air purifier, the blower motor,and a freeze thermostat. Instead of the old system of using resistors to adjust blower speed, it accomplishes the same result with an electronics circuit. Since I didn't want to yank the blower out of the buggy, or buy a test-blower, I connected two module ceiling lights in parallel to simulate the blower - the blower pulls about 11 amps, and each light pulls 5 amps, so the end result worked fine. The system works perfectly, so I'll install it in about a week or so (the installation is needed with the Hoseline 120 volt air conditioner system).

First, I installed new longer output leads on my Onan generator - before I bought it, someone had trimmed the output cable to about 10 inches (possibly since it was used as a trade show exhibit) - I needed about 36". I almost used type GXL (polyurethane insulation) automotive cable, but I suddenly remembered that GXL is a 60 volt rated wire, so I used 10 gauge marine cable (300 volt rating). Oddly enough, all the cable connections were via 1/4" tabs, but I stock a heavy duty 3M nylon insulated version, and with the aid of my ratchet crimper, the terminations came out fine. The finished job even started and generated power! I installed a new fuel filter and air filter at the same time.
I had left some gas in my Evinrude 6 gallon marine gas tank, and found that the tank oozed a bit in the sun, which means new valve O rings are needed. They are on order.
I did a layout of all the terminal strips for my AC & DC panels - they'll go in tomorrow, and I'll start stringing wire. I need to leave space in the cabinet for the AC equipment, but I can install everything additional I need in the bottom 12" of the cabinet. As soon as it's wired, the cabinet goes back in place.
When I drove the buggy back from Rochester on Thursday, I figured that the batteries would be down from sitting for about 3 weeks. They were. The ammeter showed a 100 amp charge for the first half hour of the return trip,t hen it dropped to about 50 amps. This morning, I plugged in my Iota charger installation to see what it would do. It sat at 14.6 volts for a few hours, then it dropped to 14.2 volts. I decided to get my Fluke AC/DC clamp meter to see just what it was putting out. I clamped the meter around one of the charger's leads, and saw only 1 amp. A check of the voltage showed that the charger had shifted to the next step in the charging program, and was now sitting at 13.6 volts. Instead of leaving it plugged in, I pulled the plug so I can measure the voltage daily to get an idea of just how much leakage I have. I want to see if my planned 1/2 amp solar charger can handle the leakage (I think it can, but I'm going to measure it anyway). Right now, I'm guessing that I'll probably just leave it plugged in continually (and let the charger do it's thing).
Moving along, I pulled my Hoseline temperature control parts out of the box and decided to see what it would do. Thankfully, I have a box of misc. Hoseline parts, and I was able to build up what I needed. I used a CM-3000 control panel, with an RCB-3000 control board. All are new, and after a little fiddling, they all work together like they should. The CM-3000 is a pushbutton station that selects heating, cooling, temperature, and fan speed (manual or automatic).

It's used with a Hoseline RCB-3000 control board - this connects to the hot water valves, the hot water booster pump, the condenser fans, the module air conditioning compressor clutch, the ultraviolet air purifier, the blower motor,and a freeze thermostat. Instead of the old system of using resistors to adjust blower speed, it accomplishes the same result with an electronics circuit. Since I didn't want to yank the blower out of the buggy, or buy a test-blower, I connected two module ceiling lights in parallel to simulate the blower - the blower pulls about 11 amps, and each light pulls 5 amps, so the end result worked fine. The system works perfectly, so I'll install it in about a week or so (the installation is needed with the Hoseline 120 volt air conditioner system).
patoz
Expedition Leader
Yes, the wire will have to bend when the door is opened, so thanks for that tip on using marine wire. I hope to be able to mount it so that it will open downward, with retaining cables to support it in the horizontal position, since that affords the best position for access to the rear and working on it.If your wiring will have to bend when the door is opened, remember to leave plenty of slack - maybe a J bend in the cable bundle. You might want to use marine wire for the terminal strip connections - the stranding is much finer than normal automotive wire, which may help a bit.
Bob, what have you got in mind for the crew bench? Are you going to convert it into a bed of some kind?

