Buying & Building a Medium Ambulance into an RV – The FAM-BULANCE

rlrenz

Explorer
COUNT YOUR BLESSINGS!

I'm part of an emergency vehicle upfitter's group - those guys who add equipment to LE vehicles like emergency lighting, K9 kennels, radios, etc. The most common questions we ask each other usually are "where can I connect to a park-sense line..." or similar. All the vehicles being set up as LE (law enforcement) vehicles have become 99.9% computer-based - the old days of just tapping into something are long gone.

The group references the various manufacturer's upfitter guides regularly, but the many voids in the manual mean we have to work with each other to figure out a solution.

Emergency lighting is now computer controlled, radio antenna holes need to fall into a specific location, side mounted spotlights are going through heat treated body sections (hole saw killers!).

A car that has been ordered with a police package has different connector locations than a standard vehicle, but PDs regularly convert a spare "civilian" car to PD usage.

The installation of a LE equipment package can easily take an experienced installer 2-3 days.

And that is why I am very glad that the medium trucks that we convert to RVs are old enough that they aren't entirely computer based. The only computers in my 1999 Freightliner / Medic Master are for the engine and the Anti-Lock brake system.

If your module (ambulance portion) is set up for conventional relay-diode control with toggle switches, you have a system that can be repaired with a couple bucks worth of parts - but if your system is controlled by a proprietary system (such as the Horton Intelliplex), any parts or programming changes become complicated quickly. If you use the Weldon V-MUX system, plan on sticker shock if you need a new touch screen module ($2000 or so) or a connection node ($900 or so).

And if the manufacturer of your system is out of business (or if they won't support legacy equipment), then you have a challenge/problem/disaster to deal with.
 

rlrenz

Explorer
Been a long time searching, but I finally tracked down enough LED replacement warning lights for the whole ambulance. When I bought it, the blue and red lenses were removed (as per Pennsylvania law), and replaced with clear lenses. I liked the idea of being able to use the emergency lights as warning lights, so I replaced the clear lenses with amber lenses. Better, but still halogen bulbs.

I decided about a year ago to keep my eyes open for Whelen 900 LED (or equal) amber lights- new, used - it didn't matter. I then also decided to look for LED scene lights. After months of searching (and with the help of my ambulance electrician friends), I found enough amber with a clear lens to do the job. I have Whelen on the sides, and TecNiq on the rear.

Finding LED scene lights was a real challenge - apparently, everyone who knows what they are, wants them. After a lot of talking to my emergency electrician friends, I tracked down four Whelen M9 scene lights. And that's where my luck stopped.

Then, out of the clear blue sky, I found a TecNiq dealer who had bought out another dealer, and he had some surplus scene lights, so now my search for LED lights is completed!

I'll gradually peck away at switching my 16 Whelen 97 halogen lights for LEDs.

Anyone need Whelen 97 halogen lights, amber lenses, blue lenses, or red lenses?

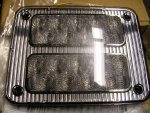
Note that on TecNiq scene lights, the individual LED lenses all point downward. The result is lighting both next to the ambulance, and out from it.
scene lt front.JPG
 

patoz

Expedition Leader
Now, you've just got to climb up that ladder and change them all out.

When I change mine out, I'm thinking about separating my Little Giant ladder to make two 'A' frame ladders, and using a scaffolding board along the side. Since I'm going to re-align and re-drill all my mounting holes so I can use the nylon anchors, it's going to take a lot longer. My back injury won't allow me to stand on a ladder rung for very long before the mussels start cramping up.
 

rlrenz

Explorer
Many years ago, I wound up with an air operated barrel dumper. It was air operated since it was designed for use with flammable materials. The air hoist had a standard paving breaker "Chicago" air fitting, so I knew it might be an air hog. At the time, I really wanted a work platform, so the creature got a platform, complete with side bars and a safety chain. It looked like it had just crawled out of the scrap dumpster, but it was designed to lift 1000# 8 ft off the ground. I could roll it into place, set its brakes, and then easily access things that otherwise would have needed a ladder.

It probably weighed 400# or so all by itself, but it did the job just fine. It's long gone now, but there are still days when I wish I still had it (along with the large shop).

A scaffolding plank between two ladders will probably be my substitute.
 

rlrenz

Explorer
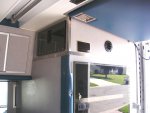
It looks like ambulance projects also thrive on almost-enough-room-for-installation. My existing front of the module AC evaporator/heating unit fills the space pretty completely, but it looks like I will have just enough room to route my AC hoses from the top mounted AC condenser through the existing AC space and then to the new space for the added evaporator.

The top-mounted condenser:
Brackets.png

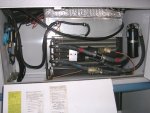
The existing evaporator installation - new AC hoses can come through the front face on the left
ac01.jpg


The existing IV bag heater cabinet will be removed, and a new evaporator for the 120 volt AC will be installed in its place. Return air will go through the left side, the cooled air will discharge through outlets on the front side next to the existing air port
ac3.jpg
 

rlrenz

Explorer
Been getting an education, I have...

I had been planning to stuff a pair of RV recliners into the buggy to serve as both daytime chairs, and as night time sleeping spots. I got a new right knee in November, then spent a week sleeping in my family room recliner before I recovered to the climb-the-stairs-to-the-bedroom point.

Sleeping in a recliner would probably work for one night before it becomes a PITA, but a day or two has become a realistic limit. I'm going to check out RV driver's seats to see if they are any better, but it will probably become "back to the drawing board"
 

patoz

Expedition Leader
Bob, if you're wanting to install small profile recliners, maybe you should check out the Toyota Sienna seats. They are expensive but top of the line. See this thread here.

I've thought about them for mine, but with my back problems, I really need a bed with a good mattress. But, on the other hand I prefer sitting in a chair or recliner vs. sitting on a couch when I'm watching TV.

The problem we are both going to have is, neither one of us wants to give up the storage space under the crew bench to install chairs of any kind.
 

rlrenz

Explorer
Totally right, Pat. Plus, my ambulance has a raised spot on each side for rear wheel clearance, and that means that I can't just bring the squad seat area down to main floor level. And I gotta admit that I want to hang onto the space under the squad seat. If I lower the squad seat height to accommodate the thickness of a a Toyota seat, I'll still have some space to work with - I may even build a new rear access door so I can get to the space from the ambulance exterior.

I'll check out the Sienna seat idea - it may be the simplest solution. I have to remind myself that I'm not planning to live in the buggy, just be able to use it for a weekend, and that changes the math completely.
 

Ozrockrat

Expedition Leader
I actually bought a Sienna seat to put in place of the attendants chair. The idea was to be able to either use it as a recliner or spin it around and use it as an office chair.

But when I removed the attendants chair She Who Must Be Obeyed decided she liked the open area. Now we carry a couple of camp chairs inside to quickly take a seat when needed and the fold up under the sofa when not in use.

At first I still wanted my recliner but since it clear the pathway to the espresso machine I will give in to her better judgement.
 

rlrenz

Explorer
I'm also facing a decision on the attendant's chair. It's a great space, and would be perfect for a recliner, except my space is only 26" wide. That's probably great for someone who's doing CPR at siren speeds, but it's tight for any kind of a recliner. For now, it will stay as a CPR seat while I search for options.
.
 

rlrenz

Explorer
I'm still here - just the usual summer family stuff plus some home projects to keep my spare hours occupied.

I've been reading news articles about truck tires that have come off and rolled down the road, wiping out anything they came close to, and it got me worried. Back in the old days, when I restored 2 1/2 ton 6x6 trucks, tightening the Budd lugs was easy -- if you wound them down with a 1/2" impact, you could get them off with a 1" impact. The military approach was definitely straightforward - the motor pool sergeant told me that if I ever tightened them by hand, pull on the wrench until I heard it go "Crick" twice, then they were tight.

Having installed Alcoa aluminum wheels, I now had a different lug nut system, and even though I continued to use my 1/2" impact to tighten them, I didn't have any confidence in the final torque. Alcoa calls out 450-500 ft-lb for my M22 studs, which I knew I could do with my 66:1 torque multiplier. The drawback is that the math says that the torque multiplier needed an input of only 6.8 ft-lb to give me an output of 450# - assuming 100% efficiency! I knew it wouldn't be 100%, but what would it be? I can measure low torques, but the accuracy of the final result was totally unknown.

At that point, I decided to keep the torque multiplier as an on-board emergency tool, but to start using a torque wrench for the final tightening.

View attachment 470836

After some digging, I tracked down a slightly used Proto 600# torque wrench. I could have purchased a Chinese wonder, but I like Proto, and the furnished calibration certificate states accuracy to 3%. Good enough for me.

I figure the odds of something ever happening are low, but I now have the peace of mind in knowing that I did my best to comply with Alcoa's requirements.

View attachment 470837View attachment 470836View attachment 470837

I was thinking (dangerous, sometimes...), and I wonder if I could gimmick up a test stand using my 66:1 torque multiplier and the torque wrench to get some sort of idea what kind of input torque I'd need to have 450-500# output? Definitely a project for summer, but it wouldn't take a lot to rig something up.
 

Coachgeo

Explorer
I was thinking (dangerous, sometimes...), and I wonder if I could gimmick up a test stand using my 66:1 torque multiplier and the torque wrench to get some sort of idea what kind of input torque I'd need to have 450-500# output? Definitely a project for summer, but it wouldn't take a lot to rig something up.
its a math formula.... no test stand needed..... just a math inclined person (which Im not). Seems to me you just convert the required torque figure by 1/66th (0.015151515) and set your torque wrench to that if your measuring thru the torque multiplier when still attached to nut/bolt. With a calculator hardest part will be holding the awkward combo of multiplier / torque wrench on the bolt/nut at the same time while checking torque.

so how would that work...... multiply the required torque by the reduction amount of the unit?? Like for his 66:1 unit would it be ( required torque x 0.015151515 = new torque figure? )

 
Last edited:

rlrenz

Explorer
The only problem with just using math to get the required input torque is that the mechanical efficiency of the gear train is assumed to be 100%. I know it's not 100% efficient, but it will take a trip to a calibration lab to get actual numbers.

The lab would use a digital read out load cell, but since I don't have one, I'll have to figure out an alternative, such as using a known-accuracy torque wrench as a calibrstion standard. Assuming 100% efficiency, the required input torque for 500# output would be 7.6 ft-lbs, but if I assume 90# efficiency, the required input becomes 8.4 ft-lbs, or 9.4 ft-lbs if the efficiency is 80%.

This all assumes that your input torque wrench is accurate at readings below 10 ft-lbs, though.

And that's why I bought a 600# torque wrench. Simplicity and accuracy.
 

Coachgeo

Explorer
The only problem with just using math to get the required input torque is that the mechanical efficiency of the gear train is assumed to be 100%. I know it's not 100% efficient, but it will take a trip to a calibration lab to get actual numbers.

The lab would use a digital read out load cell, but since I don't have one, I'll have to figure out an alternative, such as using a known-accuracy torque wrench as a calibrstion standard. Assuming 100% efficiency, the required input torque for 500# output would be 7.6 ft-lbs, but if I assume 90# efficiency, the required input becomes 8.4 ft-lbs, or 9.4 ft-lbs if the efficiency is 80%.

This all assumes that your input torque wrench is accurate at readings below 10 ft-lbs, though.

And that's why I bought a 600# torque wrench. Simplicity and accuracy.
with the range of 450-500 would think that would be wide enough swing for inaccuracy??? 600lb torque wrench??? eee gads...... you could have bought a crap load of fuel to take more trips for cost of that kind of accuracy lol .
 

Forum statistics

Threads
188,039
Messages
2,901,524
Members
229,352
Latest member
Baartmanusa
Top