Camper Van / Ambulance Pop Top On a Budget

asander1

New member
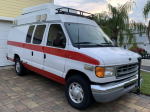
Full size American vans (Ford, Chevy etc.) make great campers, but very few used vans come with a pop top or a high top that you can actually sleep in.

1609126147167.png

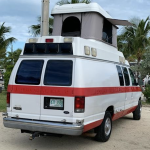
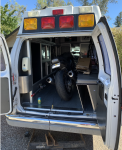
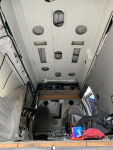
Even with a high top like this Ambulance, most people can't even stand fully upright inside, let alone have a bed that isn't in the main living space.

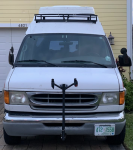
There are pop tops and high tops available for these from several well respected vendors, but they are fairly expensive:

1609119464406.png
1609124518244.png

1609125449325.png

A pop top with a bed is hard to get for less than 9-12k - which for a budget build where you might start with a used van for 5k doesn't make a ton of sense.

You might get lucky and find a wrecked van and pull the top off, but these are rare as hens teeth:

1609125773050.png


Occasionally pop tops from Westfalias show up on the used market, but these are also hard to find and not super cheap either:


1609125983822.png

Likely to be 1/2 way across the country from you as well...

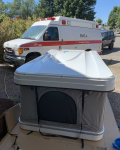
Either of these budget options are very hard to find and still involve a lot of work to actually install. So here is another option that has been done a handful of times before but you don't see very often... a roof top tent with the bottom cut out and incorporated into the van roof:

1609169797564.png


Cheers to David - @Abitibi and others before me for the inspiration... https://expeditionportal.com/forum/threads/ambuland-build-thread.103768/page-26

Most hard shell roof tents are still $3,000-4,000+, but at least we are getting somewhere budget wise...


1609170021806.png


1609170068231.png


Now, check this thing out:

1609170154028.png


$1,500 delivered to your door, now we are talking! And something we can cut into without freaking out! Keep an eye out for 10% off coupons at various sites on this thing as well. This thread will cover the install I did with this into my Type II Ambulance van. Stay tuned...!
 

asander1

New member
So in order for this to work, we need a flat roof surface to seal the base of the roof tent to... Type III box vans are flat on top...

1609172500969.png

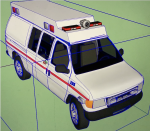
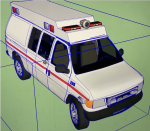
But I prefer the Type II vans, in the computer they look flat...:

1609172404229.png

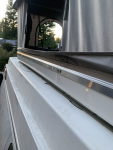
But in real life there is a ridge that provides strength to the large fiberglass top:

1609172731950.png

But otherwise it is pretty much flat! Great! Let's get back into the computer and see how the top might fit up:

1609172893232.png


Looks pretty good! The width of the Trustmade is perfect for the Ambulance top!


1609172934610.png

Just one tricky part where the tent mates to the ridge:

1609173005615.png

But some careful trimming should take care of it....

Now the fiberglass top would not be ideal to actually support 2 adults up there, but not to worry - this is my 4th Ambulance and under the fiberglass is usually a nice steel support structure we can build to:

1609173710161.png

These things are built to withstand a rollover:

1609173460300.png
 

Attachments

  • 1609172404229.png
    1609172404229.png
    1.2 MB · Views: 32

asander1

New member
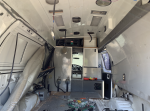
Ok, lets get started!

First step - remove Ducati:

1609174116250.png

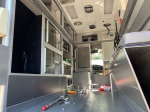
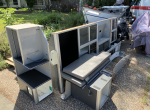
Step 2, remove the rest of the cabinets:

1609174176181.png

1609174207841.png

1609174287730.png

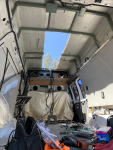
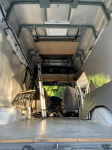
Ok, all clear!

1609174405175.png
 

asander1

New member
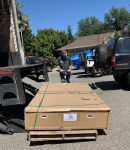
Ok, now get the roof top tent...

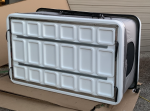
1609174506543.png

Unbox it:

1609174616203.png

Looking good so far...

1609174662933.png

Let's see how the tent is constructed so we can figure out how to attach it to the van...

1609175026923.png

There is a stainless steel frame with 10 bolts that makes up the main support structure, we can use this to mount directly through the van roof...

Drill out the rivets holding the little straps on, these are used to keep the tent closed from the outside, but we need a flat surface, and will be securing the tent top from inside the van.

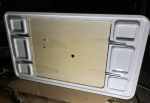
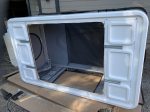
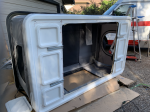
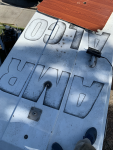
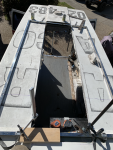
In order to access the bed and get additional headroom we need to cut the bottom of the tent out, after lots of measuring and planning:

1609175147992.png

We decided on keeping a ledge at the front and the back which fits the interior of my specific van and keeps some structure in the roof tent bottom. You can see there is a flat base around the entire perimeter of the tent that we will use to seal the tent to the van roof.
 

Bikersmurf

Expedition Leader
Full size American vans (Ford, Chevy etc.) make great campers, but very few used vans come with a pop top or a high top that you can actually sleep in.

View attachment 633650

Even with a high top like this Ambulance, most people can't even stand fully upright inside, let alone have a bed that isn't in the main living space.

There are pop tops and high tops available for these from several well respected vendors, but they are fairly expensive:

View attachment 633619
View attachment 633640

View attachment 633647

A pop top with a bed is hard to get for less than 9-12k - which for a budget build where you might start with a used van for 5k doesn't make a ton of sense.

You might get lucky and find a wrecked van and pull the top off, but these are rare as hens teeth:

View attachment 633648


Occasionally pop tops from Westfalias show up on the used market, but these are also hard to find and not super cheap either:


View attachment 633649

Likely to be 1/2 way across the country from you as well...

Either of these budget options are very hard to find and still involve a lot of work to actually install. So here is another option that has been done a handful of times before but you don't see very often... a roof top tent with the bottom cut out and incorporated into the van roof:

View attachment 633717


Cheers to David - @Abitibi and others before me for the inspiration... https://expeditionportal.com/forum/threads/ambuland-build-thread.103768/page-26

Most hard shell roof tents are still $3,000-4,000+, but at least we are getting somewhere budget wise...


View attachment 633718


View attachment 633719


Now, check this thing out:

View attachment 633720


$1,500 delivered to your door, now we are talking! And something we can cut into without freaking out! Keep an eye out for 10% off coupons at various sites on this thing as well. This thread will cover the install I did with this into my Type II Ambulance van. Stay tuned...!
Very cool option at a much more affordable price. Mine is just like David’s first Ambo. I’ll keep this in mind if my priority shifts more to camping and away from not getting any taller.
 

asander1

New member
Ok, keep cutting the tent there are just 2 layers, the plastic base, and the faux wood bed...

1609180183472.png

1609180212518.png

Now you can take the cutout on top of the van and use it for basic sizing / layout, we know the ridge part needs to go no matter what, so cut that out first leaving some extra on the front and back for final trimming...

1609180264372.png

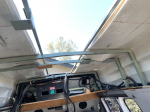
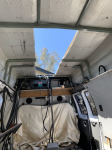
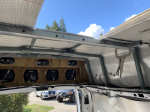
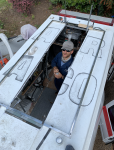
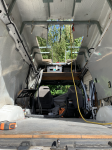
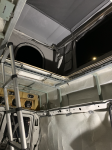
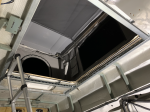
Now you have a nice sunroof - no going turning back now!!
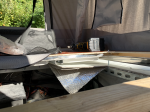
1609180345218.png
 

Abitibi

Explorer
Looking good so far, curious how the interior, bed and latching will turn out!

Good thing you kept some meat on the tent's floor. It will help with keeping the alignment when closing the tent.

I bet you enjoy the extra room, light and breeze. Totally transform the interior!

Cheers
David

Sent from my SM-G973W using Tapatalk
 

asander1

New member
Cut out the steel supports that are in the way of the opening... we will be boxing in the opening and welding to what is left of these...

1609180446421.png

Note the welding blanket over the front seats to shield them from sparks...

1609180462292.png

You can see the outline drawn on the inside of where the opening will be.

Now take the stainless steel frame that is from the tent, this is what we will be bolting through to the van, so it has the 10 bolt holes already in it..

1609180624038.png

Position it exactly where you want the tent to live and now you can see exactly where it lays on the underlying steel supports. In my case we positioned it just behind the front one and just in front of a rear one, this way we could add a 2" box crossmember to each and have it fully supported on the front and back. Then we welded in more box to support the rails that make up the sides of the final opening:

1609180935865.png

Adding the box sections to connect to the side beams that will go in later on...

1609180990603.png
 

asander1

New member
Steel frame from tent is clamped in place where it will go to check everything lines up properly:

1609181152039.png

You can see there is full steel support under each end now...

Now remember we left some meat on each end of the tent - so marking out the top where the actual opening is - measure 2x cut 1x!

1609181251190.png

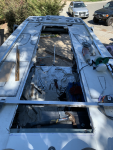
Final opening cutout:

1609181520290.png

The reason it looks like a big plus + is we have the squarish opening that is in the tent with meat on the ends, but we also need to remove the ridge from the van, the full length of the outside of the tent base.

We will trim back the steel supports when we add the side rails...
 
Last edited:

asander1

New member
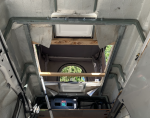
Mock fitting the tent and now you can see the superstrut going front to back on both sides. This is welded into each of the side supports as well as at the ends, creating a super strong rectangle in the top of the van.

1609182872138.png

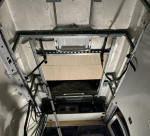
A bonus of the superstrut is that the collapsable ladder that comes with the Trustmade tent fits into the slots perfectly! so you can move the ladder around the van as much as you like.

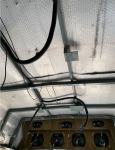
Once you have the box structure installed, mark and drill the 10 holes in the van to match the factory Trustmade stainless steel tent frame. These holes go through the fiberglass hi-top, through the steel below allowing you to sandwich the tent solidly in 10 places to the van substructure.

1609183329616.png

You can see the stainless steel crossbeam in the Trustmade that helped define how big to make our actual opening..

1609183395906.png
 

asander1

New member
Now we need to fine tune the front and rear cuts to match the profile of the end of the tent base:

1609183603209.png

From the side, before tightening:

1609183657615.png

Add butyl tape all around the base where the tent base will seal to the fiberglass top:

1609183693433.png

1609183714488.png

Edit - forgot a step - after you tighten down the tent to the roof and seal to the butyl tape, go around the whole thing with a generous helping of lap sealant. Especially where the ridge was (middle of front/back) and the tent doesn't overlap the fiberglass.

1609183741605.png

Looking great! Now add a superstrut cross brace at the edges of the opening..

1609183809621.png
 
Last edited:

AbleGuy

Officious Intermeddler
Great thread!

l have been wanting to do pretty much the same thing to a camper shell on my pickup, so it’s great to see how you are doing this mod.

1Q:
What’s your opinion about the quality of that RTT?

Like you, I’m certainly not going to spend $3’k on a RTT only to just cut it up. For that price I’d just be more tempted to find an older slide in pop up truck camper (although that really wouldn’t solve my “being able to park the rig inside the garage” needs).
 

asander1

New member
Superstrut all around...

1609183970260.png

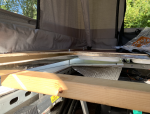
Bed platform is 3/4 Birch plywood cut into several panels to allow various configurations. There are short sections that cover the 'fixed' ends of the tent.

1609184065513.png


1609184127279.png

The original tent is secured on the outside...

1609184357765.png

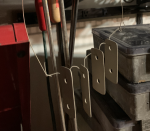
But we want to be able to secure it and open it from the inside... so we made up some little tabs:

1609184406627.png

That attach to the 4 corners of the inside of the tent top:

1609184497323.png

Ratchet straps then run straight down through slots cut in the bottom of the tent, make a 90 degree turn through U bolts and into fixed ratchets. This allows you to open and close as well as firmly secure the top all from the inside of the van!

1609184628120.png

Now in practice, until I get a bungee, you still need to go outside to tuck the fabric back in, but we won't dwell on that~! :)
 

Attachments

  • 1609184089808.png
    1609184089808.png
    1.4 MB · Views: 29
Last edited:

asander1

New member
Great thread!

l have been wanting to do pretty much the same thing to a camper shell on my pickup, so it’s great to see how you are doing this mod.

1Q:
What’s your opinion about the quality of that RTT?

Like you, I’m certainly not going to spend $3’k on a RTT only to just cut it up. For that price I’d just be more tempted to find an older slide in pop up truck camper (although that really wouldn’t solve my “being able to park the rig inside the garage” needs).


I am actually very impressed with the quality of the Trustmade tent! Is is the best one on the market? Probably not - is it the best value though? I think so! and at $1500, it is awesome for this mod.

My friend has a 4k James Baroud and he was also impressed. Now you could upgrade the mattress, but otherwise the fabric is quality, the stitching is good, the materials are solid and well constructed. It also has a ton of features - 4 screened windows, 2 awnings on the sides, 6 pockets in the tent, a big net in the middle of the top. Overall very nice, and I have spent probably 40 nights in it...
 

Forum statistics

Threads
188,031
Messages
2,901,417
Members
229,352
Latest member
Baartmanusa
Top