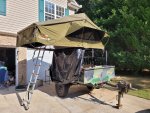
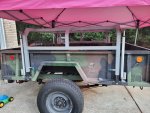
Collection of Trailer Builds

tatanka48

Active member
Awesome - trailer project envy over here, thanks for sharing.

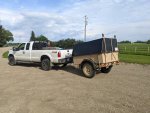
My $.02 - your adjustable tongue needs one more square tube attached to the frame further back (under the box). Currently, the fully extended tongue (as shown above) places all torque/moment at the bolted attachment (where you replaced the pintle). Adding one more square tube to the frame (with a longer tongue than what you've currently got) makes a big difference in terms of spreading load and resisting any bending or twisting over time.

So, longer tongue and one more square tube as an additional fixed receiver/support (new one being just a structural housing, no more pins for adjusting). Hoping that makes sense....

Good luck bud, looking good!

tlin, you make a good point here

though it might seem sound the leverage supplied by the extended tongue WILL apply extreme forces to the bolted connection thus creating the possibility of shearing the bolts making the connection

i'm seeing several long tongued trailers and up 'til now have refrained to comment

many of them are made of lighter tubing than i would have used

and they are unstayed underneath

anchoring a lengthened tongue farther back under the body will help a lot

if the tongue tubing proves too light reinforcement underneath will be necessary

MNJK10, GOOD LUCK WITH YOUR BUILD

"T"
 

Amy&Tyler

New member
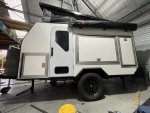
what did you use for the outside skin? any pics of the inside?

The outside is completly covered in the same plastic used for Hockey boards, I did all the sides including the bottom to protect from road rash and debris from the under side. Then Silicone sealed all the edges all around. As for pictures on the inside and back Ill have to take some when i get home I dont have any recent with the finishing touches etc.
 

tx-jeremy

Member
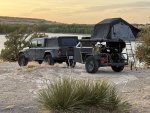
I bought this trailer about a year ago and slowly began to accumulate parts, etc for an eventual build. A spring break trip (coming up soon!) to Big Bend accelerated my plans to get a “workable version 1” out the door.


This is the trailer as it stands as of today and I love it. Can’t wait to put it to the test.

0bdf4036d5977874f59a227b23a53a7e.jpg

7c7bd92d3e7bc7fe593a64fed91f9821.jpg

9c771f4273da35f2f4569db9307a1388.jpg


And just for context here’s what it looked like when I bought it.

2b9b49186c9fe5aceb67d903a30c125c.jpg


Sent from my iPhone using Tapatalk
 

tatanka48

Active member
tx-jeremy, looking like a fine start.

do yourself and carry 2x as much water than you have planned

The Bend area can be brutal and cause dehydration at an accelerated rate

even in the spring

BON CHANCE

"T"
 

tx-jeremy

Member
tx-jeremy, looking like a fine start.

do yourself and carry 2x as much water than you have planned

The Bend area can be brutal and cause dehydration at an accelerated rate

even in the spring

BON CHANCE

"T"

Hey T,

Thanks!

Yessir! Taking 15 gallons with me spread across 3 tanks so they’re easy to refill as we go past Panther Junction, etc.


Sent from my iPhone using Tapatalk
 

Craig Butler

New member
Built a steel frame for one of my Penmans , put the spare tire on the front and made some places to lock up back gates. Stout little trailers! Screenshot_20220705-062725.pngPXL_20220704_235852802.jpg
 

Arkmatt

New member
4C1D612A-F5A1-45EA-97A0-EFE96BAFB2C4.jpeg
 

Galvatron

New member
Almost done.... All the heavy lifting is done, now the real time consuming work starts.
20221004_161544.jpg
 

Attachments

  • 20220929_185357.jpg
    20220929_185357.jpg
    3.9 MB · Views: 46
Last edited:

Forum statistics

Threads
188,240
Messages
2,904,433
Members
229,805
Latest member
Chonker LMTV
Top