Converting a factory JK/JKU hardtop to modular

Tkhawk

Adventurer
What rack/rack brackets are those?
It's the frontrunner rack. The only modification that I made to the rack to make it work was to add spacers between the bracket and inside of the roof to keep the height just right.
 
Well it's done finally... kinda. I got the wrong black paint and I will eventually clean up the inside where I had to go back and add epoxy under the flanges. But I love it! Thank you @jscherb for the instructions and help along the way!

Nice job - looks great! If I ever get some free time, my modular top and rack will look very similar. I'll be using the ACE Engineering roll bar rack supports and Rhino Rack Pioneer platform up top. Great to get a feel for how it will look; thanks for sharing.
 

Murdoc319

New member
Long post warning—-

Hi Jeff! I’ve been reading about your work over the last few days and it is amazing. Thank you so much for the designs, inspiration, tutorials, and community support over the last 5 years!

I picked up a hardtop for my 2 door jk last week from an allegedly 2017 rubicon. It was supposed to have some scratches and one “gouge” but at a great price so I drove 3 hours to get it. There was some repaired damage when I got there, but it was dark and I thought all I needed was some paint- not the case. Somebody sold this guy a sport with rubicon stickers on it and I think this top has been in an accident. There are cracks everywhere and the top looks crooked / bowed out near the passenger door. The roof inner/outer skin is even separating on the drivers side. I’ve never had a hard top so I didn’t even know what to look for at the time of purchase.

I’m thinking that a modular conversion and a series of repairs are the only thing that could get this top back to square. I could cut the panels, fix the cracks with the panels on a bench, and re-align everything through manipulation of the flanges. I’ve already ordered most of the supplies you’ve mentioned, but had a question about doing the cracks.

Most of the damages are on double walled portions and one of the small cracks is at the roof inner/outer seam. Given the high number of cracks and their locations, Would it be worth it / possible to cleanly sever the inner and outer shells to access the back side of the damage, or would I have to cut a series of access holes or create backing plates? Some of the cracks (one on the back panel for example) run across 3 contour lines (top, to main panel, to rear window for example). How would you tackle something like that?

Replacement skins are unavailable for affordable prices and I don’t want to waste a piece that can be salvaged so I am committed to fixing this. I greatly appreciate any help you can provide and thank you again for all of the support you’ve already given the community!

Ron
 

jscherb

Expedition Leader
Long post warning—-

Hi Jeff! I’ve been reading about your work over the last few days and it is amazing. Thank you so much for the designs, inspiration, tutorials, and community support over the last 5 years!

I picked up a hardtop for my 2 door jk last week from an allegedly 2017 rubicon. It was supposed to have some scratches and one “gouge” but at a great price so I drove 3 hours to get it. There was some repaired damage when I got there, but it was dark and I thought all I needed was some paint- not the case. Somebody sold this guy a sport with rubicon stickers on it and I think this top has been in an accident. There are cracks everywhere and the top looks crooked / bowed out near the passenger door. The roof inner/outer skin is even separating on the drivers side. I’ve never had a hard top so I didn’t even know what to look for at the time of purchase.

I’m thinking that a modular conversion and a series of repairs are the only thing that could get this top back to square. I could cut the panels, fix the cracks with the panels on a bench, and re-align everything through manipulation of the flanges. I’ve already ordered most of the supplies you’ve mentioned, but had a question about doing the cracks.

Most of the damages are on double walled portions and one of the small cracks is at the roof inner/outer seam. Given the high number of cracks and their locations, Would it be worth it / possible to cleanly sever the inner and outer shells to access the back side of the damage, or would I have to cut a series of access holes or create backing plates? Some of the cracks (one on the back panel for example) run across 3 contour lines (top, to main panel, to rear window for example). How would you tackle something like that?

Replacement skins are unavailable for affordable prices and I don’t want to waste a piece that can be salvaged so I am committed to fixing this. I greatly appreciate any help you can provide and thank you again for all of the support you’ve already given the community!

Ron
Hi Ron,
Welcome to the forum and thanks for the kind words.

How the cracks get repaired depends to a large degree on exactly where the are on the top - if they're in areas which are structural, for example the upper corners of the liftgate opening, then I'd strongly recommend doing the repairs on both sides, which means cutting open the inside wall. Also I would repair structural areas with epoxy resin rather than SMC-compatible polyester resin because the epoxy bond is stronger and more reliable (sometimes SMC polyester doesn't bond as well as necessary for structural repairs).

Pictures would help, if you post some I can further advise.
 

jscherb

Expedition Leader
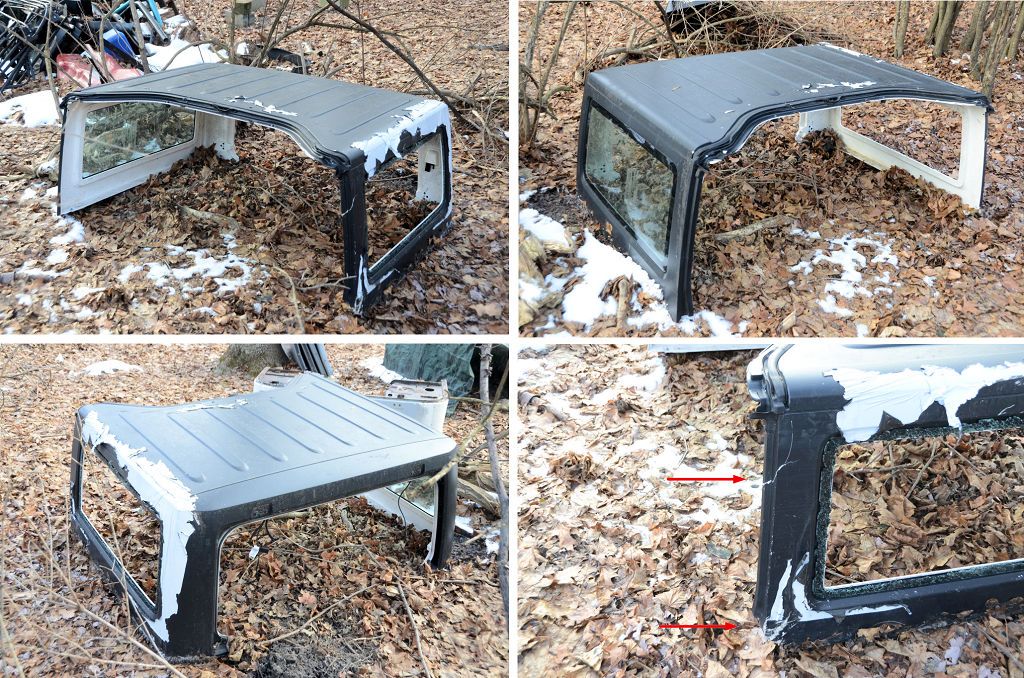
BTW I've been thinking ahead to spring cleaning and getting rid of some of the stuff that I don't have a need for anymore - if anyone is interested in a 2dr hardtop I don't need this one anymore. This one came with the Freedom panels I repaired earlier in this thread. It was in an accident, but there are only two small damaged places, pointed out by the red arrows in the last photo, both are easy repairs. The white stuff on the top is adhesive-backed plastic sheet, I think the wrecker that pulled this Jeep out of the ditch put it on to prevent rain from getting into the Jeep while it was sitting in their yard and it's easy to remove. The passenger side window is intact, the driver's side is broken. A Retrofit Offroad slider window kit would be perfect.

I've already got enough modular parts to assemble two 2dr hardtops here so I really don't need this one.

ExtraTop.jpg
 

jscherb

Expedition Leader
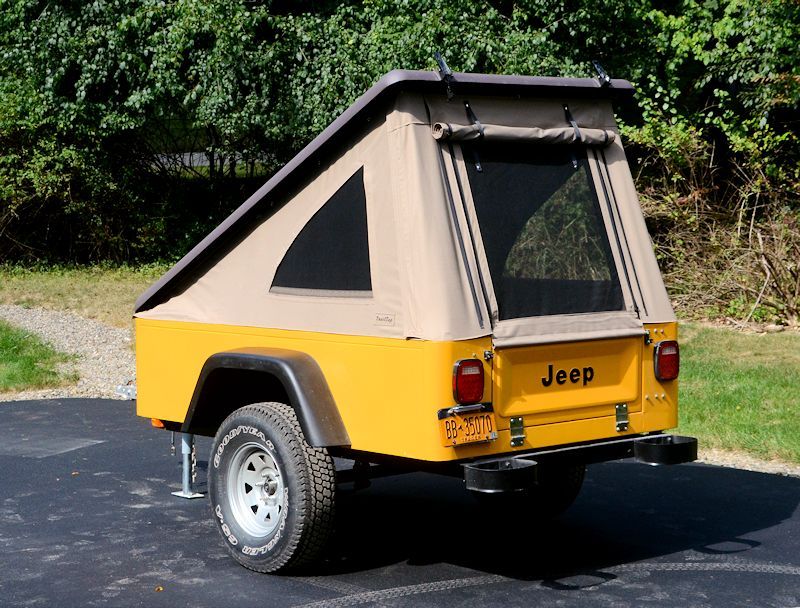
I haven't posted this idea before but I might as well... one of the ideas I had for the top in the last post was to build a pop-top camper. I've already done a pop-top camper lid for my Jeep-tub trailer and I would adapt it to the 2dr hardtop. The trailer pop-top is longer than the 2dr hardtop roof, so it would overhang the windshield a bit, but that's good because the 2dr top is too short for most people to sleep on anyway. A photo of the trailer pop-top and a very rough photo-edit of the camper top.

CoverlFinished7.jpg


2drPoptop(2).jpg


Since I've already go the complete pop-top, adapting it to the hardtop is a pretty straightforward project. Problem is that I rarely get access to the 2dr these days, Robert's got it in Philadephia (he has one of the 2dr converted modular hardtops on it).
 

Murdoc319

New member
Hi Jeff,

Thank you for the warm welcome and the quick response. I had some Evercoat 864 resin come in today but I suppose i'll leave that for the flanges / non-structural repairs - Is there a specific epoxy resin that you like to use? What is the best way to cut an access hole? I was thinking a hole saw to avoid corners and make plugging back up easier - but I'm not sure that will provide me with enough access. I appreciate you taking the time to provide feedback, especially on a Sunday!

Ron

P.S. That pop up camper top looks pretty cool!

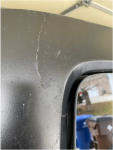
Here are the damages:
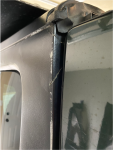
Driver Rear Liftgate Hinge.pngDriver Rear Upper Corner. The crack starts just at the top line and comes down into the window area
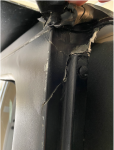
Passenger Panel Bowed Out.pngPassenger Panel is bowed out, should be flush with door - looks like damage to the whole upper right corner of the side panel
Passenger Side Panel Front and Outboard Damage.pngPassenger Panel front and outboard damage with door open
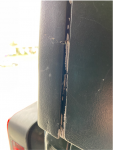
Passenger Rear Corner Outer Skin Separation and Crack.pngRear Passenger Corner, there is a crack in the groove but it extends perpendicularly out and to the rear of the panel a few inches
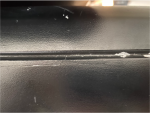
Passenger Side Panel Channel Crack.png Passenger Side panel channel crack. This crack will be removed when i cut the panel off but it does cross into the window area and into the top area at different places
There is also a small crack just above the passenger window that goes into the window channel a little bit - quite small but I couldn't get a good picture of it. I may end up removing the window to do the front side repair.
 

jscherb

Expedition Leader
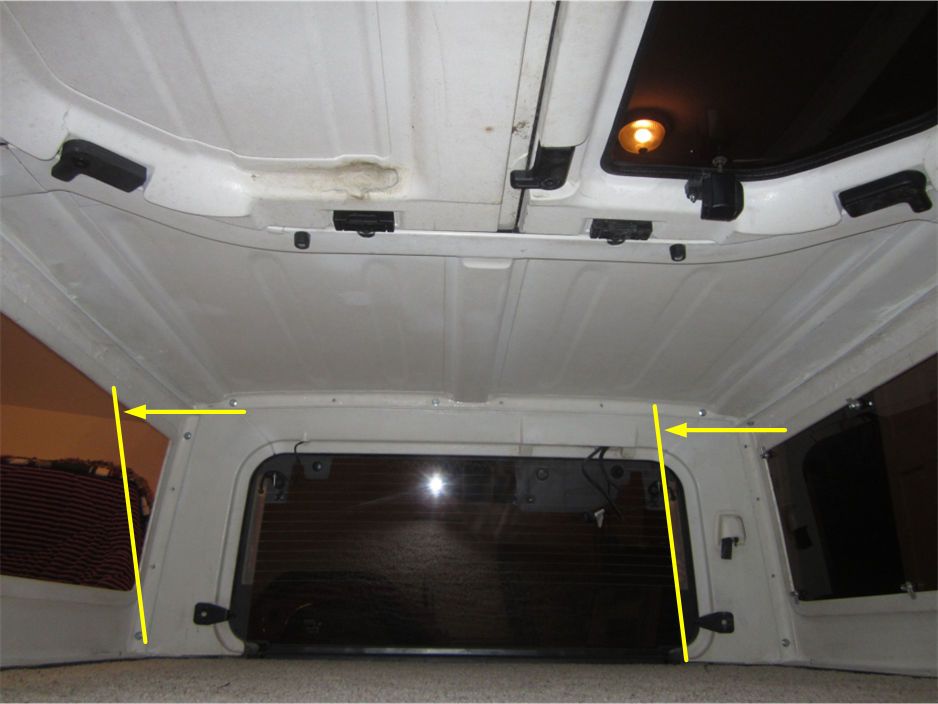
From the photos the damage seems consistent with the hardtop being "racked", meaning pushed a bit into a trapezoidal shape - like the image below, except not as extreme as shown by the lines:

Racked.jpg


The damage in the driver rear upper corner is consistent with that, as is the bowing out of the passenger panel and the small cracks along the grooves.

What happens if you push the bowed passenger panel back in place? Can it be pushed back? If it can, then note where it flexes when it's pushed back and that's most likely where the worst damage is and those are places you probably should cut holesin the inner skin for access to make the repairs. I would also cut access at the driver rear upper corner.

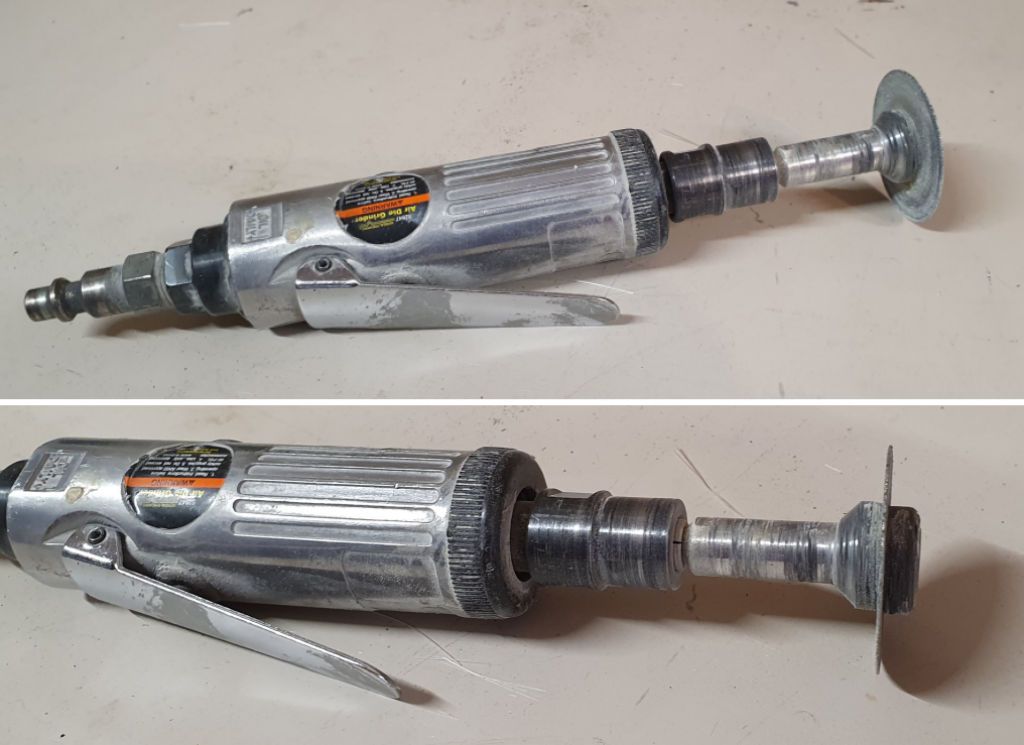
A trick you can use the cut the access holes... I use a very thin diamond grit blade in a die grinder to do these types of cuts:

DiamondGritCuttingWheel.jpg


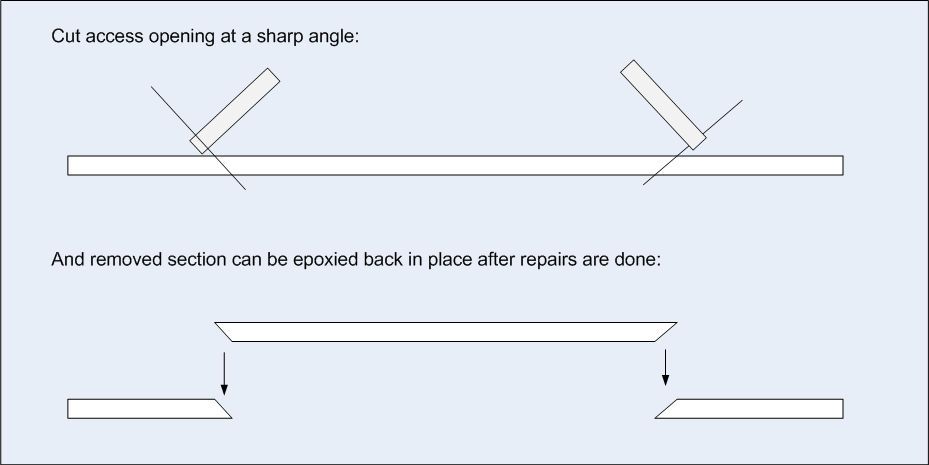
If you cut at an extreme angle, you can make an access panel that can be epoxied back in place pretty easily:

AccessHole.jpg


Once you cut the access holes in the inner skin you should be able to assess the damage.

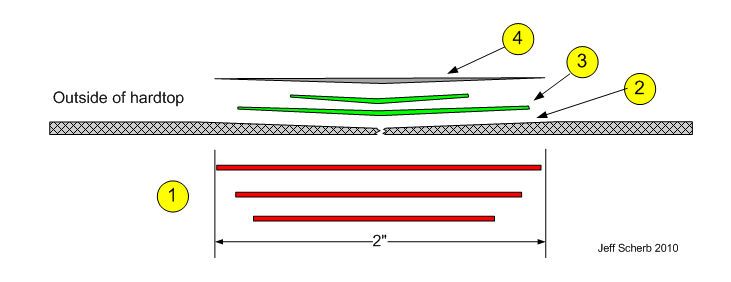
Best practice for the repair would be to sand a recess (2) in the outer surface so you can lay some fiberglass mat and resin in place (3) followed by some body filler (4) and on the inside you can build up a few layers of fiberglass reinforcement (1) without the need to sand a recess because it'll be covered by the access hole patch.

CrackRepair2.jpg


Good luck with your repairs.
 

Murdoc319

New member
Thank you, Jeff!
From the photos the damage seems consistent with the hardtop being "racked", meaning pushed a bit into a trapezoidal shape - like the image below, except not as extreme as shown by the lines...

Thank you, Jeff! I appreciate the tips and am anxious / excited to get started. I will document and update this thread to the extent that it will be helpful to others.
 

ElDudo

New member
I'm picking up a top to cut up this afternoon.

Jscherb, is the process easier to cut the top into the 4 parts? I was originally thinking of just cutting the window panels out, leaving the top and rear panel intact and connected, but looking at it again this might make fabricating the mating surfaces a little more difficult.
 
Last edited:

jscherb

Expedition Leader
I'm picking up a top to cut up this afternoon.

Jscherb, is the process easier to cut the top into the 4 parts? I was originally just thinking of leaving the top and rear panel intact and just making the sides modular, but looking through the process it might make the mounting flanges harder to form.
Leaving the top and rear together will make it vulnerable to cracking at the roof/rear corner when it's removed/stored/reinstalled, you would have to be careful not to stress it when removing/storing/installing. Adding the joint there means that all the parts are basically flat and easy to store disassembled without stressing any joints.
 

ElDudo

New member
Leaving the top and rear together will make it vulnerable to cracking at the roof/rear corner when it's removed/stored/reinstalled, you would have to be careful not to stress it when removing/storing/installing. Adding the joint there means that all the parts are basically flat and easy to store disassembled without stressing any joints.

Thank you sir.
 

ElDudo

New member
Here's my starting point, the bottom lip of the top is pretty chewed up from being stored on the garage floor by the previous owner. I'm thinking the best way to fix this is to take the 2" wide tape, align one edge of it with the subtle lower body line of the top, then fold it in half lengthwise around the bottom edge to establish a straight line and build up the fiberglass from there.
 

Attachments

  • IMG_1398.JPG
    IMG_1398.JPG
    2.2 MB · Views: 15
  • IMG_1403.JPG
    IMG_1403.JPG
    2.3 MB · Views: 15
  • IMG_1402.JPG
    IMG_1402.JPG
    2.5 MB · Views: 14
  • IMG_1401.JPG
    IMG_1401.JPG
    2.3 MB · Views: 13
  • IMG_1400.JPG
    IMG_1400.JPG
    2.9 MB · Views: 12
  • IMG_1399.JPG
    IMG_1399.JPG
    2 MB · Views: 13
Last edited:

Forum statistics

Threads
188,217
Messages
2,903,944
Members
229,665
Latest member
SANelson
Top