Cummins Canoe (A Stepvan Story)

PlethoraOfGuns

Adventurer
Finally had a day or two without snow. Boy, what a winter.
PXL_20210223_145902049 copy.jpg
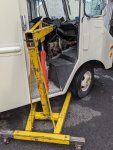
For those that are wondering, this is how you get the engine and transmission in and out of the van. Super easy with plenty of room to work with. Just need to remove the passenger seat.
PXL_20210223_165309722 copy.jpg
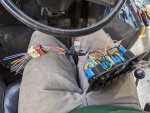
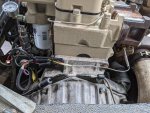
Got everything hooked up. All the new sensors and things installed too. Can we talk about an amazing invention? They're called cable ties, so simple and so useful.
PXL_20210223_165330878~2 copy.jpg
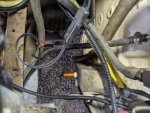
A shot looking down at the the magnetic pickup sensor for the tachometer on the drivers side of the bellhousing. This one has me worried. Witchcraft is how it all works. We'll see if I casted the proper spells to make this one work.
PXL_20210223_030900264 copy.jpg
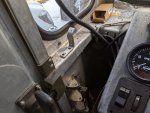
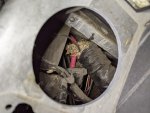
Cut a hole in the dash for the tachometer. Found out why the floor heat wasn't working so great. Damn Tennessee rodents...
PXL_20210223_203138267~2 copy.jpg
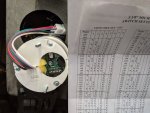
Also for anyone curious about the spells to make this tachometer work with the magnetic pickup sensor.

PXL_20210223_232452089.NIGHT copy.jpg
And there we go. Four new gauges added and we're good to go. All power is good, hoses connected, fluids topped off, everything cable tied, turned the key and...
 

PlethoraOfGuns

Adventurer
I didn't bother with the flux capacitor. No way is this rig able to get anywhere close to 88mph! And I like old gauges too! Just wish they all matched. I was just using what gauges I had laying around from past projects.
 

PlethoraOfGuns

Adventurer
Well, the engine is running pretty good. There is a rubber-like chirp at idle, but other than that she's cherry. Still have everything left to do.

PXL_20210224_212819244 copy.jpg
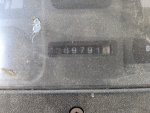
To remind myself when she got new engine, here is a photo pf the odometer. Lets see if this engine can get her to 1,000,000 miles, we're not too far off...
PXL_20210224_163521675 copy.jpg
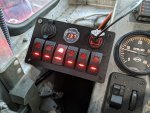
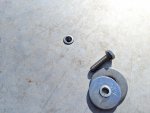
While we're up front cleaning up all the wires from the gauge mess, put together this little switch panel. It mostly switches auxiliary lights and such. Good to get rid of some of these wires that have been dangling all about the last couple months. Good thing I cut off and save old connector couplings. This one had plenty of wire spaces for our needs. And later, if need be, the switch panel will be very easy to remove.

PXL_20210224_132403783 copy.jpg
Found a sweet spot for this switch panel. Just had to make this bracket right quick.

PXL_20210224_224512055 copy.jpg
All the lights work as they should! Also have 12v outlet and USB charger up in the cab now. Driving around with a portable pocket charge pack was getting old. Hey look, the engine is idling at a nice 700 rpm! And the alternator is actually working, giving us 13.7v.

PXL_20210225_174335966 copy.jpg
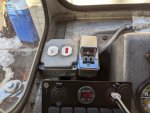
Cleaned up the last of the stray wiring in the cab. Wired the block heater to this switch with the red light, so now we can easily turn it on or off when an electric cord is plugged into the shore power plug we installed awhile back. Not sure if we'll ever need the block heater, the old engine started when it was 12 degree f. But hey TX can be even colder than that, so who knows, we might need block heater. The power from the shore plug first goes through this circuit breaker above that single outlet. That will protect all the wiring in the back of the van when we're plugged into shore power. When we're not plugged into shore power, we'll need another method to get power to the outlets. Hmmm...
 

PlethoraOfGuns

Adventurer
Working on more electrical things. If there is one thing that makes sure everything else works well, it's electricity. Cities would come to a standstill without electricity. So would construction sites, as everyone knows that electricians actually run the show. Well, I guess the van will still get around and do stuff, but the electricity will make it all the better!
PXL_20210228_220338181 copy.jpg
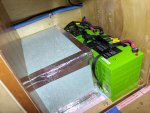
Got the batteries fully wired up with some nice big cables. We'll build a shelf up above them for additional storage. And I guess the door to this cabinet will also have a vent on it so these batteries can get some fresh air.

PXL_20210226_031606546 copy.jpg
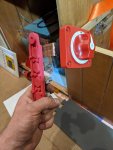
Many of the components are very close to one another. No enough room to run cables between, and will save lots of money by making our own buss bars out of 0.5" copper pipe. Just flatten it in the vise and hammer bends into them. Drill holes to go onto threaded posts and all good. Not sure how many amps these could carry, but I'm sure it's at least what we need, and the runs are extremely short.

PXL_20210228_210112833 copy.jpg
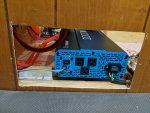
The inverter is huge and was the first piece to be mounted. Oriented it right in front of this vent as these need lots of airflow. It had the option to hardwire it, so that's what we did.

PXL_20210301_003137291 copy.jpg
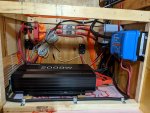
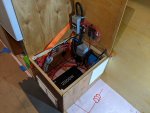
The rest of the components mounted. Having this side panel removable makes things very easy for servicing, but most times the hinged seat lid will be just fine. This space filled up quick. During the build my brother suggested to get a way to charge the rear battery bank while driving, off the alternator. In case of days when sun just isn't doing it. We have 600watts of solar, which will be sufficient for our needs. But if you have 4 days of rain, that might leave you in a pickle. So the blue box here is a dc to dc charger to charge the rear batteries from the front. The solar charge controller will be mounted on the wall later, as we planned to have it out there so we can read data and fiddle with it. Plus, there is no more room in this electrical cabinet for anymore stuff.

PXL_20210301_003905038 copy.jpg
Everything mostly done in there. Still have no way to charge these lithiums. We been using them, and everything seem fine. They are still almost full and haven't been charged since at least summer 2020. Just for that I'm sold on lithiums. I would never imagine leaving lead acid deep cycles sitting for 6-8 months without charging. The circuit breakers for all the solar and the 12v fuse panel are mounted to the bottom of the seat lid. All the wires are in wire loom and fold down nicely when the seat is closed. The gas strut has just enough power to hold the seat lid open with all that extra weight.

PXL_20210301_023311301 copy.jpg
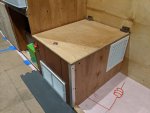
Here it is all closed up. Nobody will ever suspect what's in there! Got two vents for air flow, should be enough I think.

PXL_20210228_235442601 copy.jpg
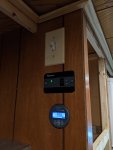
And got all the controls installed on the wall. The top switch is a selector for all the outlets between shore power and inverter power. The middle switch is to control the inverter. And the bottom is for the battery shunt, which tells you all the data about what's going in and out of the battery bank.
 

PlethoraOfGuns

Adventurer
Working on more essentials. Methods of heating up food and being able to communicate to the passengers that you would like said food heated up.

PXL_20210301_233518150 copy.jpg
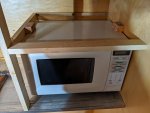
Every rig needs a microwave! Right?

PXL_20210301_233257410 copy.jpg
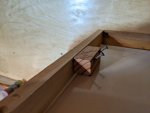
Holding it down was quite easy, just these wood blocks screwed down at an angle holds super strong. Wanted a universal hold down method without drilling into the microwave.

PXL_20210301_235546709 copy.jpg
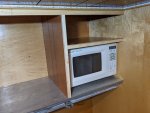
We think the space above microwave will be a bread bin.

PXL_20210304_190759208 copy.jpg
Got the solar charge controller installed. No solar panels yet, but this is a good place to store it. Also got the intercom system installed and wired up.

PXL_20210304_190745464 copy.jpg
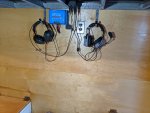
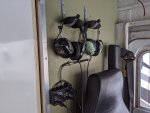
These hooks work great for storing the headsets when not in use.

PXL_20210304_191521037 copy.jpg
Oh look, even a puppy approves!
 

calicamper

Expedition Leader
What a cool project!!! I wore one of those heavy head sets for hours during my student flying days. Pretty sure I have a dent in the top of my head. Heavy!!! You might migrate to lighter headsets later... cool rig!! Some old school Bread wagon vinyl wrap on the sides would take you full stealth mode, but you might need bread samples to pass out so you maintain cover?
 

PlethoraOfGuns

Adventurer
Those headsets may be heavy, but a small price to pay in order to keep your hearing and be able to talk to people. They are expensive, so we got what we could get off eBay. Do you recommend any lighter headsets that won't break the bank?
 
Last edited:

TheRealPapaK

Active member
I love the intercom Idea. The David Clarks will last you forever. I still have mine from almost 20 years ago and they are as good as new. I use Clarity Aloft now but if you want something light that won't break the bank account, I think you're out of luck.
 

PlethoraOfGuns

Adventurer
Probably the biggest downsides to a stepvan is the noise. But these headsets solve that, plus, we can make handsfree phonecalls and everyone with a headset on can tune in on the call! Not really worried about the weight, as we don't plan to drive more than 4 hours at a time.
 

PlethoraOfGuns

Adventurer
Let's do some plumbing!

PXL_20210305_002029478 copy.jpg
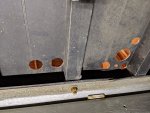
We got the holesaws out and made a bunch of semi-random holes under the sink cabinet to the exterior. Did I mention how awesome having an aluminum floor is?

PXL_20210305_012545143 copy.jpg
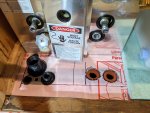
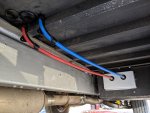
Installed rubber grommets and bulkhead fittings where lines are going to be going through floor.

PXL_20210306_032808032 copy.jpg
The water heater is all wired up. It can be powered by 1500w of 120v or with coolant lines from the engine or the diesel hydronic heater.

PXL_20210306_213626591 copy.jpg
Overkill is underrated. It's what we had laying around, haha. But boy, this vise is really getting some good use!

PXL_20210307_003136036 copy.jpg
Running all the PEX pipe we found that heating them up helped set some nice bends.

PXL_20210309_010811321 copy.jpg
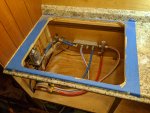
Another stressful day. Cutting in the sink. It barely had enough space to fit.

PXL_20210309_024602428 copy.jpg
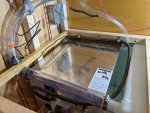
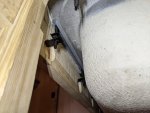
So tight, we had to make these lil holes with a forstner bit for the clamps to grab onto. Sink came out of the trash, but unfortunately had to go find these sink clips at the store. Never used them before, pretty crafty.

PXL_20210310_030908438 copy.jpg
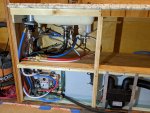
Oofta! Got everything to fit. It looks like a mess, but everything is pitched just right so everything can be gravity drained. Also got the heater fan mounted. Will run the coolant lines and diesel heater install maybe next week. The water pump ended up in a really silly spot. Not going to be fun to change, but that's a later me problem.

PXL_20210310_002907801 copy.jpg
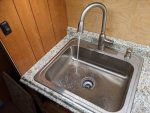
Yay, we have running water! What a game changer this will be! So used to washing dishes in two rubbermaid containers.
 

PlethoraOfGuns

Adventurer
Now that we have running water, we need a way to clean ourselves off...

PXL_20210309_193048111 copy.jpg
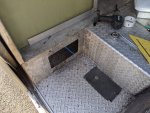
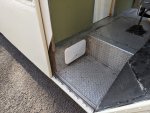
When we cut in the water tank fill port thingy, we measured and almost cut in the shower box next to it, on the passenger side of the van. Last minute we decided not to as we came up with the plan to stick it here, in the passenger side mudroom step area.

PXL_20210309_203557403 copy.jpg
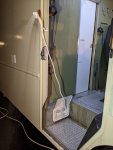
Takes up no space there. Increases stealth aspect since we don't have a giant white box on the exterior that says shower on it. Who cares if it leaks or makes a mess. And this is now the lowest plumbing in the system so opening the valves drains everything.

PXL_20210309_205455562 copy.jpg
Piping came through grommets in floor under sink and makes a turn right into the back of shower box. The shower box is drilled and tapped into the thick aluminum body with brass screws.

PXL_20210310_023059712.MP copy.jpg
Shower time! Who wants to take a nice hot shower under the stars? Grab a ticket, get in line. The cheap shower head leaves something to be desired. Water pressure is terrible, coverage is small, and it leaks and dribbles everywhere. We feel this thing will waste lots of water during use. We want something more efficient, powerful, and still have the ability to shut off at shower head to conserve water. Any suggestions?
 

TheRealPapaK

Active member
I always like the sink spray nozzles. The the things that were common beside the kitchen faucet in the 90s with the thumb trigger
 

PlethoraOfGuns

Adventurer
All this sun we're missing out on! Lets harness some of it!

PXL_20201207_012641693 copy.jpg
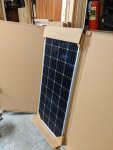
These panels have been sitting around since Black Friday sales. Lets finally get them out of storage.

PXL_20210303_160325340 copy.jpg
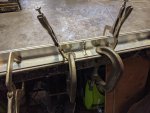
Have a plan to build a frame for these solar panels. Unfortunately, they don't readily sell 16' sections of aluminum angle, so took some 8' ones and welded them together.

PXL_20210310_190443593 copy.jpg
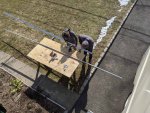
Lots of measuring and hole drilling.

PXL_20210310_200418666 copy.jpg
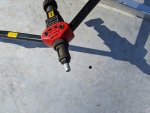
Got these aluminum self-sealing nutserts. A whole bunch of them should hold the solar panel frame securely.

PXL_20210310_200848752 copy.jpg
Nutsert installed and stainless hardware ready to go. Don't worry, we added copious amounts of sealant to the threads and surrounding area during install.

PXL_20210310_201623000 copy.jpg
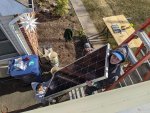
We thought this was a 2 person job, boy were we glad to get all the extra help!

PXL_20210315_202219135 copy.jpg
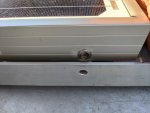
This probably voids the panels warranty, but whatever, this is a great way to mount our panels. Drilled frame and added some nutserts to bolt to roof frame.

PXL_20210310_215304002.MP copy.jpg
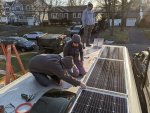
Panels all installed! We decided to put the panels all to the drivers side. This keeps them away from tree branches when driving down the road and the passenger side dips down towards the gutter/curb. We also have lots of roof space for all kinds of activities!

PXL_20210310_215423392.MP copy.jpg
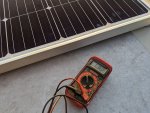
We wired all the panels in series. Made sure to test them and everything seems to work properly!
 
Last edited:

Forum statistics

Threads
188,296
Messages
2,905,076
Members
229,959
Latest member
bdpkauai
Top