You are using an out of date browser. It may not display this or other websites correctly.
You should upgrade or use an alternative browser.
You should upgrade or use an alternative browser.
Cummins Canoe (A Stepvan Story)
- Thread starter PlethoraOfGuns
- Start date
PlethoraOfGuns
Adventurer
Drat. I was really hoping to see the Cummins canoe on the back of the JB weld packages. “JB weld repaired the crank shaft on this masterfully built overlanding machine saving hundreds of dollars in the process”
Haha, ya darn tootin we'd be on the packages! JB Weld working on keeping 10's of thousands of explosions per minute acting on it would be a feat for sure.
i can only guess using jb weld is a joke, i'd grab a second hand crank and give it a go with new bearings if i was on a budget.
i've been enjoying following the build, keep up the good work
Yea, we're gonna get a new crank and bearings and do it right.
PlethoraOfGuns
Adventurer
After opening up the engine, tearing it completely down, we've come up with the conclusion that yes, it was very low on oil. Enough to maybe have enough pressure to get oil to the main bearings, but not enough to get up to the rod bearings, reason why the mains were fine but the rods were toasted and worn very prematurely. The long dipstick was surely the cause for that and this has been an issue for a long time. The broken crankshaft I can't fully blame on the oil. There just wasn't enough drag from the toasted bearings to do that. Maybe I'm wrong, maybe it's an inferior crankshaft? It's the only part on the engine that says made in Brazil? Who knows. We move forward.
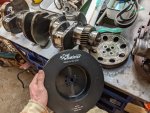
To minimize the risk of blowing up any more crankshafts, we're throwing this big bad boy on there. Did lots of research on the subject and it's stupid to have a regular pulley on a crankshaft, and not a harmonic balancer. To go one step beyond a regular harmonic balancer, we're going with a Fluidampr. Everyone on the forums swear by them. All my mechanic buddies recommend them. Not only will it save your crankshaft from blowing up, they apparently smooth out the engine. And if you ever drove a Cummins, you know what I'm talking about. This engine hiccup was not fun, and I don't want to do it again, for a very long time. So a little bit of extra money for a lot of insurance, we did done it.

To minimize the risk of blowing up any more crankshafts, we're throwing this big bad boy on there. Did lots of research on the subject and it's stupid to have a regular pulley on a crankshaft, and not a harmonic balancer. To go one step beyond a regular harmonic balancer, we're going with a Fluidampr. Everyone on the forums swear by them. All my mechanic buddies recommend them. Not only will it save your crankshaft from blowing up, they apparently smooth out the engine. And if you ever drove a Cummins, you know what I'm talking about. This engine hiccup was not fun, and I don't want to do it again, for a very long time. So a little bit of extra money for a lot of insurance, we did done it.
PlethoraOfGuns
Adventurer
Been very busy breaking down rest of engine and cleaning things.
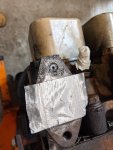
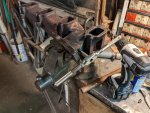
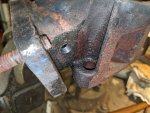
Only broke two bolts during the entire teardown process. One just happened to break flush in the head where the exhaust manifold bolts to. Drilled a hole to get an extractor in there, but then the drill bit snapped just as it broke through the opposite side!
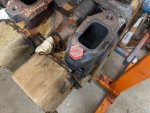
So the next tool in my toolbox is welding a nut to the bolt. Well, that snapped off and left us back at the beginning and with welding crap all over the place.

I didn't have any drill bits that were harder than drill bits, so we had to grind it out.
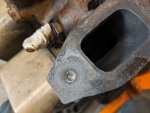
And it was working after awhile.
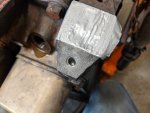
But then an hour turned into hours. And one dremmel bit turned into 10.
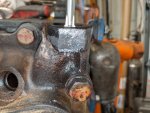
But eventually we bored out the whole drill bit and old bolt, while being centered and not messing up the threads. Lots of lube and running a tap down through and good as new!
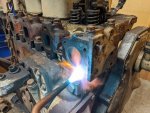
Everything else we let soak in Aerokroil for a few days and heated up before removing.
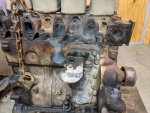
Despite our best attempts at preventing broken bolts, one had to be dealt with.
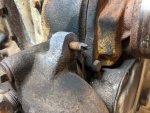
Didn't break flush, so we were able to grind a flat spot on it for vise grips to get her out.

Also, what is going on with these injectors?!? Was the engine running on diesel or gunpowder?

Only broke two bolts during the entire teardown process. One just happened to break flush in the head where the exhaust manifold bolts to. Drilled a hole to get an extractor in there, but then the drill bit snapped just as it broke through the opposite side!

So the next tool in my toolbox is welding a nut to the bolt. Well, that snapped off and left us back at the beginning and with welding crap all over the place.

I didn't have any drill bits that were harder than drill bits, so we had to grind it out.

And it was working after awhile.

But then an hour turned into hours. And one dremmel bit turned into 10.

But eventually we bored out the whole drill bit and old bolt, while being centered and not messing up the threads. Lots of lube and running a tap down through and good as new!

Everything else we let soak in Aerokroil for a few days and heated up before removing.

Despite our best attempts at preventing broken bolts, one had to be dealt with.

Didn't break flush, so we were able to grind a flat spot on it for vise grips to get her out.

Also, what is going on with these injectors?!? Was the engine running on diesel or gunpowder?
PlethoraOfGuns
Adventurer
PlethoraOfGuns
Adventurer
Oh boy, almost forgot to show everyone this one bolt we had to reach. It was at a crazy funny angle to loosen...
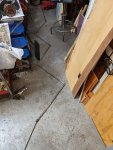
Always make sure to carry a swivel or two.
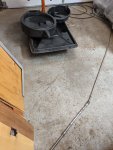
Don't forget a few extensions in your toolbox.
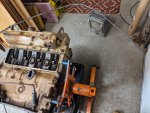
Oh yes and wobblehead extensions are great to have too.
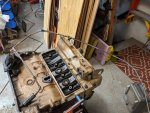
Dang that thing was a pain in the dingus...

Always make sure to carry a swivel or two.

Don't forget a few extensions in your toolbox.

Oh yes and wobblehead extensions are great to have too.

Dang that thing was a pain in the dingus...
Last edited:
Betarocker
Adventurer
How did you end up with 80' of extensions and u-joints?
PlethoraOfGuns
Adventurer
Things tend to fall of trucks around these parts...
PlethoraOfGuns
Adventurer
PlethoraOfGuns
Adventurer
Spending a lot of time indoors cleaning and painting.
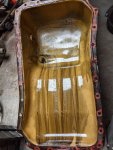
Finally got around to cleaning the oil pan that has been thrown into the corner of the garage. Lots of metal chunks down there. One of the reasons we're doing a full rebuild, who knows where all that metal has gotten to.
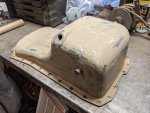
Did an easy clean up of the exterior. We're not going for show finish on this thing.
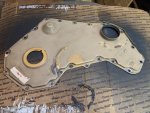
The timing gear case cover had a funny grinding/burn mark from what I think was the fun/idler pulley.
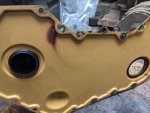
It got hot enough to burn the paint on the inside of the cover. Not sure if that was from a result from the engine blowing up or not.
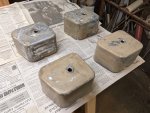
Cleaned up the valve covers and other stuff too.

Everything all painted and ready for reassembly.

Finally got around to cleaning the oil pan that has been thrown into the corner of the garage. Lots of metal chunks down there. One of the reasons we're doing a full rebuild, who knows where all that metal has gotten to.

Did an easy clean up of the exterior. We're not going for show finish on this thing.

The timing gear case cover had a funny grinding/burn mark from what I think was the fun/idler pulley.

It got hot enough to burn the paint on the inside of the cover. Not sure if that was from a result from the engine blowing up or not.

Cleaned up the valve covers and other stuff too.

Everything all painted and ready for reassembly.
PlethoraOfGuns
Adventurer
Machine work done, engine assembly continues.
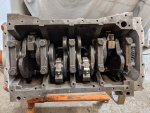
Torqued, lashed, seated, and lubed. Hopefully no problems.
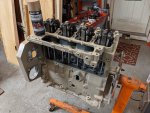
We loosely installed all the covers and painted everything as it stands, trying not to get paint in where we don't want it.

While paint dries, we should probably deal with this silly killer dowel pin.
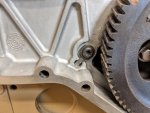
They sell kits to fix this, but it's so simple and budgets, so we did our own thing.
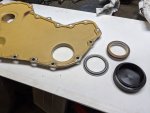
And tackled the crank seal on the timing cover. Just spend the $30 for the install tool or borrow one so you don't mess up and have to buy another $50 seal.

Torqued, lashed, seated, and lubed. Hopefully no problems.

We loosely installed all the covers and painted everything as it stands, trying not to get paint in where we don't want it.

While paint dries, we should probably deal with this silly killer dowel pin.

They sell kits to fix this, but it's so simple and budgets, so we did our own thing.

And tackled the crank seal on the timing cover. Just spend the $30 for the install tool or borrow one so you don't mess up and have to buy another $50 seal.
PlethoraOfGuns
Adventurer
Thanks! Hopefully we'll get on an actual adventure soon...
PlethoraOfGuns
Adventurer
Making good progress on engine.
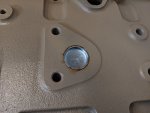
But sometimes things get forgotten. Like this plug. Thought something bolted there, but I was mistaken.

This is how I always do oil pans with RTV silicone. Let me know your thoughts.
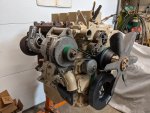
Almost complete. Here you can see the homemade dipstick tube I made out of some PEX pipe. Filled the engine with the proper amount of oil and stuck dipstick into tube and kept cutting tube until level showed perfect on the dipstick.

But sometimes things get forgotten. Like this plug. Thought something bolted there, but I was mistaken.

This is how I always do oil pans with RTV silicone. Let me know your thoughts.

Almost complete. Here you can see the homemade dipstick tube I made out of some PEX pipe. Filled the engine with the proper amount of oil and stuck dipstick into tube and kept cutting tube until level showed perfect on the dipstick.
Last edited:
Similar threads
- Replies
- 19
- Views
- 1K
- Replies
- 7
- Views
- 1K
- Replies
- 5
- Views
- 572

