You are using an out of date browser. It may not display this or other websites correctly.
You should upgrade or use an alternative browser.
You should upgrade or use an alternative browser.
Cummins Canoe (A Stepvan Story)
- Thread starter PlethoraOfGuns
- Start date
PlethoraOfGuns
Adventurer
Agreed. It would be terrible to redo all that.
arlindsay1992
New member
Looks fine to me. 90% of it squeezes out anyway. As long as it's a continuous bead without gaps it'll be fine.
PlethoraOfGuns
Adventurer
Some people say to snug the bolts down, wait an hour, then do a final torqueing. Any merit to that? I ain't got time for that.
PlethoraOfGuns
Adventurer
Instructions and/or directions are really just suggestions.
arlindsay1992
New member
I've done it both ways with success.
ITTOG
Well-known member
This was my preferred method. Less of it will squeeze out. I only snugged it down finger tight. I know some actually used tools to snug it down a little more.Some people say to snug the bolts down, wait an hour, then do a final torqueing. Any merit to that? I ain't got time for that.
PlethoraOfGuns
Adventurer
Hmmm, the fact that less of it will squeeze out makes me think that's the way to do it. I always lay it on pretty thin, and still, so much always oozes out. You gotta have some in the there when you're done to make a seal! I also don't wipe the excess off when installed.
arlindsay1992
New member
It takes very little to make a seal. What's more important than anything else is having clean surfaces. Rubbing alcohol, brake parts cleaner, or acetone can be used for this. Besides this, it's not rocket science. Don't use so much that it drips and falls off inside the engine.
ITTOG
Well-known member
When I said twice as much I was talking about width of the bead, not height. It is still somewhat thin on height, just a wider bead. Thus, not much oozes out.Hmmm, the fact that less of it will squeeze out makes me think that's the way to do it. I always lay it on pretty thin, and still, so much always oozes out. You gotta have some in the there when you're done to make a seal! I also don't wipe the excess off when installed.
PlethoraOfGuns
Adventurer
More things to push through.
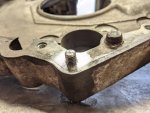
Cleaned up the bell housing adapter and needed to remove this broken bolt. There have been several broken bolts on this engine. It was in pretty poor shape and neglected over the years. Glad we were able to fix all of them.
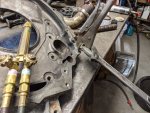
This one was easy as it didn't break flush. Let it soak in Aerokroil for a day or so. Ground the two sides of the bolt flat, stuck vise grips on that bad boy, and heated up the aluminum adapter with torch. Cranked it out with a big wrench for leverage. Felt soooo good...
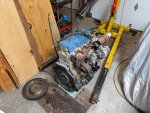
And today's super exciting part, got the engine off the engine stand! That's right, no more engine stand! Now need to figure out how to read the flywheel to tell the new tachometer how many rpm's we're cooking at.

Cleaned up the bell housing adapter and needed to remove this broken bolt. There have been several broken bolts on this engine. It was in pretty poor shape and neglected over the years. Glad we were able to fix all of them.

This one was easy as it didn't break flush. Let it soak in Aerokroil for a day or so. Ground the two sides of the bolt flat, stuck vise grips on that bad boy, and heated up the aluminum adapter with torch. Cranked it out with a big wrench for leverage. Felt soooo good...

And today's super exciting part, got the engine off the engine stand! That's right, no more engine stand! Now need to figure out how to read the flywheel to tell the new tachometer how many rpm's we're cooking at.
Last edited:
PlethoraOfGuns
Adventurer
Project tachometer is complete.
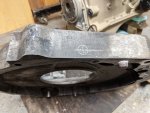
Got the flywheel mounted and took some careful measurements. Removed everything and applied those measurements.
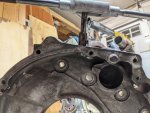
Luckily we had a 3/4"-16 tap laying around for the magnetic pickup sensor.

Got plenty of threads to hold sensor tight. Even ground the bell housing adapter so the lock down nut sits flat.
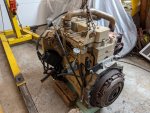
Got the clutch aligned and torqued down. Looks like we're all ready to install in the van. Just need to add filters, fill lines, prime some stuff and she should fire right up! Hopefully we'll have an easier time priming with the piston lift pump, because the old diaphragm lift pump was terrible.

Got the flywheel mounted and took some careful measurements. Removed everything and applied those measurements.

Luckily we had a 3/4"-16 tap laying around for the magnetic pickup sensor.

Got plenty of threads to hold sensor tight. Even ground the bell housing adapter so the lock down nut sits flat.

Got the clutch aligned and torqued down. Looks like we're all ready to install in the van. Just need to add filters, fill lines, prime some stuff and she should fire right up! Hopefully we'll have an easier time priming with the piston lift pump, because the old diaphragm lift pump was terrible.
Last edited:
PlethoraOfGuns
Adventurer
Thanks. Hope it all works well. The pick up sensor counts the teeth. The tach gauge has dip switches on the back to program the amount of teeth it's supposed to count.
Similar threads
- Replies
- 19
- Views
- 1K
- Replies
- 7
- Views
- 1K
- Replies
- 5
- Views
- 571
