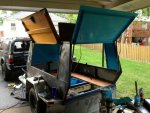
DeMented Toys $500 Excellent Adventure Trailer Build

DeMented Toys

Adventurer
What kind of screw jacks? Tell me more. The jacks I got are rated at 3500lbs and the whole trailer empty with batteries and solar just weighs 1100lbs. It's getting ready to loose weight too when I start cutting off unnecessary steel, lightening up the frame with circular "go fast" holes, removing steel to add lexan window ports and cutting holes for large deck plates to house 12v cooling fans (from a computer store, perfect). The jacks I got are also well made, which makes them heavy to be carrying around. :)
 

DeMented Toys

Adventurer
304 Ah of power is quite a bit. The batteries are 38 Ah each and weigh around 25lbs each. I've crunched the numbers and yes, for a weekend warrior camping trip I wouldn't come close to needing that much. For a few weeks off the grid in the winter, 304 Ah is going to be great. With full sun in the summer the solar panel will help replace some of the power as I use it. In the winter with short overcast or snowy days the panel isn't going to help much...
304 Ah should also be good for running power tools on my ranch without having to fire up a generator.
When I'm not doing military stuff I'm a metal smith/artist. It's going to be great having 304 Ah of quiet, clean, semi-renewable power available to run lighting, video and media equipment, fans and whatever else during those long weekend art shows....
The batteries have a good power to weight ratio. I could pull some out for short weekend trips and put them back in for longer adventures, ranch work, or art shows, but that's silly. The trailer is good sized with a 4'x8' floor. It weighs in around 1100 lbs with batteries under the floor. That leaves me with 2400 lbs of weight carrying capacity. It pulls very well, although I've never loaded it even close to max capacity. So for now, I'm sticking with 304 Ah. Once I get the wiring all figured out, fuse box, charge controllers, lighting, 12v power outlets, inverters, and then do a few long trips and art shows with it I can adjust fire as needed. The way the batteries fit under the floor I can fit 6 together into one bank, then I have 2 that have to go into a separate compartment. I was thinking of just pulling the 2 batteries that don't fit in the bank, but figured that since I already have them I may as well use them. So it's either 304 Ah at about 200 lbs, or 228 Ah at about 150 lbs.
 

haminawag

New member
Battery capacity

Well, that explains it. You DO need that much power. Great work so far, I knew you were a metal smith, that steel framing is just too perfect for you not to be. A suggestion from me would be for you to make some metal straps to go under the battery boxes then up to the frame and weld 'em, if you haven't done that yet, or something similar to support the weight of those heavy, BOUNCING deep cycles.

A Jack-Screw: To give you a VERY SIMPLE example let's suppose you want a jack on one corner of the trailer, you weld a big beefy nut to the outside corner of the frame, then you take a 2 or3 foot long piece of all-thread that fits the nut, screw it down through the nut until the all-thread touches the ground, place a pad under the all-thread so it doesn't screw into the dirt, and keep screwing, it'll lift that corner of the trailer right up. Easy-Peasy. No more cranking those annoying trailer jacks that take forever, just ZIP-ZIP with a power drill and it's level. Weld a nut into each end of a piece of pipe and weld the pipe onto the trailer, or make a swing-away for each one so they're not always sticking up, whatever your inventive mind can come up with to suit your needs. Hopes this helps. Now that'll be a dollar.:ylsmoke:
 

haminawag

New member
Now about that paint job

I realize I'm an old schooler, (and proud of it) But I think it'd look really neat if you did the trailer in a Vietnam era three-tone camo paint scheme, brown, sand, & green like they put on the F-105 Thunderchiefs & F-4 Phantoms back in the day. Then maybe you could do that Toyota truck in the same manner. Krylon makes those camo colors in rattle cans and they do a surprisingly good job, very durable too. I've used them back in Albuquerque where they sat out in that beating-down sun for months on end, and I've used 'em here in central Illinois with its climate extremes, I recommend them. Almost makes me wish the paint on my Wagoneer was shot. Stay cool.
 

haminawag

New member
GUYS, GET THIS CATALOG

I almost forgot to mention Surplus Sales of Nebraska, awesome company with a great paper catalog full of all sorts of mechanical, electrical, electronic, hydraulic, pneumatic stuff, easy prices too, name it and they have it, usually.
http://www.surplussales.com/
 

DeMented Toys

Adventurer
ImageUploadedByTapatalk1378078756.993440.jpg
I got some of the lighting wired and 12v fans installed behind 8" deck plates.
We survived the inaugural test run! A weekend on the Current River and an Ozark Monsoon.
 

haminawag

New member
Awesome

The trailer looks awesome, I like the diamond plate wrapped all the way around the front and sides, and the tackle-box up front blends the whole thing together very nicely.:ylsmoke:
 

DeMented Toys

Adventurer
ImageUploadedByTapatalk1378425267.547117.jpgImageUploadedByTapatalk1378425281.564886.jpgImageUploadedByTapatalk1378425288.315062.jpg
Expedition Trailer - Operation 12v wiring

Also, I am now running 160 watts of solar panels on the roof for this 304 Ah (-50% = 152 Ah of useable power) ;)
 

DeMented Toys

Adventurer
ImageUploadedByTapatalk1378693024.468105.jpgImageUploadedByTapatalk1378693032.384893.jpg
A 20# propane cylinder fits perfectly beside the tongue box. Awesome! Instead of building a fancy bracket for the tank I'm just going to drill holes in the diamond plate and clamp it to the floor by its base.


DinéMetalworks.com
 

DeMented Toys

Adventurer
Very nice work! If you are interested in a tank clamp, I recommend one of these (being on a budget myself), this is the second trailer that I have put it on.
http://www.amazon.com/Th-112-4BS-Bracket-Tank-Holder/dp/B0037QFNYM/ref=sr_1_3?ie=UTF8&qid=1350247017&sr=8-3&keywords=propane%20tank%20mount&tag=5336653594-20

For the support at the base, I'm using a section of 8" dia. steel pipe with nuts welded to run locking screws

I saw those and they look great. I'm going to try mounting my tank from the bottom only, clamping it to the floor by the base, similar to the locking tabs that hold the tank down on a lot of propane grills. And probably putting a small nylon strap around the tank for good measure. :)
$34 is fairly cheap, but this project is starting to add up quickly. :)


DinéMetalworks.com
 

DeMented Toys

Adventurer
ImageUploadedByTapatalk1378745174.387468.jpg
I had a great solar panel mount until I added 100 watts more panel. :)
Now I'm thinking I'll reengineer. I'll probably ditch the adjustable mount and use a locking aluminum channel to flat mount them. Then I can just loosen one side and lift it to angle them toward the sun. I'm also ditching the lexan raised protector on the front 60 watt panel. It adds weight and wind resistance. I think the panels are designed to withstand hail so they should be fine without it....


DinéMetalworks.com
 

DeMented Toys

Adventurer
ImageUploadedByTapatalk1378954073.109498.jpgImageUploadedByTapatalk1378954085.443050.jpgImageUploadedByTapatalk1378954094.159545.jpgImageUploadedByTapatalk1378954103.959359.jpg
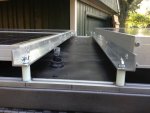
I have reengineered my solar panel mounts. The channels allow me to either remove the panels or tilt them to follow the sun. :)
I put the poly spacers in to lift them off the roof. That will create a little air space to keep the roof cooler and I can more easily hose off leaves and debris from between the panels and roof.


DinéMetalworks.com
 

Forum statistics

Threads
188,443
Messages
2,905,019
Members
230,360
Latest member
TNielson-18
Top