DIY Composite Flatbed Camper Build

The Artisan

Adventurer
Using Kalori roof top 12v AC and 250 ah lithium drop in by Stark. Stark is out of business but they look to be the same as battle born.
See post #213
Thanks your amp draw must not be bad. I am going with a telsa pack when I set mine up. Decided against battery bank and solar. Terrible use to charge a large bank. 2k genset and making an insulated quiet box for it.
Kevin
 
Last edited:

Terra Ops

Adventurer
The panels do a good job at insulating. This keeps the compressor run time to a minimum.
Since the unit and thermostat are over the dinette/bed, I may try hanging a curtain to isolate the sleeping area further.
The fan runs constantly, but its the compressor that is the largest draw.
Where do you buy a tesla pack?
 

jmnielsen

Tinkerer
The panels do a good job at insulating. This keeps the compressor run time to a minimum.
Since the unit and thermostat are over the dinette/bed, I may try hanging a curtain to isolate the sleeping area further.
The fan runs constantly, but its the compressor that is the largest draw.
Where do you buy a tesla pack?

I think a lot of people get them out of wrecked Tesla’s. Lots of people build their own with 18650s though, that’s what makes up a Tesla pack.


Sent from my iPhone using Tapatalk Pro
 

The Artisan

Adventurer
The panels do a good job at insulating. This keeps the compressor run time to a minimum.
Since the unit and thermostat are over the dinette/bed, I may try hanging a curtain to isolate the sleeping area further.
The fan runs constantly, but its the compressor that is the largest draw.
Where do you buy a tesla pack?
My panels are 2" So around R8 + ceramic bead coating used in gov applications claim another R14.
Ebay or breakers. About $1200 24v@ 233
50lbs per pack.
Kevin
 

rowanoverland

New member
Thanks for sharing all these details of your experience in building this.

Was the 2400 lbs dry weight all in, with ac, battery, furniture, cabinets, toilet, etc? Or was it the empty shell?
 

Terra Ops

Adventurer
Yes, that is all in. Water tank empty.
While this weight is over 1000 lbs lighter than my previous camper, it still came in higher than I'd hoped.
Anybody have thoughts or experience regarding this weight number or type of construction?
I was wondering if a combination of wood framing and epoxy bonding of foam board/frp would be
substantially lighter.
 
Last edited:

DzlToy

Explorer
While many companies still use it, I would steer you away from wood completely. Modern composite technology is fantastic and it is quite easy to build your own panels if you are a DIY kind of a guy. Wood rots, twists, burns and bugs eat it. You may say, "Psshshhhtt", but go look at an old boat or an Alaskan camper from the 80s or 90s. Most are falling to bits, even when skinned or fiberglassed.

This is where plastics pay dividends. They take 5,000 years to break down in a land fill (don't buy plastic or recycle if you do :). Undesirable for composting, very desirable for the life of an RV.

Many SIP (Structural Insulated Panel) manufacturers use EPS and fiberglass to construct their panels. A SIP (not SIP Panel) has high strength torsionally, in tension and in compression. Fiberglass is readily available in many forms, including sheets if you are not inclined to hassle with wet layup. The key IMO, is the resin. Spring for the good stuff, use less of it. This saves massive amounts of weight on a large structure like a camper box. Bond fiberglass or phenolic sheets to XPS or EPS foam sheets and bond angle iron (alloy or steel) to the edges and corners if you want a bit of easy to install protection. There is nothing to weld, no wood and thus nothing to rot, warp, nail, screw, etc.

Building using this method creates an incredibly lightweight yet strong structure with superb insulating properties (noise and heat). Calculating the weight of the cloth, epoxy resin, and foam core gives you a sub 500 pound lifting roof camper shell that measures 10 feet long and 48" tall when collapsed. An innovative lifting mechanism keeps weight down and that calculation includes two additional layers of cloth on the exterior to tie all of the panels together, negating the need for edge moulding. Wood and steel are your enemies for many reasons and eliminating them would allow you to put your next camper on Weight Watchers.
 

Terra Ops

Adventurer
Thanks for the response, that was a good summary of why I posted this build thread :)
If you look at page 1, you will see the 4" aluminum L channel. While its strong, it does add substantial weight.
After reading this article http://www.truckcamperadventure.com/why-wood-frame-construction/ it made me wonder if wood framing bonded with the frp and foam,
would provide a lighter box. It would be easier and cost less.
I get all the reasons not to use wood, but if sealed properly, it should hold up for a long time. This leads to another thought of using composite studs. Have not looked into this
yet, but I'm sure its pricey. Weight may also be a factor?
I initially was going the wet lay up route, but when I came across panels, this seemed less laborious and provided a finished exterior. Also not sure about the strength at the joints.
It would be interesting to hear thoughts regarding pros and cons of wood regarding weight.
 

DzlToy

Explorer
If, by composite studs, you mean something like an HDPE plastic "lumber", I would steer you away from that also. High Density plastics are quite heavy, certainly compared to a pine or fir 2x4 stud, and they also have quite a high coefficient of expansion. I would prefer not to have that in my walls.
 

Terra Ops

Adventurer
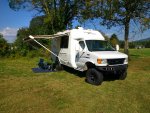
Attended my first Van Rally this weekend. It's very cool that Ashville Van Life takes an all inclusive approach to these gatherings.
Lot's of cool rigs and interesting friendly people. https://www.ashevillevanlife.com/
 

Attachments

  • IMG_20190920_162211187_HDR.jpg
    IMG_20190920_162211187_HDR.jpg
    2.6 MB · Views: 112
  • IMG_20190921_091641265_HDR.jpg
    IMG_20190921_091641265_HDR.jpg
    1.4 MB · Views: 109
  • IMG_20190921_091715009_HDR.jpg
    IMG_20190921_091715009_HDR.jpg
    1 MB · Views: 104
  • IMG_20190921_091740512_HDR.jpg
    IMG_20190921_091740512_HDR.jpg
    501.1 KB · Views: 102
  • IMG_20190921_113100497_HDR.jpg
    IMG_20190921_113100497_HDR.jpg
    1.4 MB · Views: 101

Terra Ops

Adventurer
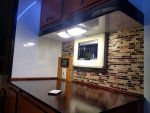
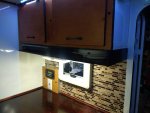
Added a few mods; shelf below the cabinets for cooktop storage and whatever else is needed, hard wired led lights in the bathroom and above counter.
This makes a huge difference, just had to determine how to run the wire to existing line and tap in. No more batteries.
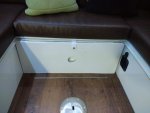
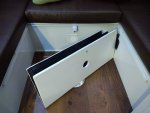
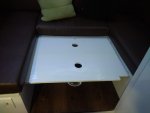
Also re-made the rear bed support. The table which also doubled as the support had been stowed below the step floor. While it was tucked away nicely, it was
difficult to get out. So it was cut in half and repositioned. A smaller table that fits more easily in the step floor has taken its place.
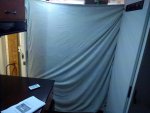
Seems like the more we use it, the more adjustments are made for ease of use. Also tried the blanket idea to isolate the rear bed for AC power reduction. It definately
makes a difference. Just need to try it on a hot humid night.
 

Attachments

  • IMG_20190914_085241506_HDR.jpg
    IMG_20190914_085241506_HDR.jpg
    906.2 KB · Views: 153
  • IMG_20190914_085255593.jpg
    IMG_20190914_085255593.jpg
    1.3 MB · Views: 152
  • IMG_20190914_085548388.jpg
    IMG_20190914_085548388.jpg
    436.9 KB · Views: 148
  • IMG_20190914_085641639.jpg
    IMG_20190914_085641639.jpg
    500.4 KB · Views: 147
  • IMG_20190914_085704969.jpg
    IMG_20190914_085704969.jpg
    294.4 KB · Views: 143
  • IMG_20190914_085723250.jpg
    IMG_20190914_085723250.jpg
    511.8 KB · Views: 139
  • IMG_20190914_090037487.jpg
    IMG_20190914_090037487.jpg
    905.9 KB · Views: 134

Terra Ops

Adventurer
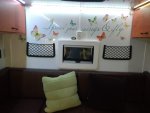
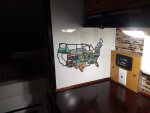
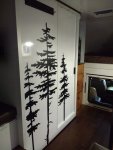
It's been a little over a year since completion. Very happy with the lithium batteries and the insulation of the panels. Still contemplate on how to make
a lighter box. However, its time for some decoration. This part was a little tricky since my wife and I have different tastes. So, we each picked out some décor and
agreed on the "States visited map". One thing to note about the FRP, it is also a dry erase board. We have yet to doodle on it.
 

Attachments

  • IMG_20190914_085326950.jpg
    IMG_20190914_085326950.jpg
    562.2 KB · Views: 110
  • IMG_20190915_131551226.jpg
    IMG_20190915_131551226.jpg
    769.2 KB · Views: 116
  • IMG_20190924_160150508.jpg
    IMG_20190924_160150508.jpg
    871.7 KB · Views: 117

rruff

Explorer
If you look at page 1, you will see the 4" aluminum L channel. While its strong, it does add substantial weight.
After reading this article http://www.truckcamperadventure.com/why-wood-frame-construction/ it made me wonder if wood framing bonded with the frp and foam,
would provide a lighter box. It would be easier and cost less.

The aluminum you used might be thicker than necessary, but with proper strength for the application they won't be that heavy. I made my first camper with wood framing and foam, with luan interior and hand-laid FG exterior. It worked fine and was light. The latest one has wood for hard points and edges but is otherwise just hand-laid FG over XPS. I like hand laid for the freedom of doing curves and reinforcements. Any way you do it, all the stuff inside the shell is what makes it heavy ... ;)
 

Terra Ops

Adventurer
The aluminum you used might be thicker than necessary, but with proper strength for the application they won't be that heavy. I made my first camper with wood framing and foam, with luan interior and hand-laid FG exterior. It worked fine and was light. The latest one has wood for hard points and edges but is otherwise just hand-laid FG over XPS. I like hand laid for the freedom of doing curves and reinforcements. Any way you do it, all the stuff inside the shell is what makes it heavy ... ;)

Yeah, no doubt there is not much you can do about the inside stuff, unless you want to go bare bones.
Regarding the aluminum channel. I noticed there is a substantial weight difference between the structural 4" and architectural 3". I went with the 4" to have enough overlap for the 2" panel thickness. I was told that the architectural was not available in the 4". What I've been thinking if I do another build, is to go 1.5" wall thickness to accommodate the 3" channel.
I've also been looking into FRP channels. I could probably knock off several hundred pounds. https://bedfordreinforced.com/produ...&utm_medium=CPC&utm_campaign=StructuralShapes
 

Forum statistics

Threads
188,007
Messages
2,901,050
Members
229,355
Latest member
BDM66

Members online

Top