PaulJensen
Custom Builder
Portable Shower
I have owned a Zodi Hot Camp shower long before I got the Jeep... With some extended trips on the horizon, one luxury to look forward to will be a nice hot shower... The Zodi as it came from the factory is more bulky with the connected hoses than I have space for in the location where I will stow it...So like almost everything else, I modified it...
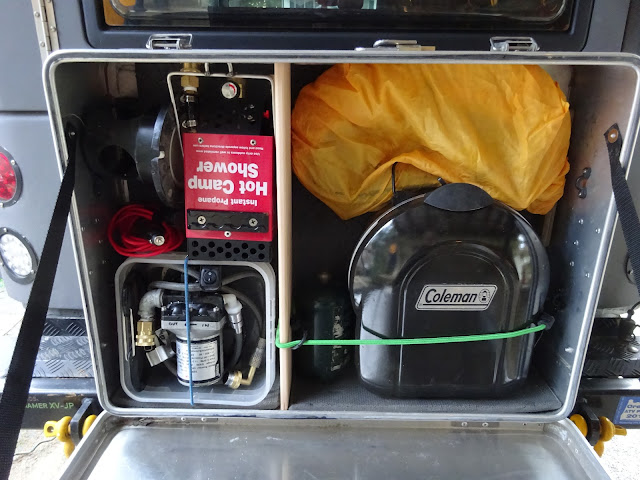
(above) The Aluma-Box on the rear door is home to the Zodi and a Coleman Grille... The yellow bag holds shower water hoses and some supplemental propane hoses...
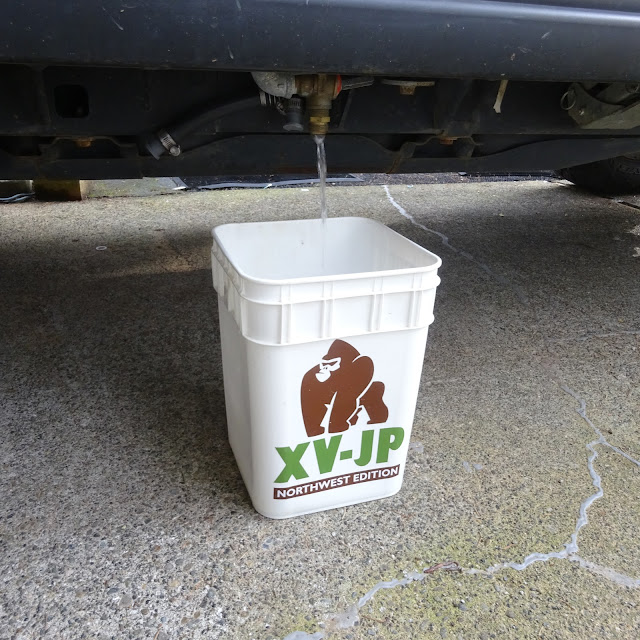
(above) Before setting up the shower, the water bucket is filled from the drain tap on the water system... Easy...
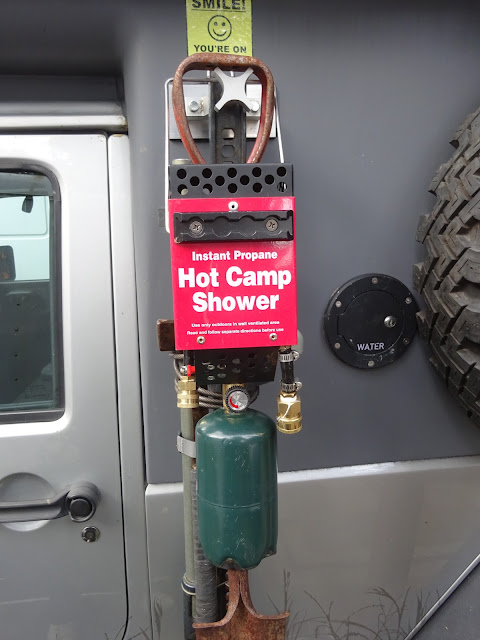
(above) Next, the shower heater unit is hung up...Here on the driver side will likely be the preferred location... The bail handle hooks securely over the shovel handle and the heater is far enough away from the camper body to not worry about heat damage... Another concern is the shower water on the ground... On the driver side it will be on the opposite side of the Jeep that will be the outdoor living room... The Foxwing Awning will provide overhead cover and poles will be handy to attach a simple tarp shower enclosure...
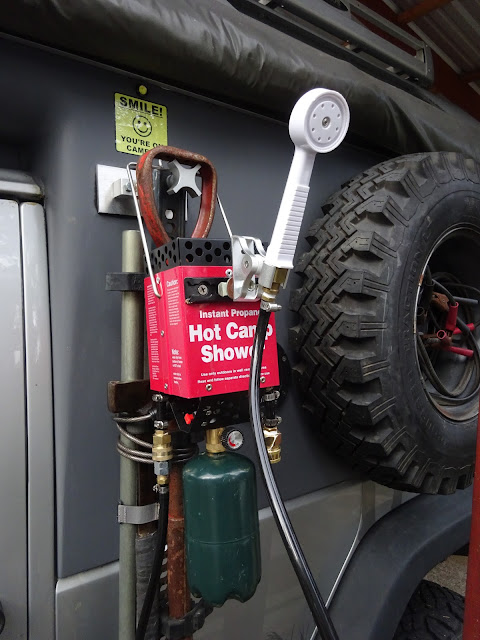
(above) The factory water heater hoses were cut and pressure washer Quick Connects are added to all the hoses... The shower head is as simple as it gets... The shower head mount I found on Amazon and attaches with L-Track fittings...
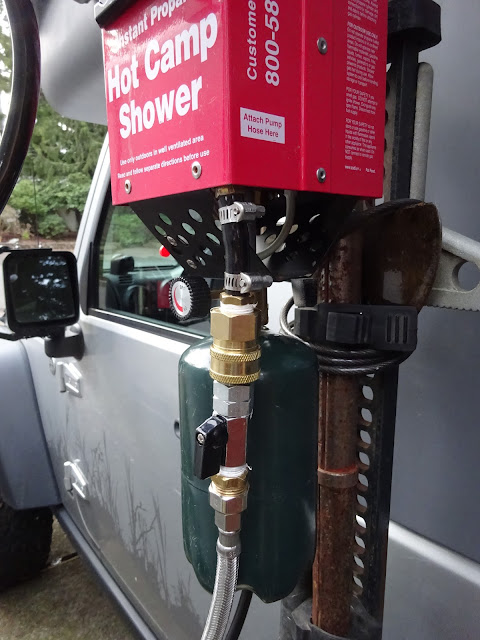
(above) The braided stainless steel 10' hose from the water pump, in addition to the Quick Connect, has a small ball valve to control water flow to the heater core...
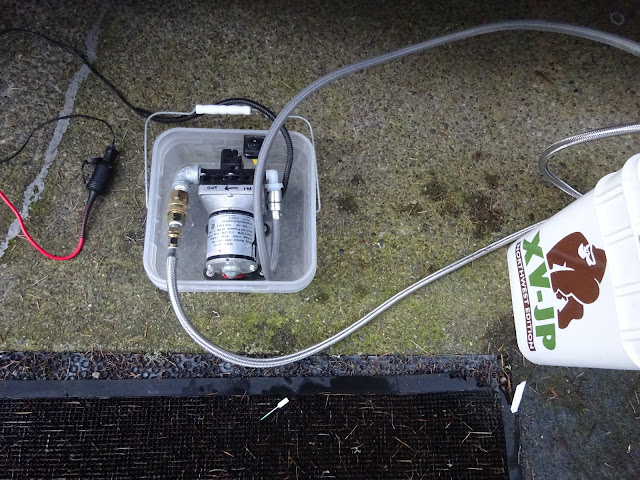
(above) The water pump was from another vehicle that I over-tighten a fitting on and broke the inlet connection... A new fitting was epoxied into the damaged inlet... Being non-pressured it works fine... A simple switch goes from the pump to a 12 volt cigarette lighter plug... The water pump is mounted with screws and bolts and a stainless steel backing plate to the plastic bucket... The bucket has drain holes...
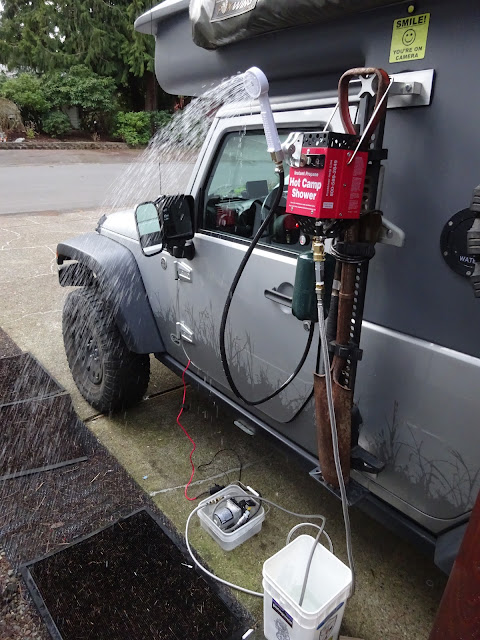
(above) With the water pump plugged in and turned on, the water supply hose is dropped into the water bucket... This is the flow through the system... Starting with cold water, I like to turn the pump and heater on, and loop the water back into the bucket for a few minutes until it is the perfect shower temperature... It takes about four minutes to deplete the water bucket with the ball valve all the way open... To disconnect the system and stow it all takes a couple of minutes...
I have owned a Zodi Hot Camp shower long before I got the Jeep... With some extended trips on the horizon, one luxury to look forward to will be a nice hot shower... The Zodi as it came from the factory is more bulky with the connected hoses than I have space for in the location where I will stow it...So like almost everything else, I modified it...
(above) The Aluma-Box on the rear door is home to the Zodi and a Coleman Grille... The yellow bag holds shower water hoses and some supplemental propane hoses...
(above) Before setting up the shower, the water bucket is filled from the drain tap on the water system... Easy...
(above) Next, the shower heater unit is hung up...Here on the driver side will likely be the preferred location... The bail handle hooks securely over the shovel handle and the heater is far enough away from the camper body to not worry about heat damage... Another concern is the shower water on the ground... On the driver side it will be on the opposite side of the Jeep that will be the outdoor living room... The Foxwing Awning will provide overhead cover and poles will be handy to attach a simple tarp shower enclosure...
(above) The factory water heater hoses were cut and pressure washer Quick Connects are added to all the hoses... The shower head is as simple as it gets... The shower head mount I found on Amazon and attaches with L-Track fittings...
(above) The braided stainless steel 10' hose from the water pump, in addition to the Quick Connect, has a small ball valve to control water flow to the heater core...
(above) The water pump was from another vehicle that I over-tighten a fitting on and broke the inlet connection... A new fitting was epoxied into the damaged inlet... Being non-pressured it works fine... A simple switch goes from the pump to a 12 volt cigarette lighter plug... The water pump is mounted with screws and bolts and a stainless steel backing plate to the plastic bucket... The bucket has drain holes...
(above) With the water pump plugged in and turned on, the water supply hose is dropped into the water bucket... This is the flow through the system... Starting with cold water, I like to turn the pump and heater on, and loop the water back into the bucket for a few minutes until it is the perfect shower temperature... It takes about four minutes to deplete the water bucket with the ball valve all the way open... To disconnect the system and stow it all takes a couple of minutes...
