FG84 Camper Build

Maninga

Adventurer
Hey Glen. Getting them made in stainless from this guy. He's somewhat brief and focused, but seems to get what I'm after.

http://www.stevescustomwelding.com.au

Haven't managed to get up to the place you got the spare fuel tank from yet. Guy did come round measuring up for custom fuel tank though, 350l we think will fit, will see how these water tanks work first.
 

Goldanfish

Observer
Maninga
, be careful of stainless tanks if you make of thin materials they will crack with rough road vibration, just be aware.
John.
 

Maninga

Adventurer
Tanks are being made from 2mm material & pressure tested. Will be installed such that it's fully supported on the bottom, cabinets and rubber ties in place so it little-no movement/abnormal stresses.

I saw the tanks today when I was dropping off the water level senders, they're quite big and weigh a bit, will take up a fair amount of space inside but believe it's worth it. Pick them up in a weeks time.
 

Maninga

Adventurer
It's been a busy month, and though I seem to spend a lot of time with the truck, it doesn't seem like I get very far. Most of it's been bits of detail, gluing stuff together (using Sikaflex 11FC, sofar gone through 8 tubes to date) and sitting in there thinking about my next step. Really need to get organised, start something and stick with it until it's finished.

Some progress photos I took on over Easter. It's a little further along than where the photos show, but it's currently full of stuff as I've moved out of the boatshed where it was being worked on.

To get the shower/bathroom area to work, haven't seen a shower pan that fits out needs/shape. So I've started making my own. My original intention was to just fibreglass it, but seeing the walls Paul Jenson did I'm going to try and replicate something similar for the pan. Will have to see how it goes.
Platform is for a Natures Head toilet. Under construction
image.jpeg

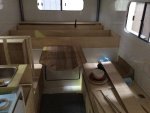
Ignore the piece of ply on an angle, I'd put it there temporarily. But area where toilet/shower is going in
image_2.jpeg

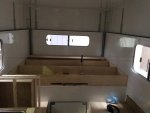
Bed area with the sides glued in. Centre dividers are removable. Have the top platform cut out for it ready for a piano hinge to be added, but no photo as yet. It really made a difference to the appearance.
image_3.jpeg

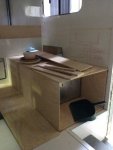
Table comes out from under the bed. It worked out to be perfect height for us (part planning, part luck), it shows about 850mm but is 1400mm long, using the rest as a cantilever style arrangement so don't have to use a table leg. Want it to be hidden unless needed
image_4.jpeg

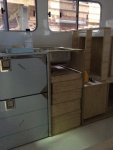
Some drawers ready for hinges. For the seat off to the right, one of the drawers is being made into a wine cabinet, will add supports so 8 bottles of wine can be held securely in place. Heather just rolls her eyes at this, but it's a matter of priorities. I expect another case or two will be stored in the back for winery visits along the way.
image_1.jpeg

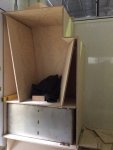
One of the seating areas. Still have a cabinet to make for the closest end, will hold the cooktop, cleaning supplies, bin. Has a 250l tank hidden inside it, closest end will be used for a shoe rack.
image_5.jpeg

Pantry area, small coat rack, and a 150l water tank. Thinking now about moving the water tank outside and putting the batteries there.
image_6.jpeg

Still left is getting drawers installed, fronts made up, finish bed, finish shower area (have to seal the plywoood), make up a door for shower area and run wiring/water lines. Have the lithium batteries sitting in front living room, solar panels ready for install, inverter, MPPT controller, bunch of other stuff awaiting final quotes (Webasto has been especially slow, been waiting around a month for their final parts list and answer to some questions). Build is on hold for around a month though, have 3 moves coming up and laundry list of jobs that need doing
 

Maninga

Adventurer
Looking good! not sure about that filing cabinet though? ;)

Hahaha.... I'm still being convinced on it too. What sounds good via specs and readings doesn't always turn out to be true. In any case, not much we can do with it at this stage, way too much work to remove it. Still, it does mean we'll have a massive amount of counterspace, maybe grow some basil plants and other herbs. Fresh caprese salad does sound good at times
 

Fender

New member
Maninga,

It is looking awesome! I am currently figuring out my bed/under bed storage area. Ideally I would still like to be able to sleep in the bed with the top down but my bed is in the front which leaves me with ~ 170mm less than you due to the frame hump.

What will be the height from the mattress to the ceiling with the top down? In addition what are the heights of the under bed storage and the height of the externally accessed storage? I assume with the top down you have approximately 1575mm of inside height.

Thanks!
 

Maninga

Adventurer
Thanks Fender, I'm quite happy with how it's turning out and can't wait to start working on it again. Sorting out the new workshed over the coming few weekends.

Height inside with the top down you're right in the ballpark (I can't remember exactly ATM, it's around 1600mm). Will have around 600mm free when sleeping in bed with the roof down, bed platform is 700mm from the floor, under bed storage 190mm, mattress ~70 plus blankets etc. External access storage is 2010x1520x670mm (LWH).

Are you making the top of your camper in line with the truck roof, or a little higher? How high's the camper going to be inside with roof up/down?

Joe
 

Fender

New member
I am really starting to see how the design phase could drive one crazy!

The inside height will be 1918mm with the top up and 1511mm with the top down. Subtract ~ 170mm off both those numbers for the bed area.

At the moment the camper height when down is designed to match the top of the truck cab. I suppose I could go another 50mm higher and match the top of the lights on the truck cab roof. I was also thinking about 711mm for space above the mattress when the top is down and a mattress thickness of 210mm! Are you sure your mattress is only 70mm thick?! :)
 

Maninga

Adventurer
Hahaha!!! Yep, I spent close to 2 years thinking about this even before I had the XP fail and decided on the custom build route. And I'd go and change a bunch of things right now if I had the chance to.

Hmmm, 100mm. It's an Ikea one we chose as it's nice and light, fairly comfortable, easy to lift, and we can add the Froli springs under it if needed.
http://www.ikea.com/au/en/catalog/products/70272342/#/80272346

I was originally planning on having the camper the same height as you've got it. All dead set certain on it, so it was as low profile as possible etc, until I realised one thing. I wouldn't be able to have the seats at a comfortable height and see out the windows. Threw out my ideal scenario then, went for more comfortable long term.
 

Maninga

Adventurer
It's been a couple of months since I last did anything to the truck, every weekend since moving has been flat out cleaning up the new place. Between getting the trees back under control, fixing the shed roof, making garden beds, compost bins, general unpacking, it's been a while since have had a day free to do nothing. Still, the truck's happy in its new home, even if it is a bit tight for it.
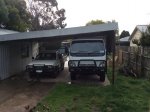
image.jpeg

There's about 1.5cm clearance between the carport roof and camper. Will have to modify the carport when I put the roofracks and solar panels on, raise it up a foot or so.

One of the things I spent time on was making the workshed work a bit better. Before there were a couple of old wardrobes and a small bench full of gunk. New workspace, took all the parts from the camper quite happily giving me room to move around. Far easier now to find stuff too.
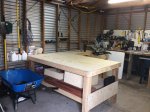
image_1.jpeg

Back to the camper. I decided I'd better finish off the cabinet with kitchen sink, getting the drawers installed. I'd made the carcass and drawers while at the boatshed, it was not just a matter of fitting them. One of the many things I'd never done before, I'd built it to be a tight fit but the base drawer was a bit too much of a tight fit. Sanded 1-2mm off the drawer, fit nicely. The rest of them went in, but wasn't sure about the top one. Clearance between the sink the drawer might have been a bit tight, but wanted to see what it'd be with the benchtop in place. No photos of the drawers.

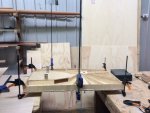
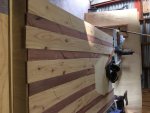
Benchtop I'd bought a few lengths of redgum, all rough sawn but largely straight and flat (workshop picture above, red boards on the shelf). Importantly, they were all the same thickness. I'd been thinking of these ever since I picked them up, how to get them smooth and made into a surface that'd work for me. Found a few places with thicknessers, but they were only open during the week (when I'm not around) or would take a few hours to get to. Figured it couldn't be too hard really, used the circular saw to level out the edges, belt sander with 80 grit paper in it, and just started at it. And it worked, started getting them nice and smooth. Running a straight stick along it to find any bumps, got it nice and straight. Made some grooves down the middle of the boards for some 1/2" ply, some 3' lengths of ply offcuts were glued in and compressed down to make this.
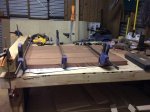
image_2.jpeg

Bit more sanding with 120 and 240 grit paper came out like this. Still have a couple of features to smooth/fill with clear epoxy, but getting ready for coating.
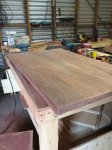
image_4.jpeg

Never done it before, and learnt a lot during the process of making it. Found the circular saw blade was too thin, so would bend and seize up (it's really heavy/dense timber, benchtop weighs ~50kg). Batteries for the saw only lasted 10 minutes, second one couldn't charge fast enough and the tablesaw I'd been lent was just dangerous so used it as little as possible. But the biggest issue was the dust, fine red stuff that got into everything. It'll take me months to get it out of stuff, the benchtop now has a red tinge to it. Still have another one to make, need to get some more redgum though.

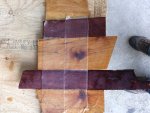
While I was working with the table saw, I had some redum and cypress offcuts. Ever since I saw the photos of Paul Jensons FG build with the bathroom wall panels, I've wanted to incorporate something similar. Had looked around for some thin timber pieces, but there's a limited supply around me. Hmmm... Tablesaw, offcuts, nice looking timber, what's a person to do?
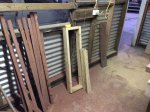
image_3.jpeg

They'll be used for the shower pan. Though Heather saw me making it, now wants me to make the camper floor the same way.
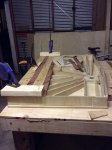
image_5.jpeg

Work to continue next weekend
 

Maninga

Adventurer
I found myself thinking about the heating/cooking/hot water again while making the benchtop. I'd been talking with webasto a lot about the gear prior to moving, just restarted again as have some time now.

I've got two options given to me.
X100
Isotemp Basic 40l
Airtop 2000
Thermo top E

Option 2
X100
Isotemp Basic 40l
Thermo top pro 90
Kalori air heater (connects to water)

Both have thermostats for temperature, both provide hot water. I'm wanting the engine pre-heat to work, not likely to be used often but nice to have it there. Prices are essentially the same.

Thoughts?
 

Maninga

Adventurer
I did a bit of a test run overnight on sealing the timbers with epoxy and added some fibreglass strip in just for foot measure. I realise the cloth is a bit wonky, but more concerned about the milky colouring.

image.jpg

I'm using west systems epoxy, 105 resin & 207 hardener using their 3:1 ratio. I did it towards the end of the day, and it was around 0c overnight, could that be my issue? Or is there something else I should be doing?

This is what it'll be used on
image.jpg
 

Forum statistics

Threads
188,217
Messages
2,903,949
Members
229,805
Latest member
Chonker LMTV
Top