FG84 Camper Build

fluffyprinceton

Adventurer
I'm guessing from the look of it your fiberglass cloth is 6oz( 203 grams/sq. metre) or thicker. If that's the cloth weight it looks like it should...
4 oz (135 grams/sq. metre) cloth is more transparent & easier to fill the weave and fine for sheathing/sealing with more abrasion protection than just epoxy. A varnish coat over the cloth (with the weave filled with epoxy) usually helps make it transparent. You need a non-epoxy varnish coat to protect against UV rays - if inside you can just go straight epoxy.Moe
 

S2DM

Adventurer
I did a bit of a test run overnight on sealing the timbers with epoxy and added some fibreglass strip in just for foot measure. I realise the cloth is a bit wonky, but more concerned about the milky colouring.

View attachment 290210

I'm using west systems epoxy, 105 resin & 207 hardener using their 3:1 ratio. I did it towards the end of the day, and it was around 0c overnight, could that be my issue? Or is there something else I should be doing?

This is what it'll be used on
View attachment 290211

That cloth doesnt look totally saturated to me, which is odd for 4-6 oz cloth, it should saturate very easily. How are you applying the resin mixture, chip brush, squeegee or roller? 18oz glass will go clear if its saturated thoroughly.

I don't think it will be an issue with epoxy, it bonds very well, but some would do a hot coat first on the bare wood and then coat with the glass after the hot coat has tacked, just to ensure good wood penetration.
 

Maninga

Adventurer
I was more concerned about the epoxy, I've a fairly large hardwood table to cover & seal. The epoxy turned out fine about 5 hours later, I think with the cold it just took a lot longer to cure/harden and ended up clear after some time in the sun. Need to learn a bit more patience.

Fiberglass is 4oz tape. I'll set up a better test run in 2 weeks when I get back from a trip away. Have a 1m wide roll sitting there waiting for me to open up, what I'll be using for shower floor, and use to play with.
 

Maninga

Adventurer
Made some progress the last few weekends. Picked up some new redgum from a furniture maker (he normally doesn't sell but had excess stock, plus was interested in the project) to make up a second benchtop for the Webasto cooker, cabinet to go in it, and really just fixing some stuff together.
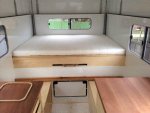
image.jpg

Will make the cutouts for sink and cooker soon, finish trimming them up and add polish to seal/bring out the color. Want to pick up a tap and some plumbing parts before start cutting into it though, make sure it all fits together properly. Door faces also need to finish off, they're started but haven't gone too far yet.
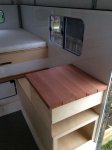
image_2.jpg
Cooktop just fits inside this across the front. Have drawers made for cleaning gear and shoe racks underneath.
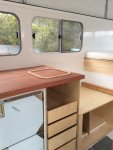
image_3.jpg
Seat here has big drawer made under either for dirty laundry or wine (I'm thinking wine, wife laundry). Next to it will be space for something, I've been thinking lately about whether I move the second internal water tank and put the lithium batteries there, or use this space for them.
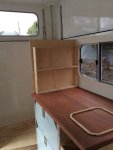
image_4.jpg
Will make a bit of a spice rack against the bathroom wall, could be used for a bunch of things.

Main pantry area/second water tank. Still got a bit of work to go in here. One weekend I'll think about finishing it.
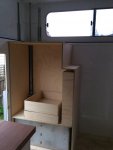
image_5.jpg

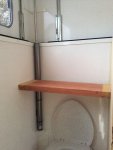
Bathroom space. The shower pan I'd made up, decided I didn't like it and had to go. Wanted to keep the base sheet I'd used though. I'll say one thing, I've been using Sikaflex 11FC as my glue, that stuff glues up well. The marine ply I'm using preferred to delaminate rather than the glue. Around the same time, I'd been looking at photos of Spudboys MAN truck for sale and picked up it used a reticulated shower. Hmmmmm. Why not use something similar myself. Way I'm thinking of doing it though needs a sink, found one online I like so made a counter from redgum and cypress to suit. Means I'll also need to put the toilet on rails and work it in with new shower pan.
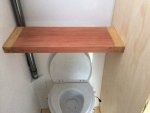
image_7.jpg

image_6.jpg

Still lots left to do.
- Overhead cabinets
- Shower pan
- Pantry
- Electrics
- Plumbing
- Solar install
- New fuel tank
- Move battery bank. Curious about making it a lithium bank to tie in with house batteries and use same Sterling alternator charger
- Install hot water service and internal heating (thermo top 90 unit with 40l hot water clorifier)
- External toolboxes
- Front/rear winch
- Towbar
- Upgrade truck seats

May not go as fast as I'd like for the next couple of months. Probably like many on a build this big, I borrowed money to get the truck. If I'm careful, in 3 months won't owe anything on the build. That's pretty tempting. Should then be able to have it ready by Feb for the insurance company to inspect and get appraisal.
 

Jeep

Supporting Sponsor: Overland Explorer Expedition V
I love the use of the different tones of wood, when ever we travel I always like to check out the local wood work especially when it's so physically attractive. I think it adds a lot of character to an interior and like to see it incorporated with some modern lightweight building practises, i.e. powder coated aluminum cabinets with wood doors, drawer faces, stuff like that. What clarifier are you going to be using?
Cheers,
Mark.
 

Maninga

Adventurer
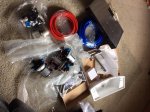
We've got more parts. It's been a slow month with not much work being done on the camper, a couple of weeks away with family gatherings and birthdays, but able to get back into it now. More parts are on order, but a few of the current ones ready to be added in

Plumbing
image.jpg
Hot water
image.jpg
Winston Lifepo4 batteries
image.jpg
Thermotop 90 wih radiator
image.jpg
Diesel cooktop
image.jpg

More pieces on the way and some more to buy this month. Have a couple of weeks off next month, trying to get as much done as possible to have stuff lined up for me to work on it.
 

Maninga

Adventurer
Joe are the actuators hydraulic? How do you insure they rise at the same rate and don't bind?

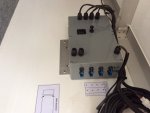
12v electric. The control box connects the remote control and actuators together, dials are used for manual speed adjustment both up and down. Works alright, but need to adjust them every few months as they get out of sync. Haven't had them bind up though.

image.jpg
 

Maninga

Adventurer
There's some circuitry involved, certainly. I had the control box customised for what I wanted, from there it was just a few wires to connect it up. Remote control's a nice feature, standing 10 meters away being able to raise/lower is a great party trick :coffeedrink:
 

S2DM

Adventurer
For what its worth, Ive seen a few guys set up their remote controls and then end up ditching them/hiding them. Pesky thing to have the camper top go up when you switch positions while driving with the remote in your pocket :)

We just hooked ours up this week, same set up, four actuators and a central control box that keeps all four lifters in sync. At this point, still debating whether to put the control switch in the dash or in a locked storage box.
 

Maninga

Adventurer
Know what you mean. I'll mount the remote on the dash once we're finished, second up/down switch will go inside the camper for when we're inside plus main one on the control box. Should cover the control side of things. Need a contact switch on the door so they only work while doors closed. Had the remote in my pocket a few times that sent it down while moving stuff in/out, a couple of close calls where roof started going down while door was open. Mostly good luck rather than good planning it didn't rip the door off.
 

S2DM

Adventurer
Need a contact switch on the door so they only work while doors closed. Had the remote in my pocket a few times that sent it down while moving stuff in/out, a couple of close calls where roof started going down while door was open. Mostly good luck rather than good planning it didn't rip the door off.

Thats a good idea, my box is all preprogrammed, but I could put a switch in the power relay. I've also been thinking about what to do if it inadvertently came down during the night while in bed, our bed sits flush to the roof when down. Considering putting a power kill switch next to the lifter switch so you raise the roof, then kill the power. Had nightmares about water getting into the switch and then waking up with my nose on the roof :)
 

dlh62c

Explorer
Is there not a current sense circuit in the design?

If the top is going down and hits an obstruction, the motor will reverse itself, kind of like a garage door opener.
 

Maninga

Adventurer
Thats a good idea, my box is all preprogrammed, but I could put a switch in the power relay. I've also been thinking about what to do if it inadvertently came down during the night while in bed, our bed sits flush to the roof when down. Considering putting a power kill switch next to the lifter switch so you raise the roof, then kill the power. Had nightmares about water getting into the switch and then waking up with my nose on the roof :)

I think the kill switch is necessary, especially if the bed's where the two halves join. We've a pull switch mounted in the middle of the box (there's the control to raise/lower, switch above it) that kills the power. Also stops parasitic drain when it's in storage, something I've found is definitely necessary. It's why my batteries are currently dead, forgot to turn it off.

Is there not a current sense circuit in the design?

If the top is going down and hits an obstruction, the motor will reverse itself, kind of like a garage door opener.

Nope. 1.2 tonne of push/pull force plus weight of the roof, it's not stopping if I don't turn stop it myself. If it hits something solid it can't break, there's sheer plates built in. Some concern over whether it'll work the way it was designed to, got a couple of ideas to fix that.
 

Forum statistics

Threads
187,904
Messages
2,899,785
Members
229,071
Latest member
fireofficer001
Top