Fourwheel Camper Personalization

White Dog

Member
I admit it; I'm an compulsive tinkerer. On every trip, whether it is a weekend or 2 months, I make a list of 'improvements' I think I need to make to my Fourwheel Camper or Toyota pickup. I think it is a passion. My wife jokingly calls it my obsession. And its not my only one I'm afraid. The 'improvements' have been going on since we bought the camper new from the Canadian distributor back in 2012. I think the list is getting shorter. Maybe I'm just writing smaller.

A thread on this forum has been going on for a while concerning the dated technology of the FWC fleet. Personally, my view is update-when-necessary otherwise leave it alone. Others would and have disagreed. That's great. Open respectful discussions should always be encouraged. That thread got me thinking it might be worth sharing my tinkerings with our FWC. Face it, no manufacturer can make the perfect camper (or anything else) for everyone or anyone for that matter. Each owner invariably wants modifications that will make the camper work better for them. Sometimes these aren't just little tweaks either. The point of this thread is to illustrate those that I have made and will be making, discuss why I made them and hopefully encourage others to ask questions and make different suggestions that solve the same need.

I need to start by introducing my camper and truck.
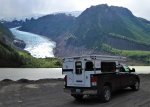
IMG_5544.jpg

The camper is a 2012 Fourwheel Camper 'Grandby' bought new. My wife was all for it as long as she got to pick some of the options that she felt would make her life more comfortable. Fair enough! One of the features we liked about FWCs was the ability to order options a la carte. By the time the order went in, not many of the check-off option boxes were empty. Again, fair enough. The truck is a 2011 Toyota Tundra, also bought new. It is the extended cab long box model which makes for a total length of nearly 21'. We thought this may be a bit of a drawback but it really hasn't. Technical off-roading isn't our thing but we aren't shy about heading down two-tracks either. The truck has the 5.7 l V8 with the six speed automatic. The engine has lots of power and has a proven reliability record. While I think I prefer standard transmissions, the automatic in this truck is excellent. The shift points seem to be in just about the right places and the tap-shifting options lets me drive it essentially as a standard just without a clutch. So far, we have put about 60,000 km on the truck/camper and spent close to 6 months on the road with the rig. We have had absolutely no mechanical issues with either the truck or camper. In the offseason, the camper lives in a shed out of the rain/snow and sun. The truck goes back to civilian life helping me with my retirement business.

When we first started planning our Overlanding life, we decided we wanted a rig that we could be totally self sufficient in for at least 7 days: no grocery shopping, no water resupply, no propane fills, no laundry, no public showers. We also wanted to have a minimum range of 700 km without refueling. We have been able to achieve these goals. When we stock up for a long unsupported bit, we put the fruit and veg in a Yeti cooler in the back seat of the truck along with a bag of ice. The meat and more fragile perishables go in the Dometic compressor fridge. By the time the ice melts in the Yeti cooler (~5 days) there is room for the last of the fruit and veg in the fridge. To keep the house batteries charged while we aren't driving, I have put 2 X 100w solar panels on the roof of the camper. The idea was to reserve the propane for heating, cooking and making hot water. If we ran out of propane, the compressor fridge would still run preserving our food. This has sort of worked out but as you will see in future postings, it has been troublesome. An acquaintance who works in the industry once told me: "The Dometic compressor fridge is a great idea just poorly executed". If I'm travelling alone, the 75 l onboard water tank is enough to keep me going for the 7 days. If my wife is along, we carry 2 X 20 l Gerry cans in the back seat of the truck. That has worked out fine. The one drawback of the Tundra is its small 100 l fuel tank (current models have 140 l tanks). I can usually get 600 km out of the tank if I drive very carefully. I always carry an empty 20 l fuel Gerry can which I fill if I suspect I am going to be stretched for fuel. This gives me close to the 700 km I was after.

I think I will start by doing a posting for each of the groups of personalization projects I have already completed then do a bit more detailed series of entries with the ones I am currently working on. I'll see how it goes. Give me your thoughts and suggestions. They aren't just for me but for all those tinkering with their campers.
 

White Dog

Member
Storage:

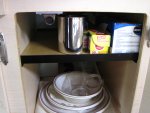
FWC builds its cupboards without any shelves. Most of us need extra shelves to better organize ourselves. I have added various versions over the years. Some are simple

IMG_6352.JPG

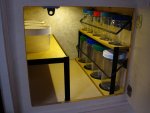
others more complex

IMG_6350.JPG

The base material for the shelves has always been 3/8" Baltic birch plywood with 3/4" X 3/4" X .0625" aluminum angle screwed to the sides of the cabinet carcass and bottom face of the shelf to support the shelf. I also attach a piece of the aluminum angle to the exposed edge of the shelf to create a lip so items don't simply slide off the shelf. I have always used 6061 T6 aluminum because it is readily available, moderately priced and pretty hard so it doesn't get banged up to much. Where a corner of the shelf is unsupported, I have built an supporting leg out of the same aluminum. The shelves are varnished with Minwax satin polyurethane. This is a reasonable match to the faux-maple vinyl material FWC used on the plywood in our camper. All aluminum pieces are spray painted with Tremclad black semi-gloss paint from a rattle can. The finish is a close match to what FWC uses. I make sure to paint the heads of the mounting screws with the same paint just so they don't stand out. You have probably noticed the bails in front of the jars on the right side of the lower picture. This keep the jars from bouncing around on rough roads. They simply lift up to get the jars out. I would like to claim these came to me in a moment of genius but I actually saw a similar idea on a YouTube video used in a Japanese tiny house. Works great. You will also note that we tend to recycle used plastic jars for food storage. These work great and are, of course, cheap. One more thing you will likely have noticed is the light on the inside of the cabinet in the lower picture. This cabinet is large and in a dark corner so it was often hard to find what we needed especially at night. The simple LED helps a lot.

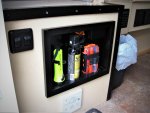
Next to the door, I built a recessed storage rack the holds a flashlight, bear spray (here in Canada, we always take the stuff) and a bear banger with some flares as well.

IMG_6358 (2).JPG

There is a couple of inches of space between the interior plywood and the liner of the propane storage box which is immediately behind. I made use of the space for this rack and it gives us quick access to the light and bear repellents from the outside of the door if necessary. We have used the light but not the bear repellents, at least so far.

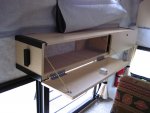
FWC installed the cupboard above the dining area in our Grandby with the hinges on the top so the doors opened upward. I suppose the idea was to make them accessible from the dinette and to prevent them from opening when travelling. The factory latches are simple friction units on our camper. We found this arrangement awkward because we like to store our spices, teas and other cooking items in this cupboard. From the stove, we could simple turn around and grab what we need. We also store snacks for the road in the stern portion of this cupboard because it is easy to reach with the top down. To make this cupboard more useable for us, I turned it over so the hinges are on the bottom and installed push to open latches that lock positively.

IMG_6356.JPG

While the cupboard was off, I reinforced the outside corners with 1 1/4" X 1 1/4" X .125" aluminum angle. The alloy and finish are the same as I used on the cupboard shelves. I put some chains on the doors so they stay horizontal when open. This lets us use them as temporary storage while we cook. The new arrangement has worked much better for us.

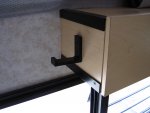
If you notice the rectangular black object on the end of the cupboard, this is a fold down hook from IKEA.

IMG_6353.JPG

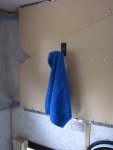
There are 3. One on each end of the cupboard for hanging hand towels and tea towels and a third on the rear roof support panel where we hang up jackets.

IMG_6355.JPG

Again, I would love to take credit for this bit of genius but I saw these on Lee Blake's van he built. He is a clever creative builder. Just search his name on YouTube.

That's about it for the past cabinet storage builds. I have some more on the go but they will show up on future postings.
 

White Dog

Member
Water Tank Level:

FWC installed an electronic water level monitor on our Grandby's water tank. You know the ones: press a button and LEDS light up (hopefully) that tell if the tank is 1/4, 1/2, 3/4 or full. We never had a problem with the one in our FWC but we have in other RVs we've owned. So have lots of other folks. I simply don't trust them.

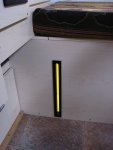
To alleviate my anxiety, I created a sight glass for our tank.

IMG_6351.JPG
The tank is under the seat, so I removed the plywood panel, routed out a 1/2 slot in it and made an aluminum guard to cover the slot. Now I can physically see the water level in the translucent polyurethane tank by simple glancing at the slot. I put an LED behind the tank so I could see the level at night but during the day, the water level is easy to see without the backlight. If you look closely, you can see the tank is about 40% full. This mod was a moment of my own genius for a change.
 

White Dog

Member
Electrics Part 1 - Getting the pixies to dance (with apologies to AvE)

Traveling without electronic gadgets would almost be unheard of these days. While sometimes I feel like I'm chained to these little miracles, being able to call home, do banking, post on my blog and carry on the business of life outweighs my latent luddite genes.

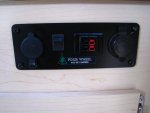
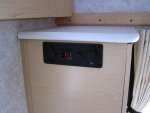
Our Grandby came with 2 X 12 VDC outlet ports below the counter on the left side of the camper. Each had two 'cigarette' plugs (is there a better name for these?). Since then, the electronics world has switched largely to USB ports. I upgraded the original panels by removing one of the cigarette plugs and replacing it with a Bluesea twin port 2 amp USB plug.

IMG_6348.JPG

Note I replaced one of the switches with a pair of 15 amp Anderson PowerPole connectors. I have been gradually buying 12 VDC power supplies for my electronics that will live permanently in the camper. I have converted the input for these to a PowerPole connector. In my mind, they are simply more reliable. This has alleviated the need for an AC inverter; one less thing to go wrong.

I do most of my computer work on the dinette table facing towards the door. This meant that power cables would have to cross the aisleway to connect to the original panels. I built a replica panel to match the originals (sans logo) and mounted it on the side of the small storage cupboard on the front right side.

IMG_6347.JPG

I no longer have to duck under the cables to get out of the camper and my wife doesn't have to worry about getting tangled in wires when she gets down from the berth, her favourite reading spot.

Simple upgrades but they make life so much easier.
 

White Dog

Member
Shower - keeping squeaky clean(ish).

My wife was adamant that she have some way of keeping clean on the road. I had to agree with her. We often travel in and out of urban areas and we like to keep ourselves presentable. Besides, after scrambling around all day or completing a long bike ride, a shower is welcome.

I came up with the Mk I version the first year we had the camper.

IMG_2551.jpg
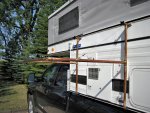
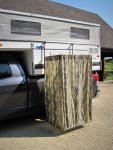
IMG_2555.jpg We ordered the outdoor shower kit with the camper and it works great. The Mk I shower arrangement works fine once it is set up but it takes a while to put together and is quite bulky to transport.

I came across this Quick Pitch shower system made in Australia: Quick Pitch Shower. I think it is a pretty innovative design but the sticker shock is a bit scary. I suspect I will pirate the design and make one similar myself, at least once I finish restoring my South Bend lathe. I think I mentioned that my obsessions are without limit. This will become the Mk II model. Another winter project.
 

White Dog

Member
Loo Riser

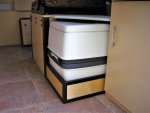
We ordered the cassette toilet with our Fourwheel Camper. We don't use it often but it's nice to have at night and 'just in case'. The bottom waste cassette can be dumped in almost any sewage receptacle as long as we don't use any of the nasty RV chemicals. Outhouses, gas station washrooms and friends toilets are all fair game. We have never had a problem with odors or leakage. It has been a reliable and convenient piece of kit. The only problem is that it is quite low which is uncomfortable and really hard on my wife's poor sports-injured knees. From the factory, it is only 12" high while normal toilets are about 15"ish. The solution was easy enough - build a riser.

IMG_6364.small.JPG

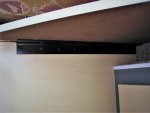
There is just enough space under the shelf to make the riser 3" which raises the top of the cassette toilet to 15" - just like home. Fourwheel Camper uses wooden cleats to support this shelf which didn't leave enough room for the top of the toilet. So, the first step was to replace these cleats with aluminum angle supports painted to match the rest of the black metal bits.

IMG_6366 small.JPG

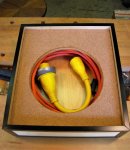
Making use of all available space is always necessary in campers. I chose to use the 3" under the toilet to store the extension cord and connector for shore power.

IMG_6361 small.JPG
We almost never use shore power but I feel I need to take along the cabling just-in case. This makes it easily accessible and uses previously unused space. Note that I glued a layer of 1/8" cork on the surface the toilet sits on. This adds a bit of cushion and also a bit of friction so the toilet doesn't slide around while bumping down some 2-track.

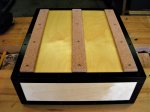
Since the toilet has to be slid out to be used, I made up glides for the bottom of the riser, again using cork. It slides out easily but there is enough friction to keep the whole thing from sliding around while on the road.

IMG_6363 small.JPG

The toilet is made out of plastic of course. While I doubt it will ever leak, I made sure to use waterproof adhesives (Titebond III) and I gave the whole riser 4 coats of urethane rather than the usual 3 just-in-case. I also made sure to saturate all the edge grain of the plywood with urethane. If the toilet ever did leak and the waste got into the plywood, the riser would be heading for the garbage.

So here is just another idea that seems to have worked out quite well. Any thoughts or alternatives out there?
 

White Dog

Member
Serendipity - or why the obvious isn't!

One of the first things we bought for the camper was a little folding stool to get in and out. The bed of the Tundra is a fair ways up and even the step on the bumper is a reach. My wife is a good 8" shorter than me, so a cheap stool from the local bid box store seemed like the obvious choice. About the fourth day out on our first trip, I put the almost new stool beside the back door of the truck thinking my wife would put it in the truck (mistake #1) and my wife was busy thinking about other thinks as she hopped into the shotgun seat (mistake #2). I suppose you all can finish the story. The stool may still be at that campsite. So we think the rest of the trip getting in and out of the camper is going to be a bit awkward especially for my wife. Now here comes the serendipity part.

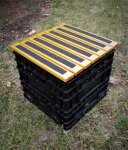
In the back of the truck we had a milk crate with a bunch of stuff in it we probably should have left at home (come on; you do it too). We started using it in place of the stool that had gone walkabout. Turns out it is the perfect height especially for my wife. Step on crate, then step on bumper and into the camper. It also turns out the angles of those 3 steps keeps me from bumping my head on the low door of the camper (come on; you've done that too). So the milk crate has done that job ever since. The only slight problem was in wet muddy weather, the plastic on the crate could get a bit slippery. We never had an accident but it was a possibility. Being a woodworker (yet another obsession passion), I added slats to the top of the crate and stuck on some strips of traction tape, that stuff they us in factories where the floor might get slippery.

IMG_6367 small.JPG

I always like things to do multiple duty. The crate is no different. It's daytime job while we drive is to keep the grey water pail from moving around.

IMG_6368 small.JPG

The traction tape keeps the crate and pail from skidding around on the rubber outdoor mat. The pail, crate and mat are always the first things out when we set up camp and the last things that go in before we start the truck. They are so obvious it would be difficult to leave them behind, at least we haven't in the last 7 years.

Just one of those little unexpected discoveries that worked out well.
 

White Dog

Member
Good Eats!

One of the great things about overland travel is being able to slow down and enjoy your passions. Both my wife and I love to take the time to cook good food especially at the end of the day. The cooking page is the first article my wife turns to when the new Overland Journal arrives. Its usually the second one I look at after the Editorial. If they skip the cooking article in an issue, they get severely nattered at, at least in our household.

For years, we carried our selection of spices and herbs in the standard supermarket jars. These were mostly glass and top heavy. We had to remember to be careful when opening the low cupboard above the window where they live otherwise they would come tumbling out. And how often did we remember to be careful!

One day, I was rummaging around in our store room looking for something when I came across a bag full of small metal tins. Our daughter-in-law always gives us a selection of teas from our favourite tea store for Christmas. They come in these tins. I save the containers because 'they may come in useful some day'. Well the day finally came. They are just about the right size for a travel portion of herbs and spices, have a clear top so we can see how much is left in them and are made out of steel with a screw on lid so they aren't going to pop off on some rough track.

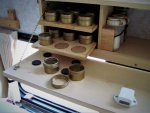
Starting with these containers, I built a couple of trays with 9 recesses drilled in each so we can carry a total of 18 herbs and spices. Should be enough!

IMG_6371small.JPG
I embedded a small rare-earth magnet in the plywood at the bottom of each recess then covered the bottom with thin cork. The magnet and lip of the recess keep the containers in place while driving and when sliding the tray out to access the needed spice. The magnet is strong enough so that we can actually turn the tray upside down and none of the container fall off.

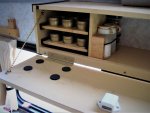
The trays slide in aluminum channels screwed to the side of the cabinet so they are easy to remove but don't move around when on the road.

IMG_6369 small.JPG

If you are wondering what the black disks are, they are self-adhesive foam rubber pads that keep the trays from moving around and marking up the cabinet. The only job left is to print up some labels for each tin.

So basically this is an over-engineered spice rack. Fun to build though.
 

codename607

Adventurer
Love this thread and the work you have done!

I've done a few changes to my camper that have helped make things easier. It's great to know others are making changes as well.
 

White Dog

Member
Thanks for the compliment. I was kind of hoping this thread would start a discussion on modifications with others adding stories and images of what they have done. Everyone has a different take on what the 'perfect' rig should be. I think we could all learn from each others experiences. Who knows, it might even help FWC with product development.

So far, the posts have been modifications that make travel easier or at least more convenient for my wife and I. I'm about to wade-into-the-deep-end and start talking about electrical stuff. That has actually been the majority of the work I have done on the camper and I still have a ways to go. It seems like electrical stuff tends to be the one that elicits the most response. I will probably get started on that tomorrow.
 

White Dog

Member
Electrics or Down the Rabbit Hole!

So far I have shared mostly the tweaks and modifications that have made our FWC more comfortable. I think I'm ready to tread into stickier mud.

I often chat with other Overlanders about technical stuff: modifications they've made, problems they've run into, stuff they wish the manufacturer had done differently. You know the campfire talk. Electrics is probably the most common topic and it's surprising how much misunderstanding and misinformation there is out there. Its no wonder given some of the stuff that's on YouTube.

Part of my job before I retired was to wire electronic equipment into survey launches. While not formally trained, I had a lot of excellent guidance from Canadian Coast Guard Engineers and Hydrographics Electronics Technicians. Also, my brother is an Electronics Technician and Electrician. He's the first one I call when I get into one of these projects. So I have a decent idea about what I'm doing.

RV manufacturers are certainly regulated. Government agencies make sure that the units being manufactured are safe. Safety is good but just because a unit is safe doesn't mean manufactrurers are going to make the electrical system do what you think it will. Fourwheel Camper is way above average in my opinion but as you will see, it has taken quite a bit of time, energy and money to get the electrics on our Grandby to where they do what I want them to.

Back a step!

Remember above I rationalized why we chose the Dometic compressor fridge over the propane 3-way. The downside of this decision is we need to have reliable 12 VDC to keep the thing running. We ordered our Grandby with two 87 A/hr AGM deep cycle batteries. If you understand these batteries, you will understand when I say they give us about 100 A/hrs of 12VDC. When the Canadian FWC distributor installed our camper, he connected the house batteries to the truck battery with 10 ga. wire. FWC installed (at that time - 2012) a solenoid isolator so that the truck battery could not be discharged by the current draws in the camper. The logic behind this type of installation is that the trucks alternator will recharge the house batteries while driving. This type of installation is the industry standard and seen on the vast majority of RVs out there.

Is all of this relevant? Yes it is! Stay tuned.

I was afraid I was going to have to start into a long description about why this isn't a very good approach. Fortunately, a few days ago, Andrew St. Pierre White at 4XOverland posted a video that describes the problem much better than I can (4XOverland Battery Discussion).

Okay, lets start dealing with my issue.

When I let the fridge draw down the batteries to about half power, it was taking hours (days!) of driving to recharge them. I have a DC amp meter so I can measure the amount of power that alternator was putting into the house batteries. The most I ever saw was about 5 A. Do the math. Putting 100 A of power back into the pair of house batteries was going to take 20 hours of driving. Obviously this wasn't tenable.

If you watched Andrew St. Pierre White's video you will understand what is going on. Automotive alternators aren't very good at charging deep cycle batteries especially in parallel with vehicle starting batteries. Add to that the voltage drop on the wires and connectors from the truck's engine compartment to the house batteries in the camper, 21' in my case, and I am surprised I was even getting 5 A into the house batteries.

What to do?

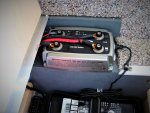
Fortunately, clever people have thought up ways to deal with this. What I really needed was a 'smart' battery charger that had 12 VDC input rather than the usual 120 VAC. After a fair amount of research I came across and eventually bought a CTEK D250S Dual.

IMG_6372 small.JPG

This is a clever bit of Swedish engineering (made in China but well made in China). It is designed to put 20 A of power into most types of batteries (how it knows what type of battery it is connected to is still a mystery to me - any thoughts would be appreciated). However the input isn't 120 VAC but 12 VDC a.k.a. the trucks alternator. It is a 4-stage charger. If you don't understand what that is, Google it or go to CTEK's website. It has a built in MPPT (Maximum Power Point Tracking) solar charge controller (up to 20 A) as well as an isolator to protect the truck's starting battery from being discharged. In fact, if the house batteries are full, it will look at the truck's starting battery to see if it is fully charged. If not it will use surplus solar power to top it up. Does it put 20 A into the house batteries? Yes it does. I measured it.

So my problems were all solved.

Not so fast Sparky!

I warned you this was a Rabbit Hole. Stay tuned for the next installment.
 

Flhtruss

Observer
Thanks whitedog for a well done thread. You have really done a nice job on the personal custom upgrades. Thanks for sharing. We also have done some personalization to our ATC. Added a water heater 6 gallon Suburban, using a small pop up tent, that has the metal frame you twist in on itself to fold flat, and store behind the driver seat. Many small things which are awork in progress. Built a rear rack / step for carrying stuff and the center has a expanded steel area to stand. Also built a light square tube which holds the trasharoo. Working on installing a thornwave battery monitor for our solar system. Wife likes some of the silicone cooking utensils, but we are not chiefs on the same level as y'all. Just recently put up some elastic net storage on the walls for small items. Like your IKEA hooks, gunna check that out.

Looking forward to your next post.

Russ
 

givemethewillys

Jonathan Chouinard
Thank you for taking the time to document your modifications. I don't own a truck camper but I find your work very interesting. And as a fellow woodworker, I really enjoyed your solutions to problems such as the spice rack and toilet riser.
 

White Dog

Member
" Built a rear rack / step for carrying stuff and the center has a expanded steel area to stand. Also built a light square tube which holds the trasharoo. Working on installing a thornwave battery monitor for our solar system. Wife likes some of the silicone cooking utensils, but we are not chiefs on the same level as y'all. Just recently put up some elastic net storage on the walls for small items. Like your IKEA hooks, gunna check that out."


I and I suspect others would love to see some photos of your projects. I'm kind of hoping this thread will be a bit of a 'mods' resource for FWC owners not just my tinkerings. By the way, the hooks from IKEA come in brushed steel finish. I just painted mine semi-gloss black to match the rest of the metal finishing

That's for everyone by the way. Come on, I know you've been up to stuff out there.
 

Forum statistics

Threads
188,029
Messages
2,901,371
Members
229,411
Latest member
IvaBru
Top