From Freightliner ambulance to RV - we hope!

rossvtaylor

Adventurer
Looking good Ross! Can't wait to see it riding high with everything in place! Where did you get the lift blocks? I apologize if you've already mentioned this previously. I am eagerly awaiting the addition of the winch. I am going to have questions on that install!

Scooter...

Hi Scooter, thanks! I made my own lift blocks. I'll pull up the installation photos, and pics of the lift blocks themselves, to post and document for you. I did mine differently than Ozrockrat (which probably means I did mine wrong, since he seems to be an expert in all things big truck...). But, I didn't find any definitive direction either way so I went the way that made sense to my very-much-not-an-expert mind.

I was going to use my milling machine (a 1940's Van Norman 26 beast) and make solid blocks. But, even in that I went a bit of a different route and welded up blocks from 3x3x1/4-inch wall tubing, with a 1/4-inch cap plate. Each section of tubing, alone, has a compressive strength sufficient for 70,000 pounds. I used two sections, welded together with 7018 rod.

Screen Shot 2016-07-23 at 6.40.15 AM.jpg

I first tacked them together, then did a root pass with smaller rod. Then fill passes with 1/8-inch 7018. That's not undercut on the edges of the weld - the edges of the tube are rounded. The weld itself also adds steel but, even without counting that, each block should be good for 140,000 pounds. I'm definitely overbuilt here. I'll post pics of the blocks and the installation process in the next day or two.

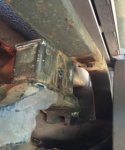
EDIT: I did have a picture of one of the blocks, welded in place, to show now. I'll need to transfer the actual installation pics from my phone, though, so that process will be a separate post. I hope the installation pics will make it more clear... but, essentially, the axle is held in place by U-bolts which sandwich it between (in order, from top to bottom) the air bag suspension arm, the swing arm and bracket, axle, cast steel bottom plate, and second bottom plate (really just a flat steel plate, to which the anti-sway bar is bolted). None of these are the official terms, I'm sure, since I'm new to this. But, it's pretty clear in looking at this sandwich that the axle is positioned front-to-back by the swing arm and the bracket that's bolted to it (which has positioning "teeth" that sit on top of the axle tube). This alignment seems to be pretty critical, as our rig has two shims on the passenger side bracket - they are all of 1/8-inch thick, combined, but apparently this is enough to align the axle correctly. Anyway... I thought it best to keep this bracket in contact with the axle, so it maintains the front-to-back alignment. I realize that swinging it down almost 4 inches will move the axle forward a hair, but it will be the same on both sides so the axle should still be aligned and perpendicular to the truck. So, here's where I departed from the "norm" and I put our spacer block on top of this bracket instead of between it and the axle. This, to my mind, keeps the bracket and swing arm "one" with the axle. The spacer block, above it, is welded to the bracket so it's not going anywhere. And, the top of the spacer/lift block has a hole into which the suspension arm pin fits. It will, I hope, all be more clear with the next post and pics... but, here's what the arm looks like with the spacer block in place.

Screen Shot 2016-07-23 at 8.00.17 AM.jpg

Before welding on the block, I needed to find out what it was. Cast steel or cast iron? I suspected less-brittle cast steel, but didn't want to screw this up. I did a drilling test and a spark test and a weld-then-break-the-weld-to-see-if-it-bonds test. It's cast steel, so I was good to go (with some pre heating and controlled weld heat). It worked out great.

And, for the winch, I'll get to that in August. We were going to change out the front bumper, with one I'd make. But, the factory bumper is a lot beefier than I expected. There's some real steel in there. So, we'll move it forward (to permit the winch to go behind it) and modify the bumper with some additional plate top and bottom. And we're going to add a <insert big indigenous animal here> guard, to minimize the chance of radiator/engine damage in the event of a strike. (In our case, they're elk.)
 
Last edited:

rossvtaylor

Adventurer
Nice welds.

Thanks! Definitely didn't want this part to fail... haha! I don't weld aluminum, but I like to think I know what I'm doing with steels. But, I want so many aluminum things... :)

Well, we went on our first expedition today - to Sam's Club of all places (we don't have a Costco here...). :(

Not an exciting trek, but it meant an hour roundtrip on the freeway... and the 6 miles of washboard dirt road to our home. The speedo is definitely off, but we knew that would happen. I was pleased to see that at 78 mph (per the GPS) the tachometer was 1750-1800 rpm. I'm sure that will help our fuel economy at cruise. And, we took a few steep hills and was happy to see we could accelerate up them. The tires are quiet and I didn't notice any difference in ride, so that's a good thing.

Here are the photos, and more detail, of the lift installation... as promised:

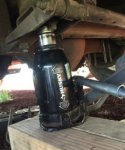
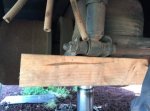
First, as Ozrockrat mentioned in his lift comments... the hardest part was getting the suspension jacked up enough to get the block in place. I was using a 10-ton Husky Home Depot jack and it works well, but like most bottle jacks it has about 5 inches of lift. With our lava cinder driveway, and the squish in the suspension, it's not possible to jack it up high enough in one shot.

Here's where I jacked, at the rear of the swingarm which the airbags lift.

Screen Shot 2016-07-23 at 8.35.31 PM.jpg

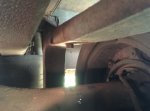
That got me this much space, so I could at least take out the front swingarm and upper bracket assembly.

Screen Shot 2016-07-23 at 8.19.35 PM.jpg

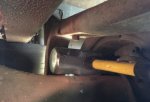
So, insert sledge hammer, lower the jack, reposition with more blocking, and jack up again.

Screen Shot 2016-07-23 at 8.19.48 PM.jpg

It actually took three lifts to create enough clearance. I put the bracket and the new lift block on the axle, jacked up the last inch, and slid it into place.

Screen Shot 2016-07-23 at 8.20.19 PM.jpg

The pin in the upper arm fits into a hole in the top of the lift block. And, in this configuration, the swingarm and the cast bracket (which hug the axle) are right on top of the axle. My thinking here was that a spacer underneath that bracket would give the axle's twisting or fore/aft thrusting more leverage, as the lower position of the axle would create a greater moment. So, I did mine differently (AKA, wrong) but it sure snugged up tight and drove well. I made the spacers without any taper, to maintain the same angles in the pinion in relation to the center joint in the driveline. No noticeable vibration, so I hope that was correctly done.

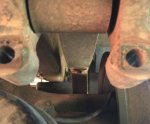
From the front, looking rearward, here's what it looks like... the swingarm bolts into (in front of) the holes on the right and left.

Screen Shot 2016-07-23 at 8.10.10 PM.jpg

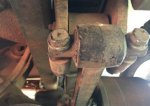
And, with the bolts started in, here's what that looks like (on the driver's side):

Screen Shot 2016-07-23 at 8.35.53 PM.jpg

On the passenger side, there were two thin shims which I re-installed - they must have been put there to shift the axle forward a touch on that side:

Screen Shot 2016-07-23 at 8.36.08 PM.jpg

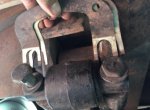
And, here's a new U-bolt compared to the old one.

Screen Shot 2016-07-23 at 8.36.37 PM.jpg

So, remember an earlier picture where I showed how much space I had over the right tire with the airbags fully deflated? Well... with the airbags deflated, I couldn't get the new U-bolts in on the driver's side I worked on next. Time to start up the truck, crawl underneath and manually raise the airbag inflator valves to inflate the airbags. As a quick aside, these levers are attached to rods which attach, on the other end, to the axle brackets. If the truck is too low, the levers are pushed upwards by the rod and the valve lets air enter the bags until they reach the right height. The have a bit of a delay mechanism, so road motion doesn't jack the suspension up and down. Anyway, I raised the levers and... nothing. No raising, no hissing, nada... Crawl out, over the lava stone, get in the cab and check air pressure... hmmm, all good. ******? I get back under the truck and try the other way, in case I got it backwards... think some more, and nope... I was going the right way. Then it hit me! How did I lower the truck the first time? Crawl back out, get back in the cab, and turn off the "air dump" switch, which I'd left on.

Screen Shot 2016-07-23 at 8.36.22 PM.jpg

After that brain fart moment, I inflated the airbags and that raised the body enough to allow me to get the new U-bolts in. Tighten them down, sandwiching everything tight, and Bob's your uncle.

I'm happy to report that the newly-lifted rig handled the treacherous journey to Sam's Club without issue and it deftly carried back a whole bunch of groceries and Gorilla racks.
 

Attachments

  • Screen Shot 2016-07-23 at 8.20.02 PM.jpg
    Screen Shot 2016-07-23 at 8.20.02 PM.jpg
    20.6 KB · Views: 20

scooter421

Adventurer
No kidding, the blocks and welding look great! A spark test, man has it been a long time since I've heard anyone talk about those. That's great you've got some steel to work with for the bumper. That should certainly keep the fabrication requirements down. I am very interested in how that works out. Eventually, I will get a winch and I'm going to need to fabricate/buy something to mount up to the front end on mine. LOL, they do make excellent grocery getters! Not exactly practical but certainly fun!

Awesome job....Scooter.
 
Last edited:

Ozrockrat

Expedition Leader
Hmmm "exspurt" hey. Ex is a has been and spurt is a drip under pressure. :) Mind you one of my old bosses said "If you learned from your mistakes you would be a ********** genius" and I do stay at a Holiday Inn Express regularly.

But that looks good. And honestly if I could weld 1/2 that well I probably would of done it the same way. The only downside I can see (which you already mentioned) is moving the axle forward and also the angle the bushings will be going through. I don't think the 1/8 of an inch the axle moves forward will worry the airbags.

What are you going to do about the panhard rod. I think I calculated out that the axle is about 1/8 to 3/16 closer to the drivers side now at normal airbag/ride height. I was considering lowering the panhard rod mount on the chassis down about 2" (all you can get without major fabrication) and then just shimmimg behind the mounting bracket to bring it back to spec. But I have been running it for a couple of years now without an alignment or redoing the panhard and it seems fine (plus I have a lot of other things to fix/fit). It will be just about impossible to have a horizontal panhard rod without fabricating a block/mount to hang below the chassis and the engineering for that is outside my capabilities.

If I change out the axles for the MRAP ones it will be a re-engineering of all the axle mounts anyway. So current alignment is OK as long as I rotate the tires often (which sucks).

We need to kill a few beer napkins before you start on the bumper or elk bar. I have made a few bars over time and have even had one of our fitted to a semi that survived a buffalo strike (water not bison).
 

rossvtaylor

Adventurer
Thanks, guys. Oz, they were actually your measurements and calculations that made me decide to do nothing with the panhard rod. I measured the axle offset, relative to the frame, and I can't measure a difference with a tape - so, close enough for us.

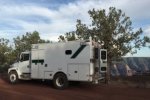
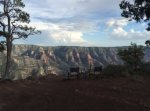
We did a bit of a trial run yesterday afternoon and we couldn't be more pleased. We drove out to Sycamore Canyon point. From our house, it's about an hour of dirt road. There's lots of rock and hills and about 4 big mud holes. KETO 1 did great - we were very happy with the low-speed performance. We powered through the mud holes and the rig crawled right up the rock strewn hills, without needing any momentum. We aren't every planning on being true rock crawlers, but this stretch of trail (about 10 miles each way, off the main washboard dirt road) showed us that we can get everywhere we'll be planning to go. Except beach sand... we know that's not in our future.

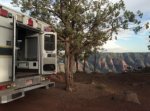
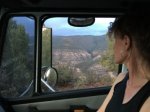
We don't yet have a real kitchen, but the fridge and microwave let us prepare dinner right on the rim. If the Grand Canyon weren't so nearby, this place would be packed - but, as it was, we had the rim to ourselves.

Screen Shot 2016-07-25 at 9.21.51 AM.jpgScreen Shot 2016-07-25 at 9.21.33 AM.jpg

And, of course, the fridge kept our wine cold, too.

Screen Shot 2016-07-25 at 9.21.17 AM.jpg

We just got the rear lift done, and nothing's been changed inside. But we carried the table and patio chairs, in the back, and just plugged the fridge and microwave in inside the box. Nothing's permanently installed, but it worked well as a trial proof-of-concept test. I'm sure that little microwave got bounced around a bit, but all was good. And the fridge is solid! It cooled down from an interior temp of 78F to 20F in about 30 minutes. We actually had to turn it up to 34, so we didn't freeze our wine and fizzy water cans.

The drive out gives some wonderful views...

Screen Shot 2016-07-25 at 9.22.16 AM.jpg
 

rossvtaylor

Adventurer
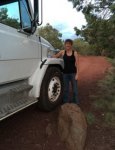
For scale, here's Kara next to a front tire. The tires fit here, without lift (yet) or cutting. We still have lock to lock steering, but they're only 12 inches wide.

Screen Shot 2016-07-25 at 3.53.24 PM.jpg
 

guidolyons

Addicted to Gear Oil
That's pretty cool. Already have a day trip done and it's not done yet. :sombrero:

Although it's good to take some shorter trips so you can figure out what works, what doesn't work, and what/how you want to place things.
 

rossvtaylor

Adventurer
haha, Guidolyons... if we waited until it's "done" we'd never get out. :smiley_drive:

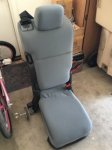
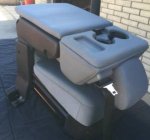
I used my remote purchasing application (my sister) to pick up a CraigsList find for the front of KETO 1. Right now, we've got a great big beast of a center console that is, really, an almost empty box. It's a huge waste of space. We like having some console storage, but also want a seat for my daughter that's up front with us. So, for $40, we got this:

Screen Shot 2016-07-26 at 4.18.58 PM.jpgScreen Shot 2016-07-26 at 4.24.21 PM.jpg

It's a take-out from a big Ford F450 (or 350?) in gray, so it will match nicely. And it's got some console functionality when folded.

Our plan is to remove the existing console, encase all the wiring down there in a suitable (safe) enclosure that will also make a "floor", move what switches we're keeping up to the overhead panel, and add a removable pedestal for a tablet or PC. We're also going to add some storage boxes, secure and open.

OZrockrat, you offered a center seat mount and I appreciate that - but I think I'll need to fabricate something to work with this seat. I don't expect it will be too hard and (pending some measurements) I think I can fit a box under it.
 

Ozrockrat

Expedition Leader
What you don't want an air ride console . If you want to grab it to template the floor profile off that would probably cut your work down. Have you checked all that wiring in the console. All the battery isolator and 2awg cables in mine would be a PITA to move.
 

rossvtaylor

Adventurer
Have you checked all that wiring in the console. All the battery isolator and 2awg cables in mine would be a PITA to move.

Oh, yes I've been inside that console! And it's exactly because of what's in there that I don't plan to move the wiring. PITA is an understatement! Basically, I'm going to rebuild a console that's about three or 4 inches thick. I'll put rubber on the top, for Ruby feet.

Thanks again for the loan offer. Let me see what I find when I dig into it and I may take you up on it. Right now, I'm in the position of having more parts than time to install them. Hopefully I can get caught up.

And, yes, Scooter... Mission is a good and polite way to describe it. I think Kara would use different phrasing... But, we had a great trip for our picnic. It really made us see what we can do and what's ahead. And Ruby keeps asking when we can go camping in it. So that's my motivation.

Generally, our plan is this:

1) Finish lift and any trimming.
2) Some body work (a few cosmetic areas of bubbling paint over aluminum corrosion).
3) Remove the emergency lights and install my recently-acquired Japanese baking pans.
4) Paint and logo it.
5) Install roof rack and solar panels.
6) Address the bumpers! The front bumper will require a frame extension and some modification for the winch install. The rear bumper's coming off totally. It will be replaced by a square tube bumper with a spare tire mount. We have three receiver tubes for that. One in case we want to tow a food trailer, and two for motorcycle or bicycle racks.
6a) Put a bed and a shower in the darn thing, so we can stay in it!
6b) Another water tank, propane, stove, install the microwave and the Whynter fridge. So much to do...

This will definitely be a work in progress and we will begin using it as soon as possible... definitely before it is anywhere near done.
 

scooter421

Adventurer
Lol....I completely understand. My wife shakes her head at me all the time. Especially, when I see another diamond in the rough just needing some TLC.
 

rossvtaylor

Adventurer
Oh, I forgot to mention the task I'm avoiding... taking off the remaining reflective striping. I'll need more coffee... and wine. Maybe mixed...
 

Forum statistics

Threads
188,299
Messages
2,905,161
Members
229,959
Latest member
bdpkauai
Top