From Freightliner ambulance to RV - we hope!

rossvtaylor

Adventurer
Pat, I'll do a bit of testing on that tomorrow. For today, I used it to tighten the lug nuts and I was cautious not to overtorque them. It seems to work quite well. But, tomorrow, I'll tighten a couple as much as I can with the 3/4-inch drive and a 5 foot pipe... then I'll see if Kara (strong, but all of 110 pounds) can undo them with the torque multiplier.

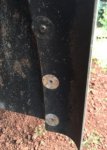
For today, our progress was limited to a couple hours of work. We removed the rear wheel aluminum fender flares. They were held on with about 50 stainless machine screws and fender washers. I saved all the fender washers, for the rubber fender flares.
Screen Shot 2016-07-03 at 6.33.16 PM.jpg

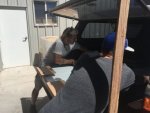
I had some help, too... my 8-year-old daughter Ruby is excited about this project too... she's going to get a hammock inside, like we had in our slide-in truck camper, and she loved it.

Screen Shot 2016-07-03 at 6.33.32 PM.jpg

The fender flares were attached to aluminum strips, which were spot welded along the joint. They were firmly attached, but were easy to break free by bending one weld at a time with the water pump pliers. I'm impressed with how thick the box skin is. I'll get the calipers out tomorrow, but it looks thicker than 1/8th inch.

Screen Shot 2016-07-03 at 6.32.46 PM.jpg

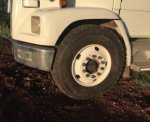
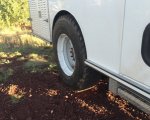
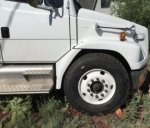
We got the front tires on and this is how it sits, on stock springs and without cutting or removing the bumper end sections. I'm sure we'll need to do a bit of trimming and the bumper is coming off (for now). But, we love how it looks. And, the tires and wheels give us an extra 5.25 inches of axle-to-ground clearance. With a few inches of lift, it's going to be perfect.
Screen Shot 2016-07-03 at 6.32.00 PM.jpg

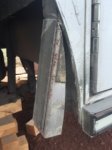
For the rear, here's what I marked to cut. The 1 7/8th inch mark at the top was determined by the interior top of the fender well. But, to get the 42-inch tires inside the well, I had to expand to 2.5 inches at the bottoms. That will give us enough width, I think, and it doesn't cut into the door frames. If needed, I can go another 1.5 inches across (total, 3/4 inches on each side.

Screen Shot 2016-07-03 at 6.30.22 PM.jpg

I cut the top of both rear wheel wheels, using a jig saw with a metal cutting blade. Because of the existing front and rear interior skirting, I wasn't able to take the cuts all the way to the bottom. I'll use a grinder and metal blade for that, tomorrow.

On both sides of our box, we've got an aluminum channel with a rubber bumper insert and a reflective strip. I cut those, in preparation for the final cuts tomorrow. I'll also use the grinder to chamfer the ends of the channel, like the original ends are done.

Screen Shot 2016-07-03 at 6.31.16 PM.jpg

Tomorrow, we'll finish the cuts and put the tires in place on the back. It will be close and I have a plan for that... but, more on that later.
 

patoz

Expedition Leader
attachment.php


I like that style of rub-rail, and it looks like it would work very well. Mine is just the typical aluminum diamond deck material which is formed into a channel and mounted with the center section outward, which is the reverse of how yours is mounted.

I removed mine and I'm going to replace it with 2.5" x 1" Aluminium channel mounted like yours is, and then mount my LED amber and red side marker lights (for a trailer) in the channel so they will be protected. After that, I'm going to fill the area between the lights with that red and white reflective DOT Conspicuity Tape. I want to make sure people see that big box behind my truck when I'm towing it at night. I will have it across the rear bumper also.
 

Ozrockrat

Expedition Leader
And, Oz, I learned from

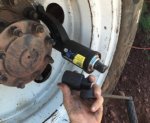
So, after doing it the hard way and reading your thread, we bought a 56-1 ratio torque multiplier that's configured to work better for semi truck wheel nuts.

Being a lazy bugger I have discovered another way to torque up the lug nuts or pinion nuts etc. I picked up this device which is 132:1. I can get 600 ft lbs with a 6" 3/4 drive ratchet. And it has a built in dial.

2afa78a881278508a4ff18f2e5755e23.jpg


cfe26f84439947877678f1e2fac7ae28.jpg


4392a6d4851550d9c311e9648a69dc02.jpg


It comes with 3 snap on sockets and it also has a wrench to use with a hunk of pipe like a normal torque multiplier.

These were used by the military for torqueing up the track plates on tanks.
 

rlrenz

Explorer
I used to have something similar, except mine was made to tighten connecting rod bolts on diesel locomotives. It was 3/4 drive x spline drive output, and such an oddball that I traded it to a company that rebuilt locomotives - they were happy, and I was happy.

I'm probably going to buy one of the Amazon torque multipliers like you have - I've gotten old enough that jumping on a chunk of pipe is less fun than it ever was
 

rossvtaylor

Adventurer
That, my friend, is a nice bit of kit! As said, you've got all the cool toys. I did a bit of Googling and didn't find pricing, but I'm guessing it's got to cost an arm and a (insert appendage of your choice)...

For the $80 we paid, I'm pretty impressed. It even came with an extender, so you don't hit the handle when torquing the rear wheels. I wondered what that piece was for, until it became obvious during use. Pretty darn nice, actually. I torqued a nut pretty much just hand tight, using just moderate strength on the crank, and I could not budge it loose with my 3/4-inch drive breaker bar (but without a pipe cheater).

Screen Shot 2016-07-04 at 7.42.29 PM.jpg

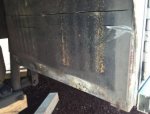
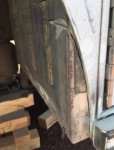
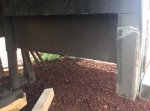
I did some cutting... here are the pics. Fortunately, all I had to cut was the wheel well front and back sheet aluminum, one vertical 2x2, and the skin. The 2x2 didn't even need to get cut all the way through, so it still has some strength. And, the base of that vertical 2x2 is welded to a horizontal 2x2 which is welded to another crossmember. In other words, I'm not worried about the fender well perimeter skin flopping around... at all.

Screen Shot 2016-07-04 at 7.42.59 PM.jpg
Screen Shot 2016-07-04 at 7.42.45 PM.jpg
Screen Shot 2016-07-04 at 7.43.16 PM.jpg
Screen Shot 2016-07-04 at 7.43.32 PM.jpg

I've got a bit of clean up to do, and a bit more trimming. And, of course, some lifting. Right now, I've only got about 1.5 inches above the tire (with the air suspension inflated). With the bags deflated, the box would rest on the tires. So, not a permanent solution but at least I can drive it into town for parts... carefully.

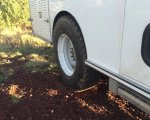
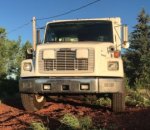
We took KETO 1 out for a quick drive on our local dirt road and the first gear acceleration and power seems great. In fact, it accelerated through the first 4 gears nicely and I can breath a bit of a sigh of relief. I wasn't sure what noticeable impact increasing the tire diameter 10+ inches would have. My biggest concern was first gear, which was damned low already. It seems fine... So, here are a few stance pics. Prior to the lift, of course. BTW, the front wheels/tires work lock-to-lock with no rubbing and I didn't have to cut anything. We didn't even have to move the bumper, but we will anyway when we install the winch.

Screen Shot 2016-07-04 at 7.56.41 PM.jpg
Screen Shot 2016-07-04 at 7.57.16 PM.jpg
Screen Shot 2016-07-04 at 7.57.30 PM.jpg
Screen Shot 2016-07-04 at 7.57.44 PM.jpg
 

Attachments

  • Screen Shot 2016-07-04 at 7.43.49 PM.jpg
    Screen Shot 2016-07-04 at 7.43.49 PM.jpg
    20.4 KB · Views: 25

patoz

Expedition Leader
attachment.php


Ross, is the shaft where you attach the crank bent comming out of the tool body, or is it just the way it looks in the picture? It looks like it's misaligned.

If you think this tool will hold up, then this is the one I'm going to order. It has more sockets than the other ones do and I like having everything all together in a 'Kit' box. However, I guess I better make sure one of the included sockets will fit my lug nuts first.
 

Ozrockrat

Expedition Leader
That, my friend, is a nice bit of kit! As said, you've got all the cool toys. I did a bit of Googling and didn't find pricing, but I'm guessing it's got to cost an arm and a (insert appendage of your choice)...

You can find them on ebay fairly cheaply. One there now for $150 or best offer. Just make sure the dial is not buggered. I will be checking mine against my snap on 3/4 torque wrench. But I don't really see me using it for tires. The Amazon torque multiplier is about 1/3 of the weight and I prefer to carry the 4' long Snap On torque wrench. If I was critical on space or weight it may be a different story.

Just as a reference the box that it comes in is 15" x 15" x 9".

Also Ross you can crank the ride height up at the rear by adjusting the leveling valves to the airbags. I think you could squeeze another couple of inches if needed short term. Let me know if you need the aluminum for the lift blocks. I have a spare couple of raw billet that you could get machined and just replace them when you get to Industrial Medal at some stage.
 

rossvtaylor

Adventurer
Hi Pat, the input shaft is "wobbly" so you're right, it is sagging a bit in the photo. It seems to be by design - the input shaft and bearing float, and are retained by a snap ring. One reviewer commented favorably about that, and he disassembled it and re-lubed it. Overall, it seems quite sturdy and it's going to live on the rig. The sockets seem very heavy duty, like impact sockets, and they're 6-point. I'd be surprised if one of the sockets didn't fit your American-made truck.

And, Oz, thanks for the suggestion. I already toyed with the leveling valves and I'm about maxed out, at that. I'll get to the lifting soon. One thing at a time! And, thanks kindly for the offer of the aluminum loan... if I can't find what I need here, I'll definitely ping you about those. Very nice of you to offer.
 

rossvtaylor

Adventurer
Update - a little progress made, around life and work. I jacked up the frame and supported it on cribbing stacks (my daughter calls them Jenga piles). With the suspension hanging, just a bit, I unbolted the rear suspension anti-sway bar and the 2 u-bolts on each side of the axle. I forgot that I'd had the suspension airbags pumped up pretty hard, and they were pushing down on the axle. Once I remembered that, and released the air, I was able to put a jack under the airbag arm and jack it up, essentially raising it off the axle. Here's sort of the overview:

Screen Shot 2016-07-05 at 9.30.04 PM.jpg

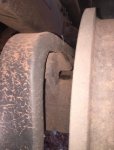
Here's what the suspension member, on top of the axle, looks like when it's mated together:

Screen Shot 2016-07-05 at 9.30.20 PM.jpg

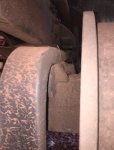
And, with some upwards jack pressure, the suspension member and the axle's positioning arm (swing arm) start to separate. Here's where the spacer block will go.

Screen Shot 2016-07-05 at 9.30.39 PM.jpg

The U-bolts are 3/4 inch rod. Actually, I measured them and they're only .71 inches across. Too big for 5/8 and too small for 3/4. What the heck?

Screen Shot 2016-07-05 at 9.31.22 PM.jpg

I had to text Ozrockrat to see what size he used. It turns out that the U-bolt diameter should be measured at the threads, not on the rod. So, that simplifies things. I need 3/4-inch U-bolts with a 3-inch radius bend. My current bolts are 14 inches long, so I need 18-inch versions. Easy peasy... I found them online for about $25 each. Before going online, though, I'm going to give my local spring/lift shop a chance and see how long it will take for them to get/make them. Buy local...
 

rossvtaylor

Adventurer
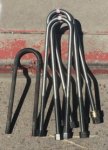
Ooooo, longer U bolts! I just picked these up from our local spring place. Exciting times and the chance to make some progress this weekend...

Screen Shot 2016-07-08 at 3.23.22 PM.jpg
 

rossvtaylor

Adventurer
Well, we didn't get any suspension progress made this weekend. Too much to do for the business and at home, after Kara and my respective travels. But, we're back and still moving forward. Today, we picked up 3 Kyocera 265W PV panels and a Midnite Solar Classic 150 charge controller from http://www.solar-electric.com/ which is Northern Arizona Wind and Sun. They happen to be local, so we saved shipping, but they have a big online presence. I'm not affiliated with them, except by knowing they are knowledgable and support the renewable energy community. They have a sale through the 15th, so that saved us 7% off their already fair prices.

The panels are huge, but we've got a lot of surface area - one of the advantages of a medium duty ambulance with a 15-foot box on it.

Screen Shot 2016-07-13 at 12.44.24 PM.jpg

I also seriously considered the Morningstar Tristar MPPT 60. That is a solid product and it's nice for inside use, since it has no fan. I've installed the PWM versions in some harsh environments, like the desert in western India, and they are just about bulletproof. But, I love Midnite Solar for so many reasons. I happen to know the owner/founder and respect him and his brother. Both Kara and I also appreciate their retro styling and the attention to detail and build quality. We bought the Classic 150. You can save a few bucks with the Classic Lite, which lacks some capability we won't use (like adding wind or hydro). But, the regular Classic has a display which you can mount remotely. The Classic looks so nice we almost hate to hide it in an exterior (vented) cabinet. But it will be nice to have it, and the fan, outside and the display inside.

Screen Shot 2016-07-13 at 12.44.04 PM.jpg

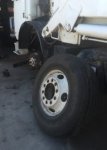
And, Kara and I went by the spring/suspension place for some more stuff. While there, I saw they were working on a garbage truck. It was cool to see that big tire and wheel and, then, on closer inspection see that it's the same exact size as what we just put on KETO 1.

Screen Shot 2016-07-13 at 4.02.02 PM.jpg
 
Last edited:

rossvtaylor

Adventurer
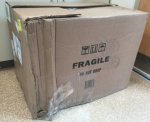
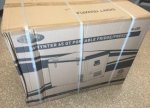
One more update before the weekend. I'll be out of town until Tuesday, but our new fridge/freezer arrived. As you can see, UPS didn't pay much attention to the "fragile" markings... Or, perhaps they did and that's why the box is only bashed in on one end.

Screen Shot 2016-07-15 at 7.01.33 AM.jpg

Removing the outer box revealed that the inner box also got mashed.

Screen Shot 2016-07-15 at 7.01.48 AM.jpg

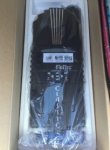
At this point, Kara and I were beginning to wonder what condition the fridge would be in... but, it turns out the interior corrugated padding was quite stout and the Whynter 65-quart fridge/freezer was unscathed inside its little cardboard cocoon. We plugged it in, to 120V AC at the lab, and it cooled right down. We haven't yet tried it on DC. For $500, it's really a nice looking unit - metal hinges, sturdy latches, a nice interior and rubber seal. We're pleased and, now, anxious to get all of these things installed. Have a great weekend, all!
 
Last edited:

hyperboarder

Adventurer
I use that same fridge, solid unit. There's a guy on here selling tie down brackets, I'd recommend getting a pair, otherwise I've left mine alone and just used the bejesus out of it.
 

Forum statistics

Threads
188,360
Messages
2,903,737
Members
230,227
Latest member
banshee01
Top