From Freightliner ambulance to RV - we hope!

rossvtaylor

Adventurer
I don't have any progress updates to report... but, we DID get out for a really nice day of exploration and (as Kara put it) "technical challenge" of the rig. The short summary is that we couldn't be more pleased, considering its size and 2WD. Last weekend, we did a dry rocky trail to Sycamore Point. This weekend, our path was a mix of forest service roads in the woods, some deeply rutted trail on the prairie, and lots of mud holes... all we can give you here are some pics.

Here's a little "technical challenge" trail that I turned onto. But, just kidding Kara - I just wanted a pic looking up that narrow hill.
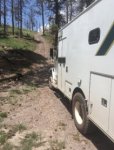
Screen Shot 2016-08-01 at 5.06.28 PM.jpg

Funny... when I turned onto the hill trail for the photo op, we were passed by two Jeeps out on a little exploration of their own. They waved and laughed at the thought I'd try that hill. I backed up and we resumed our travels, behind the Jeeps for a bit.

Screen Shot 2016-08-01 at 5.06.45 PM.jpg

Exiting the trail, we had to stop for another pic - Kara's getting used to this silliness already. The sign warns that the area we just left isn't suitable for low clearance vehicles. We're not that, anymore. Felt good not to worry.
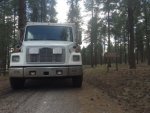
Screen Shot 2016-08-01 at 5.07.02 PM.jpg

After that, we drove past Obsidian Tank and out onto the prairie trails. We drove out into the middle of the prairie, on the deeply rutted and muddy track, to a lone hill with a cool water catchment system. It's one of our favorite places to watch the sky... And, today, to watch the local cowboys checking fence lines.

I know a lot of you close up the rear doors, but we're really enjoying having the ability to open them up and use it as a porch or bay window... wine optional. Whoa...did I really just say wine was optional?
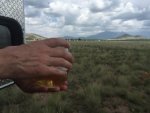
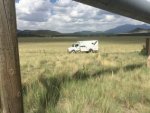
Screen Shot 2016-08-01 at 5.07.20 PM.jpg
Screen Shot 2016-08-01 at 5.07.54 PM.jpg

See, there really was mud... and we powered through the mud holes in good fashion. We'll never be the snorkel-sporting river-swimmer type, but at least we're feeling like KETO 1 will carry us to the places we most want to go.
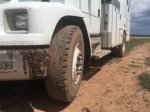
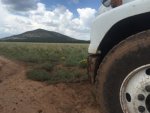
Screen Shot 2016-08-01 at 5.08.52 PM.jpg
Screen Shot 2016-08-01 at 5.09.08 PM.jpg
 

patoz

Expedition Leader
Looking good Ross! I wish we had some places like that, that we could spend the day playing. All we have around here is a state forest which is heavily regulated, and some mud holes if you know where to look.
 

rossvtaylor

Adventurer
Thanks Scooter and Pat! It was a nice day... we're pretty lucky, I think.

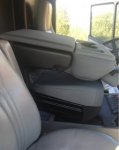
We didn't get anything done this week - I was in Texas for work and this weekend we worked on our business, and drove to Phoenix for the day today. But, while in Phoenix, I did pick up a couple of things I bought from Craigslist (and had others pick up). One was an old 1950's Coleman 3-burner stove, for the kitchen, and one was the center seat/console that I described a few posts back. I think it sits up a bit high...

Screen Shot 2016-08-07 at 7.57.14 PM.jpg

Joking, of course... but I wanted to see how it looked for width. I think it will be great. As a bonus, which I didn't know about, the bottom seat cushion also lifts up. So, that will be the perfect spot for a lock box.

A couple of things also arrived with Mike, the nice UPS driver. One, from eBay, was the Bogert Humvee jack power unit (hydraulic pump unit) that I bought. It's unused and should be perfect for my jack plans.

Screen Shot 2016-08-07 at 7.57.43 PM.jpg

That power unit is a 6000 psi pump unit. I admit I should have researched a bit more, but I got "caught up" in the excitement of finding this. After buying it, I found that eBay is littered with 10,000 psi Enerpac units for less money. But, this was new and military surplus... (I can justify it that way, right?).

On the other end of the spectrum, where I think this was a great buy, was a 5800 psi 9-inch stroke hydraulic cylinder from Surplus Center. The ad photos don't do this thing justice - it's a beast and absolutely pristine. It still had the oil-impregnated paper wrapping. I love that it's got a nice ram cover and a cross locking pin, you can insert when it's extended. For not even $50, I think I'll be ordering another one of these. It's going to be perfect for my jack plans and the second one will be part of an engine lift project for the shop.

Screen Shot 2016-08-07 at 7.57.28 PM.jpg

Hopefully the next two weeks will bring some progress on all this stuff!
 

patoz

Expedition Leader
Looks like Christmas in August, and some cool looking stuff to boot!

That middle seat looks like it will be a perfect match once you get it positioned correctly.
 

Ozrockrat

Expedition Leader
That's the same seat I run in mine. It's a bit narrow for a full sized adult and Mackenzie says it's hard on longer trips but an IKEA sheepskin fixes that.
 

scooter421

Adventurer
Very nice Ross! What are the plans for the hydraulic cylinder? I've had some thoughts of my own but it looks like you may have a better plan.
Rather than dragging heavy jacks around in order to change a tire, I had considered installing some sort of jack to make life easier.

Scooter...
 

Ozrockrat

Expedition Leader
I have been looking with envy at the A Class motor home leveling jacks. 2 on the back would be ok but I cannot work out a place to fit them on the front. Currently I have a 20t air over hydraulic jack and a set of aluminum jacking pads. Given that I haven't carried a spare anywhere yet including Baja it's probably a moot point. I'm screwed with or without a suitable jack.
 

scooter421

Adventurer
The levelling jacks would be nice for sure. I also have limited options for permanently mounted jacks. Eventually; after a couple new bumpers, I had considered welding on 4 mounting locations for one jack. That way, I could at least raise one corner at a time to change tires.
 

rossvtaylor

Adventurer
Hi guys, I've not yet figured out the jacking options. I hope to do some welding and experimentation this weekend... if there's no update on Monday, have Kara check underneath the rig. :)

On a totally unrelated note, about mounting exterior items to the box... The exterior skin is quite a bit thicker than I'd expected, so it's definitely got some structural strength to it. But, if I want to hit a "stud" (one of the 2x2s) on a wall for which I don't have interior access, have any of you got a method for that? One that doesn't involve drilling a row of little holes... will a home stud finder work on an aluminum skinned box?
 

Ozrockrat

Expedition Leader
Pull your lights out and measure for the ones on the roof. Actually you can access just about all the wiring etc by pulling the ceiling lights. For the side I unbolted the cupboard near the ceiling and measured off them. But not being the sharpest tool in the shed I forgot to put markers on the inside somewhere.

You will generally find that the vertical screw lines that hold the ply onto the walls are screwed to the upright studs. On the current box I have it is 12" between studs or 14" on the center.
 

RiderBloke

Observer
Thanks Scooter and Pat! It was a nice day... we're pretty lucky, I think.

On the other end of the spectrum, where I think this was a great buy, was a 5800 psi 9-inch stroke hydraulic cylinder from Surplus Center. The ad photos don't do this thing justice - it's a beast and absolutely pristine. It still had the oil-impregnated paper wrapping. I love that it's got a nice ram cover and a cross locking pin, you can insert when it's extended. For not even $50, I think I'll be ordering another one of these. It's going to be perfect for my jack plans and the second one will be part of an engine lift project for the shop.

View attachment 360206

Hopefully the next two weeks will bring some progress on all this stuff!

Do you have something like this in mind? (Found on Pinterest.) I have wondered how to lift such a truck on the road to change tyres.

d5a26f5473e522d79ce452208269f1b1.jpg


Sent from my iPad using Tapatalk
 

rlrenz

Explorer
14" on center sounds about right for Medic Master side spacing - the cab end will be about 18" on center.

The side skin will be about 0.090" - the roof should be about 0.100".

Access along the sides will be by pulling all the side warning and scene lights. You'll have enough room that you can snake wiring through in a convoluted tube. You may have to use an electrician's snake to pull it from one light to the next. If a snake gets too curly-cued, a chunk of straightened copper tubing will also do the job. A mirror (I use an old IH Scout side mirror) and a flashlight help a lot.

The difficulty in getting things perfectly leveled is why I went with a marine 12 volt refrigerator instead of an LP-12 volt refrigerator. The LP cooling system has to be very level to work effectively, but a marine refrigerator can accommodate a lot of pitching and rolling with no problem.
 

rlrenz

Explorer
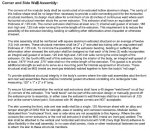
I stand corrected - Thinking after the fact, 0.090" for the side walls didn't sound right, so I dug into my files, and here is what Medic Master did as their side wall standard construction.

0.125" is correct for the side walls, 0.090" is what they used for the inner panels on cabinet doors.

Medic Master side wall specs.JPG
 

rlrenz

Explorer
To complete things, here's the roof specs:

Roof Assembly:
The roof's substructure assembly shall consist of perimeter roof rail extrusions, lateral roof bows, longitudinal center support and interconnecting corner caps. The roof's sub-structure shall have a center longitudinal extrusion running parallel to the side roof rail extrusions. This center support extrusion shall have an alloy and temper strength of 6063-T6. It shall measure at least eight (8) inches wide but no more than ten (10) inches wide. The design of this center support extrusion shall be a "U" shaped structure with a hollow cavity to provide both strength and additional insulation qualities. A receiver channel shall be integral to its design to accept an interior ceiling grab handle. This feature shall permit the insertion of an overhead grab handle that is flush with the interior ceiling panels. The depth of the recessed overhead grab handle shall be such as to permit a gloved hand to encircle it. The lateral roof bows shall be welded to this center support extrusion and the outer roof rail extrusions to form the roof substructure.
The patient compartment roof shall have spray foam insulation filling the roof's center support extrusion's hollow shape. In addition the roof shall have rigid foam block insulation between the roof's center support extrusion and the exterior skin.
The perimeter roof rail extrusion shall be an extruded hollow aluminum shape. The cavity of this hollow shape shall be no larger than necessary to provide a solid connecting point for the horizontal structural members. Its design must allow for a minimum of six (6) inches of continuous weld where each horizontal structural member abuts the corner extrusion. This extrusion shall have an equivalent wall thickness of .125 inch. A drip rail shall be included as an integral feature of this extrusion design. A drip rail that is screwed, taped, riveted or otherwise mechanically fastened to the roof extrusion is not acceptable to this Agency.
The lateral roof bows shall be 2" x 2" square aluminum extruded tubing with an equivalent wall thickness of .125 inch. To minimize the possibility of the extrusion bending, twisting or suffering other deformation when stressed the extrusion shall be designed so that each of its three (3) walls incorporates an integral wall gusset of at least .125 inch high and .125 inch wide running the entire length of the extrusion. On the fourth (4th) wall of this extrusion, facing the interior of the body, an integral wall gusset of at least .1875" thick and .375" wide shall run the entire length of the extrusion. This gusset is to provide additional strength as well as to serve as a mounting point for internal equipment or structures. These structural shall be MIG (metal arc inert gas shielded) welded together to form the body's "roll cage".
To ensure full weld penetration the extrusion shall have a 45 degree "weld bevel" on all four (4) corners of the extrusion. This "weld bevel" can be part of the extrusion design or manually ground off the extrusion prior to assembly. In either case the extrusion's wall thickness shall be a minimum of .100 inch at the corner's bevel point. Extrusions with 90 degree corners are NOT acceptable to this Agency.
These structural members shall be located so that the roof skin is supported on a minimum "center" distance of 14 inches. The roof bows shall interconnect with the roof rails and the center support and be continuously welded at all contact points. In no case shall a lateral roof bow have free span of more than 46 inches.
The roof skin shall be .125 inch thick and have an alloy and temper strength of 5052 H32. The roof skin will be fully seam welded where the skin contacts the roof rail perimeter extrusions. The skin shall be attached to the lateral roof bows with VHB (Very High Bond) adhesive to allow flexibility in the roof assembly. In no case can screws, rivets or other mechanical fasteners be used to attach the skin to the lateral roof bows.
To provide additional strength and to resist crushing, the finished roof structure shall incorporate a "crown" or "roll" so that the center of the roof is at least one and three-quarters (1 3/4") of an inch higher than the perimeter roof rails. In addition to providing extra strength this "crown" or "roll" shall prevent water from standing on the modular roof. This shall be accomplished without weakening the roof members by rolling or de-forming them. Any construction technique used that reduces the strength of the roof members is not acceptable to this Agency.
The corner caps shall be designed to interlock with the roof perimeter and vertical corner extrusions and roof sheet. The corner caps shall be formed of an aluminum casting that is designed to fracture and prevent torsional stresses from being transmitted through the corner assembly in case of side or corner impact. A stamped or formed aluminum corner cap is unacceptable and does not meet the requirements of this specification. The final finish shall be smooth and without deformation or roughness. To further enhance the structural integrity of the modular body all contact points between the corner assembly and the roof perimeter shall be fully welded.
The exterior of the body shall be finished smooth and shall present a modern and aerodynamic appearance and shall embody provisions for doors and windows specified herein.
 

Forum statistics

Threads
188,006
Messages
2,901,018
Members
229,320
Latest member
SMBRoamer
Top