You are using an out of date browser. It may not display this or other websites correctly.
You should upgrade or use an alternative browser.
You should upgrade or use an alternative browser.
Gear's Baja JK Thread
- Thread starter Gear
- Start date
Gear
Explorer, Overland Certified OC0020
Here is the link www.4x4spod.com
Gear
Explorer, Overland Certified OC0020
XJxplorer
Not really sure. My suggestion is to give a quick email to John the sPOD guy at sales@4x4s-pod.com. He checks his emails regularly and should be able to give you an answer. Let me know how it turns out!
Is there any way to hook it up to an xj???
Not really sure. My suggestion is to give a quick email to John the sPOD guy at sales@4x4s-pod.com. He checks his emails regularly and should be able to give you an answer. Let me know how it turns out!
Gear
Explorer, Overland Certified OC0020
Spray Paint = Cool Black rims
Well I scuffed up the new AEV Bridger wheels today and sprayed a nice coat of black on them. Here are the photographs. Now I just want to sit outside and :drool: over my cool rims and tires.
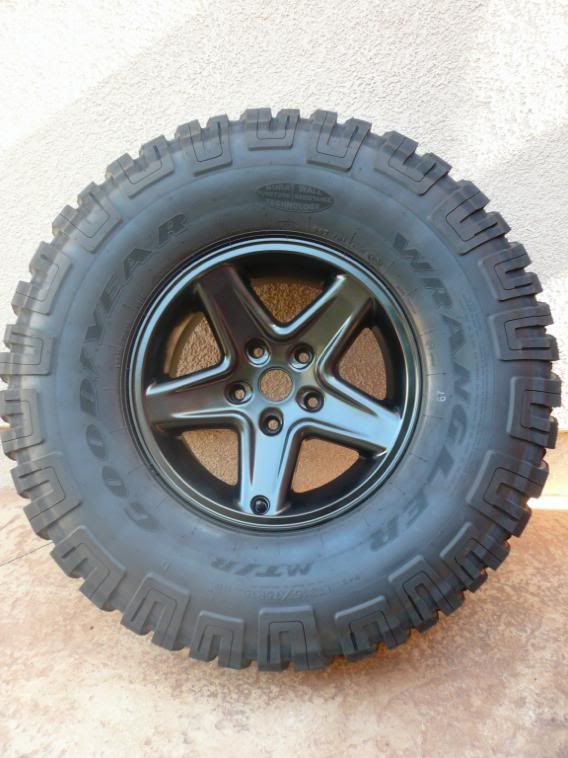
Semi Gloss Black
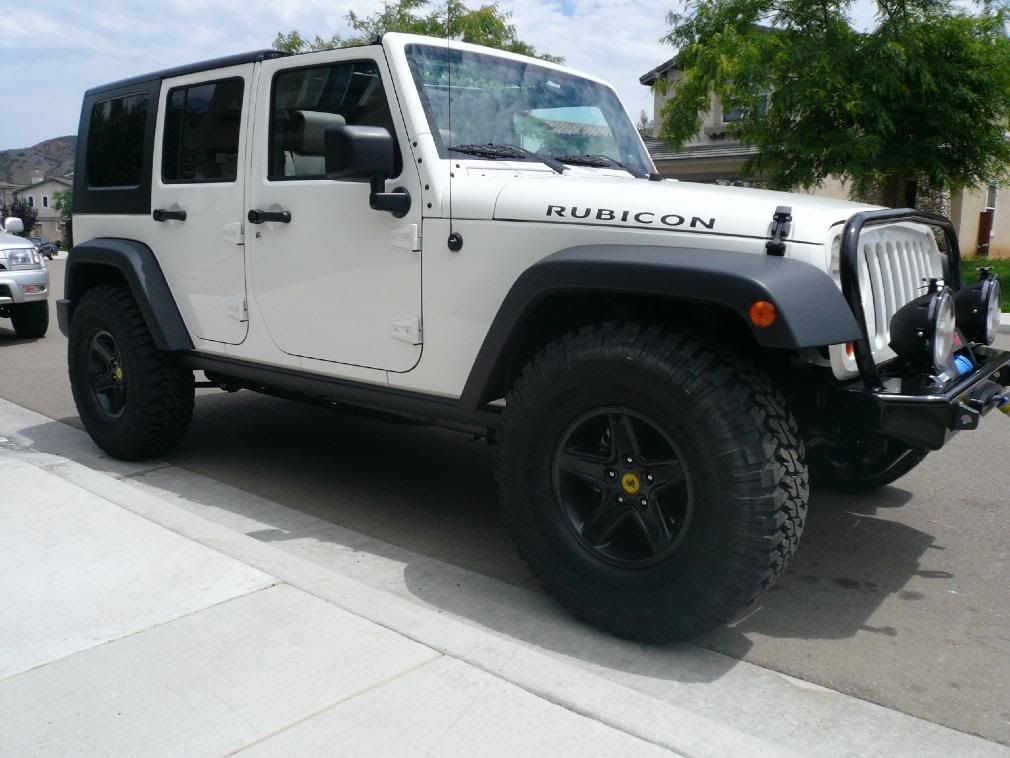
On the Jeep.
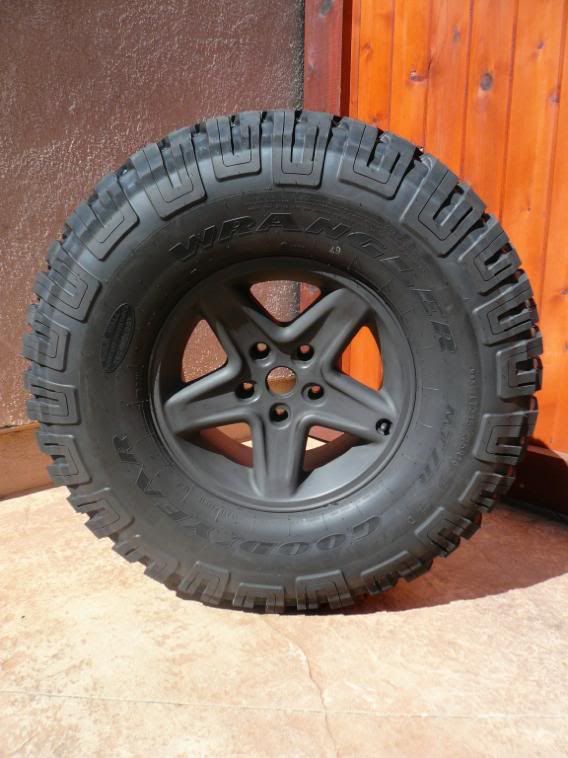
Also tried Flat Black
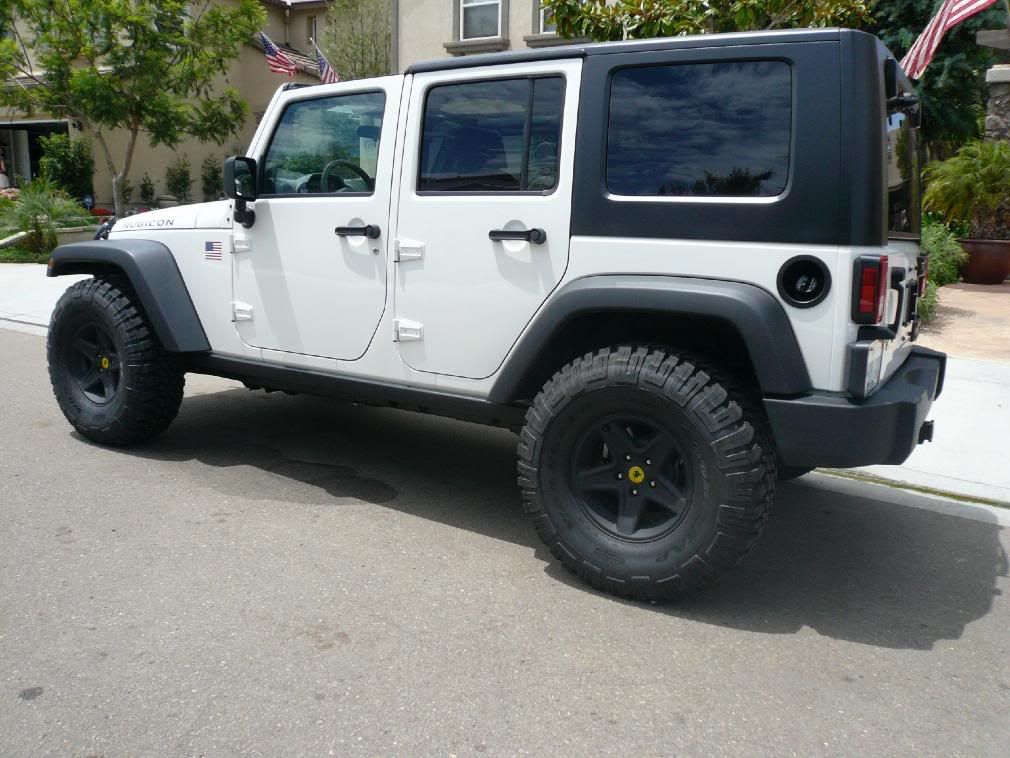
Flat Black on the Jeep.
Looks like I will be going with Semi Gloss Black. I just need to go pick up a few more cans of paint.:victory:
Well I scuffed up the new AEV Bridger wheels today and sprayed a nice coat of black on them. Here are the photographs. Now I just want to sit outside and :drool: over my cool rims and tires.
Semi Gloss Black
On the Jeep.
Also tried Flat Black
Flat Black on the Jeep.
Looks like I will be going with Semi Gloss Black. I just need to go pick up a few more cans of paint.:victory:
Last edited:
articulate
Expedition Leader
I love it.Gear said:Well I scuffed up the new AEV Bridger wheels today and sprayed a nice coat of black on them. Here are the photographs. Now I just want to sit outside and :drool: over my cool rims and tires.

Semi Gloss Black
I just noticed the switch pod - OMG those are cool. There are more switches than I need, but what the heck. I can always add accessories.
Gear
Explorer, Overland Certified OC0020
Cool Headlamp/Interior Light for Kids
I added a small but significant mod for my youngest son. He has always disliked driving at night in the dark. So I found this little Petzl headlamp the other day which has a 360 degree swivel LED light source( white as well as red.) It can be clipped to the brim of your hat or worn with the supplied headband. I simple 3M adhesived it to the center roll bar. I can use it to read maps or change a flat. Best of all I can place the one red LED on for driving at night and all is well with my youngest.
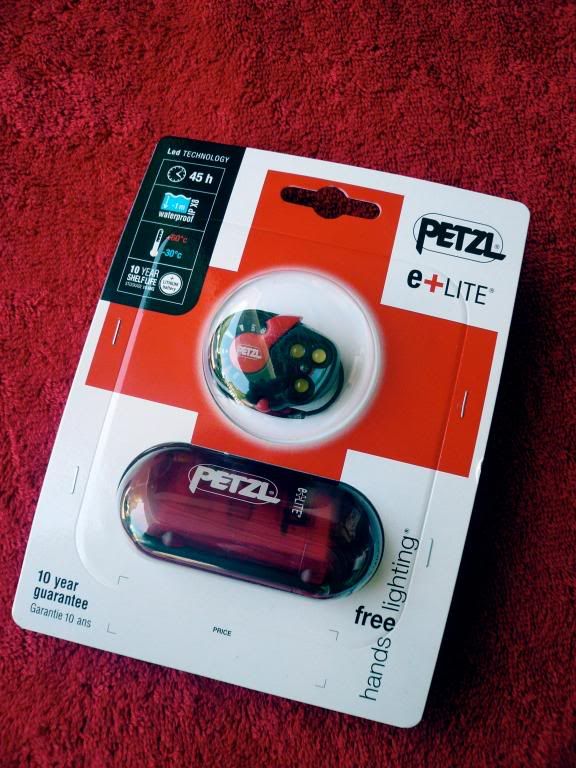
Petzl E+lite
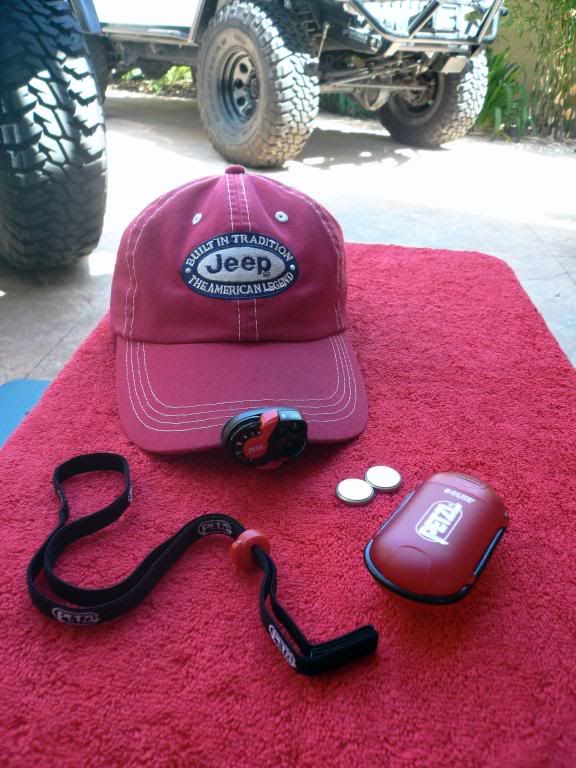
What's inside, headband, storage case, batteries. Shown cliped to my hat.
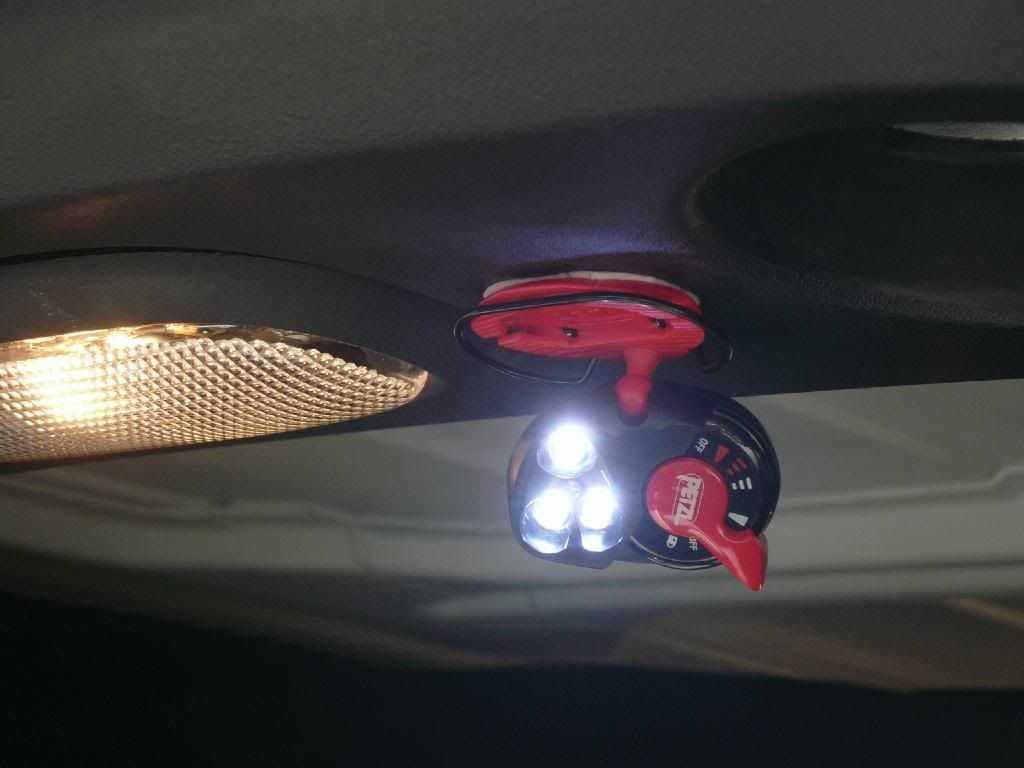
3 white LED's or 1 red LED.
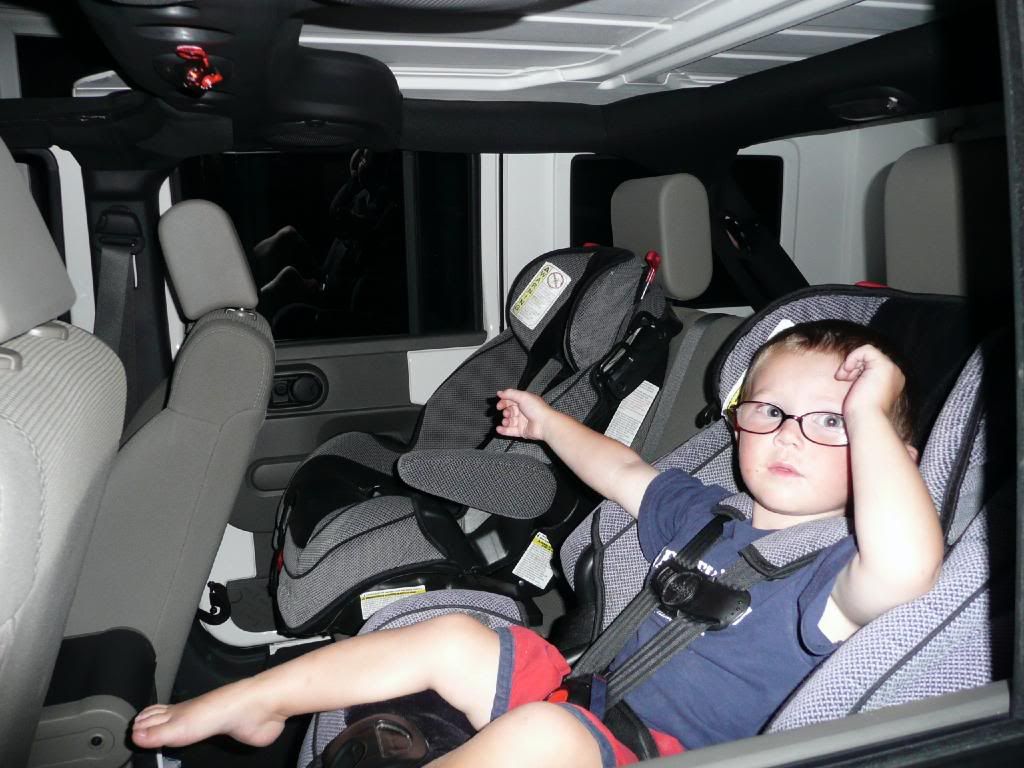
E+lite shown in the upper left corner

1 red LED -- Works great!
I added a small but significant mod for my youngest son. He has always disliked driving at night in the dark. So I found this little Petzl headlamp the other day which has a 360 degree swivel LED light source( white as well as red.) It can be clipped to the brim of your hat or worn with the supplied headband. I simple 3M adhesived it to the center roll bar. I can use it to read maps or change a flat. Best of all I can place the one red LED on for driving at night and all is well with my youngest.

Petzl E+lite

What's inside, headband, storage case, batteries. Shown cliped to my hat.

3 white LED's or 1 red LED.

E+lite shown in the upper left corner

1 red LED -- Works great!
Last edited:
4Rescue
Expedition Leader
Gear said:
Holy No Up Travel Batman!!! Looks tough tho.
Gear said:LUISJG wrote
Yes, I know kind of scarry. Your comment made my laugh. Hopefully Nth Degree comes thru with there lift kit on time. Should be released any day now.
35 look lot better on the jk ,,I been debating into getting 35 and selling my 33's but then I gonna have to change gears,,or maybe not how does yours behave with stock gears?
Gear
Explorer, Overland Certified OC0020
So far the stock gears have been just fine. Yes there are times when you have to step on the gas to make the Jeep down shift but for the most part I don't feel a need to run out and get them. With this said I would like a little more power out of the Jeep and know that gears should be first on the list. I need to contact Off-road Evolution and see if they are still doing front and rear gears for $1000. This would be worth it. Will just have to give them a call on Monday. Oh and your JK looks great on 33". We all want the next size up. 37" would be nice but not really practical.
Last edited:
Gear said:So far the stock gears have been just fine. Yes there are times when you have to step on the gas to make the Jeep down shift but for the most part I don't feel a need to run out and get them. With this said I would like a little more power out of the Jeep and know that gears should be first on the list. I need to contact Off-road Evolution and see if they are still doing front and rear gears for $1000. This would be worth it. Will just have to give them a call on Monday. Oh and your JK looks great on 33". We all want the next size up. 37" would be nice but not really practical.
yeah,,, I rather use the 1000 for gears for something else. like bumpers.
maybe in 3 years I might change ..
just finish my cb install look at my jk thread will upload pics tonight.
Gear
Explorer, Overland Certified OC0020
Jeeperman Rear bumper with Swing out Tire Carrier Installed
The other day I started work on installing my Jeeperman bumper.

First off, remove the 14 lbs. plastic brick that Jeep calls a bumper.

Here is the back of the Jeep without the brick. In the photo I still need to remove the receiver hitch, 2 metal tabs on top of the crossmember and the metal side wings. The last two items are what you unbolt to take the brick off your Jeep. You will then bolt up the new bumper to the 4 bolt holes at the receiver hitch as well as 3 bolts on each side of the frame members.

Here is the parts bag with the expanded view of how the bumper goes together. No instructions were supplied. The overall build is pretty self explanatory but I will give some of my thought on where things go just to help you get over some of the hurdles. The photographs show the order of the build. Oh and by the way when I called Jeeperman about the instructions they said they were on there website at www.Jeeperman.com. You just need to adapt the TJ instructions to you JK.

Install the latch pin and delron spacer. The hole in the picture is where you attach the bump stop.

Important use the two supplied nuts on the backside of the bumper to space the bump stop off the bumper. This will align the swingout with the latch pin.

Here is the latch that attaches to the lower portion of the swingout.

Here is the layout for the swingout carrier. Goes like this bolt, aluminum top spacer, inner spacer, seal, bearing. This goes in the top portion of the swingout. The bottom will have bearing, seal, inner spacer, thick washer, 2 thin washers. Also in the photograph is the swingout catch bar and a zerk fitting to grease the bearings.

Lower section greased and ready for the swingout.

Here is everything in place except the top aluminum cover with bolt. I had to modify this part. See next photograph.

Must be black.
To be continued --
The other day I started work on installing my Jeeperman bumper.
First off, remove the 14 lbs. plastic brick that Jeep calls a bumper.
Here is the back of the Jeep without the brick. In the photo I still need to remove the receiver hitch, 2 metal tabs on top of the crossmember and the metal side wings. The last two items are what you unbolt to take the brick off your Jeep. You will then bolt up the new bumper to the 4 bolt holes at the receiver hitch as well as 3 bolts on each side of the frame members.
Here is the parts bag with the expanded view of how the bumper goes together. No instructions were supplied. The overall build is pretty self explanatory but I will give some of my thought on where things go just to help you get over some of the hurdles. The photographs show the order of the build. Oh and by the way when I called Jeeperman about the instructions they said they were on there website at www.Jeeperman.com. You just need to adapt the TJ instructions to you JK.
Install the latch pin and delron spacer. The hole in the picture is where you attach the bump stop.
Important use the two supplied nuts on the backside of the bumper to space the bump stop off the bumper. This will align the swingout with the latch pin.
Here is the latch that attaches to the lower portion of the swingout.
Here is the layout for the swingout carrier. Goes like this bolt, aluminum top spacer, inner spacer, seal, bearing. This goes in the top portion of the swingout. The bottom will have bearing, seal, inner spacer, thick washer, 2 thin washers. Also in the photograph is the swingout catch bar and a zerk fitting to grease the bearings.
Lower section greased and ready for the swingout.
Here is everything in place except the top aluminum cover with bolt. I had to modify this part. See next photograph.
Must be black.
To be continued --
Gear
Explorer, Overland Certified OC0020
Jeeperman Rear bumper with Swing out Tire Carrier Installed Part II

Install zerk fitting.

Install the latch catch. You will need a snap ring tool to make this happen. You can see in this photograph that I am missing some powdercoat. If you do not install the bump stop on the bumper correctly as stated above the swingout will extended to far and scratch the powdercoat.

This picture shows the correct bolt pattern for 5 on 5. This is the new Jeep JK wheel pattern. I used a washer and a spare nut to press the wheel studs into the metal.

Completed hinge.

Finished install.
Install zerk fitting.
Install the latch catch. You will need a snap ring tool to make this happen. You can see in this photograph that I am missing some powdercoat. If you do not install the bump stop on the bumper correctly as stated above the swingout will extended to far and scratch the powdercoat.
This picture shows the correct bolt pattern for 5 on 5. This is the new Jeep JK wheel pattern. I used a washer and a spare nut to press the wheel studs into the metal.
Completed hinge.
Finished install.
RunninRubicon
Adventurer
Wow! Nice bumper and tire carrier. Great job on detailing it for us.:wings:
Similar threads
- Replies
- 0
- Views
- 744
- Replies
- 19
- Views
- 3K
- Replies
- 12
- Views
- 4K
