Continuing on with electrical . . .
I ran my non-camper 2nd Gen Tacoma with dual Odesseys with my 50qt ARB as the primary draw on the aux battery. Weight management is a big issue for me so wanted LiFePo for weight to amp hour ratio. Plus figured I'd have other other draws in the camper, so a 100 AH Battleborn gives me 3x the AHs for half the weight of my old Odyessy.
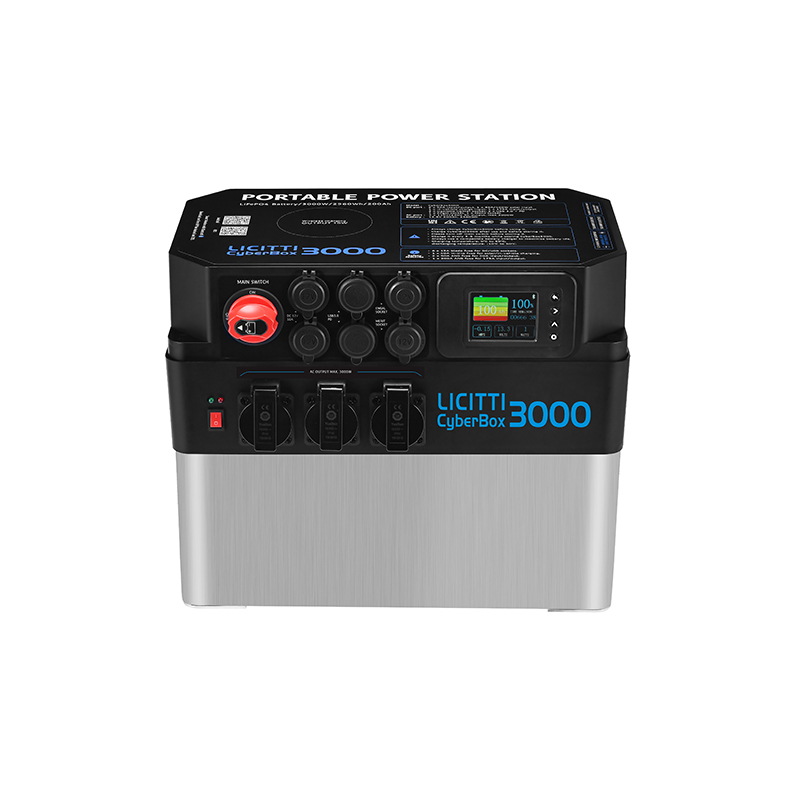
Decided on the National Luna DCDC Powerpack (AKA green box). Got some good holiday deals last year, but it may not be the cheapest way to go. I seriously researched the Jackery and others. Lack of good non-solar charging option along with skepticism about Li-ion durability and handing high Phoenix heat as well as the superior amount of amp hours available put me squarely in the Battleborn LiFePo camp. I also don't want to have to install constant rooftop solar if I can avoid it.
View attachment 699692
View attachment 699693
Pro's:
-- Easy to remove (necessary in Phoenix summers where the camper outside can easily get over 120;
-- has 4 50amp Anderson Power Ports (2 for either input or output, 1 for connection to starter battery for charging, 1 for solar input through built in MPPT controller)
-- multiple other USB ports, 12v cigarette ports and 1 Hella port (sometimes called Powerlet), which is higher amp (15 I think) and snaps tight vs normal 12v cigarette ports
-- came with 25 feet of 16mm (~6AWG) cable for the battery connection with fuses and pre-done Anderson plug
-- 25 amp DCDC charger, with Li profile that fits Battleborns
-- MPPT Solar controller
-- On/Off circuit breaker
-- Ports are all pretty easy to switch out can customize, except for the Andersons
-- Year end deal last year included a hardwired monitor, which is pretty useful to watch the solar charging on my portable solar panel when I use it.
-- I could take it out easily and use it in my 4Runner as well
-- I think it's cheaper and/or more versatile than one of the solar generators for the power
Cons:
-- several $100s more expensive than building my own system
-- Stuck with the box configuration. Can't separate components (well, can't do so easily)
-- No inverter as with Jackery's , etc. I used a Victron Phoenix 500amp inverter as you can see in the picture above. Don't really have much heavy duty AC power needs.
Rest of configuration:
I ran the charging cable in a heavy duty loom out the OEM grommets in the Tundra cab bulkhead passenger side and followed the existing P-side electrical lines to the engine bay and starter battery. You can see the cable under the bedrail and then velcro'd to the Bedrug down to the exit in the right corner.
View attachment 699694
My wiring run is kinda long as I'm putting my water cans in the P-side corner to be opposite of the 38 gallon gas tank for weight distribution and didn't want the battery box around the water. Plus, Toyota puts their batteries on the D-side, so I had to add about 8' more 6AWG cable to the supplied cable, but it worked out great.
My camper electrics are in the rear D-side
View attachment 699695
I rive-nutted two bolts on the right side and used a self tapping lathe screw on the left in the corner (where it's too tight for a rivnut) to attach a 1/4" baltic birch panel. Used 8AWG from the battery cable tied under the bedrail to go up to the Bluesea switch box. I really like the Bluesea box. Water resistant with 4 15amp breaker switches. I found a great gasket sealed plastic box on Amazon that the panel fits perfectly into a cutout I made on the lid so I can just open the box for wiring or changes without pulling the panel board. My Maxxair fan goes to one switch, a set of 5 Led lights for the cabin goes to another, the built in 12v port and dual USBs are switched from the top switch (comes that way) and I have one left for future use.
And, it's mounted upside down

. . . I actually did that on purpose to put the USB port up high for an out of the way plug-in for a Luminoodle I have which we attach under the awning at night.
FYI -- Bluesea makes a 6 switch version of this little panel which might be more useful -- gives you 3 more switches than this since there's no 12v or USB on that one.
View attachment 699701
Finally the fridge . . .
I didn't want to have my fridge go through the ports on the front panel of my Powerpack. The 12v ports aren't secure enough to guarantee the connection won't come loose off-road and I didn't want to have the on/off switch turn the power off to the fridge. I could have used one of the 50amp output ports, but that's overkill, plus I use them all. So, I drilled a hole in the side of the box and wired ARB's 10awg fridge loom with it's in-line fuse directly to the battery using a15-45amp Anderson plug. I really like the loom as it has a screw-in plug on the other end for the fridge, so nothing can rattle out. Anderson plugs CAN separate, but I'm using one of their clips to secure it so there's no chance of the fridge disconnecting anywhere in the circuit.
View attachment 699717
You can also see I put in a Victron smart shunt (upper right corner) so I can monitor amps in an out, voltage and charging via Bluetooth on my phone. Very useful.


