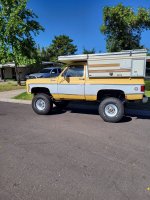
Guess who's back!?! Atl-atl's K5 Blazer + Four Wheel Camper "The Crawlin Cabin" documentation thread!

ExpoMike

Well-known member
You can get some Button Head bolts, which will be rounded like a carriage bolt but have a hex drive used to tighten them. Best of both worlds. You can stiffen up the plate but welding some angle iron pieces on the top side, between the cross members (but not too the cross members). I would run pieces front to back, on the outside edge and the middle. Then I would put a piece at an angle between the outer and middle pieces. Kinda like this |\|/| Place the open part of V onto the plate, so the point end is sticking up.
 

Atl-atl

Adventurer
You can get some Button Head bolts, which will be rounded like a carriage bolt but have a hex drive used to tighten them. Best of both worlds. You can stiffen up the plate but welding some angle iron pieces on the top side, between the cross members (but not too the cross members). I would run pieces front to back, on the outside edge and the middle. Then I would put a piece at an angle between the outer and middle pieces. Kinda like this |\|/| Place the open part of V onto the plate, so the point end is sticking up.
Thats almost exactly what I was thinking for the bracing. I like the idea for button head bolts too.
 

Atl-atl

Adventurer
Well my sincerest apologies for the lack of updates. There has been almost no progress for 2 weeks now as life has gotten in the way of the Blazer. I did have new driveshafts made and got new shorty headers which I also got ceramic coated. Unfortunately the sweet long tubes just arent going to fit around the front driveshaft so I had to rethink my exhaust which resulted in new manifolds. I also decided during this time, and since buying the new welder, that Im going to attempt to build the exhaust myself so I bought all the necessary bits for that. Ill finally be back to working on the truck in a day or two and will hopefully be able to finish it up by March 1st.

The new shafts arent entirely new. The front shaft is reusing the cardan joint but is otherwise new. The rear shaft is all new and has a high angle cardan joint. Im going to grind down the stops on the front joint to allow for a little more flex. They are 1310 joints all around. If(read: when) I go up to 1 ton axles Ill likely have to change the length of the shafts so Ill just have them rebuilt with 1350s or install some bastard joints. Im ok with the driveshafts being the "fuse" in my drivetrain anyway.
IMG_9969.jpeg

Not the longest slip joint in the world but should be fine.
IMG_9967.jpeg
IMG_9968.jpeg

Freshly ceramic coated shorty headers ready to go in. This should be the last piece of the puzzle so I can finally finish the motor.
IMG_9972.jpeg
IMG_9973.jpeg
IMG_9974.jpeg

Yes Im running a cat, no I dont care what your opinion is, I hate smelling like exhaust fumes.
IMG_9970.jpeg
 

Atl-atl

Adventurer
I had about 36 hours in Flagstaff, during which I had to do some work on the RV but I also managed to get some work done on the Blazer. Got the new shorty headers installed and fabbed up the Y pipe. Happy that everything fits. Plan is to finish welding the Y pipe tomorrow morning and fab up a new mounting bracket for the power steering reservoir so I can drop a few things off at powder coat before I leave. Ill be bringing the Y pipe down to Phoenix with me tomorrow so I can get it ceramic coated. Not sure if I want to get it done all polished and shiny like the manifolds or just do silver or black.

There is SO much more room with these shortys compared to the long tubes. They are smaller diameter primaries and they tuck closer to the block. There is only about 1/4" of clearance at the corner where the starter mounts but I think it should be fine.
IMG_9987.jpeg
IMG_9986.jpeg
IMG_0017.jpeg
IMG_0018.jpeg

Temporarily installed the front driveshaft to make sure the exhaust has clearance. Forgot to take a picture with the Y pipe tacked in place. There is about 2 1/2" of clearance between the driveshaft and the exhaust crossover. If I have time in the morning Ill toss it back in and take a pic. Definitely need to grind down the stops on the cardan, I can already tell the front shaft is going to bind when the front axle is flexed.
IMG_0019.jpeg
IMG_0020.jpeg

Y pipe tacked together.
IMG_0010.jpeg

V band all the things!!
IMG_0012.jpeg

The Y pipe is easily removable with V bands on all sides. Even with the front driveshaft in place. This will surely come in handy in the future.
IMG_0015.jpeg
 

Atl-atl

Adventurer
Alright, Ive moved on to wiring while I wait for stuff to come back from powdercoat. Ive got the Fitech harness almost completely installed already which is cool but Im stuck in a few places. First is the alternator. On my stock truck I had the big red wire going from the "bat" stud on the alternator to the power distribution block on the firewall (which also fed the starter and firewall junction box that powers the cab.) Then the 2 wires from the alternator plug; red voltage regulator lead (that also went to the distribution block) and brown exciter wire that goes straight to the firewall junction box.

On the new alternator it has a similar plug with 2 wires, though theyre tiny and just disappear into the harness, and a "bat" stud for the main charging wire. Im planning to run a bigger wire straight from the "bat" stud on the new alternator to the battery. But do I need to do anything with the old red and brown wires coming out of the firewall junction box? My guess would be the Fitech ecu takes care of everything with the new alternator in terms of regulating charging but maybe Im wrong.

Also if I want to keep my stock voltage gauge working, what needs to be connected?

Wiring is pretty tidy with this Fitech harness. It will get better over the next few days as I finish things up and make it all look pretty.
IMG_0039.jpeg

Final location for the ecu, relays and fuses is not determined yet but Im going to keep it in the engine bay instead of trying to go inside the cab with it. Im contemplating building a mounting plate for all the electronics or if Im feeling frisky maybe making a box for everything to fit nicely inside.
IMG_0041.jpeg

Got some other misc. stuff taken care of while I was in there. Torqued down the manifolds, installed the spark plugs and wires and installed the dipstick.
IMG_0042.jpeg
IMG_0043.jpeg
 

Atl-atl

Adventurer
I took a break from wiring today because it was warm enough for me to finish installing the new canvas on the camper. I got the top done last week when we had a warm day and today I got the bottom installed. This was a painstaking process. Not even including the fact that I initially shipped my old canvas to the upholsterer in February of 2023!! The new canvas was first made too small so I had to ship it back, have it reworked and sent back to me. Thankfully this time around it was correct. No idea how they could have gotten the measurements wrong when I sent them my old canvas but they did. What a royal pain in the ass. I expect more out of people/companies when you spend over $2000 on something.

The second biggest pain in the ass was getting off all the silicone sealant that had been used on all the various parts including but not limited to the roofing material, the trim pieces that sandwich the canvas on top and bottom, the misc. trim pieces for things like the roof vents, hooks for the closure clamps, drip rail over the door etc. There wasnt an excess amount but you can see in the picture below it was in some very hard to reach places. Also the roof material is super thin aluminum and the paint is barely holding on these days so you have to be ultra careful. I used a combo of synthetic brush on a small cordless drill, handheld wire brush and literally just rubbing it off with rubber gloves.
IMG_0006.jpeg

Here you can see it above the "Blazer" sticker. It went around the entire circumference of the camper above and below the trim strips that hold the canvas in place. There was probably 100 linear feet of silicone to remove. I need to figure out how to remake the old stickers on the camper or have an artist paint them back in before I clearcoat the paint to preserve this thing.
IMG_0053.jpeg

More bits to remove silicone from.
IMG_0061.jpeg

The top edge of the canvas gets tucked in between the roofing material, which folds down over the vertical edge of the roof, and the frame of the roof which has the interior ceiling perforated vinyl material attached to it.
IMG_0008.jpeg

I used this wicked glue to stick the canvas to the vinyl before screwing everything in place with the trim strips. I DO NOT recommend using this product indoors, holy hell does it stink. But also holy hell does it hold. Apply it liberally to both surfaces, let it get tacky for a couple minutes and stick it together. Its instantly strong enough to hold up the entire canvas. I couldnt believe my eyes.
IMG_0007.jpeg

I was able to get everything installed and cleaned up before it got too cold to continue working outside. I realized Ive got the wrong RV roof goop so I wasn't able to do the final seal on the upper trim strip and around the various trim pieces that need it but thats not a huge deal, should only take an hour the next time we get a warm day. For now everything functions correctly, the canvas fits pretty darn well with only minor spots that have slight tension or looseness. Nothing that concerns me, its plenty taught and looks great. This was a huge project that Im happy to be done with. Just have a few smaller projects left on the camper but its all stuff that can wait until spring. In theory I could bolt the camper onto the truck and drive down the highway or take it camping if I wanted to.

I forgot to take pics with the windows open. They have mesh screens on the outside, then an inner layer of lightly tinted plastic that is a velcro flap so it can be opened/closed and finally another layer of solid fabric that is also velcro.
IMG_0055.jpeg
IMG_0057.jpeg

I also had a strip of velcro on a flap installed around the top edge of the interior so I can add a velcro-in thermal insulation layer if/when I decide.
IMG_0059.jpeg
IMG_0060.jpeg
 

Atl-atl

Adventurer
Well Ive been gone for a while. Got lost in a sea of wires but I found the shore and Ive got some big updates!! Youll have to wait for the wiring details though because there are a lot. Ive been tackling a thousand small projects over the last few weeks(Ive mostly been wiring though) and my list is really starting to get short. I ran all new breather lines for the axles, trans and t-case, ran the heater hoses, all the vacuum lines that I think I need, built a bracket for the power steering reservoir had it powdercoated and installed the PS lines, picked up the crossmembers and skid from powder and got them installed for hopefully the last time, installed the driveshafts to make sure they are going to clear the exhaust, the front is going to need to be shortened because it does not have enough slip, finished welding the Y-pipe and got it installed.

You can see some of the new stuff in this pic. The trans and t-case breathers are currently resting on the firewall next to the brake master. Not sure where I want to locate them but its not going to be where they are in this pic. Heater hoses are much shorter than stock, they used to go way up onto the fender and then back over to the engine block. Power steering reservoir is mounted, I had to make this mount because my initial plan was to run a mechanical fan and needed room for the intake. That plan has changed but I figured Id use the reservoir mount like this anyway.
IMG_0174.jpeg

Front clip is on!!! What a major milestone. I held off doing this for as long as possible because the truck is a HUGE pain to work on now. The top of the radiator is almost 5 feet high so I have to work from a platform in front of the truck from now on. Its incredibly annoying. I used to be able to walk right in and touch the firewall, now I can barely reach the throttle body.
IMG_0179.jpeg

Space really disappears quickly when you put the clip, radiator and fans in place. The engine doesnt look so comically sized anymore.
IMG_0180.jpeg

Trans cooler gets deleted. It was actually run through the radiator as well so those holes will be capped.
IMG_0181.jpeg

OEM upper and lower radiator hoses from a K5 work and fit almost perfectly. I trimmed the lower a couple inches but it would have worked as-is in a pinch. You can also see in this pic that I decided to run electric fans. This is the famous Ford Windstar dual fan. As many on here know these work really well and can be found really cheap. I opted for new and it was about $100. Hopefully it holds up as well as OEM. Also for anyone interested, the pigtails are(used to be) really hard to come by but I actually found new replacements on rockauto for not a lot of money. The 3 pin is Standard Motor Products #S725 which can be found here https://www.rockauto.com/en/moreinfo.php?pk=50369&cc=0&pt=2556&jsn=3 The 2 pin is Standard Motor Products #S581 and can be found here https://www.rockauto.com/en/moreinfo.php?pk=50236&cc=0&pt=10138&jsn=1 There are a million ways to wire fans and I will go into what Ive done in my next post.
IMG_0182.jpeg

Mounting brackets just squeeze in between the rad and coolant overflow bottle in its factory location. Since taking this pic I tightened everything down and scooted the fans up to the very top of the rad. There is about 2 inches at the bottom that the fans dont cover but I figured covering the top was better because heat rises. There is someone on CK5.com that made some insanely elaborate mounting brackets for these fans in a Blazer that I took a small amount of inspiration from haha.
IMG_0185.jpeg

I also had the battery trays blasted and powder coated and they finally came back so I could really get to wiring. Here is a pic with everything in place to check for clearance etc. Plenty of room in between the fans and front of the motor but not nearly as much as I thought there was going to be. The intake set up like this clears everything, I just need to make a bracket out towards the filter end to hold it in place. Id like to run it to the other side where there is less going on but Id need a custom upper rad hose to do that. For now it works here and it will be easy to change in the future if I want to go search the auto parts stores for a different shape hose.
IMG_0197.jpeg
 

Atl-atl

Adventurer
Alrighty then, a month later here is the wiring update youve surely been waiting for!

The wiring actually went really smoothly. The Fitech harness is rad and all the plugs went where they were supposed to with the correct fittings. I did a TON of research trying to figure out how to link it to the chassis wiring. Early on I found this picture which helped a ton. Im not sure exactly what truck this is from because its slightly different than mine but its close enough. The top red wire does not exist in my truck but the other ones do and they all worked as labeled in this picture.
IMG_0205.png

Here is a side by side of my bulkhead connector and the one from above, with details about how I wired my 78. Without giving too much away, wiring it this way worked...
Screen Shot 2024-02-26 at 8.32.32 PM.png

To complicate things I have a dual battery setup and also decided to run electric fans. My truck originally had a super ghetto relay for the dual battery setup. I switched to a Redarc SBI12D. It was super easy to wire in, even adding an emergency jump button to connect the aux battery when a jump is needed. I made a little box out of sheet metal to mount the Redarc solenoid, fan relays, original trucks junction box, a Blue Sea fuse block and the Fitech fuse/relay box.

Here it is with the old solenoid and not painted.
IMG_0089.jpeg

Here it is with most of the wiring in place, although its since been cleaned up, the new Redarc peice, fan relays, fuse block, and Fitech fuse box.
IMG_0215.jpeg

I decided to run a 3 relay setup that I found the schematic for on the Fitech.com forums. This setup allows the fans to run in a factory GM style where both fans come on at your chosen temperature at half speed. Then they bump up to full speed at a higher temp that you can also specify in Fitech. This helps not cause a huge amp draw when the fans initially kick on which is cool. Also it keeps the fans from just blasting full speed any time they are needed and being super noisy. Thankfully I got them wired correctly the first time and they function as intended which is really cool, no pun intended.
FANS-POWER-CONTROL.jpeg
IMG_0212.jpeg

Here is what the engine bay currently looks like. The intake is mounted with a bracket from underneath The IAT sensor is mounted inside the shiny tube using a rubber o-ring. The red wire on the passenger side is temporary to power the HVAC to make sure it works, which it does. AC is not hooked up though because it needs all new custom lines made. Plan is to do a final clean-up of all the wiring once the truck is running and tuned and the AC is working etc. I like things to be tidy and while this looks pretty good, it can definitely be better.
Screen Shot 2024-03-13 at 8.05.28 PM.png
 

Atl-atl

Adventurer
And now, your moment of zen...

So this was actually a couple weeks ago. Life has been insane. Got the truck running but not...like, running running. Enough to drive around the block and get it onto a trailer but thats about it. I leased a commercial space in Phoenix so the Blazer got trailered down from Flagstaff. It has leaks, lots of leaks. All brand new parts, everything leaks. Coolant, engine oil, trans fluid, t-case fluid, exhaust leaks from every joint. I was defeated for a while. Ive been slowly getting everything buttoned up with the help of some very patient people over on ck5.com. Exhaust wound up pretty simple. after the cat I just ran the muffler into a dump. Undecided if Im going to make an actual tail pipe that goes up over the rear axle. For now it looks cool and sounds good.
IMG_0256.jpeg

IMG_0276.jpeg

A lot of my problems were my own doing. I decided to use Amsoil break-in oil, which is red. If you arent familiar, transmission fluid is also red. So when I got the engine running and it immediately leaked red fluid from between the transmission and the back of the engine you can understand my frustration. It too me SO long to figure out what was leaking. It also involved removing the trans and t-case, obviously. I figured out right away that it wasnt the transmission which is good. But it took me quite a while to figure out where the engine was leaking from. The oil was hitting the flywheel and slinging everywhere. The leak could have been coming from 10 different places. I got it narrowed down to either the rear main seal or back of the oil pan gasket. These engine use a gasket instead of RTV, except for the corners where the block, pan and front/rear covers all meet, you put an inch or so bead of silicone. After literal days of laying under the truck with a flashlight drying things with towels and waiting for them to seep, I figured out it was the back of the oil pan gasket. It actually was flexing and you could see the oil moving around. So either the brand new oil pan was defective, the rear cover wasn't aligned(it has to be aligned to the rear main though so sometimes this happens) or the gasket is defective.

Once I figured this all out I decided to try just putting some Right Stuff Black RTV on the rear of the oil pan gasket and so far so good. Unfortunately it took removing and replacing the flywheel and starter 3 times in order to start the engine and get it to temp to see if it will leak after each attempt at a fix. To further complicate things I had been running the engine with no PCV system or any kind of crank case ventilation. So it was possible that simply running the engine was causing a number of different seals/gaskets to leak but at this point we will never know.

Fast forward to today and I finished putting together a PCV system. Grabbed a cheap catch can, PCV valve and breather filter. The catch can came with a couple mounting options and I bent up some aluminum to make a bracket that attaches it to the AC accessory mount. Actually turned out really good!

Here is a schematic of the routing I used. Only difference is my fresh air intake is simply a breather coming from the port on the passenger side valve cover. Since Im running a speed density setup I dont really need to worry about pulling metered air from between the air intake and a MAF sensor, since I dont have a MAF sensor.
1711047342606.png

IMG_0436.jpeg

IMG_0438.jpeg
 

Atl-atl

Adventurer
Well, this update is not a good one. I got the truck idling pretty good, but it takes a while to start. When I try to drive it around the block the cat gets so hot it glows orange, it backfires and stumbles and wont take any throttle. The Fitech handheld told me there are P0204 and P0208 errors which is some kind of injector issue in cylinder 4 and 8. I gave up and took it to a shop. Luckily I found an authorized Fitech dealer/installer close by, they are super cool and of course they love the Blazer. They've had the truck for about a week and have been able to make some progress but they found quite a few issues mostly with the fitech system wiring harness. For starters, the O2 sensor pigtails were mislabeled L-R and the injector harness was mislabeled L-R. The injector harness was also installed incorrectly(by yours truly) front to back(its not labeled F-R so how could someone know?) so everything was firing incorrectly, this might explain the unburnt fuel in the cylinders after shutting off the engine. Once that was figured out they said the truck fires up and idles better but it still has issues and doesnt like to drive. They tested the injectors which are working correctly so now they think there is a problem with the wiring in the injector harness. They are in touch with Fitech about a number of these issues. Hopefully Fitech will cover some of the labor since it appears a lot of these issues are/were caused by the incorrectly labeled harness parts and potentially faulty harness. Im not happy about this but at least the truck is in good hands now.
 

ExpoMike

Well-known member
That totally sucks! It's one thing to have a part go bad, as even new stuff can be bad but to have that many wiring issues from the production side, very sad to hear.

Back in the beginning of days of FiTech, I got their very first GoStreet EFI injection system. After almost 8 years... it is still sitting in the box it came in. There were just too many reliability issues, that people were having and I followed along for 3-4 years. I despise unreliable vehicles and every time I thought I would swap out a carb to put this EFI on, I couldn't bring myself to do it.

Hope they get everything figured out.
 

Kingsize24

Well-known member
Sorry about your troubles, but yes, FI tech has been a reliability nightmare since inception. Hopefully you get it figured out. If not, I'd hope they would give you a full warranty replacement or money back for a different system.
 

Forum statistics

Threads
188,346
Messages
2,903,839
Members
230,176
Latest member
Arcadia1415
Top