You are using an out of date browser. It may not display this or other websites correctly.
You should upgrade or use an alternative browser.
You should upgrade or use an alternative browser.
Home made rooftop tent for XJ
- Thread starter MHead
- Start date
Shower Enclosure
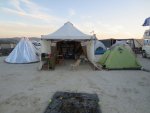
I've added a shower enclosure using the same fabric and fiberglass pole technique. A lot of what makes a shower pleasant is preventing the gentle air motions always present outdoors from evaporating the shower water. Other benefits are that the enclosure provides a changing room for use where there are other campers. Previous to adding this enclosure I used the tent-room at the back of the Jeep for showers which worked OK. But a shower here left water and usually mud right behind the Jeep. The side shower moves this mud out of the high traffic zone.
I added two pole cylinders that are similar to the cylinders I use for the poles used by the tent.
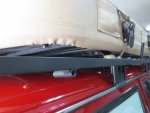
Unfortunately these attachments are somewhat low. I designed the shower top to slope upward away from the Jeep. The wall material is too heavy for the 1/4" rod to support so I added an extensible aluminum tent pole that reaches from ground to the highest point within the tent.
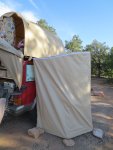
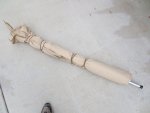
There are no zippers on the material. To transport, I fold, then roll around the tent pole. The ball-bungees do double duty: the hold the roll closed and when the shower must be set up on an asphalt pad such as pictured, they perform the function of stakes.
As for the actual shower, I tried a 2 Gal metal bug-sprayer with the nozzle converted to a shower head with a valve. You just fill the sprayer 1/2 way and place it directly on the stove. After about 5 minutes the water is warm enough. You pump up the sprayer and use the valve for hot water. This all works well but was too large and heavy to carry. Now I just carry half a tile sponge and a metal pan. Pan with water goes on the stove. I just sponge hot water over the pan and catch the runoff. Spent 8 nights camping with just this type of shower and didn't experience the usual need for motel shower.
Tried this arrangement in Canyonlands NP, Needles district. We were able to arrive in camp after dark, set up and have two showers in under a half hour.
I've added a shower enclosure using the same fabric and fiberglass pole technique. A lot of what makes a shower pleasant is preventing the gentle air motions always present outdoors from evaporating the shower water. Other benefits are that the enclosure provides a changing room for use where there are other campers. Previous to adding this enclosure I used the tent-room at the back of the Jeep for showers which worked OK. But a shower here left water and usually mud right behind the Jeep. The side shower moves this mud out of the high traffic zone.
I added two pole cylinders that are similar to the cylinders I use for the poles used by the tent.

Unfortunately these attachments are somewhat low. I designed the shower top to slope upward away from the Jeep. The wall material is too heavy for the 1/4" rod to support so I added an extensible aluminum tent pole that reaches from ground to the highest point within the tent.

There are no zippers on the material. To transport, I fold, then roll around the tent pole. The ball-bungees do double duty: the hold the roll closed and when the shower must be set up on an asphalt pad such as pictured, they perform the function of stakes.

As for the actual shower, I tried a 2 Gal metal bug-sprayer with the nozzle converted to a shower head with a valve. You just fill the sprayer 1/2 way and place it directly on the stove. After about 5 minutes the water is warm enough. You pump up the sprayer and use the valve for hot water. This all works well but was too large and heavy to carry. Now I just carry half a tile sponge and a metal pan. Pan with water goes on the stove. I just sponge hot water over the pan and catch the runoff. Spent 8 nights camping with just this type of shower and didn't experience the usual need for motel shower.
Tried this arrangement in Canyonlands NP, Needles district. We were able to arrive in camp after dark, set up and have two showers in under a half hour.
Last edited:
Kitchen Lighting Improvement
For nighttime operation the kitchen has always been a little dark. I used simple lanterns but these gave shadowed light and consumed batteries. The time has come for improvement.
There now exist simple inexpensive 12V LED strings. They are cheap and available. See e.g.
http://www.amazon.com/gp/product/B005EHHLD8?keywords=LED tape&qid=1445198162&ref_=sr_1_6&sr=8-6
$10 gets a lot of 12 V light. These can be cut to length, sewn into pockets in fabric/clear plastic, and electrically paralleled.
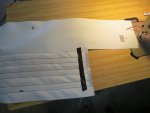
I first cut the LED and fabric as shown down a couple of pictures. The LED strips have adhesive backing (which isn't worth anything but will hold for a short time) so I stuck LED strips to fabric. The end of each strip penetrated the fabric through a small slit. The clear material is used to make windows for car soft tops and boat canopies. The next picture shows the sewing. You can't see the clear which is on the other side.
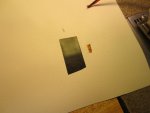
I taped these ends in place and then sewed the LED on. You can't sew the LED strips. Instead I sewed a clear plastic cover onto the fabric where the strips were adhered. You must tape the LED strip ends to put the assembly through the sewing machine.
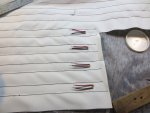
Next the tape comes off and small connection wires are soldered on as shown in the next picture. Not shown is the wiring required to parallel all strips, red to red, black to black. After paralleling a cable is connected. Cable routes underneath the light panel. Panel is installed onto factory XJ hatch with small screws. Panel is fairly stiff due to the plastic and doesn't sag. Next picture shows installed light panel.
The main power cable routes up to the center of the hatch. In my case I have additional LED in a small box containing a overall switch. This dates back a few years. The new panel replaces this little box but I still use it.
I also added a LED dimmer, again cheap from Amazon
http://www.amazon.com/Triangle-Bulb...TF8&qid=1445199548&sr=8-4&keywords=LED+dimmer
You can use the thing as-is or take the internal circuits out. I took circuits out and placed into my small box. I strongly recommend you put some sort of dimming in since the panel is shockingly bright. Useful at times but better dimmed down for most nigh time situations.
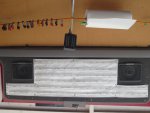
Another picture of the panel. If you look carefully you can see the clear cover sewn on. This is what holds the LED strips. Their self-adhesive is really poor and would not hold them on more than a few hours. You can't depend on the self adhesive.
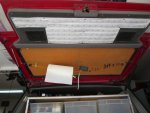
And finally the completed result at night.
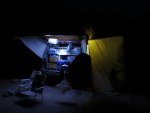
It may be dimmed in the picture above. It is really bright at full 12 V.
For nighttime operation the kitchen has always been a little dark. I used simple lanterns but these gave shadowed light and consumed batteries. The time has come for improvement.
There now exist simple inexpensive 12V LED strings. They are cheap and available. See e.g.
http://www.amazon.com/gp/product/B005EHHLD8?keywords=LED tape&qid=1445198162&ref_=sr_1_6&sr=8-6
$10 gets a lot of 12 V light. These can be cut to length, sewn into pockets in fabric/clear plastic, and electrically paralleled.
I first cut the LED and fabric as shown down a couple of pictures. The LED strips have adhesive backing (which isn't worth anything but will hold for a short time) so I stuck LED strips to fabric. The end of each strip penetrated the fabric through a small slit. The clear material is used to make windows for car soft tops and boat canopies. The next picture shows the sewing. You can't see the clear which is on the other side.

I taped these ends in place and then sewed the LED on. You can't sew the LED strips. Instead I sewed a clear plastic cover onto the fabric where the strips were adhered. You must tape the LED strip ends to put the assembly through the sewing machine.

Next the tape comes off and small connection wires are soldered on as shown in the next picture. Not shown is the wiring required to parallel all strips, red to red, black to black. After paralleling a cable is connected. Cable routes underneath the light panel. Panel is installed onto factory XJ hatch with small screws. Panel is fairly stiff due to the plastic and doesn't sag. Next picture shows installed light panel.

The main power cable routes up to the center of the hatch. In my case I have additional LED in a small box containing a overall switch. This dates back a few years. The new panel replaces this little box but I still use it.
I also added a LED dimmer, again cheap from Amazon
http://www.amazon.com/Triangle-Bulb...TF8&qid=1445199548&sr=8-4&keywords=LED+dimmer
You can use the thing as-is or take the internal circuits out. I took circuits out and placed into my small box. I strongly recommend you put some sort of dimming in since the panel is shockingly bright. Useful at times but better dimmed down for most nigh time situations.

Another picture of the panel. If you look carefully you can see the clear cover sewn on. This is what holds the LED strips. Their self-adhesive is really poor and would not hold them on more than a few hours. You can't depend on the self adhesive.

And finally the completed result at night.

It may be dimmed in the picture above. It is really bright at full 12 V.
Similar threads
- Replies
- 1
- Views
- 163
- Replies
- 2
- Views
- 490
- Replies
- 0
- Views
- 409
- Replies
- 0
- Views
- 88
- Replies
- 0
- Views
- 317

