Hummelator Off-road teardrop build

stomperxj

Explorer
Went in to the metal yard where I initially traded my 2x5 steel in hopes of trading the last two peices for some 2 1/2"x2 1/2" x 1/4 wall steel tubing for the tongue. They told me that they couldn't sell the other stuff and ended up scraping it so they wouldn't trade any more of it. Crap. Tried a few other places and they wouldn't accept trades.
So looks like I'm going to have to buy it. At this point I can only purchase steel in 20' lengths.
I'm looking at about $150 for a 20' of 2 1/2"x2 1/2"x 1/4".
I know that will be plenty strong for the tongue but thinner wall steel would be cheaper.
If I went for 2 1/4" square with a 1/8 wall, would that suffice for a ongue on a trailer this big?
I'm leaning towards the 2 1/2 spare 1/4" wall still but shedding a few pounds and saving a couple dollars never hurts

Thoughts?

Most steel yards have a remnants pile you can search through for smaller pieces. I'd look for a remnant/off cut for your tongue tube and get the thinner wall stuff for the rest of the frame. Try craigslist for used stuff too. Also big recycling yards sometimes sell scrap pieces.
 

Hummelator

Adventurer
Updat

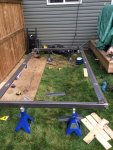
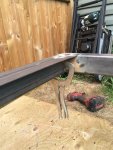
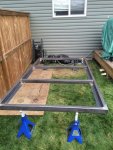
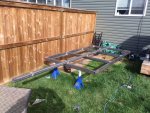
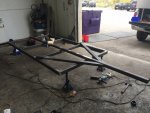
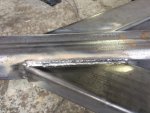
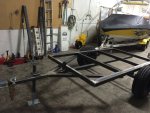
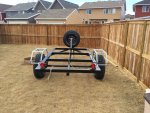
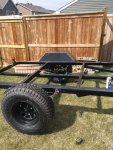
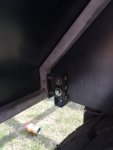
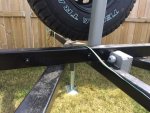
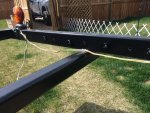
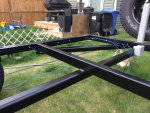
So I have the majority of the welding done. With the exception of the "A" supports for the tongue and fully welding the tongue ( though it is tacked in place)
image.jpg
image.jpg
image.jpg
image.jpg
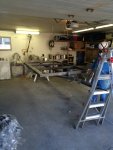
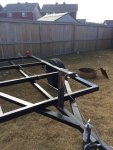
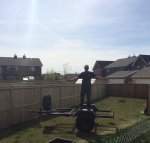
As you can see I am welding in my back yard. And it is as much fun as it sounds.
I've decided that should I build another expedition trailer, I will likely end up purchasing the trailer and making any modifications if needed. Unless I get a garage/shop anytime in the future. My current set up is a pain in the ***. As was stick welding this damn thing...
Found out my buddy had a mug welder so I am gonna barrow it and swap the wire for fluxcore to finish off any welds needed.
Need to order lights and wire for the trailer but everything I like comes out of 'merica so I would have to pay the exchange rate and duty. So just looking around right now for Canadian suppliers. Amazon looks promising.
Anyways, that's all
 

Curtis in Texas

Adventurer
Don't be to discouraged about your work area. I built a 12 foot tandem axle dune buggy flatbed trailer about 40 years ago now, that has changed hands three times and the darn thing won't die! It has about 200,000 miles on it now. I stick welded it in my backyard too. I loaned it to so many people over the years, (before I sold it to a friend,) so they could move friends and relatives across the country that I've lost count of how many times it's run coast to coast.

In the end it's not where you build it that counts, as it is how well you build it.

Nothing wrong with stick welding trailers. Other than a mig will spoil you.
 

Hummelator

Adventurer
Update

My buddy let me move my trailer into his shop to finish up the welding. I have to say that working in a shop and made working on this thing much more enjoyable. Damn near finished the welding on the trailer. All that is left to weld is the top side of the "A" frame support for the tongue-ran out of welding rods because I used a few a work on Friday...
image.jpg
I was having a difficult time stick welding at first but figured out my amperage was too low, but now welds are looking good. My buddy had a mig welder but no gas so I sprung for a small bottle of gas. Went to test it but the welder was not functioning properly so I ended up using the buzz box to finish welding. These Welds were better than others but overall I am confident that the welds will not break/crack ( though I will check periodically)
image.jpg
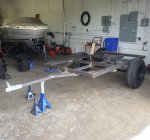
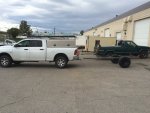
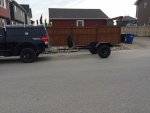
Also mounted the axel assembly and coupler and tightened everything up. Took her out for a spin to see how it rides, and though it bounced around a lot with out any weight, it pulled nice and straight. However I have yet to get it up to highway speeds.
image.jpg
image.jpg

Tomorrow I won't have much time but I'm hoping to finish up the welding, and start on some wiring. Got a smoking deal on 10 GA wire on Amazon so I will be running that throughout the frame. Still waiting on my clearance markers...shipping from Hong Kong...


Not sure I put my axel in the right spot.. Once I Have the camper mounted to the frame, I'm not sure I will have enough weight on the tongue of the trailer. Right now the tongue weight s somewhere between 40-80 LBS. and I estimate the overall weight of the frame of the trailer at 307 lbs (close to 600 with axel, tires, rims, leaf, etc.)
If I have to move the spring perches it's not the end of the world.
Time will tell.
 

Hummelator

Adventurer
And that's a wrap..

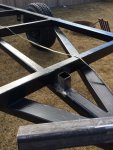
Ended up finishing the welding (save for the spare tire mount) and safety chains. My frame warped a little bit at the front where the tongue and A frame supports met the main frame. I'm sure I can work around it but it will always be in the back of my mind bugging me.
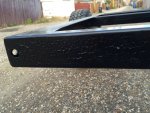
Did have issues with paint. When to an industrial paint supply store thinking that the would know exactly what I need in terms of primer and top coat. Nope. They sold me a primer that was not compatible with the enamel topcoat :mad::mad::mad:
Now the frame has to be sand blasted and repainted.
Called around a few places and found a place that will sand blast and powder coat for under $400. If I had know it was going to be that cheap, I would have gone that route to begin with.
Oh well. My goal for the trailer was to get it panted so it didn't rust in the winter... Paint looks like alligator skin but it will keep rust at bay for now.
So as the snow flies and the temperature drop, trailer will sit in the yard until the days start to get warm again.


image.jpg
image.jpg
image.jpg
image.jpg
 

Hummelator

Adventurer
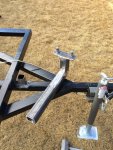
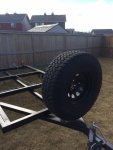
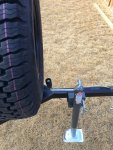
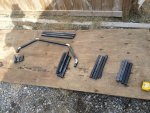
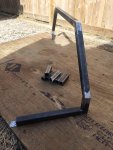
So the days have begun to warm up and the snow has for the most part melted. Finally found enough inspiration for get working on the trailer again. Started with the easy one. Spare tire mount. Still had some 2.5"x2.5"x 1/4" steel tubing laying around. Used that to build the post for the tire mount. Bought some studs from auto value and hammered those in. All in all I'm extremely pleased with how it turned out- exactly as I had envisioned.
IMG_2798.jpg
IMG_2799.jpg
IMG_2800.jpg
IMG_2801.jpg
IMG_2804.jpg
I had welded a 2"x2" square tube onto the tongue, slipped the tire mount post into it and drilled a hole for a quick release pin thingy(?) I wanted to keep it removable because one never knows.

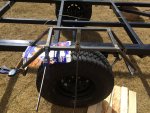
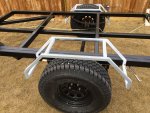
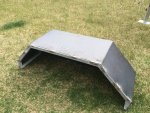
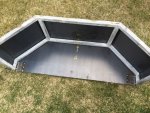
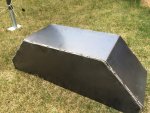
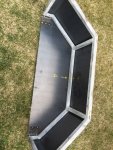
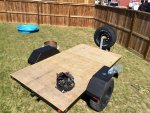
Next came the fenders. I was thinking long and hard about how I wanted to do these. Tires were to big to buy a traditional premade sheet metal fender and I also wanted to be able to stand on the fender to access the eventual roof cargo rack. I had initially started down a path that involved 1" galvanized steel round tubing as I have a ton of it at my disposal for free. Had planned to make a jig and bend the pipe to desired shape. But once I factored in that I wanted the fenders to also be removable, that idea was quickly scraped. So back to what was comfortable for me to work with. Steel tubing. Figured out how I wanted to design it and went and purchased a few lengths of .100 wall 1"X1". Measured, cut and fit the first piece to make sure it would work. Then cut all the pieces to size for assembly another day. Spent majority of my day today welding and grinding the fender frames. Fairly happy with how they turned out. Fenders took way more effort than I wanted to put into them but you get out what you put in.
IMG_2822.jpg
IMG_2824.jpg
IMG_2828.jpg
IMG_2829.jpg
IMG_2831.jpg

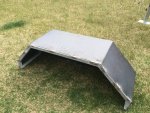
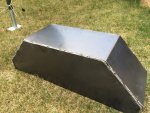
Will need to take the fender frames to a sheet metal shop this week and have some bent for the fenders. Planning to spray them with Bedliner. Hopefully will have the frame off to powder coating either this week or next, then it's onto wiring.
I'm ready to get the trailer behind me ( literally and figuratively) and move onto the cabin. I have decided to deviate from the original drawings a little. Going to be making the cabin slightly taller than originally decided. Going to go from 48" to 57" high. Little extra headroom will be worth the extra work and material.
 

Curtis in Texas

Adventurer
I did similar fenders for my cargo trailer only I built some pockets in the back of them. These.pockets are sized to strap a military 5 gallon gas or water can in. They also make great steps so I can stand in the top of the fender and adjust the solar panel angle.
 

Attachments

  • 20170314_162551.jpg
    20170314_162551.jpg
    584.4 KB · Views: 92

Hummelator

Adventurer
I did similar fenders for my cargo trailer only I built some pockets in the back of them. These.pockets are sized to strap a military 5 gallon gas or water can in. They also make great steps so I can stand in the top of the fender and adjust the solar panel angle.
I like the built in step/cradle idea but a this point I won't have room for it. Definitely going to work it in on the next trailer though!
 

Hummelator

Adventurer
Got around to finishing the metal work on the fenders.
It's been a strange last few weeks. Lost one of my huge customers, then got hired back by them as an employee. Long story but it's for the best...but that means I may not have the funds to get as much done on the trailer as I had hoped this year.
IMG_2894.jpg
IMG_2895.jpg
IMG_2896.jpg
IMG_2897.jpg
IMG_2898.jpg
IMG_2901.JPG
Prep for wiring. I've decided to run the wiring on the exterior of the frame for simplicity sake. Also, that way I'm not worried about the wires rubbing on sharp edges inside the frame.
I have a 3 wire brake/turn signal light with a single led bulb. I'm not sure how I should wire it. One wire common, one wire is 50% light emission and the third is 100% light emission. Common sense tells me that the brake light should be the brighter. However, if I'm braking and activate my turn signal, the brake light will already be at its brightest where as if I wire the brake to the lesser powered wire, when I activate my signal it will flash brighter. First time wiring a trailer... can anyone point me in the right direction?
IMG_2900.jpg
IMG_2899.jpg

I will be headlining the fenders, but I have to seam seal the sheet metal first. I was going to use PL premium unless someone knows why not?

As I said from the begining, I will be making a lot of changes on this build. After reading through Albatross's biwak box thread it got me thinking about different materials other than wood- then it hit me. Garage door panels! Now before you laugh hear me out. Most people don't realize how strong garage door panels are- that is, full steel wrapped and insulated garage door panels. Commercial sections are 1 3/4" thick and you can stand on top of them. Quite often when I go to fix a door, say the cables came off, and I have the head space I will actually climb onto of the door when it's horizontal and I'll work from there. Plenty strong. So I have decided to get some flush face residential panels to use for the floor and walls. Decided I will after all have proper entry doors built and I will use plywood for the roof still. All the edges will have 3x3 aluminum angle and I will still Bedliner the entire thing.
 

Attachments

  • IMG_2895.jpg
    IMG_2895.jpg
    559 KB · Views: 76

kzam

Observer
Garage door panels! Now before you laugh hear me out. Most people don't realize how strong garage door panels are- that is, full steel wrapped and insulated garage door panels. Commercial sections are 1 3/4" thick and you can stand on top of them. Quite often when I go to fix a door, say the cables came off, and I have the head space I will actually climb onto of the door when it's horizontal and I'll work from there. Plenty strong.

What sizes do garage door panels come in and would they weigh less or be less expensive than aluminum-skinned insulated panels?
 

Hummelator

Adventurer
What sizes do garage door panels come in and would they weigh less or be less expensive than aluminum-skinned insulated panels?
The garage door panels I will be using come in a few different sizes. They are 1 3/8" thick x 9' long x 21" wide. They are insulated with polyurethane foam and will likely weight 1.5-2 pounds per SF. I will use them for the floor and side only so I will need a total of 9 panels. I can get the panels for about $1000
 

Hummelator

Adventurer
I've made a lot of progress recently. Starting to see the light at the end of the tunnel... at least for this stage.
IMG_2942.jpg
IMG_2941.jpg
Trailer has been wired
IMG_2997.jpg
Fenders were primed and bed lined using rattle cans.
I was worried that the trailer would sit much lower at that hitch because the 31" tires and a spring over set up but even empty it sits pretty good.
IMG_2999.jpg
Used 5/8 pressure treated plywood to give it a deck.
As I mentioned from the start, there will be lots of changes along the way-one of which is going to be my camper. My buddies uncle has a used Space Kap looks like this with out the roof rack
IMG_0438.JPG
He wants to get it out of his yard and he want to replace his garage door in about a year so he's going to trade the space kap for my services. The paint is peeling on the roof and there are a few cracks in the fibreglass but I think this will be a great option. There's a couple things I like about this idea...
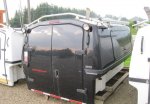
1-this is already built to be watertight ( well not at the moment but easily fixed)
2- it's already built. I may even be able to use the trailer for camping this year
3- the price is right.

I've seen a couple space kaps that have been converted into campers and they look pretty utilitarian


Couple of things I've learned from building the trailer to this point
1- next time I will be using aluminum C channel and using a bolt together design. I think rust will be an issue at some point with this frame. Using C channel will just make wiring easier. And bolt together design because I don't have to worry about any welds that may be up to the
2-wiring. I used all 11 ga wire for wiring everything. Next time I will use smaller gauges on the lights- just easier to work with.
⬇️Not sure why these pictures are here...⬇️
 

Attachments

  • IMG_2894.jpg
    IMG_2894.jpg
    560.2 KB · Views: 122
  • IMG_2896.jpg
    IMG_2896.jpg
    537.4 KB · Views: 85

Forum statistics

Threads
188,184
Messages
2,903,526
Members
229,665
Latest member
SANelson

Members online

Top