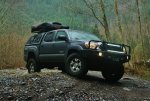
IM BACK!!! again....

toyrunner95

Explorer
I really like your set up. You seem to make logical and well though out decisions when it comes to modifying your rig. I see a lot of people modifying their vehicles to do overlanding without being logical. Why spend crazy amounts of money right now? Spend time and build it for what you are going to use it for. I have a stock 2013 Tacoma and it does great off road. Yes, I do plan on lifting it but as of right now, paying it off is the more intelligent decision. I've seen extremely modified JKU's take on Black Bear Pass in Ouray, CO but I did it in a Tacoma with a set of craigslist Duratracs and had no issues. Black Bear Pass did claim a mud flap though...RIP Mud Flap.

Anywho, I like reading your posts. I'm currently in the Army and have 2 years remaining on my contract. I'd like to make Overlanding a more frequent activity in my life. My other "rig" is a 2000 Land Cruiser that I got while on R&R a little over a month ago. Right now my wife is using that. I did get a complete ARB drawer system with a side trim kit for $1000 from someone on craigslist. Too sweet of a deal to pass up. Eventually I'll upgrade the lift with an OME 2.5" lift. It's a lengthy process but I'll get there some day!

Keep up the awesome mods!

This truck is a kind of culmination of 12+ years of research and dreaming. I still have a few years of payments on the truck but the plan is to use it as a buisness venture, do what you love and the money will follow mind set.

The overall theory on the build is based on alot of Australian concepts. I watched alot of creek to coast episodes with Roger Vickery and alot of all 4 adventure with Jase and simon. My conclusion was a simple question. What do i need ( accessory wise) to do what I love alone and safely. Furthermore I adopted the idea from expedition overland , am I making good decisions. With that being said there is always compromise. Like yes I put money into it before it was paid off. But by the time I pay it off it will have a lot of miles and.... well reliability becomes an issue. SO, this is the result. Once I get the last few pieces I can button up the loose ends and I'll do a recap of what I did. The keep it simple process is nice too.

As the truck sits now, I will list the things I have done and why.

1.the truck. A 2013 toyota tacoma double cab TRD off road. It had features that would benifit me quickly. Rear locking diff, low miles, manual transmission, clean. As simple as a truck you can get in the states from the factory. Since I didn't plan on anything too extreme off the bat. Good base to start with.

2. Lift. I went with a toytech ultimate 3" adjustable. It was a cost effective way to get the truck in the air with minimal change to stock configureaction. Simple new front struts and a overload in the rear accomplished what I needed.

3. Bumper and winch, I looked at a hundred diffrent styles of bumpers and none really looked as good or functioned as well as the ARB. I didn't want something so close to the grill that I couldn't mount anything and the ARB bro video a decent protection from animal strikes. Deer and elk are prevalent around where I live so duh. I went with a warn vr 80000 for a winch because I wanted the dependability of a warn but I don't see how dependability translates into over 1200 dollars with of cable and a glorified starter motor. Hense the vr series. If you take care of a winch and actually service it it will work for a long time. No matter the brand. I happen to like warn.

4. Canopy. I went with a snug top rebel for a couple reasons. 1 it is made in California and came with a lifetime warrenty. 2. I had it in 2 weeks. The only other contender was a ARE but they are made back east and that was 8 weeks out. I went with win doors because it makes accessing the front of the bed much easier and makes cleaning easier.

5. Bed setup. I literally stumbled across a set of outback drawers for my truck when I picked up my bumper. They came out of a wrecked tacoma and I couldn't pass up the deal. They had no instructions but I pieced them together and viola' they work. The fridge is an ARB 32 quart I belIeve. I bought that a couple years ago for project 1x1 knowing that if I ever got rid of 1x1 I could keep the fridge. It has been one of the best investments I ever made. I keep it in the truck and use it every day. Works fantastic.

6. roof bars. Again being the miser I am I didn't see the point of buying g yet another set of $400 Thule or Yakima roof bars. So I got to work engineering and fabricating a set. For anyone who thinks that fabrication is hard or they can't do it, stop thinking that. There are plenty of YouTube videos, pintrist articles, and Web info for free that you can learn from. It just takes practice. My advise is start with things that aren't load bearing. Like back yard projects or gas can holders. Don't start with tire carriers and hitches and bumpers. You will quickly learn when they fall apart going down the road that cops don't like that. I built my load bars in about a half a day with a 110 Lincoln welder. They work great. I plan to mod them into a roof rack here soon, when I do i will post up a whole post.

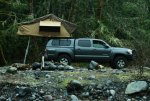
7. The tent , I went with CVT mainly because of price. And I don't regret it. The cvt is an excellent choice. I got the Mt cayley and I think for the price and durability it can't be beat. The customer service is superb and the installation and setup were a breeze. Again I can't justify spending upwards of $1500 on a tent, that's just crazy. Espically for a 2 man. Now I went with a roof tent for a couple reasons. 1 I have slept on the ground d for years and I'm tired of it. I never sleep well and I hate rolling up a wet tent. 2, I wanted one since high school and to hell with it I'm buying one. Nuff said.

Over all it still needs to be tested and finished out but I will keep you guys posted. Look for the finish here soon ish. Hopefully by August I I'll be fully kitted out.

Thanks for reading!
 

toyrunner95

Explorer
As promised here is the update about the load bars.

The first thing I had to do was figure out the materials, I decided that I didn't want anything really tall. Most of the rack systems you see today on trucks are really tall, then when its a combined with a 11 or 12 inch tall roof tent, your talking about a 15 inch height all together. Plus a lift, plus tires, add it all up and the truck is getting up there. So I had to come up with a solution that would keep the tent as low as possible without interfering with the paint or anything.

My solution was pretty down home simple. I laid a piece of scrap 1x1 across the top of the canopy and measured the distance from the rail to the bottom of the 1x1. It came to about .5 inches. So lets call it 1.5 inches to be safe. That would give me enough room to get my hands under the bars without trouble.

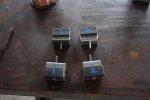
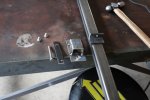
The first hiccup was finding a piece of steel that would slide INSIDE the track. Most roof systems come with those little square nuts that are slid into the track then the feet bolt to those making a friction sandwich. The end result was a 1 inch wide by 1/8th thick piece of flat stock. The next piece was the top plate, this could really be anything so i decided on a 3" wide by 1/8" thick piece of flat stock I had laying around and I had enough length to make 4. Then came the risers and load bars. Most load bars are light weight and flexible. I needed something a bit stronger so it wouldn't flex under load or stress. I had to keep it rigid. I chose some 1"x 1-1/2" square stock with an 1/8 wall. This also doubled as my riser. Now with the pics you will see how I accomplished my goal.

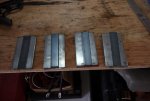
Here is the bottom of the foot plate
IMG_0029 (3).jpg

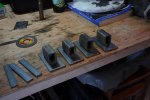
Here are the pieces cut and staged
IMG_0030 (3).jpg

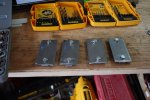
Foot plates tapped and assembled, the 1" strip had to be tapped in order to accommodate the bolts.
IMG_0032 (3).jpg

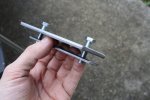
Completed foot plate
IMG_0031 (3).jpg

Now this is going to be changed, I used a piece of angle with a bolt through the riser to attached, well I didn't take in to account curve of the canopy and so the angle is too rigid, it causes tension in the rack. When I build a roof rack I will correct that with flat bar at the right angle.
IMG_0034 (3).jpg

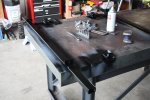
Pieces tacked together
IMG_0035 (3).jpg

Painted,
IMG_0038 (3).jpg

I will try and get a shot of the finished product tomorrow, it got too dark tonight.
 

toyrunner95

Explorer
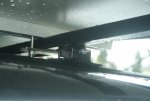
As promised, here is the picture of the mount bracket. Bare with me it was raining so i had to take a quick happy snap.

IMG_0078.jpg

And now for something I think you'll really like!
J.jpg
D.jpg
 

toyrunner95

Explorer
I went up the 70 road today out of greenwater. Had some medical expences pop up so it's on the back burner for a bit. Don't worry more to come Soonish.
 

toyrunner95

Explorer
So I went to Ft flagler state part for a good full on test. I hit a few hiccups. Nothing serious mostly process changes of how I set up.
1. Water. I bought a 2.5 gallon jug from Fred meyer. That worked great. But my issue was I kept having to move it. Like I didn't have enough table space. I'll have to work on that.
2. I bought a gas grill that worked well enough for what I need. But now where to put it. I don't want to take it all apart every time I use it. So I'll have to modify it a little to get it to fit better.
3. The bed drawers. They work well and they hold lots but I think I could utilize them better. I feel as if I'm stuffing stuff in them just to take up space.
4. The chairs. I need to play with where to put them. I think I have a space in front of the drawers. I will just have to take it apart nd re evaluate.
5. Lighting. I totally spaced on lighting in the tent.... I ended up using my light from my watch lol. I need to remember to bring that.
6. Dry goods box needs to be finished out, it worked really well, just needs to be finalized and stocked with things so I can grab and go. Like a can opener.
Other than that things went pretty well.
 

toyrunner95

Explorer
It is officially May. I have 8 weeks to get the truck as finished as I can before the rally at the end of June.

This weekend I'm going to be setting up the bed. ill head to the steel shop on Monday and finish the roof rack and make the bed deck.

I need an awning and I need a compressor. The Compressor is very last. But the awning is a necessity. For shade as well as rain.

I still need to find a water solution, I'm close to that decision I just need to get the bed deck situated.

I need a CB but eh... not a high priority.

I need to do something about the carpet on the drawers. I don't like it. it collects fur.
 

Mallrat

Observer
Are you running wheel spacers at all? You've got the 285/75R16 Duratrac's right? Have you flexed with them at all. I seem to recall it being VERY difficult to fit the full 33 without cab mount chop and/or a LOT of trimming.
 

toyrunner95

Explorer
nope no spacers. I've flexed it but not too hard core. I do rub on the A arms before full lock. I have the adjustable coilovers and with the weight of the bumper I have them pretty stiff. so it keeps the front from really stuffing.

My theory on off road is like BBQ, low and slow. If you use the tools instead of brute force, your vehicle will survive much more. I prefer over axeled and under powered to keep from breaking things.

I would rather rebuild a winch than pay for a body shop.
 
Last edited:

tuckdaddy

Get a bite hippies
Some 1.25" spacers will keep your tires off the upper control arms. Otherwise at full compression some trimming may be required on the lower parts of the front fender(Had to on my 07' even wheeling low and slow.) Ran some spidertrax spacers on the front and rear of my old 07' TRD Tacoma and they worked beautifully.
 

toyrunner95

Explorer
ROOF RACK!

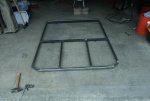
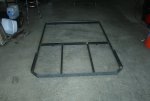
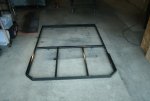
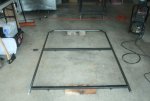
Over the past few months I have been contemplating the need for a roof rack. Again, being the cheapskate I am; I am not going to buy ANOTHER roof basket. Plus, the styles that were available where either A) universal and didn't look good. or B) WAY too expensive. So I set to work designing something that was effective, simple, durable, and will be what I want.

The first issues was what am I gong to do with it? During my test run I found that I really didn't have a place to put any firewood. I wanted something that would hold the tent. but have some extra space for dry bags, firewood, Storage in general. But I didn't want something that was so big and heavy that it would hinder performance. I wanted something cheap, but not cheaply made.

IMG_0129.jpg

Off I want to the steel yard. I picked up 20' of 1" 1/8" wall square tube, I had used it before in making the bed of my beater pickup Bertha and I found that braced and gusseted correctly it can be quite strong.

IMG_0127.jpg

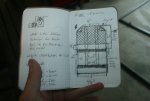
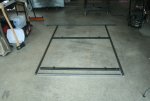
I knew that The tent size was 48"x 48" so based on that measurement and what I deemed the average length of a piece of wood is, I started cutting. 6' long sides, 48" wide bars. (I do the feet and inches on purpose, Feet is always length, Inches is always width. That way I know what I'm cutting and where its going. Unless of course its less than 12")

IMG_0133.jpg

starting to get the basic shape I want. I decided to use flat bar around the front edge. This would give me somewhere to mount lights if I want and it would give me a secure edge to place things against to keep them from sliding around. I can always modify this later if I need to.

IMG_0134.jpg

Paint: um... I painted it.... nuff said.

IMG_0138.jpg

It is ready for install, just waiting for paint to dry, and the rain to stop. Once I get everything back installed I will post up pics.

OH, Total cost: $45 for the steel, Time with the welder, $13 for the primer and paint. All in all, cheaper than $400 roof bars and $400 roof basket.
 

Attachments

  • IMG_0130.jpg
    IMG_0130.jpg
    484 KB · Views: 24

toyrunner95

Explorer
Update! !

So I shortened the basket on the roof rack. Then I adjusted the load bars and attached the new awning.
IMG_20150606_121951_899.jpg
IMG_20150606_121930_118.jpg
IMG_20150606_160421_105.jpg

Then we went fishing.... and made fish tacos. We had to buy the fish because, well we suck at fishing.
IMG_20150510_163325_128.jpg
 

Forum statistics

Threads
186,493
Messages
2,886,653
Members
226,515
Latest member
clearwater
Top