International 4700 4X4 Rescue Conversion

motorman

Active member
Instead of drawers or cabinets, consider a simple, open shelf with lips on the forward edge or elastic to retain Sidio crates or soft cubbies. Foam can also be custom cut to hold plates, mugs and glasses and the entire block can be inserted into a cubby hole, eliminating drawer slides, locks, handles, latches, etc. If you like simple and light, that is the ticket.
Absolutely agree
Less is more!
 

motorman

Active member
houston we have a problem

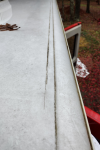
i have a leak inside my box
appears to be coming from the roof panel and the structure

the roof is stitch welded and then caulked & painted

after a couple years living outside in the freeze thaw cycle + UV i have been compromised

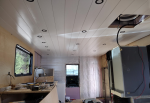
had to take my ceiling down

plan is to wire wheel the seam, paint and lay a bead of lap sealant

any other suggestions?


1670953518972.png

1670953547775.png

1670953584969.png
 

DzlToy

Explorer
No Home Depot/Lowes/Ace/True Value sealant will stand the test of time. You need to call Lord Adhesives, Henkel, Sika or 3M tech support and speak with an application engineer. Tell them you need a product with long term UV stability, and one that can stand up to constant weather exposure, freeze and thaw cycles, large temperature variations, dissimilar materials, etc.

A professionally sprayed aliphatic polyurea works quite well for this application. AVOID canned spray 'bed liner' and most roll on/DIY products. They are budget/value garbage. Silicon caulking, tub and tile caulk, epoxy, JB Weld, Liquid Nails, gutter and window sealants and the like should also be avoided, at all costs. These products are Band-Aids at best and simply do not last.

Millions of dollars each year are spent on 're-doing' repairs that were never done right in homes, RVs, boats and campers. There are literally thousands of products on the market to serve these needs. Sealant is not sealant, caulk is not caulk, etc., You MUST get something that is engineered for your particular application, materials, weather, and so on, if you want it to last.
 

motorman

Active member
No Home Depot/Lowes/Ace/True Value sealant will stand the test of time. You need to call Lord Adhesives, Henkel, Sika or 3M tech support and speak with an application engineer. Tell them you need a product with long term UV stability, and one that can stand up to constant weather exposure, freeze and thaw cycles, large temperature variations, dissimilar materials, etc.

A professionally sprayed aliphatic polyurea works quite well for this application. AVOID canned spray 'bed liner' and most roll on/DIY products. They are budget/value garbage. Silicon caulking, tub and tile caulk, epoxy, JB Weld, Liquid Nails, gutter and window sealants and the like should also be avoided, at all costs. These products are Band-Aids at best and simply do not last.

Millions of dollars each year are spent on 're-doing' repairs that were never done right in homes, RVs, boats and campers. There are literally thousands of products on the market to serve these needs. Sealant is not sealant, caulk is not caulk, etc., You MUST get something that is engineered for your particular application, materials, weather, and so on, if you want it to last.


thanks for the recommendation to contact the experts
the AE at SIKA advised that 715 was for aluminum / horizontal surfaces
so far the fix has been applied for over 4 weeks and no more leaks!
we have had 2 tremendous downpour storms since the corrective action and i am confident in the solution
 
Last edited:

motorman

Active member
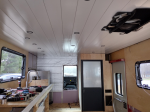
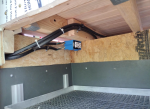
so my fix for the ceiling was going to require installing some 1 x 2furring strips to attach ship-lap
to avoid a direct thermal transfer through the 2x2 AL ribs i installed 1/2" fomular insulation for R3
then added another layer between the furring strips
lost about 1" of headroom but increased the ceiling insulation by R3 . . . possibly more
BUT the ship lap was easier to install piece by piece as opposed to a 4 x 8 piece of paneling!
measuring and drilling for lights was easier and ability to keep aligned / centered was guaranteed

1674755124868.png


1674755152043.png

1674755244745.png

1674755381432.png


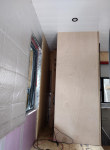
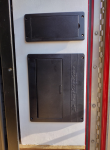
insulated the front wall and took the opportunity to finish the decommissioning of the ambo system
notice what is missing?


1674755477358.png

had to re-measure & cut the panes for the fridge enclosure

1674755552300.png

and re-engineered to take advantage of some space behind the fridge
will make a sliding pantry that can also serve as a 'door' to seal off the pass through

1674755652107.png
 

motorman

Active member
productive weekend

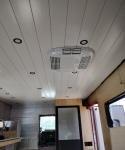
finished the AC installation

1675082748245.png

installed the last piece of the ceiling


1675083290682.png

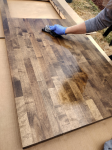
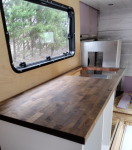
cut the butcher block counter, stained & oiled
finished counter top length is 60"

1675083730444.png


1675083746776.png

1675083817844.png
built & painted the kitchen base cabinet out of 3/4 " plywood
the vertical panels fit inside the top and bottom to provide structural strength as the counter rests on top
did not want the fasteners to handle all the load
will have 2 or 3 partitions in each side for ascending / descending compartment sizes
current dimensions of each are 25" x 15"
certainly enough space for all the stuff

1675083636828.png

the space to the left of the cabinet is 28" wide
this will be the space available to sit when the bed is 'put away' during the day
 

motorman

Active member
put the kitchen back together and installed the counter, cabinet, sink and shower 'partition'
i will be making a very shallow cabinet that will fit to the right and in front of the sink down to the toe kick
there is about 6" of depth available for the 30" width
narrow but deep drawers on both sides of the sink
notice the air matrix heater in its hiding place with close access to the hot water heater & engine coolant lines

1675717692793.png

1675717755106.png

1675717793776.png

cleaned up the electrical cabinet and installed the batteries
2 x EG4 400ah 12v beauties
Victron goodies to follow

1675718021068.png

1675718056120.png

AC & DC distribution is convenient and resides close at hand

1675718144959.png

DC on top

1675718165276.png
 

motorman

Active member
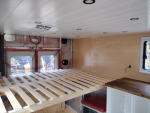
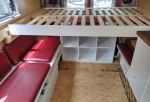
working on the bed slat alignment
1/8" paneling ripped for spacers on either side

1676665274117.png

with a piece of scrap clamped to have everything line up

1676665328964.png

3 screws for the stationery slats

1676665391219.png

2 on the front of the sliding / movable stats

1676665460063.png

beveled the opposite end top & bottom to allow 'smooth' sliding

1676666858789.png

and wa-la

seating with the bed in 'day use'

1676666920313.png

1676666967777.png

60" queen
by way of two 30' x 80" memory foam mattresses

1676667013230.png
 

motorman

Active member
looking for some input here if you please

planning to install a chinesium diesel heater in this location
utilizing an AL bracket from the ambulance demolition

any reason to not use this location?
i see these things mounted in all sorts of 'enclosed' locations and assume this is more than suitable

will be about 18' of fuel line to the primary diesel tank
is this too far?

1677017150404.png

1677017171301.png

water supply line will be routed above properly

exhaust will go out the former exterior outlet on the drivers side
the total exhaust length is under 15"
will the muffler be necessary?

1677017307006.png

with one of these attached to some AL plate


1677017452123.png


with a short combustion air inlet will it be too loud?
or is a longer routing better?

i could route about 35-40" of inlet air pipe bringing air from the rear of the box
 

andy_b

Well-known member
looking for some input here if you please

planning to install a chinesium diesel heater in this location
utilizing an AL bracket from the ambulance demolition

any reason to not use this location?
i see these things mounted in all sorts of 'enclosed' locations and assume this is more than suitable

will be about 18' of fuel line to the primary diesel tank
is this too far?

View attachment 766636

View attachment 766637

water supply line will be routed above properly

exhaust will go out the former exterior outlet on the drivers side
the total exhaust length is under 15"
will the muffler be necessary?

View attachment 766640

with one of these attached to some AL plate


View attachment 766642


with a short combustion air inlet will it be too loud?
or is a longer routing better?

i could route about 35-40" of inlet air pipe bringing air from the rear of the box
There usually are limitations on how far away the first bend of the heated interior air can be from the heater itself and the minimum clearances from the heater body. Likewise, there are usually limits to how far the total length of the fuel line can be and the elevation gain between the pickup, pump, and heater itself. If you could get a hold of the install instructions ahead of time, might be helpful.

Here is a link to the Planar heater (which is a Russian copy of a Webasto): https://planarheaters.com/wp-content/uploads/2018/01/Installation-Manual-Planar-EN-V06.2021.pdf

An exhaust muffler will help no matter what. Tiger Expedition in Germany makes a intake silencer if the intake side is too noisy.
 

motorman

Active member
There usually are limitations on how far away the first bend of the heated interior air can be from the heater itself and the minimum clearances from the heater body. Likewise, there are usually limits to how far the total length of the fuel line can be and the elevation gain between the pickup, pump, and heater itself. If you could get a hold of the install instructions ahead of time, might be helpful.

Here is a link to the Planar heater (which is a Russian copy of a Webasto): https://planarheaters.com/wp-content/uploads/2018/01/Installation-Manual-Planar-EN-V06.2021.pdf

An exhaust muffler will help no matter what. Tiger Expedition in Germany makes a intake silencer if the intake side is too noisy.


thanks for the instruction manual
cleared up some of my questions
 

andy_b

Well-known member
thanks for the instruction manual
cleared up some of my questions

In my install the heater is super close to the fridge - I insulated the fridge with some radiant foil heat shield and wrapped the hot air exhaust with sleeving. TBH, it doesn't get that hot even on high.
 

motorman

Active member
interior is 'finishing' up nicely . . . IMO
the couch is 64" long with 3 compartments below 24 x 15 x 5.75" (l x w x h)
will most likely use fabric boxes as opposed to drawers

the hard seating surface is 15.75" off the floor
plan is to utilize a 3-4" cushion
an arm rest of some sort is planned for the end to have something to lean against

the space to the right next to the wheel well will be another form of storage

1678122523369.png

the 4th compartment by the door is shoe storage during ingress / egress
will finish painting the 2 panels when there is more to paint

1678123079723.png

seating on the kitchen side is finished as well and is 28" wide
the storage solution is the perfect size to accommodate our induction cook top

1678123453346.png

seating surfaces are 42" apart

one of the last major construction projects will be the cubical storage at the end of this 'hall'
approx 18 x 48 x 24 (l x w x h)

you can see on the left side how the seating continues for 40+ inches for storage and / or additional sleeping

1678123926924.png
 

Attachments

  • 1678123275595.png
    1678123275595.png
    714.9 KB · Views: 17

motorman

Active member
many things coming together and the construction is almost completed

cubical storage is completed
this will house clothes and such
boxes are 12.5 x 16 x 13
will utilize the cloth 'boxes'

1681160007109.png

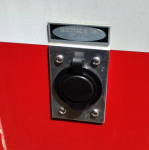
power is in w/ 2 x usb outlets as part of the 120V supply via integrated small unit transformer
the left side is a single breaker that is a branch circuit with passenger side external receptacle

1681160046605.png

the right side is a single breaker that is a branch circuit with drivers rear compartment for charging tools
cut down the shelf wall mounting brackets and re-installed the 2 shelves
this is tons of storage

1681160090943.png

1681160108505.png

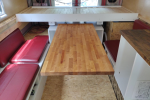
the table is 25 x 52 butcher block
used 40" compound drawer slides for full extension
and no table leg!!!
slides are mounted with 14 x machine screws + washers + nylocks per slide
table is attached with 16 x 1" screws per slide

1681160838754.png

1681160902307.png

1681160626156.png

1681160642151.png

when fully closed it is a 12' side table

1681160706678.png
 

Attachments

  • 1681160793927.png
    1681160793927.png
    826 KB · Views: 13
Last edited:

Forum statistics

Threads
188,238
Messages
2,904,391
Members
229,805
Latest member
Chonker LMTV
Top