Introducing the “NEW” Alu-Cab Canopy Camper

Phreak480

Army Guy
Therefore as I understand it on the Blue Sea instructions, I would want to hook the two power leads from the switch panel (the red wires sticking up in the picture below) to main positive terminal of the hub (since that is the hot wire coming direct from the battery). And then each switch on the panel would run to a + circuit on the hub, along with the positive wiring coming in from each "device" requiring power, which is where it get confusing since both would have to be wired into the same hook up. The negative from the device then would tie into the hub's negative common buss. Will this work?

I feel like I am maybe trying to combine the wrong two products, but just looking to see if I can make it work. I thought my hub would eliminate the need for the + or - Buss bars I see being used in the typical install, but maybe I still need one?? Any direction is appreciated.

View attachment 647619

Those are simple switches with just 2 terminals and the lever either makes or breaks the connection. They are no different than a valve on a water hose in that respect. This makes them very simple. It sounds like you desire to have 1 fuse for each switched circuit and will use your existing fuse panel for that.

Here is what you need to do:
Remove all those wires from the switches and throw them in your spare parts bin.

Use the "side" terminal (the ones that currently have positive wires on them) to connect each switch to 1 slot on your fuse panel. You will obviously need to assembly wires to do this with. Looks like spade lug (switch has male so wire needs female) on the switch end and ring terminals on the fuse panel end.

This will give you each switch fused independently which allows you to size the fuse for the device and wire the switch feeds. You will then connect to the wiring to each device from the end terminal on each switch using the same types of connectors as used on the side terminals they were fed fused power via.

The negative side for each circuit will go to the negative bus bar of the fuse panel.


Please let me know if you have any further questions on my description, hope it helps.
 

blake92242

Member
Okay all you wiring wizards, I have question I am hoping someone can clear me up on. My panel is being put together in a slightly different version of parts than most b/c of some of the parts I already had before switching camper platforms. I already had a Blue Sea Power Distribution Hub (model 5026) so instead of going with one of the Weather Deck switch panels that have resettable breakers, I bought the one that didn't as my hub will provide protection for each circuit. It has a negative common bus built in. Picture below:

View attachment 647618

Therefore as I understand it on the Blue Sea instructions, I would want to hook the two power leads from the switch panel (the red wires sticking up in the picture below) to main positive terminal of the hub (since that is the hot wire coming direct from the battery). And then each switch on the panel would run to a + circuit on the hub, along with the positive wiring coming in from each "device" requiring power, which is where it get confusing since both would have to be wired into the same hook up. The negative from the device then would tie into the hub's negative common buss. Will this work?

I feel like I am maybe trying to combine the wrong two products, but just looking to see if I can make it work. I thought my hub would eliminate the need for the + or - Buss bars I see being used in the typical install, but maybe I still need one?? Any direction is appreciated.

View attachment 647619
@Phreak480 is correct in the way you'll have to wire it. It will be bit of a wiring nightmare compared to the ones that have breakers built in. Just try and keep the wires zip tied and clamped to the board to keep things more organized.
 

wackyhacky76CO

Active member
Those are simple switches with just 2 terminals and the lever either makes or breaks the connection. They are no different than a valve on a water hose in that respect. This makes them very simple. It sounds like you desire to have 1 fuse for each switched circuit and will use your existing fuse panel for that.

Here is what you need to do:
Remove all those wires from the switches and throw them in your spare parts bin.

Use the "side" terminal (the ones that currently have positive wires on them) to connect each switch to 1 slot on your fuse panel. You will obviously need to assembly wires to do this with. Looks like spade lug (switch has male so wire needs female) on the switch end and ring terminals on the fuse panel end.

This will give you each switch fused independently which allows you to size the fuse for the device and wire the switch feeds. You will then connect to the wiring to each device from the end terminal on each switch using the same types of connectors as used on the side terminals they were fed fused power via.

The negative side for each circuit will go to the negative bus bar of the fuse panel.


Please let me know if you have any further questions on my description, hope it helps.
@Phreak480 is correct in the way you'll have to wire it. It will be bit of a wiring nightmare compared to the ones that have breakers built in. Just try and keep the wires zip tied and clamped to the board to keep things more organized.

Thanks folks! I knew there had to be a way to make it work. I appreciate it!
 

Phreak480

Army Guy
@Phreak480 is correct in the way you'll have to wire it. It will be bit of a wiring nightmare compared to the ones that have breakers built in. Just try and keep the wires zip tied and clamped to the board to keep things more organized.


Yes the key will be staying organized. I'd suggest that you pick a starting point on the row of switches and then a starting point on the fuse panel and then just move in an orderly fashion down the line. Keep wires as short as possible while still allowing some room to service things. If the wires were going further I'd suggest labeling between the fuse panel and switches but since the distance is so short you can just go in order and it will be easy to follow. I'd definitely label wires going to places further than the back of that panel though.
 

SoyBoy

Member
I agree completely. This area between the cab/camper is definitely wasted space in the design and I have been pretty focused on mounting something in there. I have considered that spot for the water tank & it has been done on at least one Tacoma install I know. There is fella on YT (https://www.youtube.com/channel/UCbZCCPuCQlEHLDyUyjuoGLQ) that has done it using one of the Front Runner flat tanks. He doesn't have any real details on the install in the videos he has posted though.
My dealer is installing the Front Runner Flat Tank (FRFT) to my ACCC on a 2013 Tacoma Access Cab Long box tomorrow. If possible do the FRFT mounting before the ACCC goes on the truck. Yes, it does fill that space pretty damn good. For my application, the frft outlet on the bottom will come out the passenger's side of the accc through a spigot for gravity flow. I will use the frft for outside duties and extra water capacity (maybe even shower use) Also, I will be able to easily fill the Septor 20L water can in place, the Septor will serve my inside accc water needs (morning coffee-:)

The fill cap area has "just" enough room to get my hand in there to unscrew it and about 1/2" clearance above the top of the fill cap after you unscrewed it. Keep in mind the panels in the fill cap area on the accc are slightly different on a 5' accc to the 6' models. (do a quick search) The YouTube guy installed his FRFT on a 5' box and commented he had to relocate his fill cap to the front flat side (check comments below his video). I will not have to relocate my fill cap location on my 6' accc FRFT install. YT guy installed his frft with the accc on the truck - so it is doable.
It looks like it may be a small effort to get a fill hose into the fill hole - but I figure in time I will find an appropriate hack for that as well. Hope this helps.

Link to the FRFT that I used-
 

Mtpisgah

Active member
My dealer is installing the Front Runner Flat Tank (FRFT) to my ACCC on a 2013 Tacoma Access Cab Long box tomorrow. If possible do the FRFT mounting before the ACCC goes on the truck. Yes, it does fill that space pretty damn good. For my application, the frft outlet on the bottom will come out the passenger's side of the accc through a spigot for gravity flow. I will use the frft for outside duties and extra water capacity (maybe even shower use) Also, I will be able to easily fill the Septor 20L water can in place, the Septor will serve my inside accc water needs (morning coffee-:)

The fill cap area has "just" enough room to get my hand in there to unscrew it and about 1/2" clearance above the top of the fill cap after you unscrewed it. Keep in mind the panels in the fill cap area on the accc are slightly different on a 5' accc to the 6' models. (do a quick search) The YouTube guy installed his FRFT on a 5' box and commented he had to relocate his fill cap to the front flat side (check comments below his video). I will not have to relocate my fill cap location on my 6' accc FRFT install. YT guy installed his frft with the accc on the truck - so it is doable.
It looks like it may be a small effort to get a fill hose into the fill hole - but I figure in time I will find an appropriate hack for that as well. Hope this helps.

Link to the FRFT that I used-

Please post pictures when it is complete.
 

rino

Supporting Sponsor - OK4WD
My dealer is installing the Front Runner Flat Tank (FRFT) to my ACCC on a 2013 Tacoma Access Cab Long box tomorrow. If possible do the FRFT mounting before the ACCC goes on the truck. Yes, it does fill that space pretty damn good. For my application, the frft outlet on the bottom will come out the passenger's side of the accc through a spigot for gravity flow. I will use the frft for outside duties and extra water capacity (maybe even shower use) Also, I will be able to easily fill the Septor 20L water can in place, the Septor will serve my inside accc water needs (morning coffee-:)

The fill cap area has "just" enough room to get my hand in there to unscrew it and about 1/2" clearance above the top of the fill cap after you unscrewed it. Keep in mind the panels in the fill cap area on the accc are slightly different on a 5' accc to the 6' models. (do a quick search) The YouTube guy installed his FRFT on a 5' box and commented he had to relocate his fill cap to the front flat side (check comments below his video). I will not have to relocate my fill cap location on my 6' accc FRFT install. YT guy installed his frft with the accc on the truck - so it is doable.
It looks like it may be a small effort to get a fill hose into the fill hole - but I figure in time I will find an appropriate hack for that as well. Hope this helps.

Link to the FRFT that I used-

it is important to consider how the tank will be held in place, for the Front Runner tanks we installed here we cut down extrusion to create a reinforced center mounting point and ran bolts through the holes in the Front Runner tank into this extrusion. The sheet metal of the camper should not be tasked alone with holding that tank in place off-road. It is not my favorite solution for water and IMO the inside tank works much better and also can be kept warm during the winter to prevent freezing.

Example: https://ok4wd.com/blog/online-garage-2019-toyota-tacoma-sb/
 

rino

Supporting Sponsor - OK4WD
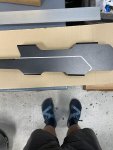
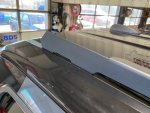
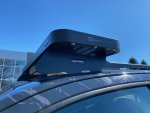
Started work on my Canopy Camper V2 build this past weekend. ? The three main goals for this version were to keep firewood out of the camper, move the spare tire out of the camper and the additional bedding space of the new high roof campers.

For the firewood storage, Harley who purchased my V1 camper had an awesome idea to chop down a Front Runner slimline II and it was a perfect fit for the CC/SB Canopy Camper fitment. So began the drill / saw marathon, haha.

IMG_7033.jpg IMG_7047.jpg IMG_7057.jpg IMG_7056.jpg
 
Started work on my Canopy Camper V2 build this past weekend. ? The three main goals for this version were to keep firewood out of the camper, move the spare tire out of the camper and the additional bedding space of the new high roof campers.

For the firewood storage, Harley who purchased my V1 camper had an awesome idea to chop down a Front Runner slimline II and it was a perfect fit for the CC/SB Canopy Camper fitment. So began the drill / saw marathon, haha.

View attachment 648732 View attachment 648733 View attachment 648734 View attachment 648735
Heck yeah Rin glad it worked out for you.. Stoked to see the new camper and I am simply loving your old setup. haha
 

Attachments

  • tempImagew45hXZ.png
    tempImagew45hXZ.png
    4.7 MB · Views: 63

abenteur_co

Member
Can anyone confirm that the solar hookup leads are 10 AWG? Was planning on running my two 100W panels in series but realized that the resulting voltage was too high for my charge controller so I need to run in parallel. Trying to confirm if the gauge is safe for ~12 amps over ~15 feet. Thanks!
 

rino

Supporting Sponsor - OK4WD
Can anyone confirm that the solar hookup leads are 10 AWG? Was planning on running my two 100W panels in series but realized that the resulting voltage was too high for my charge controller so I need to run in parallel. Trying to confirm if the gauge is safe for ~12 amps over ~15 feet. Thanks!

Yes they are 10 AWG, we have used two 126w Sunflare panels in series and parallel without issues. Personally I run two Sunflare 105w in parallel through the camper wiring harness to a Redarc BCDC1240. ?
 

DNLUSK

Member
Started work on my Canopy Camper V2 build this past weekend. ? The three main goals for this version were to keep firewood out of the camper, move the spare tire out of the camper and the additional bedding space of the new high roof campers.

For the firewood storage, Harley who purchased my V1 camper had an awesome idea to chop down a Front Runner slimline II and it was a perfect fit for the CC/SB Canopy Camper fitment. So began the drill / saw marathon, haha.

View attachment 648732 View attachment 648733 View attachment 648734 View attachment 648735
What is this V2 high roof camper? Do you have pictures?
 
On the note of the Goose gear power boards, we have two "standardized" builds we do here at the shop. The first is a "basic" fuse block and solar controller, just enough to get the camper up and working. Below is the diagram and parts list we created to build this system.

View attachment 629119

Canopy Camper Recommended Electrical Bits

View attachment 629120


Electrical Components:


  • Blue Sea Circuit Breaker (P/N 7044)
  • Power Trays For Circuit Breaker Above
  • Blue Sea Fuse Block (P/N 5025)
  • Victron Solar Controller (100/30)
  • 25’ 6 AWG Wire (B+R)
  • 2’ 10 AWG Wire (B+R)
  • 16-14 #8 Ring Terminals (Qty: 6)
  • 12-10 #10 Ring Terminals (Qty: 2)
  • 6 AWG – 3/8” Ring Terminals (Qty: 4)
  • 6 AWG – 1/4” Ring Terminals (Qty: 2)
View attachment 629121


Solar Components (Roof):
  • Sunflare 126w 4 Pole Solar Panel
  • Sunflare 126w 2 Pole Solar Panel
  • Sunflare 1’ MC4 Jumper Harness
  • Sunflare 5’ MC4 Wire Harness
  • Anderson SB50 Connector (Qty: 1)
  • Anderson SB50 10awg Pins (Qty:2)

The second system has a switch panel which the biggest feature IMO is being able to turn off / on all lights at once. Also key if you plan to add a water pump or the fire place to control the fan. Here is what that system looks like.

View attachment 629122

Switched Canopy Camper Recommended Electrical Bits

View attachment 629123

Camper Electrical Components:

  • Blue Sea Circuit Breaker (P/N 7044)
  • Blue Sea Circuit Breaker (P/N 7036)
  • Blue Sea Mini Bus Bar (P/N 2315)
  • Blue Sea Common Bus Bar (P/N 2300)
  • Blue Sea 12v Dash Socket (P/N 1011)
  • Blue Sea USB Charger (P/N 1016)
  • Blue Sea Temp Monitor (P/N 1741)
  • Blue Sea Deck Panel (P/N 4378)

  • Victron Smart Solar MPPT 100/30
  • Victron BMV-700 Battery Monitor

  • 25’ 6 AWG Wire (Black + Red)
  • 10’ 10 AWG Wire (Black + Red)
  • 6 AWG – 3/8” Ring Terminals (Qty: 6)
  • 6 AWG – 1/4” Ring Terminals (Qty: 2)
  • 16-14 #8 Ring Terminals (Qty: 5)
  • 10 AWG – 3/8” Ring Terminals (Qty: 6)
  • 12-10 Flag Spade Connecters (Qty: 25)
  • 16-14 Flag Spade Connecters (Qty: 25)
  • 22-18 Flag Spade Connecters (Qty: 25)
  • 5’ 3/4” Shrink Wrap
  • 5’ 3/8” Shrink Wrap
  • Zip Ties (Qty: 50)
  • Anderson SB50 Connector (Qty: 2)
  • Anderson SB50 10 AWG Pins (Qty:2)
  • Anderson SB50 6 AWG Pins (Qty:2)
Solar Components (Roof):

  • Sunflare 126w 4 Pole Solar Panel
  • Sunflare 126w 2 Pole Solar Panel
  • Sunflare 1’ MC4 Jumper Harness
  • Sunflare 5’ MC4 Wire Harness
  • Anderson SB50 Connector (Qty: 1)
  • Anderson SB50 10awg Pins (Qty:2)

These are just basic guidelines for our sales people / installers to follow and obviously half the fun is giving your Canopy Camper your own twist, so hope this helps as a baseline and LMK if you have any Q's.

-Rin

Thank you for this!
 

Gthack123

New member
E914A342-EF2D-449E-B5EB-5ED4FF3B66FB.jpeg
maiden voyage! Fruita and Moab. Unfortunately 50 mph winds put a damper on the Moab portion but the camper help up just fine.
 

Attachments

  • 36B6114E-4CB8-498F-BE0E-3551D6C8118D.jpeg
    36B6114E-4CB8-498F-BE0E-3551D6C8118D.jpeg
    1.5 MB · Views: 176
  • 9AFF8B0E-F385-4E2F-9AF5-B91C6CE61AED.jpeg
    9AFF8B0E-F385-4E2F-9AF5-B91C6CE61AED.jpeg
    3.5 MB · Views: 177
  • AA50CF95-1E64-4CCF-B99C-64F4315D8414.jpeg
    AA50CF95-1E64-4CCF-B99C-64F4315D8414.jpeg
    3.7 MB · Views: 171

Mtpisgah

Active member
View attachment 649541

maiden voyage! Fruita and Moab. Unfortunately 50 mph winds put a damper on the Moab portion but the camper help up just fine.

nice setup. How do you like the Rak Attach. I have been running 1Up racks on my wife’s and my vehicles for seven years and only needed a swing hitch with the camper. I bought a Kuat Pivot and am second guessing that decision within the first week of use.
 

Forum statistics

Threads
188,029
Messages
2,901,381
Members
229,411
Latest member
IvaBru
Top