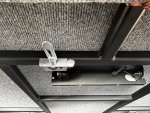
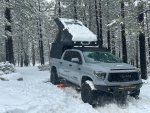
Modified/installed an Alucab
canopy table bracket so that I can store an Alucab table under the sleeping platform of my ALCC. Table can be stowed/removed when sleeping platform is raised or lowered. I talked to the nice folks at
AVO who had teased this mod on their instagram feed late last year. They gave me a couple great tips which saved me lots of time.
sleeping platform raised:
View attachment 765036
sleeping platform lowered:
View attachment 765037
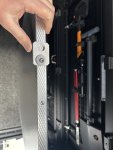
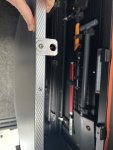
A couple folks have reached out for more info about parts used for this. Here is a quick write up and a couple more pictures:
The Alucab components of this install are:
Table:
https://www.alu-cab.com/product/alu-table/
Bracket:
https://www.alu-cab.com/product/table-bracket/
Additional hardware:
[EDIT] I received the new hardware and I think it works better.
4 - M8 x 1.25 ultra low profile socket head screw, 35mm length
4 - M8 x 1.25 hex bolts, 40mm long
4 - M8 Tee Nut inserts for wood, 11mm long
4 - 1" spacers, large enough for M8 bolt
4 - 0.75" spacers, large enough for M8 bolt.
2 - 3/8" x 1/2" long large flange aluminum rivets
1 - 3/16" x 3/8" long aluminum rivet
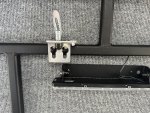
The table comes with a small aluminum plate attached at one end, which is designed to slide over and mate with the table bracket's anti-luce fastener. Remove this plate and keep all parts, you will relocate this plate off center. The existing hole can be closed with the single 3/16" x 3/8" long rivet.
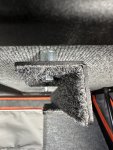
Determine where you want the table brackets installed under the sleeping plaform, I chose as far forward as practicalto the middle cross-brace. The table bracket instructions will give you the recommended width between the 2. My install left me with 1/4" on each side. Once the location has been determined and marked, drill the 4 holes necessary for the m8 tee nuts. Install the tee nuts by hammering them into the top side of the sleeping platform, below the mattress. The brackets have long slotted holes so you can adjust the fore/aft position as desired. Attach the brackets to the bottom of the sleeping plaform using the hex bolts, with the spacers between the bracket and the sleeping platform.
The anti-luce fitting and bracket are then attached to the next cross-brace, just rear of the led light. I chose to offset to the driver side, in the hopes of avoiding the wiring that runs inside the brace. No issues encountered. The anti-luce bracket is attached via the large flange rivets. The light will need to be rotated completely forward or rearward for the necessary vertical clearance with the table.
The tightest tolerances seem to come from the head of the hex bolt (used to attach the table bracket) and the table itself. The bracket also can just barely come in contact with the ledge below the sleeping platform. In the hopes of making the table slide a bit more freely and not have contact with the legde below, I have invested in some ultra-low profile socket head screws (
https://www.mcmaster.com/90358A029)
that will give me the room to run a fender washer between the fastener and bracket, yet still be lower profile than just a normal hex bolt. Washers unnecessary and take you to same profile as a normal hex bolt. Skip them. I will also switch to a 3/4" spacer instead of 1" spacer, to move the bracket closer to the bottom of the sleeping plaform. This new hardware arrives later this week. I think it will be an improvemnent, but wanted to share the original hardware since that is what AVO shared with me.
Good luck and enjoy!

