Isuzu NPR HD Truck Camper Build

VicHanson

Adventurer
First some good news about the fridge, it only used .42 KW in the first 24 hours, according to the published rating, it should have used .79, so it is much more efficient than stated. I finally found out how to change it to get the current amp usage, but then I couldn't find it running all day. Every time I went by it to check it, it wasn't running. Finally caught it running a few hours ago, it was showing 1.08 amps, but as I stayed and watched it, it slowly dropped down to .96 before it shut off. It uses .08 amps in standby.

I made some good progress on the camper today, in spite of spending lots of time thinking and checking to make sure I was doing it right. I put some of the smaller pieces together on a table, that way I could staple it on both sides, as well as it would have been difficult to do it in place because there wasn't anything behind to support the pieces. I also replaced some of the 1x2 pieces with 1x4, because it was easier to tie the pieces together. Here are a few of the latest pictures.

Oh, I was able to use the 1" staples for many areas, and was able to cut some of them shorter to use where the 1" ones were too long.

Vic
 

Attachments

  • IMGP0138_resize.JPG
    IMGP0138_resize.JPG
    549.4 KB · Views: 131
  • IMGP0139_resize.JPG
    IMGP0139_resize.JPG
    309 KB · Views: 120
  • IMGP0142_resize.JPG
    IMGP0142_resize.JPG
    276.5 KB · Views: 158
  • IMGP0145_resize.JPG
    IMGP0145_resize.JPG
    432 KB · Views: 193
Last edited:

VicHanson

Adventurer
Jim, I could still be here when you get back at the way things are going now!

Peter, thanks for reminding me about the epoxy to rebuild the weak wood, I will try to get some right away.
 

VicHanson

Adventurer
Peter, If I'm understanding you correctly, you are talking about the shelf plywood, meaning the flat plywood under the wide portion that would be above the side of the pickup in normal use. On the driver's side, that was rotten on the outside the full length of the camper. The worst place was where the water inlets were, both to fill the tank and the city water, so something must have been leaking there. I cut out the whole piece of plywood and am replacing it. Much of the inner skin plywood is gone, all that is left is one layer of plywood and the vinyl inner coating. To replace that would have been a major problem so I am leaving that in place, I will bond it to the ridgid foam insulation, but it won't be contributing any structual strength (it was only 1/8" to begin with). The 5mm Lauan plywood will go over that, also attached with Liquid Nails adhesive, as well as stapled to the wood framework. I am planning on using Thompson's wood sealer on the plywood. I will put the original aluminum siding back on over this. Any advice on the best type of sealer to use for the seams and joints on the aluminum siding? I have heard there is a roll of putty type sealer, or the caulk gun type.

Yes, the garage will be structually attached to the bed overhang, so it won't be supporting itself anymore. Also I will be building storage areas under the side shelves, they will be resting on, and attached to the plywood decking of the new flatbed. Still not sure exactly how I will do the doors, I have a quote from the flatbed builder, but it's quite expensive (about $750), so will be doing something cheaper with wood, not aluminum.
 

VicHanson

Adventurer
Peter,

Besides the bikes, the garage will hold 6 Trojan T-105 batteries (in a vented box, sealed from the rest of the garage) and hopefully about 10 gallons gas, 30 gallons diesel fuel, and 50 gallons of fresh water. I'm moving the LP tanks from below the refrigerator to open up that area and am debating whether to put them on the other side, or in the garage area.

Thanks for the tip about Thompson's. I got the driver's side rebuilt today, except for 1 board and the redoing the water inlets, The outside 110v outlet, and hooking the LP lines back up. Started to put in the insulation to see how that goes - it is pretty easy. However I think it is best to get it a little too small rather than a little too big, it's hard to shave off just a little, the cracks can be filled with spray foam.

Doing a completly new outside skin would really be nice, for looks and probably easier, however I'm afraid it is too expensive. The flatbed builder said he has some aluminum sheeting, I'll probably check on that and see if it is at all a possibility. But then I suppose it will need painting, unless I go for the shine. This is supposed to be on a budget, but I haven't really been sticking to it!

I'll put today's pictures in a separate post, have to switch to my computer.
Vic
 

VicHanson

Adventurer
Here are the photos from today:

IMGP0148_resize.JPG
This is the before photo of the corner bathroom compartment in the back.
IMGP0149_resize.JPG
Here is the old piece of plywood
IMGP0152_resize.JPG
Looking up at the opened up area - sink, oven, I took out the heater, bathroom
IMGP0154_resize.JPG
Side view with new wood
IMGP0156_resize.JPG
New plywood in place (except for the small piece in the back end)
IMGP0158_resize.JPG
I had to leave a little bit of the old plywood, it was screwed in under the oven and I couldn't get at the screws
IMGP0161_resize.JPG
A couple pieces of insulation in place
 

kerry

Expedition Leader
That's really coming along. Are you going to be able to reuse the exterior siding?

All your pictures make me ask a question. What kind of magic turns $300 worth of cheap lumber into a $15k truck camper?
 

VicHanson

Adventurer
Hi Kerry,

Didn't get much done yesterday, went shopping for more wood after church, then only got in a few hours of work before it started raining. It is rainy much more than normal here, I am told it is because of El Nino. Seems to have just stopped now, next rain forecast for Friday, so hopefully can get some good work days in.

The quick answer to your question, "What kind of magic turns $300 worth of cheap lumber into a $15k truck camper?", is About $10 worth of staples, some glue, and a bunch of screws!!

I suppose the full answer includes lots of labor and the appliances, plumbing, wiring and "value added".

I plan on reusing the exterior siding, not sure what I will side the garage with yet.
 

VicHanson

Adventurer
Today I spent a lot of time installing the insulation. The biggest problem are all the small sections, and most of the 1x2 are not exactly square, so it takes a long time to measure and cut each piece. And of course some times I measured wrong, or wrote it down wrong, or just didn't cut it right, so I got to redo some of them. I had finished putting the insulation on the part under the bed, and then realized that I still hadn't taken off one of the aluminum reinforcing corner pieces. Of course when I took that off, the wood was bad under it so had to replace that too.

Tomorrow I take the truck in to get the box taken off, and then need to clean up the truck frame to mount the new flatbed frame, so I probably won't get much work done on the camper. The good news is that it isn't supposed to rain again until Friday!

The yellow stuff is spray foam insulation, real messy stuff, especially when you put to much in - it continues to grow for almost the next minute!

IMGP0165_resize.JPG
Thought I was done here, then I saw the metal in the corner

IMGP0166_resize.JPG
Here is with the corner wood replaced
 
Last edited:

VicHanson

Adventurer
I've got a naked truck!

A beautiful sunny day here today! I drove to Tri-County Truck and Equipment to sell the box today. I thought they sold Isuzu, Fuso, and Hino trucks, but the card I have just says Hino trucks, but also parts and accessories for Isuzu, Mitsubishi, UD and Workhorse. Anyway, Renae was very efficient and had the body off in less than 2 hours, with 1 forklift, a big floor jack and a bunch of jack stands. He even took the tail/brake lights off the box and hooked them up on the truck temporarily for me. I asked for the old mudflaps but he gave me some new ones, with their dealership name on them. I was very pleased with my dealings with Tri-County, very nice people and seemed fair and honest, so happy to advertise for them.

In the afternoon I cleaned up the rust on the truck frame and put Ospho (sp?) on it, it is supposed to stop the rust and even chemically change it to something different, can't remember what. Anyway, it is great stuff! Tomorrow morning I will prime and paint the frame, and then in the afternoon take the truck in to get the new flatbed frame put on it. I'm glad the Isuzu has thicker frame steel than the Fuso because it was really rusted. Not sure if the truck was originally from the East Florida coast, where I bought it, of if it was from the rust belt somewhere.

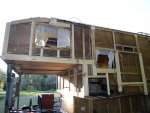
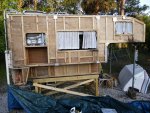
I had been planning on putting the camper on it right away, so that I could get started on the storage compartments. I think it will be easier to build them with the camper on the truck rather than do it first and then mount the camper. However I realized that I won't be able to use the truck for awhile then, so I need to do some more work on the camper first, so I won't be without a vehicle for any longer than necessary.

I ordered a 2000 watt inverter last night, it is a Tripp Lite PV2000FC PowerVerter Plus, supposed to work good with refrigerators, electronics, and power tools. It is not pure sine but they call it Pulse-width Modulated Sine Wave, not sure if that is really any different than normal modified sine wave or just advertising speak. I got it from Buy.com for $381 with free shipping. You can see it here: http://www.buy.com/retail/product.asp?sku=10330490

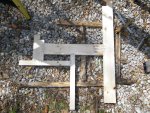
Attached are photos of the naked truck and the new flatbed.

IMGP0167_resize.JPG IMGP0168_resize.JPG IMGP0169_resize.JPG
 

VicHanson

Adventurer
Today was an exciting day, got the flatbed frame put on the truck! Dana had told me he would call after lunch when he was ready to put the bed on. In the morning I used spray Rust-Oleum primer on the truck frame because it allows painting right away instead of after 24 hours like the 1 quart cans say. I wanted to paint the whole frame, not just the part that was rusty areas, so used regular Rust-Oleum in a quart can for that. It was still a little tacky when we started putting the bed on but not too bad. I put a thick bead of Heavy Duty Liquid Nails adhesive on the frame, then we put a treated 1x3 on between the truck frame and the aluminum bed frame. We also put 2 layers of duct tape on the bottom of the aluminum frame to protect it from the treated wood. The bed frame is made of two 4” C beams going front to back, and 3” C beams going side-to-side on 16” spacing. There is also a 4” C beam all the way around the outer perimeter, with the opening facing out. The 3” cross beams are set down 3/4” so the plywood bed will be flush with the perimeter beam on the top.

Dana also mounted the mud flaps and the tail lights on the aluminum frame, as well as the fuel filler tube. I asked him if he had any experience installing an auxiliary fuel tank and he said he could do that. He also said he had an aluminum tank that he had built for someone and then they didn't take it. It was about 50 gallons and was too wide to fit underneath the bed, but he said he could cut it down so that it would fit flush with the bed, and it will still hold about 36 gallons. Dana is a good friend of my cousin Jim, who I am staying with. When I paid for the flatbed, he said that he had given me the “cousin Jim” price. So I was hoping for the same with the fuel tank, and sure enough he gave me a good price on that too, I think he said $230 for the tank, including the modifications and installation, which is a little less than a price I had gotten for a used NPR tank (32 gallons). There will be an extra charge to hook it up to the stock tank, not sure what that will cost yet as we are still working on the plans for that. We hope to do it with gravity feed so that it doesn't need a pump. He wants to install the tank before I put the plywood on the frame, and I also need to do some more work on the camper before I mount that, so it isn't a problem. Hopefully by Monday will be ready to put it on!

IMGP0173_resize.JPG
Dana putting on the mud flaps

IMGP0176_resize.JPG
Mark welding the mounting flanges on the bed

IMGP0178_resize.JPG
It's all mounted and ready!
 

FusoFG

Adventurer
We hope to do it with gravity feed so that it doesn't need a pump.

most semi trucks with dual tanks just connect the drain fitting on the bottom of each tank with a hose and treat it as one big fuel tank.

because we travel rough roads / off road we were afraid that a low hanging hose might rip off on something and strand us with no fuel.

we connected the supply hose on each tank and the supply hose to the engine to a 3 way valve. we also connected the return hose on each tank and the return line from the engine to another 3 way valve so each tank is isolated and all the hoses are up high.


all we have to do to switch tanks is to turn both valves from one tank to the other.
 

gait

Explorer
Maybe useful to keep the tanks separate just in case one gets dinged.
The Pollack 6 port changeover switch may be useful, changes over both hoses on both tanks as well as electric gauge changeover. Its motorised (not a solenoid) so only consumes power when changing over (fraction of a second)
http://pollak.thomasnet.com/viewite...valves/light-truck-6-port-motor-driven-valve?
They are US made. I've recently seen them on eBay from Aus and UK. Be careful though, apparently there may be some copies around.
 
Last edited:

Forum statistics

Threads
188,481
Messages
2,905,480
Members
230,494
Latest member
Sophia Lopez
Top