ITTOG's Truck Camper Build (was 6' x 12' Trailer Conversion)

ITTOG

Well-known member
No clearance lamps on mine.
Designed it that way with mitigating potential leaks.

I doubt there are any regs with regards to overhead clearance lamps that would effect us.
Never checked, and in near 80k worth of road miles on it in dozens of states, never been bothered about it (y)
Thanks for the response. Maybe that is why I can't find anything?

I did start looking at slide in campers online and noticed those that are wider than the truck always have clearance lights. If not wider, for example Supertramp, they do not have clearance lights. I know F150 Raptors are required to have clearance lights because they are wider than normal F150's so there appears to be a number somewhere that requires it?

I think I will go without clearance lights for now. I do have to install brake lights because my camper blocks my lights on the truck. I may make them external to the camper to prevent three holes per brake light.
 

ITTOG

Well-known member
What a great-looking set up. It's so cool to see it operational. Nice work.
Thanks. I definitely enjoyed it and can't wait to get out again.

I forgot to post my previous trip report with more pic's of the camper. It can be found at the link below (in case you have signatures turned off).
Latest Trip Report
 

ITTOG

Well-known member
Time: 4.5 hours
Total Time to Date: 437 hours
Rework: 0 hours
Total Rework to Date: 92 hours (not part of time above)
Current Weight: To be weighed, but I estimate at least 785 pounds


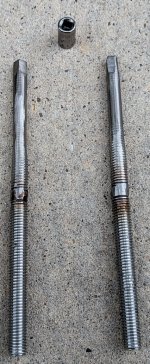
I worked a little on the camper accessories recently. First are the improvements @cannedtaco suggested on the alignment pins. I grinded down the threads on the top 2 or 3" so hoping it will be easier to align and sit the camper down over the pins. I did not grind to a point because the top is grinded to fit a socket so I can use a drill and speed thread them. I can always grind them to a point in the future if I still have issues. Next is to test Alignment Pins 2.0 when I load the camper on the truck again.
PXL_20231029_193404281.jpg

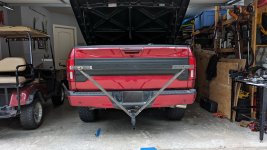
There has been a lot of anxiety about putting holes in the camper skin for the tail lights and clearance lights. I do not want to add additional holes and create additional opportunities for leaks. I have done a lot of research online for federal and texas regulations on this. I did not find anything on truck campers specifically. Most of it was for small RV's and trailers. I also looked at commercial builders whose campers do not sit outside the width of the truck (ie FWC, Super Tramp, etc) and they do not put lights on their campers. Therefore, the decision was made to not add lights to the camper and I decided the tail lights would be hitch mounted and not connected to the camper. (If you do not recall, the camper widens at the back and blocks the visibility of the truck tail lights. That was a bad design.)

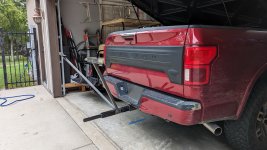
So I decided to build a hitch mounted frame for the tail lights. The next two pics show the frame. I used an old hitch I had, 1" tubing, and 1" x 1/8" angle iron.
PXL_20231029_195133070.jpg

PXL_20231029_195144545.jpg

I mounted the lights and started inserting the wires in the 1" tube. I haven't cut off the excess yet.
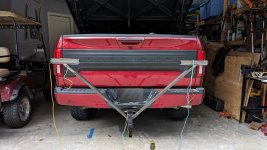
PXL_20231029_202437040.jpg

I got everything wired up and started testing. In this pic I have the parking lights on.
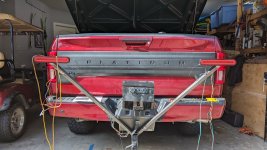
PXL_20231029_211022946.jpg

Here the brakes are engaged. One thing I did not like about a four wire design is that the brakes use the same wire as the blinkers. Thus, when the brakes are applied you get all the red lights and the orange turn lights on. I wish the orange lights were not on!
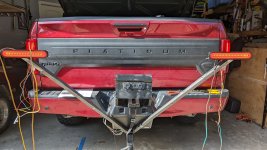
PXL_20231029_211109813.jpg

Light Requirements Documentation
- @IdaSHO did not put clearance lights on his camper and has thousands of miles without issue. I found other home builds without lighting as well.
- Supertramp does not put lights on their campers - https://forum.expeditionportal.com/...ramp-camper-for-sale-pnw.241376/#post-3134714
- Texas regs - https://www.dps.texas.gov/section/v...bRNSpaZRAp_suUbAg-ke6W1aoiZ4TzNgamrq6rJTLZJ54
- It appears I do not need a high, center mounted tail light according to texas regulations. From https://www.dps.texas.gov/section/vehicle-inspection/faq/center-high-mounted-stop-lamp, there are the following statements.
○ 13. If my camper shell covers the Center High Mounted Stop Lamp, will that cause me to fail inspection?
§ No. A camper shell that covers the Center High Mounted Stop Lamp will not be cause to fail inspection.
○ 14. If my camper shell comes equipped with a Center High Mounted Stop Lamp, but covers the vehicle’s Center High Mounted Stop Lamp, will that cause me to fail inspection?
§ No; however, if the camper shell was manufactured with a Center High Mounted Stop Lamp, it must be operable at the time of inspection.
 
We have a hallmark cuchara and it only has the tail lights and liscense plate light. No clearance lights. It hangs over the side (somewhere around 6-8 inches) and back (18+ inches) of the truck.

One thing to just make sure (it looks like your good) is that your setup doesnt obscure/cover the liscense plate. Officers may not know the clearance/ aux light regulation but I would bet they could have time to look it up while they have you pulled over for obscured plate.

Will your taillight hitch work with the trailer setup as well? Seems it might be a pain if it doesnt, but you need to transport that setup because your not going to tow the trailer the whole time. Oh, they do have plugs/cables to attach the camper and trailer to the truck plug. Search for truck pigtail splitter.

You could always external run the wires with low profile conduit from under the camper and use body tape to attach the lights.
 

IdaSHO

IDACAMPER
More than a few reasons I went with the design I did.

Truck tail/brake/clearance/reverse lighting is completely unobstructed.
As is the license plate.

And truth be told.... the ONLY reason I added tail/brake lights to the camper was to reduce the following distance of tailgaters.
It doesn't seem like it would make much of a difference, but with the 24" rea overhang we have, it does.
And once we have the TOAD vehicle for full time travel, the camper mounted tail/brake lights will be visible over the top of the TOAD.
Overkill knowing the TOAD will have its own lighting, but I feel this is one place to go overboard, especially with todays drivers. :rolleyes:

51497921163_aebd386987_b.jpg
 

rruff

Explorer
Anyone know the regs for exterior light requirements? Or have a link to them? I have been looking but have only found for RV's and trailers. When I look at other campers like mine that are not any wider than the truck it appears they do not use any clearance markers in the front or the sides.
Don't have links but I think the regulation most places is 80" or less width, you don't need them... over that you do. I doubt this is on the radar of many or any cops, though.
 

ITTOG

Well-known member
Thanks guys, I greatly appreciate the input.

We have a hallmark cuchara and it only has the tail lights and liscense plate light. No clearance lights. It hangs over the side (somewhere around 6-8 inches) and back (18+ inches) of the truck.

One thing to just make sure (it looks like your good) is that your setup doesnt obscure/cover the liscense plate. Officers may not know the clearance/ aux light regulation but I would bet they could have time to look it up while they have you pulled over for obscured plate.

Will your taillight hitch work with the trailer setup as well? Seems it might be a pain if it doesnt, but you need to transport that setup because your not going to tow the trailer the whole time. Oh, they do have plugs/cables to attach the camper and trailer to the truck plug. Search for truck pigtail splitter.

You could always external run the wires with low profile conduit from under the camper and use body tape to attach the lights.
Thanks for those details. Mine hangs out the back 2' so an issue due to that and it blocks the trucks tail lights.

Yeah my license plate is completely visible. No issue there.

The current iteration does not allow for the lights to be used with a trailer. If I am pulling a trailer I am comfortable with only using the trailer lights. The only change I plan to make is to make it collapsible so it can be stored easier. Like it is now is a bit of a pain to store.

More than a few reasons I went with the design I did.

Truck tail/brake/clearance/reverse lighting is completely unobstructed.
As is the license plate.

And truth be told.... the ONLY reason I added tail/brake lights to the camper was to reduce the following distance of tailgaters.
It doesn't seem like it would make much of a difference, but with the 24" rea overhang we have, it does.
And once we have the TOAD vehicle for full time travel, the camper mounted tail/brake lights will be visible over the top of the TOAD.
Overkill knowing the TOAD will have its own lighting, but I feel this is one place to go overboard, especially with todays drivers. :rolleyes:

51497921163_aebd386987_b.jpg
Great pic. Does that say IDACAMPER3.0? I thought the repaint was 2.0 so what else have you done?

Don't have links but I think the regulation most places is 80" or less width, you don't need them... over that you do. I doubt this is on the radar of many or any cops, though.
That is in line with some of the stuff I saw as well.
 

IdaSHO

IDACAMPER
Changes that pushed the camper from v2.0 to v3.0 were not entirely cosmetic. Ditched the small generator, so generator exhaust port (hole thru wall) was deleted. AC box in rear wall and vents in side wall was added, range hood fan and vent thru side wall added, reworked underside of cabover, rear tail lights, destickered, and repaint/colorchange via monstaliner. 👍
 

ITTOG

Well-known member
Time: 10 hours
Total Time to Date: 447 hours
Rework: 0 hours
Total Rework to Date: 92 hours (not part of time above)
Current Weight: To be weighed, but I estimate at least 785 pounds


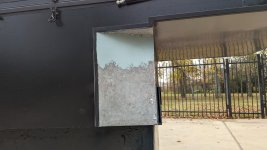
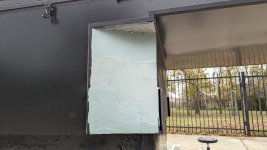
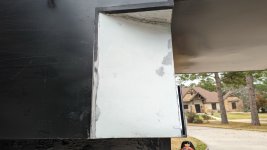
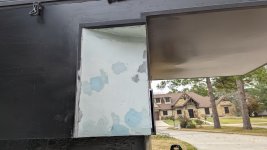
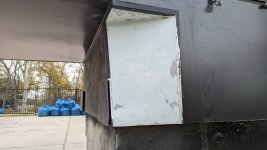
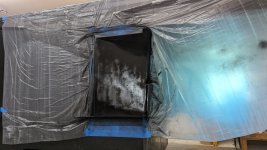
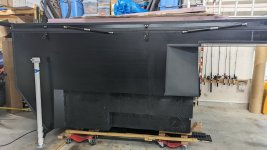
It was time to complete the wings. I hated working with the Bondo with glass and due to that I pushed this off until the end. I discovered regular Bondo is so much easier to work with. Too bad I needed the Bondo with Glass due to it being water proof. I made the job more difficult because I already installed the trim. Regardless, I got the job done.
PXL_20231221_183810090.jpg

PXL_20231221_201016193.jpg

PXL_20231222_184427667.jpg

PXL_20231222_200615610.jpg

PXL_20231222_211047632.jpg

PXL_20231226_181428908.jpg

PXL_20231226_181440055.jpg

I used the same paint as the trim and you can see it looks different. I had a piece I previously painted and it looked like that so it must change color after being out in the sun and/or being washed. I sure hope so.
PXL_20231227_143229940.jpg

PXL_20231227_143240783.jpg

Clearly I am not good at Bondo and paint but it will do.

Continued below...
 

ITTOG

Well-known member
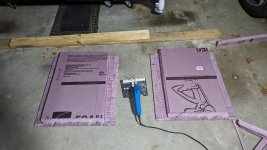
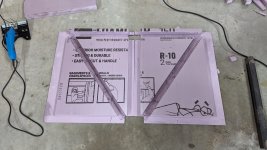
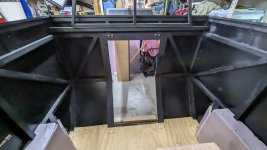
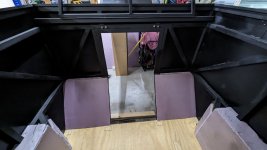
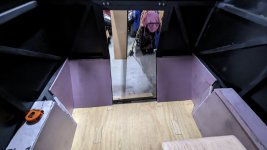
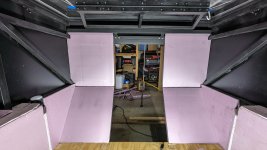
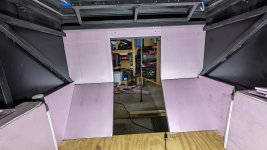
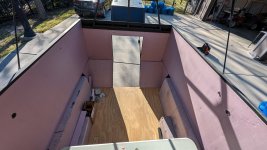
Next I started adding insulation inside. I cut the pieces to size on my table saw and then used a circular saw and hot knife to cut out the 1.5" tube channels.
PXL_20231224_225854641.jpg

PXL_20231226_203145024.jpg

PXL_20231225_143551536.jpg

PXL_20231225_143620725.jpg

PXL_20231225_182201524.jpg

PXL_20231226_203339184.jpg

PXL_20231226_204841541.jpg

PXL_20231227_212628911.jpg

It takes a lot longer to install the foam than one would think. It takes a lot of time to cut out all the tubing channels.

I have decided to attach the foam to the 1.5" tubing using push pin clips, and Velcro if needed. I am using the plastic pins to reduce thermal transfer.
1704288485110.png
 

Mules

Well-known member
Next I started adding insulation inside. I cut the pieces to size on my table saw and then used a circular saw and hot knife to cut out the 1.5" tube channels.
View attachment 813348

View attachment 813349

View attachment 813350

View attachment 813351

View attachment 813352

View attachment 813353

View attachment 813354

View attachment 813355

It takes a lot longer to install the foam than one would think. It takes a lot of time to cut out all the tubing channels.

I have decided to attach the foam to the 1.5" tubing using push pin clips, and Velcro if needed. I am using the plastic pins to reduce thermal transfer.
View attachment 813356
Looking great! How are you going to cover the foam on the interior?
 

ITTOG

Well-known member
Looking great! How are you going to cover the foam on the interior?
Good question. I almost included that in my last post. Right now I am thinking about Luan and am not sure how I will affix it because I want it removable. But I also want it to lay on the foam which would rule out velcro (too thick). If I don't come up with a better solution I guess I could recess the velcro in the foam???? Other idea's would be appreciated.
 

Mules

Well-known member
Good question. I almost included that in my last post. Right now I am thinking about Luan and am not sure how I will affix it because I want it removable. But I also want it to lay on the foam which would rule out velcro (too thick). If I don't come up with a better solution I guess I could recess the velcro in the foam???? Other idea's would be appreciated.
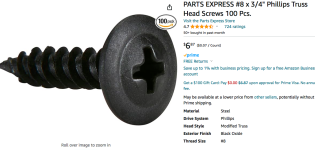
Maybe just use your push pin clips to hold both the luan and foam? Not sure if they are long enough. I used black screws to hold my carpeted luan to the walls. I wanted to remove my luan also, to do wiring in the future.

Screen Shot 2024-01-03 at 7.17.24 PM.png
 

Forum statistics

Threads
188,026
Messages
2,901,364
Members
229,352
Latest member
Baartmanusa
Top