ITTOG's Truck Camper Build (was 6' x 12' Trailer Conversion)

Mules

Well-known member
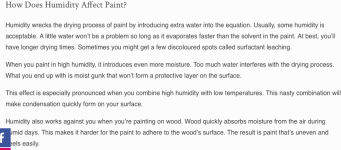
I'm not sure why your paint gummed up but it could have been humidity, or some kind of condensation.
Screen Shot 2023-09-22 at 4.51.32 PM.png


As for the paint coming off the steel, there are a couple items to help the paint stick to the metal.

1) Cleaning/degreasing of the surface is key just in case there is some oil, grease or silicone on the surface. If someone uses Armorall spray in the vicinity of the project, is a kiss of death for adhesion.

2) Although you can get away with Rustoleum paint, it is always best to start with a primer on the metal, and the finish paint on top of the primer. Primers are specifically designed for metal, or plastic and have much better adhesion, and paint has much nicer looks.

It's looking good.
 

ITTOG

Well-known member
I'm not sure why your paint gummed up but it could have been humidity, or some kind of condensation.

View attachment 797868


As for the paint coming off the steel, there are a couple items to help the paint stick to the metal.

1) Cleaning/degreasing of the surface is key just in case there is some oil, grease or silicone on the surface. If someone uses Armorall spray in the vicinity of the project, is a kiss of death for adhesion.

2) Although you can get away with Rustoleum paint, it is always best to start with a primer on the metal, and the finish paint on top of the primer. Primers are specifically designed for metal, or plastic and have much better adhesion, and paint has much nicer looks.

It's looking good.
Thanks for the info. I think that is in line with my thoughts on the situation. Yeah I should use a primer, I know....

I don't know what would be considered high humidity when painting but I think I have settled on the issue being high humidity AND spraying it on too thick. I think I just got going too fast and got carried away on the thickness.

Last night I repainted the door at 94 F and 48% humidity (the same as before). I put it on thin to ensure thickness is not an issue. This morning it looks great. I will probably need two layers to get complete coverage and then one more layer to get it built up a bit.
 

ITTOG

Well-known member
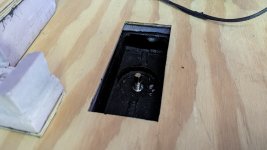
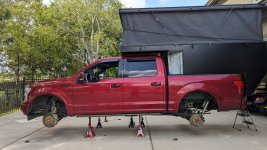
With the upcoming trip less than a week away I decided to put the camper on the truck. The last time I put it on the truck it took 1.5 hours due to complications aligning the hole in the camper with the hole in the truck bed, and of course with the nuts under the truck bed. Thus, I built the alignment pins previously discussed. In the pic below you can see the pins sticking up from the bed. It was difficult to get the alignment pins to go into the camper holes due to the hole only being about 1/32" larger than the pins. However, as long as I lower the camper into the bed evenly, it went in without issue. Otherwise the pins were great because it only took me 25 minutes to get it in the truck. I significant improvement. If I had someone helping I could probably due it in about fifteen minutes.
PXL_20230923_220643435.jpg

Here the pin is through the hole in the camper.
PXL_20230923_220651365.jpg

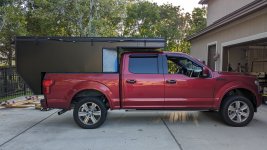
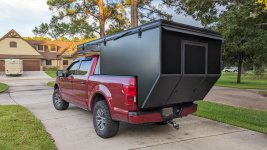
First pic on the truck with the protective film off of it.
PXL_20230923_230411679.jpg

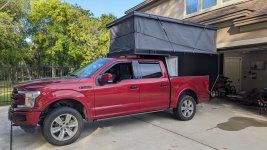
Of course I had to pop the top.
PXL_20230924_140410302.jpg

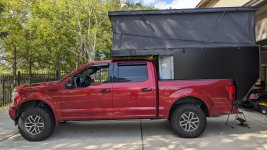
Final step in preparing the truck is getting the larger mud tires on it.
PXL_20230924_152858579.jpg

It is ready to go to camp.
PXL_20230924_155317783.jpg

Well, except for one thing… I still don't have the door on. The humidity the last few days has been around 60% or higher. So painting wasn't going to work. I am starting to get desperate so yesterday, with the humidity at 59%, I added the second coat and quickly took the door inside the house to dry. The humidity inside is usually about 35% to 40% so it will dry just fine in there. I will probably have to do the same thing today because it is supposed to rain.
 

Mules

Well-known member
With the upcoming trip less than a week away I decided to put the camper on the truck. The last time I put it on the truck it took 1.5 hours due to complications aligning the hole in the camper with the hole in the truck bed, and of course with the nuts under the truck bed. Thus, I built the alignment pins previously discussed. In the pic below you can see the pins sticking up from the bed. It was difficult to get the alignment pins to go into the camper holes due to the hole only being about 1/32" larger than the pins. However, as long as I lower the camper into the bed evenly, it went in without issue. Otherwise the pins were great because it only took me 25 minutes to get it in the truck. I significant improvement. If I had someone helping I could probably due it in about fifteen minutes.
View attachment 798229

Here the pin is through the hole in the camper.
View attachment 798230

First pic on the truck with the protective film off of it.
View attachment 798231

Of course I had to pop the top.
View attachment 798232

Final step in preparing the truck is getting the larger mud tires on it.
View attachment 798233

It is ready to go to camp.
View attachment 798234

Well, except for one thing… I still don't have the door on. The humidity the last few days has been around 60% or higher. So painting wasn't going to work. I am starting to get desperate so yesterday, with the humidity at 59%, I added the second coat and quickly took the door inside the house to dry. The humidity inside is usually about 35% to 40% so it will dry just fine in there. I will probably have to do the same thing today because it is supposed to rain.
Awesome!! Don't forget to get plenty of pictures of her out in the wilderness.
 

ITTOG

Well-known member
Time: 2.5 hours
Total Time to Date: 432.5 hours
Rework: 0 hours
Total Rework to Date: 92 hours (not part of time above)
Current Weight: To be weighed, but I estimate at least 785 pounds


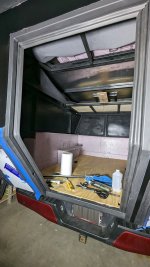
In the rush to get things completed enough to make the camper usable on my upcoming trip I was using every spare minute I had available. Here I have added three sides of the weather-stripping. The bottom was added after I put the door on and determined where best to put it. Turns out it was best to put it on the camper on the vertical part you can see in the pic.
PXL_20230925_161037210.jpg

This is the first time both handles had ever been in the door. Here they are in and glued underneath and have caulking around them. For both, I used the 3M 4000UV.
PXL_20230925_220719475.jpg

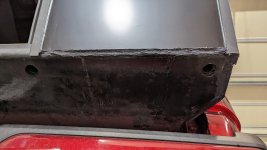
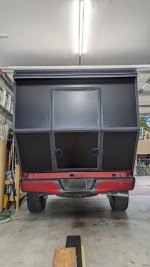
This is the bottom of the camper where it sticks out past the bed of the camper. The holes are where a crossbar stretches across the back and is attached to my jacks. There are four of these holes. I plan to make something that will plug the holes but for this trip I just put painters tape over the holes. It worked perfectly.
PXL_20230925_220741175.jpg

The first time the door has been on and closed using the handles.
PXL_20230925_221834137.jpg

Due to the weather-stripping the door sits about 1/4" offset past the camper. It was easier to do it this way than to try and make it flush.
PXL_20230925_222850742.jpg

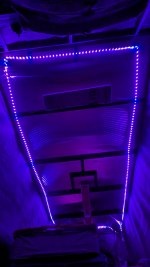
I have regular lights to install but for this trip I just put up some LED strip lights. I used them because I could toggle between white and red. I used the red light most of the time so it wasn't so bright. Especially at night.
PXL_20230928_003623040.jpg

The truck and camper are ready to go off grid.
PXL_20230925_234845252.jpg

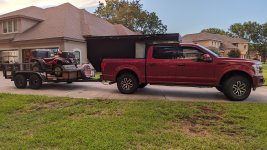
But first I had to get the trailer connected.
PXL_20230926_001457906.jpg

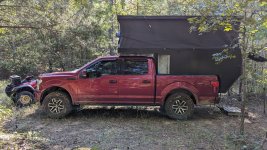
A shot in the wild. There will be more when I add the trip report in my other thread. I will try to remember to link it here for those that don't usually read it.
PXL_20230927_205638737.jpg
 

Mules

Well-known member
Time: 2.5 hours
Total Time to Date: 432.5 hours
Rework: 0 hours
Total Rework to Date: 92 hours (not part of time above)
Current Weight: To be weighed, but I estimate at least 785 pounds


In the rush to get things completed enough to make the camper usable on my upcoming trip I was using every spare minute I had available. Here I have added three sides of the weather-stripping. The bottom was added after I put the door on and determined where best to put it. Turns out it was best to put it on the camper on the vertical part you can see in the pic.
View attachment 799430

This is the first time both handles had ever been in the door. Here they are in and glued underneath and have caulking around them. For both, I used the 3M 4000UV.
View attachment 799431

This is the bottom of the camper where it sticks out past the bed of the camper. The holes are where a crossbar stretches across the back and is attached to my jacks. There are four of these holes. I plan to make something that will plug the holes but for this trip I just put painters tape over the holes. It worked perfectly.
View attachment 799432

The first time the door has been on and closed using the handles.
View attachment 799433

Due to the weather-stripping the door sits about 1/4" offset past the camper. It was easier to do it this way than to try and make it flush.
View attachment 799434

I have regular lights to install but for this trip I just put up some LED strip lights. I used them because I could toggle between white and red. I used the red light most of the time so it wasn't so bright. Especially at night.
View attachment 799435

The truck and camper are ready to go off grid.
View attachment 799436

But first I had to get the trailer connected.
View attachment 799437

A shot in the wild. There will be more when I add the trip report in my other thread. I will try to remember to link it here for those that don't usually read it.
View attachment 799438
The fun begins!!!
 

ITTOG

Well-known member
Anyone want to share how the ceiling in their pop up is completed. All I know is I plan to use 2" foam for insulation but can't decide how to cover the foam. One complication I have is where the top of the sunbrella attaches to the ceiling. I will have to leave a gap large enough to get the sunbrella installed/removed. With my big hands that will be at least 2". So I am thinking about a removable section of foam around the perimeter of the ceiling.

Responses and pictures would be greatly appreciated.
 

dstefan

Well-known member
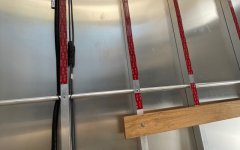
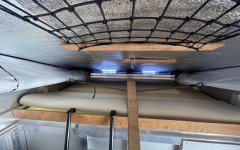
I used this stuff in the 5mm thickness. It works really well. Super light weight. Put it over the “joists” in my camper roof with VHB and some foil tape and it’s been good for 2.5 years now. I was more concerned with heat being in the Southwest, but it’s been very good for cold too. I didn’t fill in the airspace as the radiant barrier aspect needs an airspace to work according to stuff I’ve read. The company claims R8, but don’t know about that. It’s a popup, so the big issue is the tent walls. We didn’t cover it. The shiny ceiling is fine with us, but they make a version with a white vinyl side too.

Edit: Really nice job on your camper build!


1697057493037.jpeg
1697057521514.jpeg
 

ITTOG

Well-known member
I used this stuff in the 5mm thickness. It works really well. Super light weight. Put it over the “joists” in my camper roof with VHB and some foil tape and it’s been good for 2.5 years now. I was more concerned with heat being in the Southwest, but it’s been very good for cold too. I didn’t fill in the airspace as the radiant barrier aspect needs an airspace to work according to stuff I’ve read. The company claims R8, but don’t know about that. It’s a popup, so the big issue is the tent walls. We didn’t cover it. The shiny ceiling is fine with us, but they make a version with a white vinyl side too.

Edit: Really nice job on your camper build!


View attachment 800557
View attachment 800558
Thanks for the info and the pictures. I never thought about not finishing the roof. I will have to think about it and see if that is something I may like. It looks good and probably adds more light due to the reflectiveness. Good idea on the webbing.

View attachment 800565

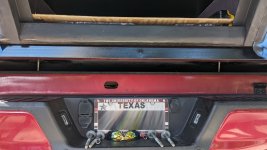
Out of curiosity are you planning on installing taillights?
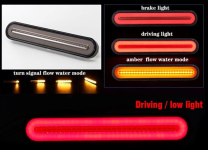
Yes I will. The image below shows what they will look like. I actually drove through houston without lights and had two cops behind me at different times. I thought for sure I was going to get pulled over but never did. For my camping trip I didn't care because I had a trailer behind me. Once I get the camper wired I will have to see how I can plug i the camper and a trailer to the truck. I have never had two items to plug in.

1697118763656.png
 

Forum statistics

Threads
188,026
Messages
2,901,363
Members
229,352
Latest member
Baartmanusa
Top