You are using an out of date browser. It may not display this or other websites correctly.
You should upgrade or use an alternative browser.
You should upgrade or use an alternative browser.
ITTOG's Truck Camper Build (was 6' x 12' Trailer Conversion)
- Thread starter ITTOG
- Start date
ITTOG
Well-known member
I am hoping at the end of the month.Looking great! She looks ready for a hose down, to look for any small leaks.
Sent from my Pixel 7 Pro using Tapatalk
ITTOG
Well-known member
Ha, I read that as a shake down. Not sure of a hose down just yet. It depends on how much time I have.Looking great! She looks ready for a hose down, to look for any small leaks.
ITTOG
Well-known member
Time: 12.25 hours
Total Time to Date: 418 hours
Rework: 0 hours
Total Rework to Date: 90 hours (not part of time above)
Current Weight: To be weighed, but at least 765 pounds
The last time I put the camper into the truck I discovered it was way more difficult than it was when it was just a frame! Aligning it with the truck bed is more difficult given I can't pick it up. Thus, I decided I would install long bolts into the truck bed before I install the camper. These will extend above the truck bed so I have a visual on aligning the holes in the camper floor with the holes in the truck bed. Once the camper is in, I can either put a nut on them and tighten it down or install the OEM bed bolts to hold the camper. (Recall I am using two turn buckles in the front and four bed bolts to hold the camper in.) I haven't used them yet but it sounds like it will work.
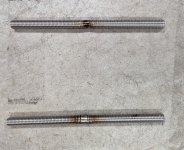
I wanted the ability to install and remove the lift stabilizer bar without tools so I welded cross bars onto the bolts to make it a T handle. I haven't cleaned up the welds yet.
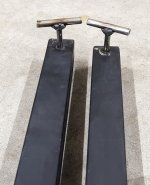
I looked at several methods to lock out the rear lift stabilizer. I looked at the FWC solutions with the board wedged into the roof, c-clamps, and even using gate locks. The most likely of these scenarios was the gate locks but they have too much play between the bolt and receiver. A buddy happen to stop buy and we were discussing my dilemma of trying to modify the gate latch receiver play and he suggested to put a pin straight through the hinge. After about five seconds of thought, that is what I did. Problem solved and it works great without play.
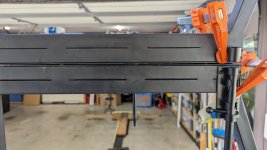
In this pic you can see I have clamped one of the two gate locks one. You can also see the bottom of the tip of the pin I used just to the left of the gate locks (lower center of pic).
This shows the pin from the top. This is actually a stake I received with some yard decoration. Approximately 5/16" x 8" steel stake.
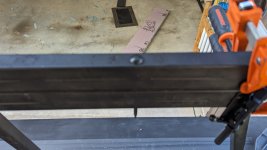
Here you can see both stakes inserted.
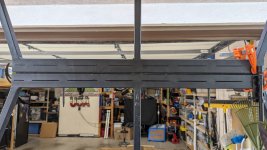
For the front stabilizer lock out I had already decided to build something similar to the GFC design (I think it is GFC). I need to buy the board now but for now this handle at least helps me open the top.
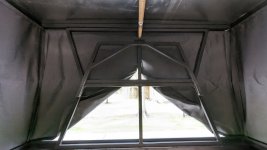
The door trim is fabricated. Just need to adhere it to the door with VHB tape and Sikaflex 252.
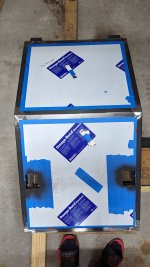
Total Time to Date: 418 hours
Rework: 0 hours
Total Rework to Date: 90 hours (not part of time above)
Current Weight: To be weighed, but at least 765 pounds
The last time I put the camper into the truck I discovered it was way more difficult than it was when it was just a frame! Aligning it with the truck bed is more difficult given I can't pick it up. Thus, I decided I would install long bolts into the truck bed before I install the camper. These will extend above the truck bed so I have a visual on aligning the holes in the camper floor with the holes in the truck bed. Once the camper is in, I can either put a nut on them and tighten it down or install the OEM bed bolts to hold the camper. (Recall I am using two turn buckles in the front and four bed bolts to hold the camper in.) I haven't used them yet but it sounds like it will work.

I wanted the ability to install and remove the lift stabilizer bar without tools so I welded cross bars onto the bolts to make it a T handle. I haven't cleaned up the welds yet.

I looked at several methods to lock out the rear lift stabilizer. I looked at the FWC solutions with the board wedged into the roof, c-clamps, and even using gate locks. The most likely of these scenarios was the gate locks but they have too much play between the bolt and receiver. A buddy happen to stop buy and we were discussing my dilemma of trying to modify the gate latch receiver play and he suggested to put a pin straight through the hinge. After about five seconds of thought, that is what I did. Problem solved and it works great without play.
In this pic you can see I have clamped one of the two gate locks one. You can also see the bottom of the tip of the pin I used just to the left of the gate locks (lower center of pic).

This shows the pin from the top. This is actually a stake I received with some yard decoration. Approximately 5/16" x 8" steel stake.

Here you can see both stakes inserted.

For the front stabilizer lock out I had already decided to build something similar to the GFC design (I think it is GFC). I need to buy the board now but for now this handle at least helps me open the top.

The door trim is fabricated. Just need to adhere it to the door with VHB tape and Sikaflex 252.

ITTOG
Well-known member
Time: 10 hours
Total Time to Date: 428 hours
Rework: 0 hours
Total Rework to Date: 90 hours (not part of time above)
Current Weight: To be weighed, but I estimate at least 785 pounds
The front side of the door trim is attached with VHB tape. On the sides, where the trim wraps around the front, I will apply Sikaflex 252.
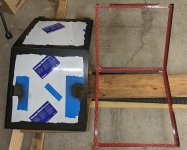
Here the trim is attached with the VHB tape. I haven't used any Sikaflex yet, first I will paint the trim.
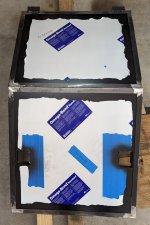
Another round of Bondo with fiberglass sanded down. I think the next layer will just be Bondo so I can start smoothing it out.

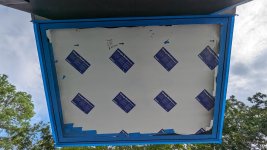
Taped up ready for caulking.

More tape and ready for caulking. This is under the cabover. For two days I complained to myself about having to caulk this. It took about 30 minutes to tape and fifteen to caulk. Talk about making a mountain out of a mole hill. Not sure why I despise it so much.
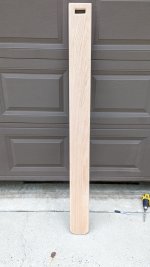
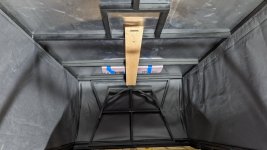
I made the board for the front lift stabilizer lock out. I also used a rivet nut to attach it to the roof and lock the lift stabilizer in place.
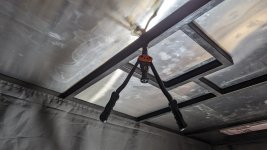
I tried to install a rivnut without the proper tool and it did not go well. I had to purchase the proper tool, drill out my failed attempt, and then do it right. Now I can lock out the front lift stabilizer and not have to worry about it collapsing.
Continued below....
Total Time to Date: 428 hours
Rework: 0 hours
Total Rework to Date: 90 hours (not part of time above)
Current Weight: To be weighed, but I estimate at least 785 pounds
The front side of the door trim is attached with VHB tape. On the sides, where the trim wraps around the front, I will apply Sikaflex 252.

Here the trim is attached with the VHB tape. I haven't used any Sikaflex yet, first I will paint the trim.

Another round of Bondo with fiberglass sanded down. I think the next layer will just be Bondo so I can start smoothing it out.

Taped up ready for caulking.

More tape and ready for caulking. This is under the cabover. For two days I complained to myself about having to caulk this. It took about 30 minutes to tape and fifteen to caulk. Talk about making a mountain out of a mole hill. Not sure why I despise it so much.

I made the board for the front lift stabilizer lock out. I also used a rivet nut to attach it to the roof and lock the lift stabilizer in place.

I tried to install a rivnut without the proper tool and it did not go well. I had to purchase the proper tool, drill out my failed attempt, and then do it right. Now I can lock out the front lift stabilizer and not have to worry about it collapsing.


Continued below....
ITTOG
Well-known member
...continued from above.
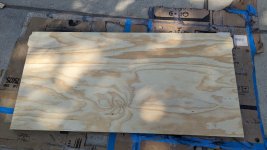
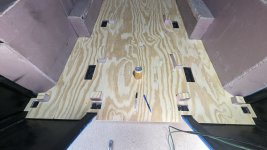
I purchased more of the 1/4" plywood for the sleeping platform and the floor. This is the tilt up sleeping platform.
Here I am cutting out slots where bolts go through the floor to bolt the camper into the bed of the truck.

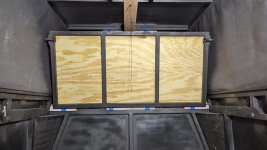
The tilt up bed.
Here I am creating plugs to fill the holes after the camper is bolted in.
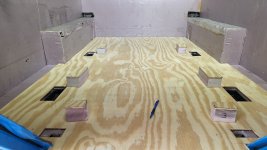
In this pic you can see there are four more holes in a straight line at the bottom of the camper. These are to install the rear lift jacks so I can pick the camper up.
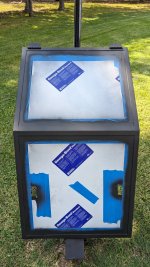
All the trim on the door is now painted.
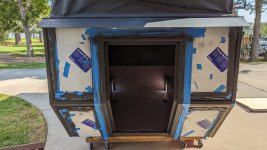
I also painted the door jamb.
I purchased more of the 1/4" plywood for the sleeping platform and the floor. This is the tilt up sleeping platform.

Here I am cutting out slots where bolts go through the floor to bolt the camper into the bed of the truck.

The tilt up bed.

Here I am creating plugs to fill the holes after the camper is bolted in.

In this pic you can see there are four more holes in a straight line at the bottom of the camper. These are to install the rear lift jacks so I can pick the camper up.

All the trim on the door is now painted.

I also painted the door jamb.

Pacific Northwest yetti
Expedition Medic
There are some things for sure, that the right tool makes the world of difference.
ITTOG
Well-known member
I have mentioned, most likely more than I should, that I hate to paint. Oh, I also hate caulking. Well, I screwed up the paint on my door when I taped it for the caulking. I waited about 18 hours before taping it. Apparently that is not long enough when the temp is not 100+. Oh well, at least the caulking is done!Keep the pictures coming. I need my entertainment! Looking good.
Otherwise it is coming along quickly in my rush to get it usable for a trip coming up. Hopefully by the end of the day Sunday I have it in the truck and ready for its first use!

Mules
Well-known member
The first of many war wounds to come. A week after mounting my camper, I got a nice scratch down the length of my camper from a tree limb. Have fun!I have mentioned, most likely more than I should, that I hate to paint. Oh, I also hate caulking. Well, I screwed up the paint on my door when I taped it for the caulking. I waited about 18 hours before taping it. Apparently that is not long enough when the temp is not 100+. Oh well, at least the caulking is done!
Otherwise it is coming along quickly in my rush to get it usable for a trip coming up. Hopefully by the end of the day Sunday I have it in the truck and ready for its first use!
View attachment 797182
ITTOG
Well-known member
The fist scratch on my brand new F150 in 2018 was due to off roading, only about two months after purchasing. I almost shed a tear. Once I got the second, third, and fourth on the way back out it was all smiles and memories. The camper should match the truck after one trip to our property.The first of many war wounds to come. A week after mounting my camper, I got a nice scratch down the length of my camper from a tree limb. Have fun!
ITTOG
Well-known member
Time: 2 hours
Total Time to Date: 430 hours
Rework: 2 hours
Total Rework to Date: 92 hours (not part of time above)
Current Weight: To be weighed, but I estimate at least 785 pounds
Most of the work for this update was with the door. I already painted it and am now prepping for caulking.
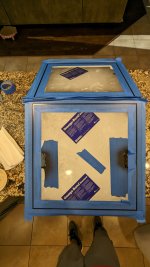
Caulking complete I immediately remove the tape because the caulking begins to set up in just a few minutes. It turned out pretty good on the door. In the end, only the caulking on the roof is bad/ugly.
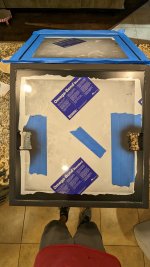
Unfortunately when I removed the tape I noticed area's where the paint came off. Luckily it was small spots but probably about ten of them.
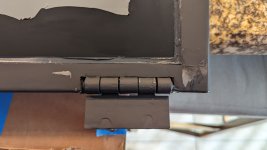

Before I repair the paint I wanted to get the holes for the door latches cut out.
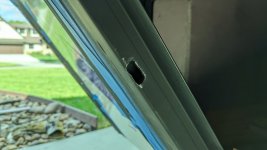
First time the door could close and stay that way without me holding it!

I started sanding the paint on the door trim and noticed it was coming off like a wet powder and gumming up the sand paper. This was the case for about 75% of the door. So I decided to take all of the paint off and try again. I don't know what caused it. When I painted the door the weather was 95 F and 48% humidity. I know this because I was waiting for the humidity to drop below 50%. Maybe that is still too high? Or maybe I didn't shake the rattle can enough?
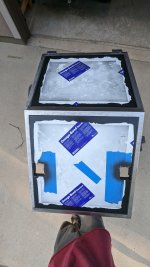
Taped and ready for paint. The past two days the humidity has been about 60% so still waiting…
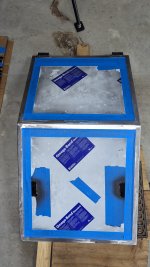
I tried the paint on a piece of scrap and will see if the same problem occurs. If yes, then it may be a bad can of paint?
Total Time to Date: 430 hours
Rework: 2 hours
Total Rework to Date: 92 hours (not part of time above)
Current Weight: To be weighed, but I estimate at least 785 pounds
Most of the work for this update was with the door. I already painted it and am now prepping for caulking.

Caulking complete I immediately remove the tape because the caulking begins to set up in just a few minutes. It turned out pretty good on the door. In the end, only the caulking on the roof is bad/ugly.

Unfortunately when I removed the tape I noticed area's where the paint came off. Luckily it was small spots but probably about ten of them.


Before I repair the paint I wanted to get the holes for the door latches cut out.

First time the door could close and stay that way without me holding it!

I started sanding the paint on the door trim and noticed it was coming off like a wet powder and gumming up the sand paper. This was the case for about 75% of the door. So I decided to take all of the paint off and try again. I don't know what caused it. When I painted the door the weather was 95 F and 48% humidity. I know this because I was waiting for the humidity to drop below 50%. Maybe that is still too high? Or maybe I didn't shake the rattle can enough?

Taped and ready for paint. The past two days the humidity has been about 60% so still waiting…

I tried the paint on a piece of scrap and will see if the same problem occurs. If yes, then it may be a bad can of paint?
Pacific Northwest yetti
Expedition Medic
What has the dry time been? It could be increasing the time to cure, just from the humidity.
ITTOG
Well-known member
I started taping at 18 hours. I didn't start sanding it until three or four days later so I don't think it was ever going to dry.What has the dry time been? It could be increasing the time to cure, just from the humidity.
Similar threads
- Replies
- 3
- Views
- 1K
- Replies
- 2
- Views
- 641
- Replies
- 3
- Views
- 667
- Replies
- 3
- Views
- 516
